
Hello fellow green-fingered friends! Randy here, coming to you from my bustling 800 sq ft patch of green in the UK Midlands. If there’s one thing I’ve learned in my five years of intensive gardening – aside from the fact that a good cuppa solves most problems – it’s that the joy of growing doesn’t have to stop at the garden gate. Bringing a little bit of that outdoor beauty indoors, especially when the British weather is doing its usual unpredictable thing, is one of life’s simple pleasures.
But let’s be honest, how many times have you snipped a gorgeous bloom, only for it to droop pitifully in its vase a day or two later? I know I have! When I first transitioned from the world of IT into full-time plant obsession, I thought harvesting flowers was as simple as 'snip and stick'. Oh, how wrong I was! My early attempts at creating beautiful bouquets from my raised beds were often short-lived, leaving me feeling a bit deflated. It felt like I was doing something wrong, and trust me, I was.
Over the years, through countless experiments in my greenhouse with my beloved heirloom tomatoes and out in the beds with everything from sweet peas to dahlias, I’ve discovered that achieving long-lasting cut flowers isn't just luck. It's an art, yes, but more importantly, it's a science built on strategic timing, careful technique, and immediate post-harvest conditioning. It's all about understanding what your flowers need the moment they leave their roots.
In this guide, I'm going to share everything I've learned, often the hard way, about extending the life of your homegrown cut flowers. We'll dive deep into the absolute best moment to harvest, the tools you need, and those crucial hydration hacks that will make your blooms last for days, even weeks, here in our unique UK climate. So, grab a brew, and let’s get those garden beauties shining in your home for longer!
The Perfect Moment: Strategic Harvest Timing for Peak Freshness
This, my friends, is probably the biggest game-changer for me when it comes to cut flowers. You see, when you harvest a flower, it’s essentially cut off from its lifeline – its roots. From that moment on, it relies on its stored energy and what it can drink through its stem. Picking a flower at the wrong stage is like asking it to run a marathon on an empty stomach; it just won’t last.
I've learned that the ideal harvest time isn't a one-size-fits-all rule. Different flowers have different sweet spots, and understanding these nuances has massively improved my vase life. One mistake I used to make constantly was harvesting in the middle of a warm afternoon. The flowers were already stressed from the heat, their water-carrying vessels full of air bubbles, and they just couldn't recover. Now, I'm an early morning or late evening harvester – especially here in the Midlands, where a sunny summer day can quickly dry things out. Early morning, when the plants are fully hydrated and turgid from the cool night air, is truly the best. They've had all night to top up their water reserves, and the sugars are highest, giving them the best fighting chance.
Here’s a breakdown of what I've found works best for some common cut flowers in my UK garden:
| Flower Type | Ideal Stage for Harvest | Best Time of Day | Randy's UK Tip |
|---|---|---|---|
| Sweet Pea | Buds showing colour, lowest flower open, but not all flowers fully open. | Early morning | Crucial for avoiding wilt in our unpredictable British sun. I aim for three to four open flowers per stem. |
| Dahlia | Fully open but firm, before the central pollen disc is fully visible. | Early morning | Wait until the dew has lifted slightly to avoid mildew spreading, but before the heat of the day kicks in. |
| Rose | Bud just beginning to unfurl, showing colour, with 1-2 outer petals loosening. | Early morning | I aim for when the first few petals are loosening, especially on my 'Gertrude Jekyll' bushes; they last longest this way. |
| Zinnia | "Wiggle test": hold the stem about 6 inches below the flower and gently wiggle. If the stem is stiff, it's ready. If it flops, leave it. | Early morning / Late evening | Our cooler UK evenings can also work well for Zinnias if mornings are busy, as they recover well. |
| Snapdragon | 1/3 to 1/2 of the flowers on the spike are open. | Early morning | I've found them very forgiving, but morning still gives the best vase life, and they'll continue to open in the vase. |
| Cosmos | Petals fully open, but the centre still slightly green and firm. | Early morning | These are delicate! Pick before the sun gets too strong; they drink a lot. |
Essential Tools & Clean Cutting Techniques for Optimal Stem Health
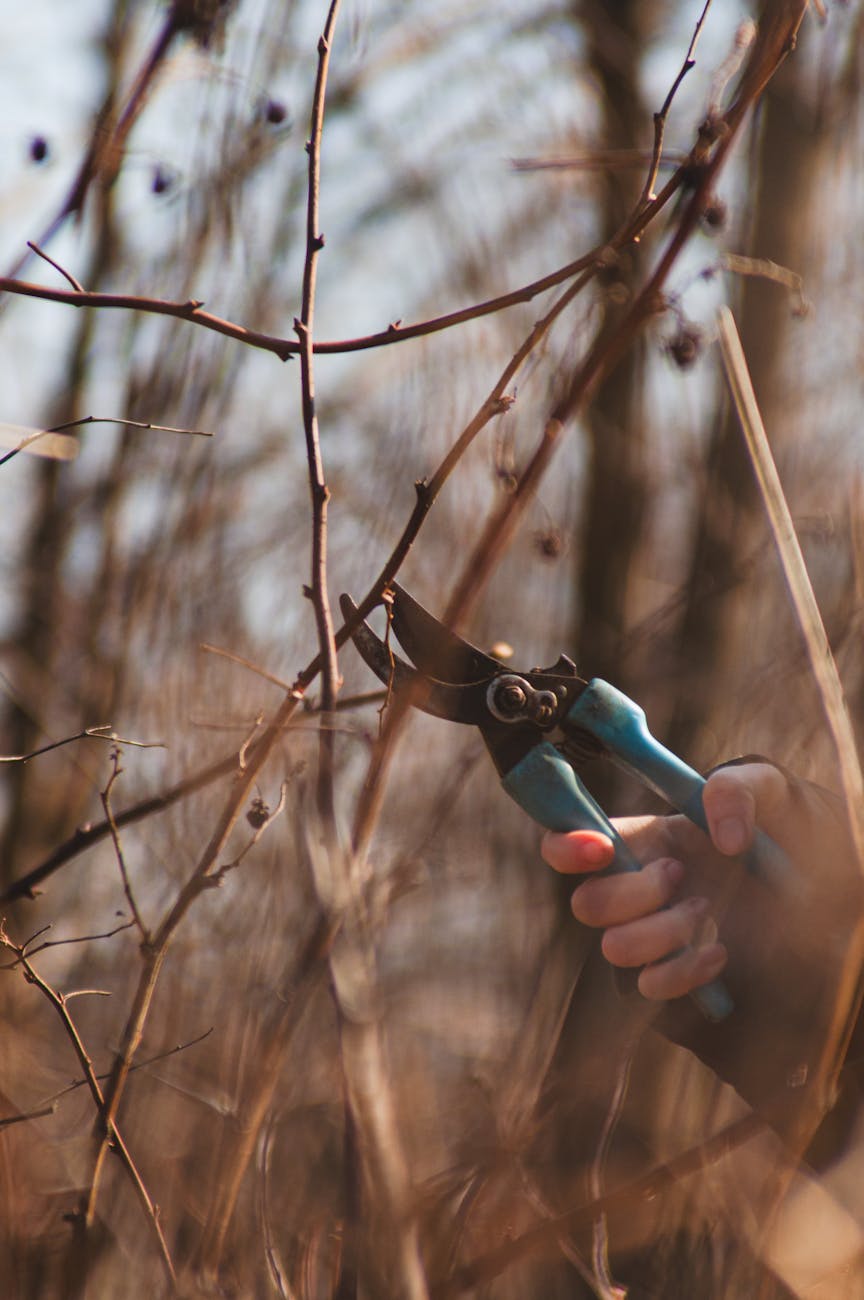
You wouldn't use a blunt knife in the kitchen, right? Same goes for the garden, especially when you're harvesting flowers you want to last. This is where your trusty secateurs come in. A clean cut is absolutely paramount because a crushed stem end can't drink water efficiently. It's like trying to drink through a squashed straw!
When I first started, I remember trying to hack through a thick dahlia stem with some rusty old shears I found in the shed – big mistake! The stem was mangled, and the flower barely lasted a day. That was a harsh lesson in investing in good tools. Now, I always have a sharp, clean pair of bypass secateurs (the ones that cut like scissors, not like an anvil) on hand. I prefer a pair that fits comfortably in my hand, as I spend a lot of time out in my 800 sq ft garden.
Here’s my technique:
- Sharp Secateurs are Key: Make sure your secateurs are razor-sharp. I clean mine with rubbing alcohol after each gardening session (or at least regularly) to prevent the spread of diseases from plant to plant – especially important with things like powdery mildew, which can be a real pain here in the UK.
- Angle Your Cut: Always make a clean cut at a 45-degree angle. This isn’t just for looks! It creates a larger surface area for water absorption, and it also prevents the stem from sitting flat on the bottom of the vase, which can create a 'suction cup' effect and block water uptake.
- Cut Low, Cut Deep: For many flowers, especially those you want to encourage to produce more blooms (like sweet peas or zinnias), cut the stem as long as possible, right down to a leaf node or a main branch. This encourages the plant to produce more flowers from lower down.
- Remove Lower Foliage: Immediately after cutting, strip off any leaves that would fall below the waterline in your vase. Leaves submerged in water will decompose quickly, creating a breeding ground for bacteria that can clog the stem and shorten vase life. I usually do this right there in the garden before they even hit the bucket.
I always have a bucket of clean water with me when I'm harvesting in my Midlands garden. The moment I snip a stem, it goes straight into that water. This is crucial, especially on a warm British day, to prevent air bubbles from forming in the stem's water-transporting vessels, which can cause wilting.
Immediate Post-Harvest Conditioning: Hydration Hacks for Home Gardeners
This is where many home gardeners, including my past self, fall short. You've harvested at the perfect time, with a clean cut, but the journey isn't over yet! Immediate post-harvest conditioning is all about rehydrating the flower and hardening its stems so it can stand tall and proud in your vase for as long as possible. Think of it as giving your flowers a good, long drink and a chance to compose themselves after being cut.
When a flower is cut, it experiences a shock. Its natural instinct is to seal off the wound. Our goal is to quickly get water back into its system before it seals too much, and to prevent any air from getting trapped in the xylem (the plant's water pipes).
My Conditioning Routine:
- The "Bucket Method" (Randy's First Step): As I mentioned, stems go straight into a bucket of water the moment they're cut. I often have a couple of buckets scattered around my 800 sq ft garden during a harvesting session. This prevents air embolisms (air bubbles) from forming in the stem, which can block water uptake.
- Warm Water Hydration: Once I've brought my bucket of freshly cut flowers inside, I transfer them to a fresh bucket of warm water. Not hot, but comfortably warm to the touch – about 40-43°C (105-110°F). Why warm? Warm water molecules move faster and are less viscous than cold water, allowing them to be absorbed more quickly by the stem. This is brilliant for rapidly rehydrating stems and pushing out any lingering air bubbles. I've tried both in my greenhouse with my 'Cherokee Purple' tomato flowers and with my dahlias – warm water wins almost every time for initial hydration.
- Flower Food / DIY Solutions: This is where you give your flowers a little extra boost.
- Commercial Flower Food: These packets contain three essential ingredients: sugar (food source), an acidifier (lowers pH, making water uptake easier), and a biocide (inhibits bacterial growth). They're great if you have them.
- Randy's DIY Mix: For my cut flowers, especially the more delicate sweet peas or my 'Cafe au Lait' dahlias, I usually mix my own. For every litre of water, I add:
- 1 teaspoon of sugar: Provides energy.
- 1 teaspoon of white vinegar: Lowers the pH, making the water easier for the stem to absorb.
- A few drops (about 1/4 teaspoon) of household bleach: Acts as a biocide to keep the water clean and free of bacteria. I learned this the hard way when a vase of gorgeous roses went slimy after only a couple of days in plain water.
- The "Hardening Off" Phase: Once your flowers are in their warm, treated water, place them in a cool, dark, or at least shady, place for 2-4 hours (or even overnight). This allows the stems to fully rehydrate and "harden off" without the stress of bright light or heat causing them to transpire (lose water). A cool garage, a shady corner of your kitchen, or even a cupboard works perfectly. This step is absolutely critical, especially after a sunny spell in the British summer, to ensure they last.
Here’s a comparison of conditioning methods I’ve used in my UK garden:
| Method | Pros for UK Gardeners | Cons | Randy's Experience (UK) |
|---|---|---|---|
| Immediate Water Bucket | Prevents airlocks, quick initial hydration. Essential for mobile harvesting in the garden. | Water can get warm quickly on hot, sunny days, requiring frequent changes. | Essential for my dahlias and cosmos; I keep a bucket right by the raised beds in my Midlands garden. |
| Warm Water Hydration (40-43°C) | Faster water uptake, rehydrates quickly, helps push out air bubbles. | Water can cool down fast in cooler UK homes; needs to be refreshed for large batches. | Brilliant for reviving slightly wilted stems, even if the house is a bit chilly. A game-changer for my roses. |
| DIY Flower Food (Sugar/Vinegar/Bleach) | Affordable, extends vase life significantly, uses common household items. | Incorrect ratios can harm flowers; requires careful measurement. | My go-to for sweet peas and zinnias – a dash of sugar and a drop of bleach makes a massive difference to their longevity. |
| Commercial Flower Food | Balanced nutrients, effective biocides, convenient. | Can be expensive, sometimes hard to find locally, not always necessary for all blooms. | Good if you have it, but honestly, my DIY mix works almost as well for most of my cut flowers and is more economical. |
By following these steps, you'll be amazed at how much longer your beautiful homegrown blooms will grace your home. It's all about giving them the best possible start after leaving the comfort of your garden soil.
5. Advanced Conditioning & Floral Food: Nourishing Your Blooms for Endurance
So you’ve got your freshly cut stems, stripped of lower leaves, and plunged them into clean water for that initial drink. Brilliant! But if you really want to push the boundaries of vase life, we need to talk about what comes next: advanced conditioning and, perhaps most importantly, floral food. This is where I’ve seen some of the biggest jumps in longevity in my own UK garden.
Once those initial couple of hours of plain water hydration are done, it's time to introduce something a bit more substantial. Think of it like giving your flowers a nutritious meal after a long journey. The key components of good floral food are usually a sugar (for energy), an acidifier (to help stems absorb water more efficiently, especially with our often-alkaline UK tap water), and a biocide (to keep bacterial growth at bay).
Now, you might be wondering about those DIY concoctions. I've certainly experimented! I’ve tried the old sugar-and-bleach mix, the penny in the water trick (mostly folklore, in my experience!), and even a splash of vinegar. While these can sometimes offer some benefit, I’ve honestly found that commercial floral food sachets are generally the most effective. They're formulated with the right balance, and that consistency really pays off. I often save the little sachets that come with shop-bought bouquets, but you can buy larger tubs too. For my greenhouse-grown 'Cafe au Lait' dahlias, which I adore but can sometimes be a bit dramatic, a good quality floral food makes all the difference, helping them last a solid five to seven days longer than just plain water.

Another factor that often gets overlooked in our homes here in the UK is water quality. Many areas, including parts of the Midlands where I am, have quite hard water. This can contribute to mineral build-up that clogs those tiny vascular tissues in the stems over time. If you have particularly hard water, using filtered water for your vase can sometimes help, or at least ensure your floral food has a good acidifier to counteract it. Just remember to mix your floral food according to the instructions – too much can be as bad as too little!
6. Mastering Vase Life Extension: Daily Care and Environmental Control
Alright, your flowers are conditioned and fed. Now the real long game begins: daily care and controlling their environment. This is where I find my former IT-worker obsession with optimisation really kicks in! It’s not just about setting them up nicely; it’s about maintaining that optimal state for as long as possible.
The absolute golden rule for me, one I preach to anyone who asks about my home-grown sweet peas, is daily water changes and a fresh stem recut. Every single day, or at the very least every other day, empty out that vase. Give the vase a quick wash – bacteria love to grow in old flower water, and they’ll clog up your stems faster than you can say 'wilt'. Then, under running water, give each stem a fresh snip of about half an inch. This removes any clogged ends and allows for maximum water uptake. I learned this the hard way when I first started, leaving my beautiful cosmos in stagnant water for days and wondering why they looked so sad so quickly!
Beyond that, the environment you place your blooms in makes a huge difference, especially in a typical UK home.
- Temperature: Flowers prefer cooler temperatures. Keep them away from direct sunlight, radiators, or even the top of a warm TV. My hallway, which stays naturally cooler, is a favourite spot for my cut flowers. A warm room accelerates their metabolism and shortens their life significantly.
- Ethylene Gas: This is a silent killer for many flowers. Ethylene is a natural plant hormone released by ripening fruits and vegetables, causing flowers to age rapidly. A lesson I learned when my beautiful sweet peas from the garden wilted next to a bowl of ripe 'Moneymaker' tomatoes from the greenhouse! Keep your flowers well away from your fruit bowl.
- Direct Sunlight: While we love a sunny window, direct sun will quickly dehydrate your flowers, fade their colours, and generally speed up their demise. Bright, indirect light is ideal.
- Airflow: A gentle breeze is fine, but strong draughts can dry out petals and leaves quickly.
Here’s a quick summary of what I’ve observed and what works in my Midlands home:
| Factor | Impact on Vase Life (Randy's Observation) | Randy's Tip for UK Homes |
|---|---|---|
| Water Quality | Hard water, bacteria-laden water clogs stems fast. | Filtered water is best, or a proper floral food to condition tap water. Change daily! |
| Temperature | Warm rooms accelerate ageing and wilting. | Find the coolest spot in the house – avoid sunny windowsills or near radiators. My hallway is a winner! |
| Ethylene Gas | Released by ripening fruit, causes premature wilting (especially sweet peas!). | Keep flowers well away from the fruit bowl! I learned this the hard way with my greenhouse tomatoes. |
| Direct Sunlight | Dries out petals, fades colours, increases water loss. | Bright indirect light is fine, but no direct sunbeams. South-facing windows are a no-go. |
| Foliage Below Water | Rotting leaves breed bacteria, contaminating water and blocking stems. | Strip all leaves below the waterline. Check daily for submerged stragglers. |
| Air Draughts | Can dehydrate flowers quickly. | A gentle breeze is okay, but avoid direct blasts from open windows or fans. |
7. Troubleshooting & Enjoying Your Garden's Bounty Indoors, For Longer
Despite all our best efforts, sometimes flowers still don’t last as long as we'd hoped. Don't worry, it happens to all of us, even after five years of intensive gardening here in the UK! Here are a few common issues and what I’ve found helps:
- Sudden Wilting: If your flowers suddenly look droopy, the first thing to check is the water level. Is it low? Have the stems clogged up? Give them a fresh, sharp recut and plunge them immediately into deep, fresh water (or even a few inches of water in a clean bath for an hour or so – a brilliant trick for reviving severely dehydrated stems!). Sometimes, if the initial harvest was during a particularly hot spell in my garden, they just need that extra boost.
- Slimy Water/Bad Smell: This is almost always bacterial growth. It means you haven't changed the water frequently enough or the vase wasn't clean. Immediately dump the water, scrub the vase thoroughly with a brush and a drop of bleach (rinse very well!), and give your stems a fresh recut before returning them to clean, fresh floral food solution.
- Petals Dropping Prematurely: Some flowers are just naturally shorter-lived (I'm looking at you, poppies!). However, if it's happening unusually fast, it could be due to heat, dry air, or exposure to ethylene gas. Revisit your environmental controls.
- Still Short-Lived: Be honest with yourself about the initial harvest timing. Was the flower just opening, or was it already a bit past its prime? Sometimes, despite our best intentions, we just pick them a little too late. And that’s okay! It's all part of the learning curve.
Conclusion: Embrace the Joy of Lasting Blooms
Bringing the beauty of my 800 sq ft UK garden indoors is one of the greatest joys of gardening for me. From the vibrant colours of my greenhouse-grown 'Sungold' tomatoes to the delicate perfume of sweet peas from the raised beds, every bloom tells a story of effort and love.
Achieving long-lasting cut flowers isn't about magic; it's about understanding the simple science behind keeping them hydrated and happy. We’ve covered a fair bit today: the critical importance of strategic harvest timing (think early morning, just as the buds begin to unfurl), clean cutting techniques to prevent crushing those vital vascular tissues, immediate hydration to quench their thirst, advanced conditioning with proper floral food to nourish them, and diligent daily care and environmental control to keep them looking their best.
It might seem like a lot to remember at first, especially when you’re busy battling the slugs or trying to keep up with the British weather! But I promise you, these practices become second nature. After years of growing everything from fragile cosmos to sturdy sunflowers here in the Midlands, I can tell you that these methods genuinely make a difference. You'll soon find yourself instinctively grabbing those clean snips and fresh water.
Don't be afraid to experiment in your own UK garden and home. Try different methods, observe what works best for your specific flowers and your environment. There's immense satisfaction in knowing you've extended the life of a bloom you nurtured from seed. So go on, give these tips a try, and enjoy your garden's incredible bounty indoors for longer. It's all part of the magic of growing things, isn't it?
