
Bringing home new plants from the nursery is one of my absolute favourite things to do, isn't it? That buzz of potential, the dreams of abundant harvests or vibrant blooms filling your UK garden. But I've learned over my five years of intensive gardening here in the Midlands, sometimes that excitement can quickly turn to frustration if those new arrivals don't quite get off to the vigorous start you hoped for. I’ve been there, watching a perfectly healthy-looking plant just sit there, sulking, barely growing, or even slowly declining despite my best efforts with feed and water.
More often than not, the culprit isn't a dodgy batch of compost or an unexpected cold snap from our notoriously unpredictable British weather. It’s usually something far more fundamental, hidden beneath the soil line: severely pot-bound roots. This is something I’ve come across countless times, especially with my beloved heirloom tomatoes destined for the greenhouse, or those eager little brassica starts. And that's why I'm here to share a technique that might sound a bit brutal at first, but one I've personally found to be absolutely crucial for ensuring those nursery plants don't just survive, but truly thrive in your garden: aggressive root pruning. Trust me, it’s a game-changer, and it’s helped me get the most out of every precious square inch of my 800 sq ft plot.
Why Aggressive Root Pruning is Crucial for Severely Pot-Bound Nursery Plants
When you bring home a plant that’s been sitting in a small pot for too long, its root system often gets into a terrible tangle. Imagine trying to run a marathon with your shoelaces tied together, or worse, with your feet bound tightly. That’s essentially what’s happening to a pot-bound plant. The roots circle around and around, forming a dense, impenetrable mat that eventually chokes itself.
In my UK garden, I've seen firsthand the detrimental effects. When you plant one of these root-bound specimens directly into the soil, those circling roots often continue to grow in that same restrictive pattern. They struggle to venture out into the surrounding garden soil to seek moisture and nutrients. This means the plant simply can't establish itself properly, no matter how rich your compost or how diligent you are with watering. I recall one year, I bought some lovely 'Crimson Flowered' broad bean plants from a local nursery here in Leicestershire. They looked great in their pots, but once in the raised bed, they just sat there, looking distinctly unhappy despite our unusually sunny May. It took me a while to realise their roots were a solid, matted brick. They never really recovered, and the harvest was abysmal.
Aggressive root pruning, despite its scary name, is like hitting the reset button. By strategically cutting away those circling, congested roots, you're not just removing dead or inefficient material; you're actively encouraging the plant to send out fresh, healthy roots in all directions. These new roots are eager to explore the generous space and resources of your garden soil, anchoring the plant firmly and efficiently absorbing everything it needs. I've found this technique to be particularly vital for plants going into my raised beds, where every plant needs to pull its weight, and for my greenhouse tomatoes like 'Cherokee Purple' which demand a strong root system to support their heavy fruit set later in the season. It’s about giving them the best possible start, especially when facing our sometimes challenging British growing conditions.
Spotting the Signs: How to Identify a Severely Pot-Bound Plant
Knowing what to look for is half the battle. When I'm at the nursery, I'm always doing a quick root check, especially if I'm investing in something a bit more substantial or a variety I know demands a lot, like a vigorous courgette or a climbing bean. You don't need to be a gardening guru to spot the signs; it's mostly about a quick visual inspection.
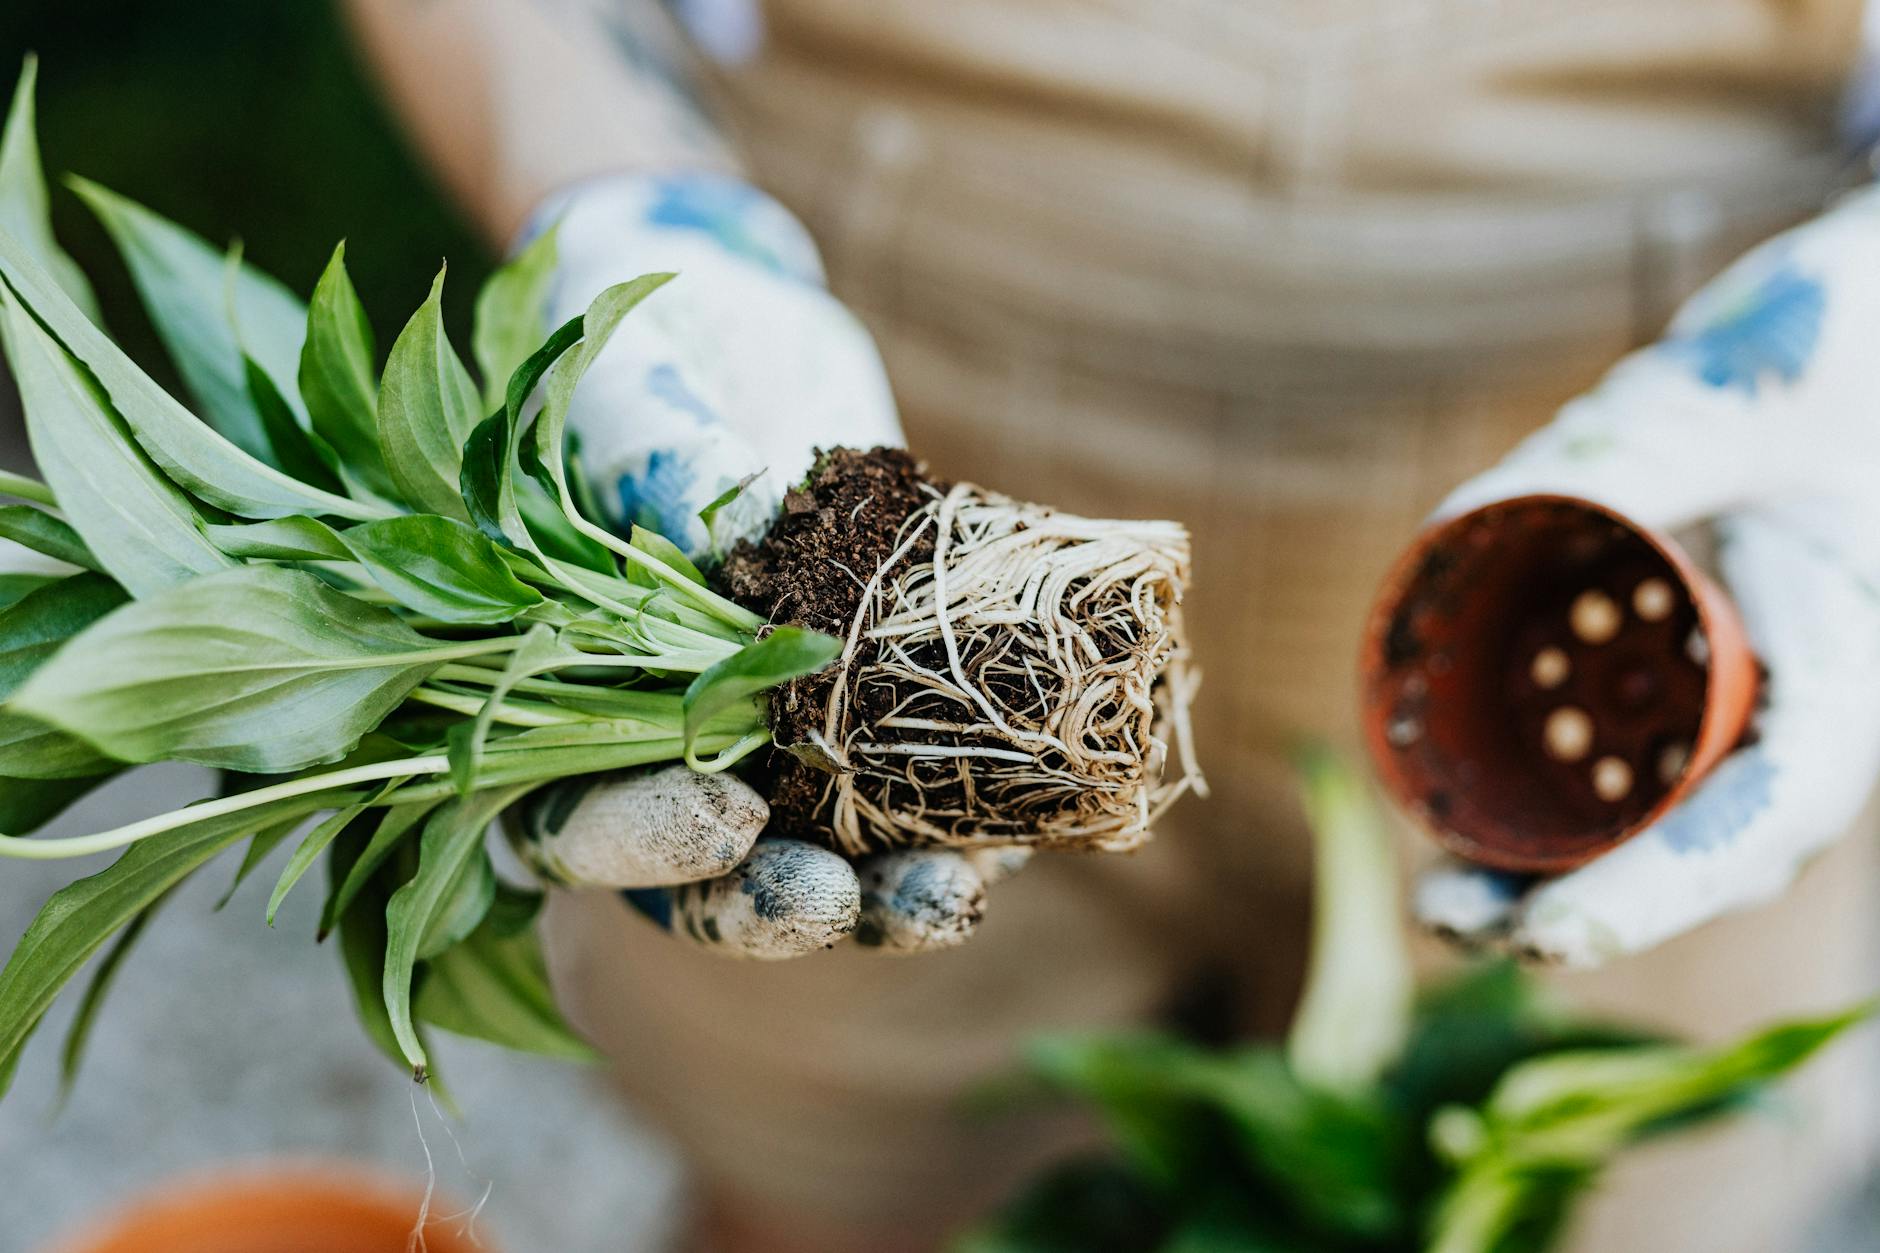
The most obvious sign is when you gently ease the plant out of its pot (always give the pot a gentle squeeze around the sides first, then cup the base of the stem with one hand and invert it, sliding the pot off with the other). If you see a dense, solid mass of roots completely filling the pot, often circling around the inside edge, then you've got a pot-bound plant on your hands. Sometimes the roots are so extensive they're even growing out of the drainage holes at the bottom, or pushing the plant up out of the pot!
Don't panic if you see a few healthy white roots; that's normal and a good sign of an active plant. We're looking for the extreme cases where soil is barely visible, and the roots form a tight, tangled net. I learned this the hard way with some young chilli plants one year; they looked fine from above, but underneath, they were a mess. That season, my 'Scotch Bonnet' chillies struggled to produce, a stark contrast to the vigorous 'Hungarian Hot Wax' plants that had plenty of room in their pots.
Here’s a quick comparison to help you tell the difference:
| Feature | Healthy Root System | Severely Pot-Bound Root System |
|---|---|---|
| Appearance | Visible soil, some white roots, loose and crumbly. | Dense, solid mass of roots; soil barely visible. |
| Pot Shape | Roots generally follow pot shape but easily loosen. | Roots tightly coiled, forming the exact shape of the pot. |
| Root Colour | Predominantly white or light tan, fresh-looking. | Often darker, brown, or black, especially on outer layers. |
| Texture | Roots spread easily when gently pulled apart. | Roots matted, difficult to separate; feels like a solid brick. |
| Drainage Holes | Few, if any, roots emerging from holes. | Roots heavily protruding from drainage holes. |
| Growth Above | Proportional growth, healthy foliage. | Often stunted, yellowing leaves, slow growth despite care. |
Essential Tools and Preparations for Root Pruning Success
You don't need a fancy gardener's toolkit for this job, just a few essential items you probably already have lurking in your shed or greenhouse here in the UK. The key is sharp, clean tools and a bit of preparation to make the process as stress-free as possible for both you and your plant.
Here’s what I always have ready on my potting bench before I start:
- A Sharp Knife or Old Serrated Kitchen Knife: This is your primary tool for making those aggressive cuts. A sharp, sturdy blade is crucial for clean cuts, which heal faster and reduce the risk of infection. I usually grab an old serrated kitchen knife I've repurposed solely for gardening.
- Sharp Pruning Shears or Secateurs: For any thicker, woody roots you might encounter, or for tidying up. Again, sharpness is key. I use my trusty Felco secateurs; they're an investment but worth every penny for a clean cut.
- Rubbing Alcohol (Isopropyl Alcohol) or Disinfectant Wipes: Absolutely vital for sterilising your tools before and after each plant. This prevents the spread of diseases from one plant to another. I learned this lesson the hard way after a bout of blight spread through my greenhouse tomatoes one year – a constant battle in our damp British climate!
- A Tarp, Old Sheet, or Large Tray: To work over. This keeps your workspace tidy and makes clean-up a breeze. There's nothing worse than having to scrape up soggy compost from your patio.
- Gloves (Optional, but Recommended): Some plants can irritate skin, and it just keeps your hands clean. Plus, who doesn't love a good pair of gardening gloves?
- New Potting Mix or Garden Soil: Have your planting site or larger pot ready with good quality, fresh compost. This ensures the plant has an inviting new home to send its roots into immediately after its "surgery." For my raised beds, I'll have a mix of my own compost and some fresh multi-purpose peat-free compost ready.
Before you even touch the plant, make sure your tools are sparkling clean. A quick wipe down with rubbing alcohol will do the trick. I usually give the plant a good water a few hours before I plan to prune it too. A well-hydrated plant is less likely to go into shock and will recover much faster. Think of it like preparing for surgery – you want the patient in the best possible condition! This little step makes a huge difference, especially when our British summers decide to throw a heatwave at us, even if it's only for a day or two.
The Step-by-Step Guide to Aggressive Root Pruning
Alright, this is where the rubber meets the road, or rather, where the secateurs meet the roots! I know it can feel daunting, like you’re doing something drastic, but trust me, your plant will thank you for it in the long run. I’ve done this countless times in my 800 sq ft Midlands garden, from my beloved heirloom tomatoes to my hungry courgette plants, and the results speak for themselves.
Here’s exactly how I tackle a severely pot-bound plant:
- Gently Extract the Plant: First things first, get that plant out of its nursery pot. I usually turn the pot on its side, give it a gentle squeeze, and then carefully pull the plant out by its base. If it’s really stuck, a firm tap on the bottom often does the trick. You want to avoid pulling too hard on the stem itself.
- Assess the Root Ball: Once out, you’ll likely see a dense, matted mess of roots, often circling the shape of the pot. Sometimes they’re so tight, they look like a solid block of plant material. This is your target.
- The Initial Cuts – Be Brave! This is the moment of truth. Take your sharp, sterilised knife or secateurs. I typically start by making four vertical cuts, about an inch or two deep, evenly spaced around the outside of the root ball. Think of it like quartering a pie, but only cutting into the edges. These cuts break the circling pattern and encourage new roots to grow outwards.
- Trim the Bottom: Next, I’ll take a good inch or two off the very bottom of the root ball. Yes, you heard me right! Just slice it straight off. This removes the oldest, most matted roots and stimulates fresh growth from the base. When I first started gardening five years ago, I hesitated with this step, just teasing roots apart. The plants still grew, but nowhere near as vigorously as when I started being truly aggressive.
- Unfurl and Prune: Now, gently start to tease out the remaining roots, especially those still circling. Don’t be afraid to pull them apart. For any thick, woody roots that are still stubbornly circling or are damaged, cut them off cleanly with your secateurs. You’re aiming to create a more open structure, encouraging roots to radiate outwards rather than continuing their constricting spiral.
- Wash if Necessary (Optional, but I often do): For extremely dense, clay-like root balls where it’s hard to see what’s going on, I sometimes gently rinse away some of the old potting mix under a slow-running tap. This helps me identify the true root structure and remove any particularly matted sections. It feels drastic, but it gives you a clean slate. I did this with a particularly sad-looking 'San Marzano' tomato last year, and it absolutely thrived in the greenhouse afterwards.

Immediate Post-Pruning Planting and Critical Aftercare
You’ve done the brave work, now it’s time to give your plant the best possible start in its new home. The period immediately after aggressive root pruning is crucial for recovery and successful establishment, especially here in the often-unpredictable British climate.
Planting After Pruning
Once you’ve pruned, get that plant into its new spot as quickly as possible. Whether it’s a raised bed, a larger pot, or directly into the garden soil, make sure the planting hole is prepared.
- Enriched Soil is Key: I always backfill with a good quality, well-draining compost, often enriched with some of my homemade compost and a slow-release organic fertiliser. This gives the plant immediate access to nutrients as it starts to put out new roots. For my greenhouse tomatoes like 'Sungold' and 'Black Krim', I dig a deep hole and mix in plenty of spent mushroom compost.
- Plant at the Right Depth: Plant your root-pruned specimen at the same depth it was in its nursery pot, unless it’s a tomato, which I always plant deeper to encourage more root growth along the stem.
- Firm Gently: Gently firm the soil around the plant to ensure good root-to-soil contact, but don’t compact it too much. You want air and water to be able to penetrate easily.
Critical Aftercare for Recovery
This is where your plant needs a bit of TLC to recover from the shock.
- Immediate & Thorough Watering: This is non-negotiable. Water immediately and deeply until water drains from the bottom of the pot or the soil around the plant is thoroughly soaked. This settles the soil and provides much-needed hydration. I usually give it a good drench with a watering can, then come back 15 minutes later for another smaller drink.
- Protection from Extremes: For the first few days, your plant is vulnerable.
- Sun Protection: If it’s a scorching sunny day (a rare treat here in the UK!), try to offer some temporary shade, especially during the hottest part of the afternoon. A piece of horticultural fleece or even an upturned crate can work wonders. I've learned this the hard way with our strong spring sun after a cold snap; full sun can quickly desiccate a shocked plant.
- Wind Protection: Our British winds can be brutal. If your plant is exposed, consider a temporary windbreak.
- Temperature Fluctuations: Here in the Midlands, spring can throw anything at you. Keep an eye on overnight temperatures. If a late frost is forecast, cover your plants, especially if they are tender varieties like courgettes or French beans. I always keep some fleece handy for this exact reason.
- Monitor Closely: For the next week or two, keep a very close eye on your plant. Look for signs of wilting (which might indicate it needs more water or is still struggling with root recovery) or yellowing leaves. Don't panic if you see a bit of initial stress; this is normal.
- No Immediate Feeding: Resist the urge to feed immediately with a liquid fertiliser. The slow-release organic matter you added at planting will be enough. Let the new roots establish first, usually after a couple of weeks, before starting a regular feeding schedule.
Here’s a quick comparison of what happens when you commit to aggressive pruning versus just teasing the roots:
| Feature | Aggressive Root Pruning | Gentle Root Teasing (or none) |
|---|---|---|
| Initial Shock | Higher, but short-lived | Lower, but prolonged |
| Root Growth Pattern | New roots grow outwards, establishing quickly in new soil | Roots often continue circling, slow to expand |
| Water & Nutrient Uptake | Rapidly improves as new roots explore soil | Limited by restricted root ball, less efficient uptake |
| Plant Establishment | Vigorous, quick establishment, strong anchorage | Slower, less stable, prone to wind rock |
| Long-Term Health | Healthier, more productive, resilient plant | Stunted growth, lower yields, more susceptible to stress |
Long-Term Benefits: Ensuring Vigorous Establishment and Future Growth
So, you’ve been brave, you’ve pruned, you’ve planted, and you’ve babied your plant through its initial recovery. What’s the pay-off for all this effort? Believe me, the long-term benefits are absolutely worth it, turning a struggling nursery plant into a garden superstar.
Vigorous Establishment and Early Growth
The most immediate benefit I see in my UK garden is how quickly these plants establish themselves. Instead of slowly sulking as they try to unwind their constricted roots, the aggressive pruning forces the plant to send out fresh, exploratory roots into the surrounding soil. This means:
- Faster Anchorage: The plant quickly grips the new soil, making it less prone to wind rock – a real problem here in the Midlands, especially with taller varieties like my 'Moneymaker' tomatoes or climbing beans.
- Efficient Water and Nutrient Uptake: With roots spreading out, the plant can access a much larger volume of soil, pulling in water and nutrients far more effectively. This translates directly into robust, healthy top growth. I've noticed my root-pruned squash plants like 'Crown Prince' take off with huge leaves and strong vines much quicker than those I was once too timid with.
Enhanced Resilience and Productivity
Over the seasons, I’ve consistently observed that plants treated with aggressive root pruning are simply tougher and more productive.
- Drought Tolerance: While we certainly get our fair share of rain in Britain, we also have dry spells. A plant with a well-developed, deep root system is far more resilient during these times, needing less supplemental watering from my precious rainwater butt. My 'Hungarian Hot Wax' peppers, which can be a bit finicky, absolutely revel in this treatment, producing a fantastic crop even when the weather turns a bit dry.
- Disease Resistance: A strong, healthy plant is always better equipped to fend off pests and diseases. While it's not a magic bullet against all blight (especially in our damp UK summers!), a plant that isn't stressed by poor root health is simply better prepared.
- Increased Yields: Ultimately, this is what many of us gardeners are aiming for, isn't it? Better root systems lead to better top growth, more flowers, and ultimately, more fruit and vegetables. My greenhouse heirloom tomatoes, particularly the 'Brandywine' variety, consistently produce heavier, healthier harvests when I've given them this aggressive start. Last year, despite a somewhat overcast summer, I harvested over 20kg of tomatoes from just three plants – all of which had undergone rigorous root pruning!
A Foundation for Future Success
Think of aggressive root pruning as building a strong foundation for your plant's entire life in your garden. It’s not just about surviving, it’s about thriving. It’s about ensuring that the plant you’ve invested your time, money, and passion into has every chance to reach its full potential, producing abundant harvests and adding beauty to your space.
Conclusion: Be Brave, Be Bold, Grow Stronger!
I know, it sounds a bit brutal to go at a struggling plant with a knife, but I can't stress enough how transformative aggressive root pruning has been in my 5+ years of intensive gardening here in the UK. I’ve learned this technique through trial and error, seeing firsthand the difference it makes to everything from my greenhouse tomatoes to my outdoor brassicas.
Don't let the fear of 'damaging' your plant hold you back. The truth is, you're not damaging it; you're liberating it from the confines of its nursery pot and giving it the freedom to establish a robust, healthy root system that will serve it for its entire life in your garden.
So, the next time you bring home a pot-bound nursery plant, remember my experience. Grab those sharp secateurs, be brave, and give your plant the best possible start. You’ll be amazed at the vigorous growth, the healthier plants, and the bountiful harvests that follow. Trust me, it’s a game-changer for any UK gardener looking to get the most out of their backyard. Happy growing!
