Beyond the Surface: Why Planting Depth is Your Garden's Secret Weapon
Ever wondered why some plants in your neighbour's garden seem to burst with life, vibrant and healthy, while your own, despite all your love and care, just… mope? Or worse, pack it in after a season or two? I’ve been there, trust me. When I first plunged headfirst into gardening five years ago, fresh out of the IT world and armed with more enthusiasm than actual know-how, I thought planting was simple: dig a hole, stick the plant in, fill the hole, water. Boy, was I wrong!
Here in my 800 sq ft UK Midlands backyard, packed with raised beds, a greenhouse dedicated to my heirloom tomatoes, and every corner crammed with herbs and flowers, I’ve learned some tough lessons. One of the biggest, and perhaps most overlooked, factors in a plant's long-term health and vigour is its planting depth. It sounds so basic, doesn't it? But getting it wrong can lead to a whole host of problems: persistent root rot in our notoriously damp British climate, stunted growth that leaves your plants looking perpetually sad, and even heartbreaking winter kill when a plant just can't cope with the cold and wet.
I remember planting a beautiful bare-root 'Gertrude Jekyll' rose in my first year. I carefully followed the instructions for digging the hole, but I didn't truly understand where on the plant the soil level should meet. Two years later, it was still a shadow of its potential, always battling black spot and showing very little vigour. It was only after extensive research and digging it up to inspect the roots that I realised I’d buried its critical "root collar" far too deep. That rose taught me a powerful lesson: planting depth isn't just about stability; it's about life or slow decline. It’s your garden's secret weapon, and mastering it will transform your success rate, especially with our often-challenging UK weather.
The Critical Junction: Locating the Root Collar and Root Flare for Healthy Growth
Before we even think about digging a hole, we need to know what we’re looking for on the plant itself. This is where the "root collar" and "root flare" come in – two terms that might sound a bit technical, but are absolutely crucial for understanding optimal planting depth. Think of them as the plant's natural transition point, the critical junction between its root system and its stem or trunk.
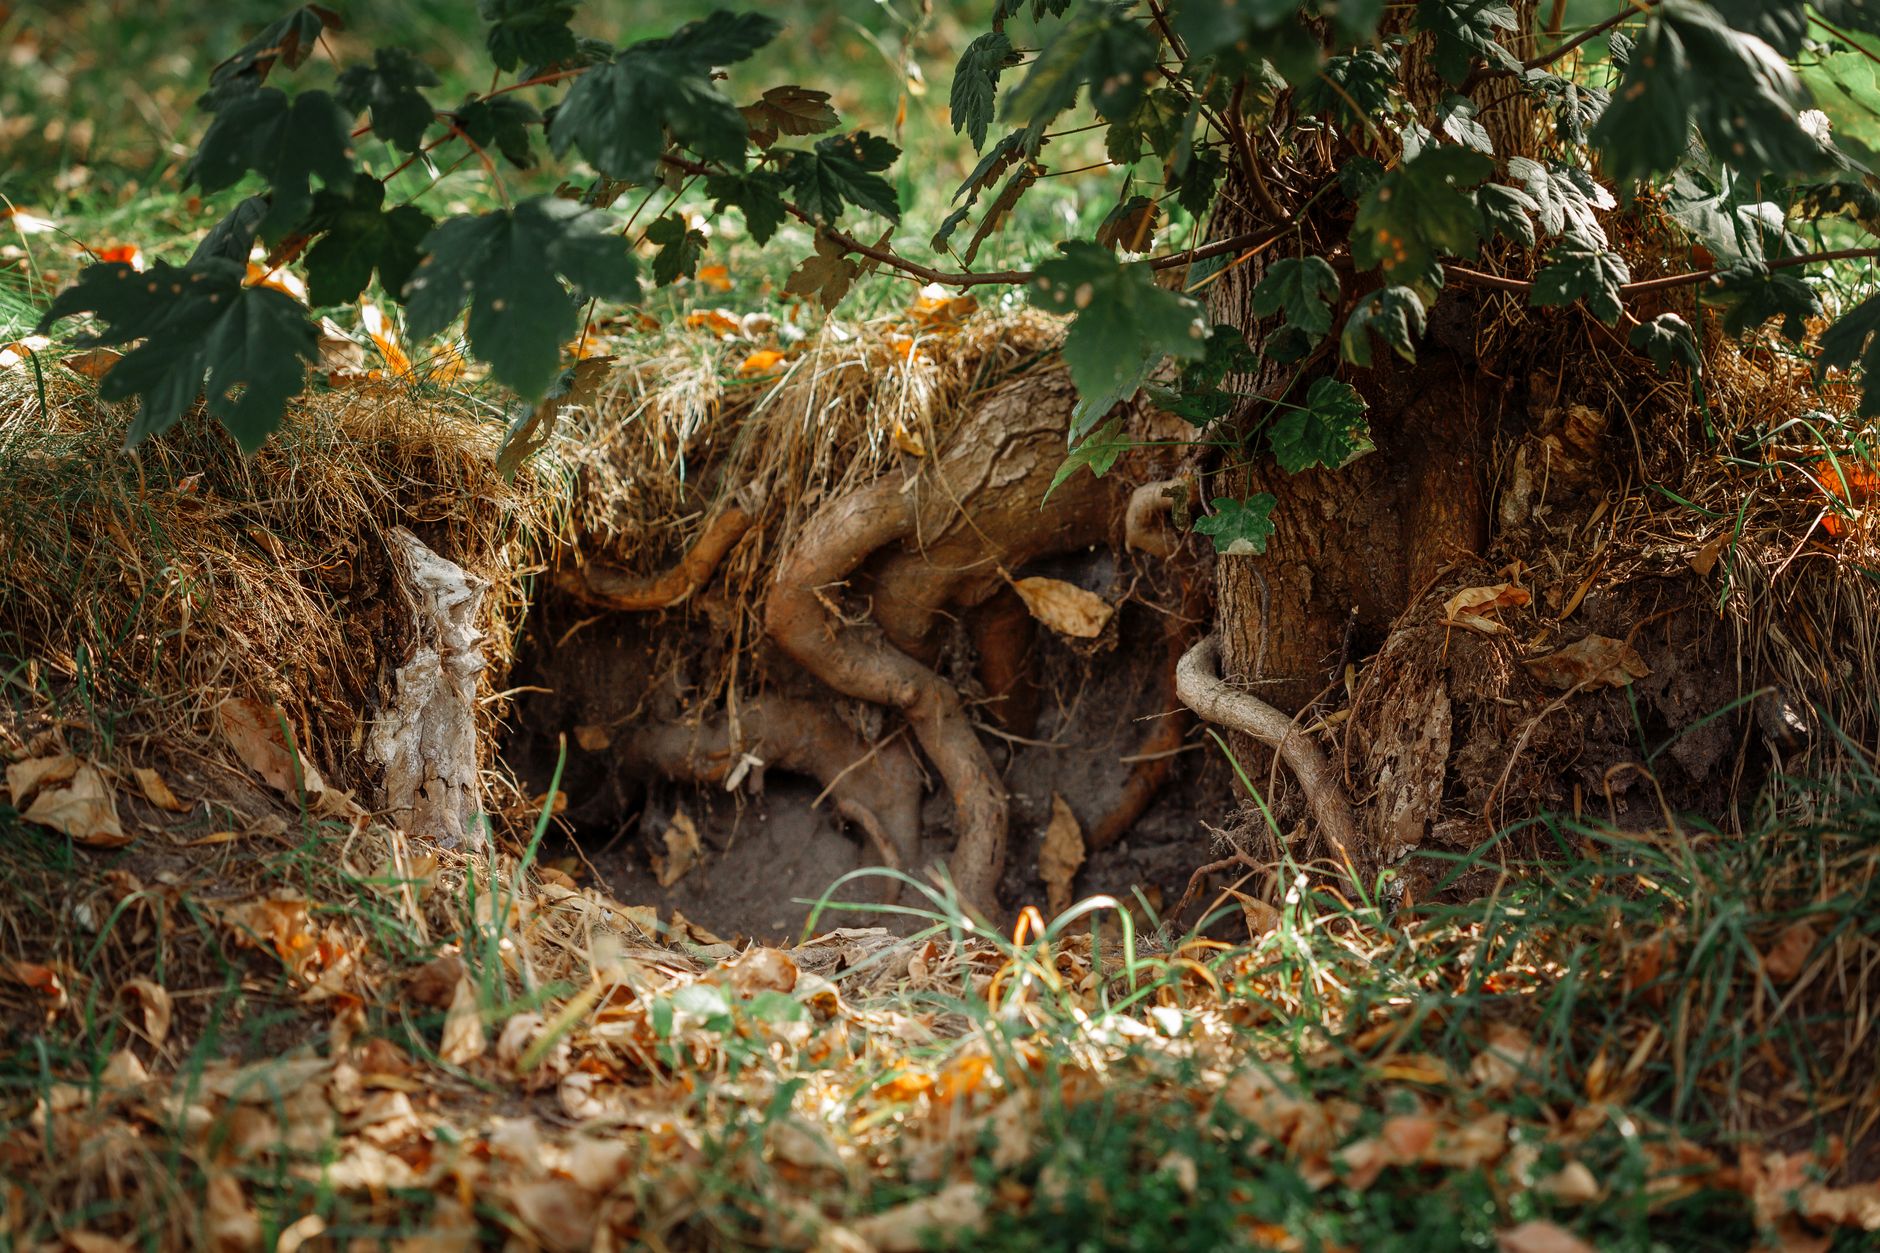
The root flare is the visible widening of the trunk or main stem as it meets the soil line. It's often described as looking like an elephant's foot or the base of a wine glass. Below this, the roots start to spread out horizontally. The root collar is essentially the area where the first main structural roots emerge from the trunk. Ideally, the root flare and collar should be visible above the soil surface.
Many, many plants, especially those bought in pots from nurseries, arrive with this crucial root flare buried under several inches of compost. I've lost count of the times I’ve unpotted a new fruit tree, say a 'Discovery' apple ready for my greenhouse border, or a lovely 'Desdemona' rose, and found that critical junction absolutely caked in soil. This isn't just a cosmetic issue; it's a matter of life and death for the plant. When the root collar is buried, it starves the roots of oxygen, makes the stem vulnerable to fungal diseases (which thrive in our damp UK soils), and signals to the plant that it should produce roots from the stem itself, which are weak and inefficient. Always take the time to gently brush away excess soil or compost until you can clearly see this flare. It's the golden rule for healthy establishment.
Anchoring Success: Optimal Planting Depths for Deciduous and Evergreen Trees
When it comes to trees, getting the planting depth right is paramount. You’re investing time, effort, and often a fair bit of money into a plant that you hope will live for decades, providing shade, fruit, or beauty. Mess up the planting depth, and you're setting it up for a lifetime of struggle. I've learned this the hard way with a few ornamental trees in my garden, particularly when dealing with our often heavy, clay-rich soil here in the Midlands.
The overarching principle for almost all trees is that the root flare, that critical junction we just talked about, should be at or slightly above the finished soil level. For my clay soil, I often aim to plant trees a little bit proud – meaning the root flare is an inch or two above the surrounding soil, with the soil gently mounded up to it. This helps immensely with drainage, preventing waterlogging around the critical root crown, especially during our notoriously wet British winters.
Whether you're planting a majestic 'Quercus robur' (English Oak) or a smaller 'Prunus avium' (Wild Cherry) for a bit of spring blossom, the source of your tree – container-grown or bare-root – will influence your approach.
Container-Grown Trees
These are perhaps the most common way to buy trees. The biggest challenge, as I mentioned, is that they are often potted too deep at the nursery.
- Inspection: Before planting, gently remove the top layer of compost from the pot until you expose the root flare. If you can’t find it after removing an inch or two, you’ll need to plant it higher than it currently sits in the pot.
- Hole Depth: Dig your planting hole wide (at least twice the width of the root ball), but only as deep as the root ball after you’ve exposed the flare. The aim is for the exposed root flare to sit level with, or slightly above, the surrounding soil once planted.
- Backfilling: Gently backfill with the excavated soil, avoiding adding too much organic matter directly into the planting hole unless your soil is truly awful. Our native soil is usually best. Firm gently to remove air pockets, then water thoroughly.
Bare-Root Trees
These are fantastic for value and often establish very well, provided you plant them correctly during their dormant season (typically late autumn to early spring in the UK). My favourite way to plant fruit trees for my small orchard area is bare-root.
- Inspection: Carefully unwrap your tree. You should be able to clearly see the root collar and flare. If any roots are damaged, prune them cleanly.
- Hole Preparation: Dig a hole wide enough to spread the roots out naturally, like spokes on a wheel, without bending or circling. Ensure the central mound in the hole allows the root flare to sit at the correct height.
- Planting: Place the tree in the centre, spreading the roots. Check that the root flare is at the desired level (at or slightly above soil level).
- Backfilling: Gradually backfill with soil, gently shaking the tree to settle soil around the roots. Firm lightly and water thoroughly to settle the soil further.
Here’s a quick comparison table to keep things clear:
| Feature | Deciduous Trees (e.g., Oak, Birch, Apple) | Evergreen Trees (e.g., Pine, Holly, Yew) |
|---|---|---|
| Source | Container-Grown | Container-Grown |
| Key Action | Locate and expose root flare/collar. Plant so flare is at or slightly above ground. | Locate and expose root flare/collar. Plant so flare is at or slightly above ground. |
| Depth Rule | Top of root flare visible at finished soil level. | Top of root flare visible at finished soil level. |
| UK Soil Tip | On heavy clay (common in Midlands), plant 1-2 inches proud for drainage. | On heavy clay, consider planting 1-2 inches proud, but ensure good anchorage. |
| Source | Bare-Root | Less common; often planted container-grown. |
| Key Action | Spread roots radially. Ensure root flare is at correct height. | N/A |
| Depth Rule | Root flare at finished soil level, ensuring all roots are covered. | N/A |
| UK Soil Tip | Firm soil well around roots to prevent air pockets; water thoroughly. | N/A |
Shrub Savvy: Mastering Planting Depths for Container-Grown and Bare-Root Shrubs
Shrubs are the backbone of many UK gardens, providing structure, year-round interest, and habitats for wildlife. Just like trees, getting their planting depth right is crucial for their long-term health, especially given our variable British weather. I've planted countless shrubs in my 800 sq ft space, from hardy 'Annabelle' hydrangeas to fragrant English lavenders, and one thing is consistent: the principles of planting depth are the same, but with a few specific considerations.
The primary goal is always to ensure the plant's natural crown – where the stems emerge from the roots – is at the correct level. Burying this too deeply can lead to stem rot, poor root development, and a general lack of vigour. I had a beautiful Rhododendron 'Praecox' struggling for two years in a semi-shaded bed; it was only when I dug it up that I found its root collar a good three inches too deep. The difference after replanting correctly was night and day – it finally flushed out with healthy new growth.
Container-Grown Shrubs
Most shrubs you buy, especially during the growing season, will be in pots.
- Inspection: Carefully unpot the shrub and examine the root ball. Brush away any excess compost from the top until you can clearly see the point where the main stems emerge from the root system. This is your target planting level.
- Hole Depth: Dig a hole twice as wide as the root ball, but only as deep as needed for the plant’s crown to sit level with the surrounding soil. For my heavier Midlands clay, I often still aim for the crown to be slightly proud.
- Backfilling: Use the excavated soil, firm gently, and water well.
Bare-Root Shrubs (Especially Roses)
Bare-root shrubs are a fantastic, economical choice, particularly for roses, which are a firm favourite in UK gardens. Getting the depth right for bare-root roses is one of the most common questions I get asked, and it's vital for their health and resilience, especially against diseases like black spot that thrive in damp conditions.
- Inspection: For bare-root roses, you'll need to locate the bud union (also called the graft union). This is the knobbly, swollen area where the desired rose variety has been grafted onto a hardy rootstock.
- Hole Preparation: Dig a hole wide enough to spread the roots out naturally.
- Planting Roses: For most of the UK, especially colder regions like the Midlands, the recommendation is to plant the bud union 1-2 inches (2.5-5 cm) below the finished soil level. This provides crucial protection for the graft from hard frosts and temperature fluctuations, which can be brutal in our British winters.
- Other Bare-Root Shrubs: For other bare-root shrubs without a prominent bud union, the aim is to plant so the point where the stems emerge is at the finished soil level.
- Backfilling: Backfill gently, ensuring soil gets between all the roots. For roses, ensure the bud union is adequately covered. Water generously.
Here’s a detailed comparison table for common shrub types:
| Feature | General Container-Grown Shrubs (e.g., Hydrangea, Lavender, Hebe) | Bare-Root Roses (Hybrid Tea, Floribunda, Climber) |
|---|---|---|
| Key Point | Root collar/crown (where stems emerge) | Bud union (graft point) |
| Source | Container-Grown | Bare-Root |
| Key Action | Expose the root collar/crown. | Locate the bud union. Prune any damaged roots cleanly. |
| Depth Rule | Root collar/crown at or slightly above finished soil level. | Bud union 1-2 inches (2.5-5cm) below finished soil level. |
| UK Soil Tip | Plant slightly proud on heavy clay for improved drainage. | Crucial for winter protection in UK climate, prevents graft damage from frost. |
| Source | Bare-Root (less common, but some ornamental shrubs) | N/A (Roses are primary bare-root shrub) |
| Key Action | Spread roots, ensure crown is at desired level. | N/A |
| Depth Rule | Crown at finished soil level. | N/A |
| UK Soil Tip | Ensure good soil contact with roots; water well to settle. | N/A |
Perennial Perfection: Planting Crowns and Roots for Repeat Performances in Your UK Garden
Now, let's talk about the unsung heroes of our borders – perennials! These are the plants that return year after year, gracing our UK gardens with their dependable beauty. Getting their planting depth right is crucial for ensuring they not only survive but truly thrive and deliver those repeat performances we all yearn for. It’s all about the crown, that vital junction where the stem meets the roots.
Here in my 800 sq ft Midlands garden, I’ve got a real mix of perennials, from my beloved hardy Geraniums that scramble everywhere to the elegant Delphiniums I try to grow each year (though our British slugs often have other ideas!). What I’ve learned through trial and error, often thanks to our wonderfully damp UK winters, is that most perennial crowns prefer to be just at or slightly below the soil surface.
If you plant a perennial too deep, especially here in Britain where we get plenty of rain, that crown can become waterlogged and rot. I lost a beautiful 'Hot Lips' Salvia a few years back because I buried its crown too enthusiastically, thinking it needed extra anchorage. Nope, just turned it into a soggy mess. Conversely, if it’s too shallow, the crown or upper roots can dry out, or worse, get zapped by a sharp winter frost. I've had more than one batch of bare-root strawberries suffer from being too exposed to the elements.
Bare-Root vs. Container-Grown Perennials
The approach differs slightly depending on how your perennial arrives:
- Bare-root perennials: These often look a bit like a dried-up bunch of roots with a small bud or two – that's your crown! Before planting, I always give them a good soak in a bucket of water for an hour or two. Then, when I plant them, I make sure the crown is just level with the soil surface. For something like a Peony, you'll see visible 'eyes' or buds; these typically want to be about 2-3 cm (1 inch) below the soil, no deeper, or they might struggle to flower. I remember planting my 'Sarah Bernhardt' Peony and being super meticulous with this, and it’s rewarded me with stunning blooms ever since.
- Container-grown perennials: These are generally simpler. Just like with shrubs, you want to plant them at the exact same depth they were in their nursery pot. The soil line in the pot is your guide. Gently tease out any circling roots, place it in your prepared hole, and backfill, ensuring no air pockets. My Hostas, which are a real feature in my shadier beds, always get this treatment, and their crowns are always visible at the surface.
Here's a quick guide to some common perennials and their ideal planting depths:
| Perennial Type | Planting Depth Guideline | Randy's UK Garden Tip |
|---|---|---|
| Most Perennials | Crown at or just below soil level | This is your general rule of thumb. For my hardy Geraniums or Catmint, I make sure the crown is visible and not buried, especially with our damp Midlands soil. Helps prevent crown rot. |
| Peonies | "Eyes" (pink buds) 2-3 cm (1 inch) below soil surface | Critical for flowering! I learned this one the hard way with a non-blooming plant years ago. If they're too deep, they won't flower, and that's a real shame after waiting so long! |
| Hostas | Crown at soil level | My Hostas thrive when their crowns are visible. If buried, they can struggle with moisture retention and pests. |
| Iris (Bearded) | Rhizome (fleshy root) mostly exposed, only very top covered with a thin layer of soil | This is a bit unique! I have a few 'Blue Suede Shoes' Irises, and keeping their rhizomes exposed to the sun helps them flower. Burying them too deep is a common reason for non-blooming in my experience. |
| Daylilies (Hemerocallis) | Crown at soil level | Simple and effective. These tough plants are quite forgiving, but keeping the crown at the surface ensures good growth. |
| Strawberries | Crown at soil level, ensuring the 'heart' (central growing point) is not buried | I grow 'Cambridge Favourite' and 'Red Gauntlet' in my raised beds. Burying the central heart can lead to rot, but exposing the roots too much can cause drying out, especially in a dry spell. Balance is key! |
Remember, the goal is to give your perennials a strong start so they can reward you with years of glorious blooms and foliage, standing up to whatever the British weather decides to throw at them.
Spotting the Signs: Diagnosing and Correcting Planting Depth Errors to Prevent Issues
Even the most seasoned gardener (and trust me, I'm still learning every single day!) can get planting depth wrong. The good news is that our plants are usually pretty good at telling us when something isn’t quite right. Learning to read these signals is vital for preventing long-term issues like root rot, stunting, or even winter kill, especially with our unpredictable UK climate. I’ve made my share of mistakes, and I’m happy to share what I’ve learned about spotting and fixing them.
Symptoms of Planting Too Deep
This is by far the most common planting depth error I’ve seen and made myself. When a plant, especially a tree or shrub, is planted too deep, its root collar (or crown for perennials) is buried beneath the soil. This can lead to a whole host of problems:
- Stunted Growth and Lack of Vigor: The plant just doesn't seem to grow, or it grows very slowly. Leaves might be smaller, paler, or yellowing (chlorosis) because the roots aren't able to take up nutrients efficiently. I once planted a 'Bloodgood' Acer too deep, and for two years it just sat there looking miserable before I figured it out.
- Root Rot: This is the big one, especially here in the Midlands with our heavy clay soil and frequent rainfall. When the root collar is buried, it stays constantly wet, depriving the vital cells of oxygen. This creates perfect conditions for fungal diseases. You might notice wilting even when the soil is wet, or the bark near the base might look soft and mushy. You might even smell a foul, decaying odour if it’s advanced.
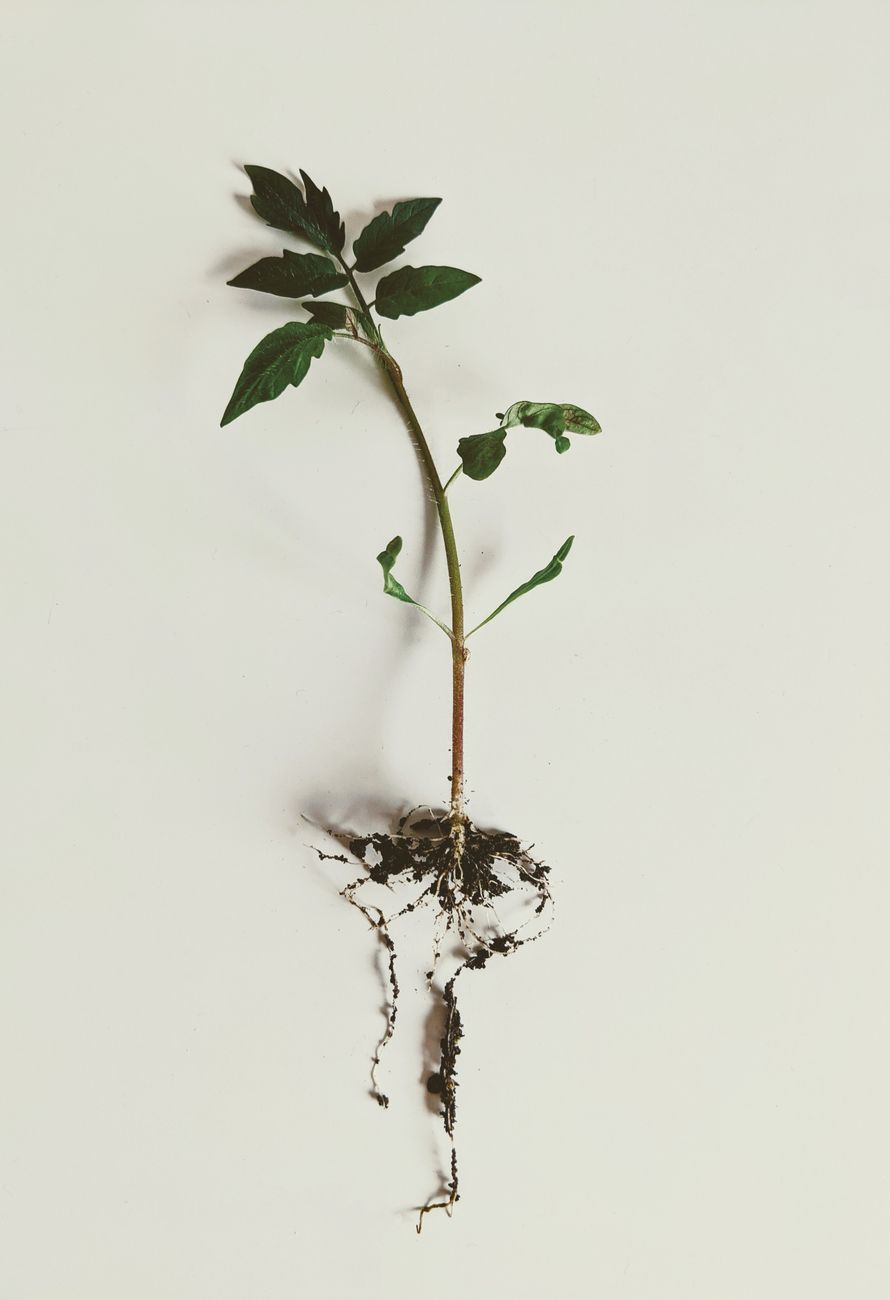
- Poor Anchorage and Instability (for trees/shrubs): Ironically, burying a plant deeper doesn't always make it more stable. The roots that develop from the stem in the deeper, oxygen-poor soil are often weaker and less effective at anchoring the plant.
- Pest and Disease Susceptibility: A stressed plant is a weak plant. Those suffering from incorrect planting depth are much more prone to attack from pests and diseases.
- Lack of Root Flare (for trees): On mature trees, the root flare should be visible at the soil surface. If you can't see it, your tree is likely too deep. I’ve seen this in many older gardens around my area, where trees have been slowly buried over decades by mulching or top-dressing.
Symptoms of Planting Too Shallow
While less common, planting too shallow can also cause serious issues:
- Drying Out: Exposed roots are vulnerable to drying out, especially during our occasional British heatwaves (yes, they do happen!). You'll see wilting, crispy leaves, and the plant will need constant watering.
- Winter Kill: This is a big concern in the UK. Roots need insulation from freezing temperatures. If they're too close to the surface, they can freeze solid, leading to significant damage or death, particularly for less hardy varieties. I lost a couple of young Lavender plants in a harsh winter because their roots weren't properly covered.
- Instability: The plant might wobble in the wind, making it susceptible to snapping or falling over, particularly young trees and shrubs.
Correcting Planting Depth Errors
Don't despair if you spot these signs! Early intervention can save your plants.
For Plants Planted Too Deep:
- Gently Excavate: Carefully remove soil from around the base of the plant until you expose the root collar or root flare. Use a hand trowel or even your hands to avoid damaging the bark or roots.
- Assess Damage: If you find signs of root rot (mushy, smelly roots), gently prune away the affected parts with clean, sharp secateurs.
- Replant (if severe): For young trees or shrubs that are severely buried and struggling, the best solution might be to carefully lift and replant them during their dormant season (late autumn to early spring). This is a big job, but often worth it for the plant's long-term health. For smaller perennials, you can often just lift, amend the soil, and replant correctly.
- Avoid Over-Mulching: Once corrected, be mindful of how you mulch. Keep mulch away from the trunk or stem to ensure good air circulation around the root collar.
For Plants Planted Too Shallow:
- Backfill Carefully: Gently add soil around the exposed roots, making sure not to bury the root collar too deeply. Create a slight mound if necessary to cover the roots.
- Mulch: A good layer of organic mulch (compost or bark chippings) can help insulate the roots and retain moisture. Just remember to keep it away from the crown or trunk.
- Replant (if unstable): If the plant is very wobbly or its roots are severely exposed, gently lift and replant it, ensuring the hole is deep enough this time.
Patience and observation are your best tools here. Take a walk around your garden, especially after a good downpour, and really look at the base of your plants. Are they sitting correctly? It's a small detail that makes a world of difference.
Digging Deeper: Your Path to a Healthier, More Resilient UK Garden
So, there you have it, fellow UK gardeners! We've journeyed beyond the surface, literally, to uncover one of the most fundamental yet often overlooked aspects of successful gardening: optimal planting depth. From the robust root flare of a newly planted tree to the delicate crown of a perennial returning for its annual show, getting this right truly is your garden's secret weapon.
I truly believe that mastering this one aspect has transformed my own 800 sq ft garden here in the Midlands. I’ve learned that it's not just about digging a hole; it's about understanding the specific needs of each plant and giving it the best possible start. I've made the mistakes – planting that Acer too deep, losing those Lavender plants to winter chill – but each one was a lesson learned, often the hard way, that I can now share with you.
Key Takeaways for Your UK Garden:
- Locate the Root Collar/Flare: For trees and shrubs, this is your primary guide. It should be at or just above the soil line.
- Respect the Crown: For perennials, ensure the crown is at soil level, with specific exceptions like Peonies and Irises.
- Consider Your Soil: Our variable British soil, from heavy clay to lighter loam, will influence drainage, so always amend well and ensure good aeration.
- Watch for Warning Signs: Stunting, yellowing, wilting, and instability are all cries for help. Learn to listen to your plants.
- Don't Be Afraid to Correct: Early intervention can save a struggling plant.
Gardening, especially here in the UK with our wonderfully varied (and often challenging!) climate, is a continuous journey of learning, experimenting, and connecting with nature. By paying close attention to planting depth, you're not just preventing problems; you're actively promoting stronger root systems, healthier growth, and a far more resilient garden that can shrug off the worst of the British weather.
So, next time you're out with your spade, take an extra moment. Feel the plant, identify that critical junction, and plant with intention. Your trees will stand taller, your shrubs will flourish, and your perennials will reward you with repeat performances for years to come. It’s a small effort with monumental rewards.
Happy gardening, my friends! May your roots be deep and your harvests abundant.
