
When you pour your heart and soul into nurturing your plants, especially those precious indoor specimens or the prize tomatoes in the greenhouse, there's nothing more disheartening than seeing them struggle. You water them just right, feed them, give them the perfect light, and still, new growth emerges twisted, leaves are crinkled, and flowers just... don't quite make it. For years, I'd scratch my head, blaming everything from nutrient deficiencies to the notoriously unpredictable British weather. But here in my 800 sq ft Midlands garden, I've learned a harsh truth: sometimes, the biggest problems come in the smallest, most invisible packages.
I'm Randy, and like many of you, I swapped a desk job in IT for the glorious, muddy reality of gardening five years ago. My greenhouse, packed with heirloom tomatoes like 'Cherokee Purple' and 'Gardener's Delight', is my sanctuary. It's also where I had my first truly frustrating encounter with what I now affectionately (or perhaps not so affectionately) call the "invisible invaders" – microscopic mites. These aren't your common spider mites, the ones you can just about spot with a good pair of reading glasses. No, these are the truly tiny terrors: broad mites and cyclamen mites. They're so small, you won't see them until their damage is well underway, leaving you baffled by what looks like a plant simply giving up the ghost.
This article is born from my own trials and errors, my late-night microscope sessions (a habit I picked up from my IT days, ironically!), and a fair bit of head-scratching over many seasons here in the UK. I want to share what I've learned about diagnosing and tackling these almost mythical pests, because once you know what to look for, and what works, you can save your beloved plants from their insidious grasp.
Invisible Invaders: Understanding Microscopic Mites on Your Indoor Plants
I remember one particularly wet and cool summer, typical for parts of the UK, when my prize 'Black Krim' tomatoes in the greenhouse started looking utterly miserable. The new growth was stunted, leaves were puckering, and the whole plant just looked... wrong. I checked for every usual suspect – aphids, whiteflies, even the dreaded early blight that our damp climate can encourage. Nothing. I tried different fertilisers, adjusted watering, opened vents more often to manage humidity, but the problem persisted, slowly spreading from one plant to the next. It was heartbreaking, and honestly, a bit embarrassing for someone who prides themselves on their green fingers.
It wasn't until a fellow UK gardener, much more experienced than I was at the time, suggested broad mites that I even considered something I couldn't see. The idea of a pest so tiny it was practically invisible felt like something out of a sci-fi movie, not my cosy greenhouse here in the Midlands. But that conversation was a turning point. It kickstarted my obsession with understanding these microscopic menaces. What I've learned since is that these mites thrive in the protected environments of our homes and greenhouses, where natural predators are scarce and conditions are often just right for them to multiply unchecked. They particularly love the tender, new growth, which is why their damage is so deceptive, often mimicking viral infections, nutrient deficiencies, or even herbicide damage. It’s a common frustration for us UK gardeners trying to grow tender plants indoors or under glass, as these mites can sneak in unnoticed and wreak havoc.
Meet the Microscopic Menace: Broad Mites vs. Cyclamen Mites
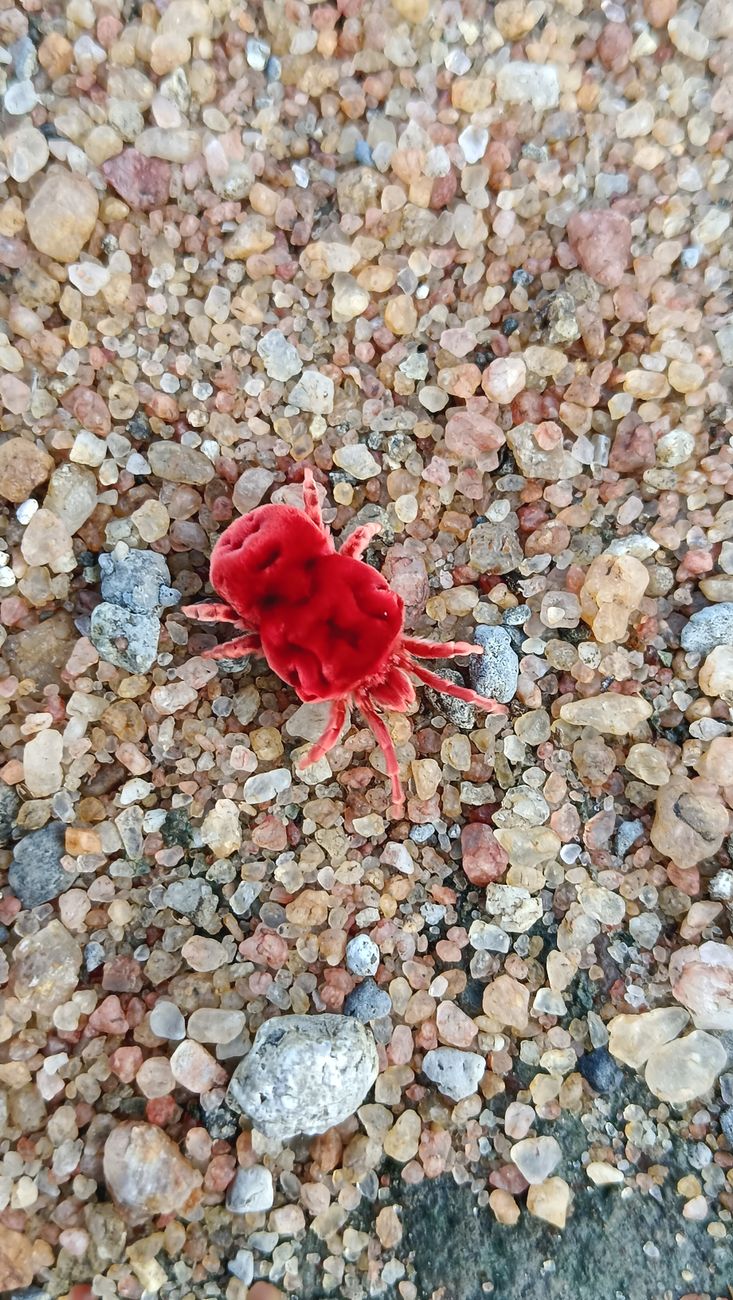
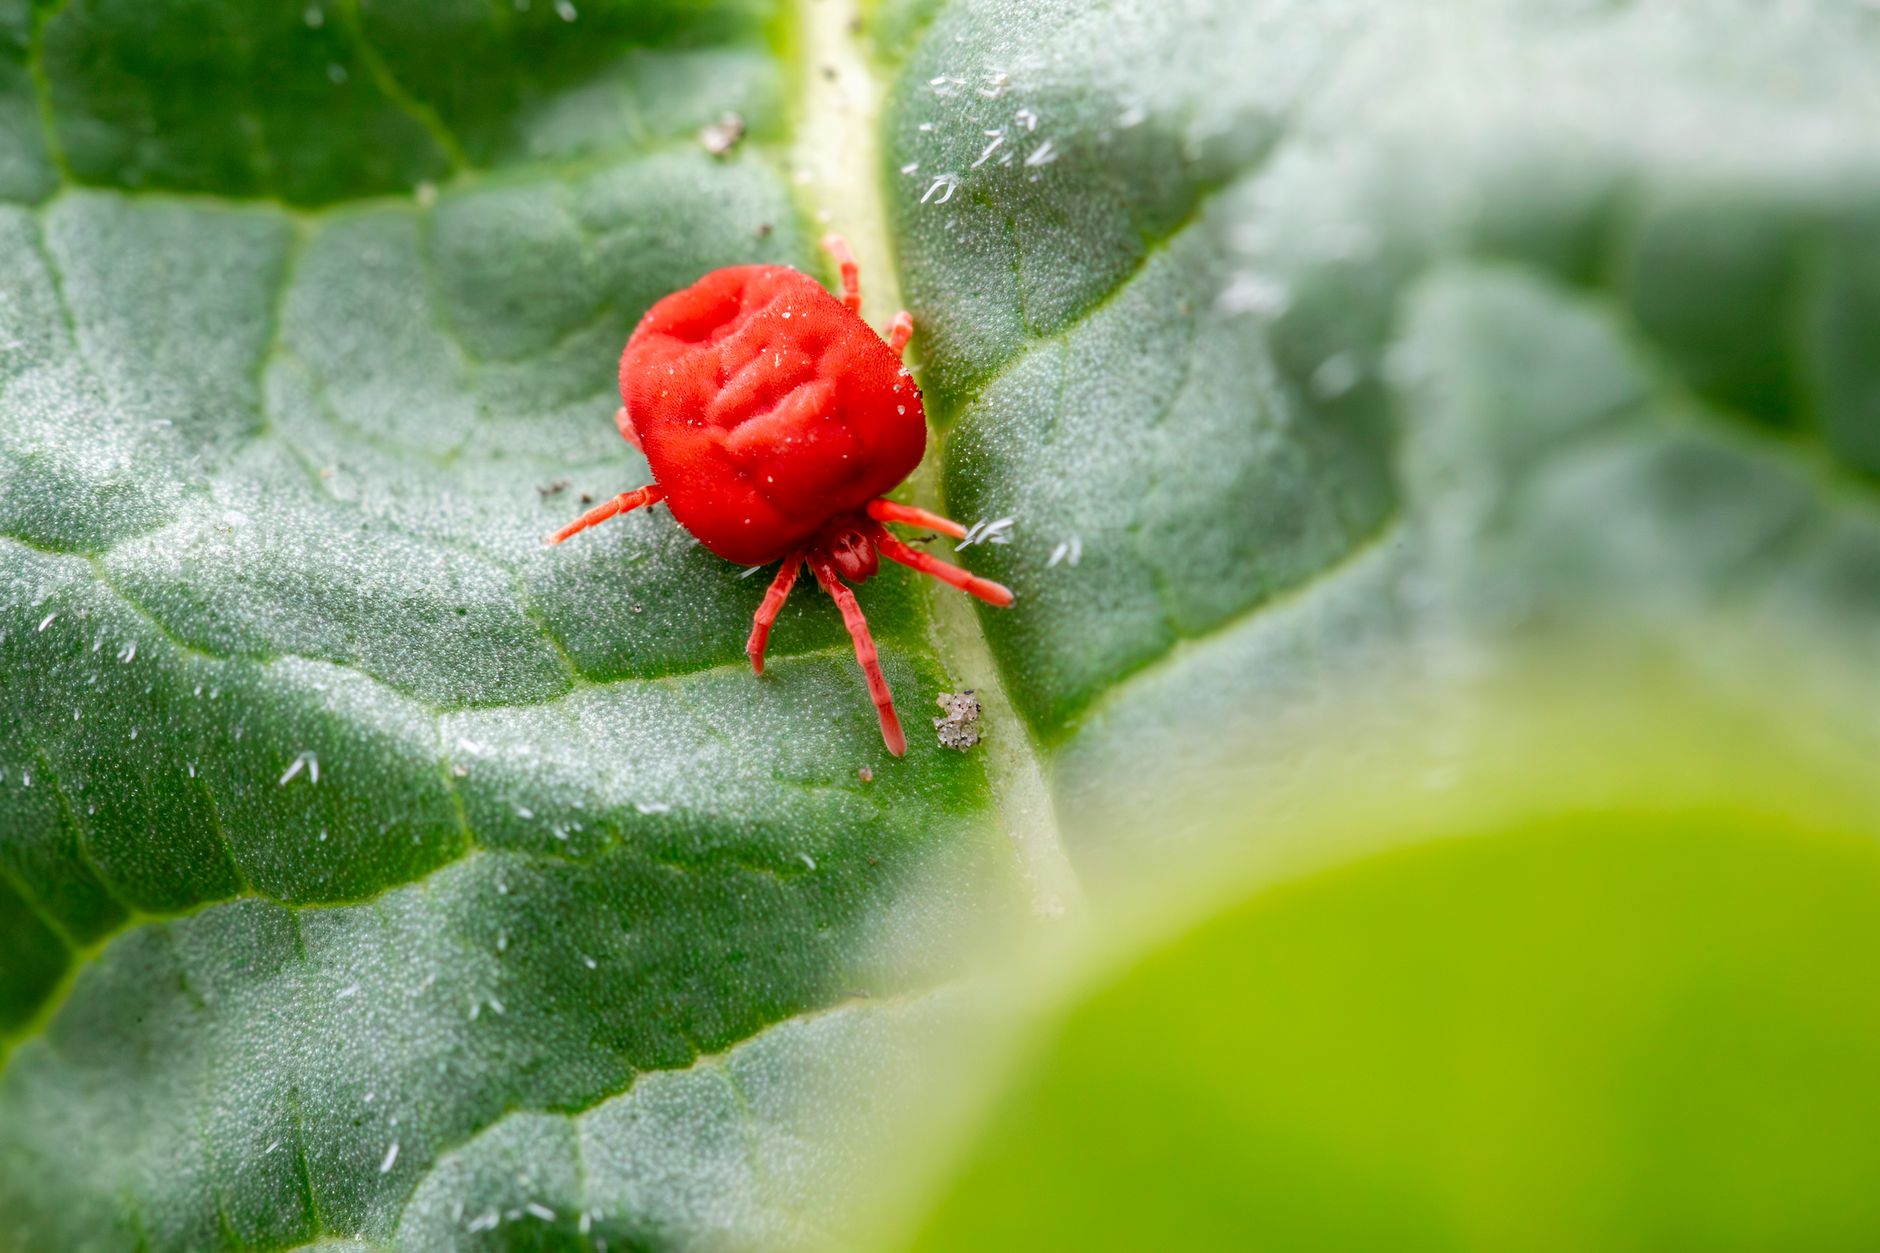
When you're dealing with something you can't easily see, it helps to know your enemy. Broad mites (Polyphagotarsonemus latus) and cyclamen mites (Phytonemus pallidus) are both members of the Tarsonemidae family, and they share some nasty habits. They're both incredibly tiny, measuring less than 0.2 mm, making them practically invisible to the naked eye. They feed by piercing plant cells and sucking out the contents, injecting a growth-regulating toxin as they do, which is what causes the characteristic distorted growth.
However, despite their similarities, there are key differences in their preferred conditions, host plants, and the specific ways their damage manifests. Understanding these distinctions is crucial for accurate diagnosis, especially when you're trying to figure out which invisible foe you're up against in your own UK garden or home. I've encountered both, but broad mites have been a particular bane in my greenhouse, especially on peppers and tomatoes, while I've seen cyclamen mites pop up on some of my more delicate house plants.
| Feature | Broad Mites (Polyphagotarsonemus latus) | Cyclamen Mites (Phytonemus pallidus) |
|---|---|---|
| Size | ~0.15-0.2 mm (extremely small) | ~0.1-0.2 mm (extremely small) |
| Colour | Pale green to yellowish, translucent, oval-shaped | Translucent, shiny, often amber or greenish, oval-shaped |
| Preferred Conditions | Warm (20-29°C / 68-84°F), high humidity (80-90%) | Cooler (15-20°C / 59-68°F), high humidity (80-100%) |
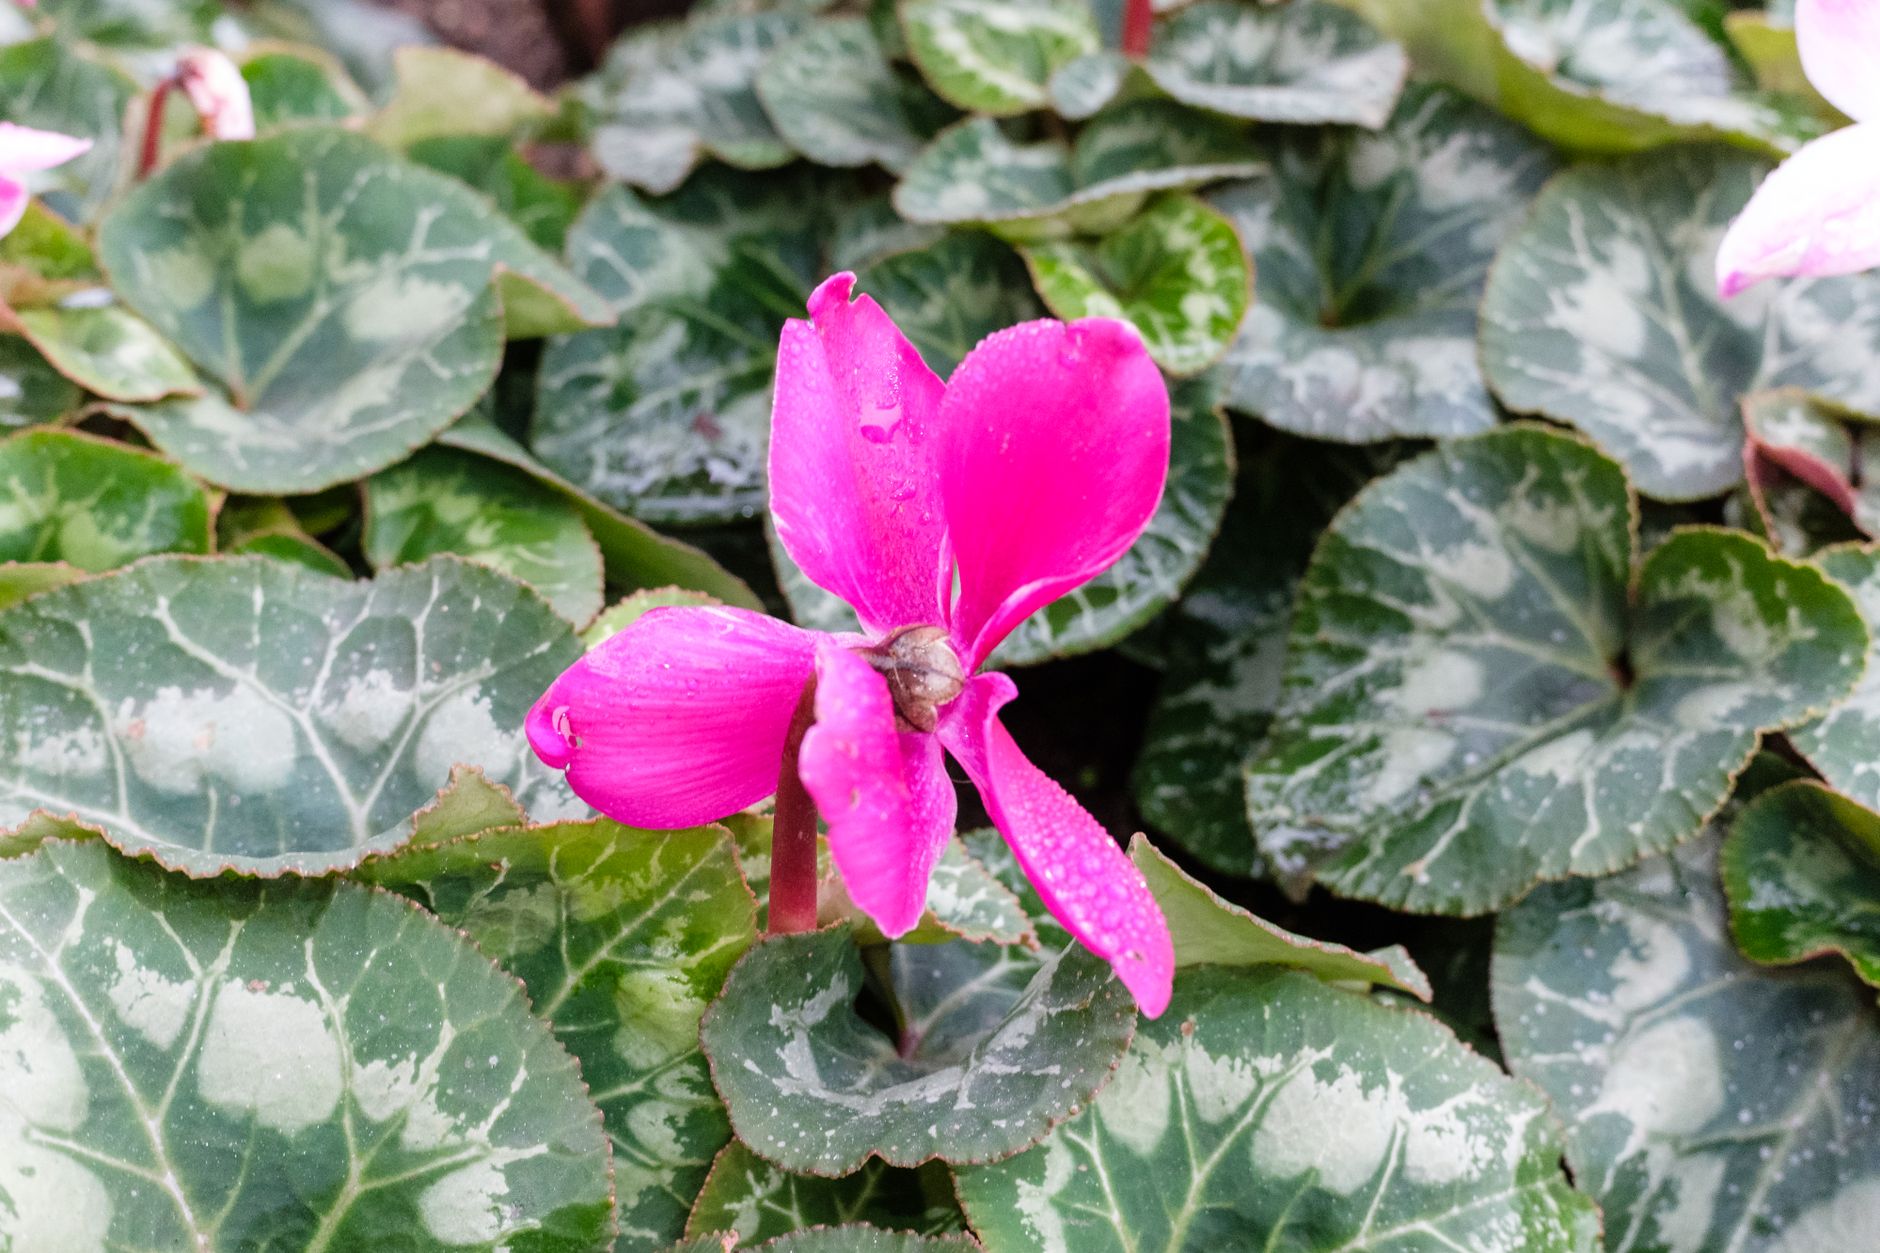
| Host Plants | Wide range: Tomatoes, peppers, aubergines, potatoes, cucumbers, beans, strawberries, citrus, impatiens, snapdragons, gerbera, many ornamentals. | Cyclamen, African violets, gloxinia, delphinium, begonia, fuchsia, geranium, ivy, impatiens, peppers, strawberries. |
| Damage Location | Primarily new growth, young leaves, buds, flowers, fruit surface | Primarily new growth, young leaves, buds, flowers |
| Key Damage Symptoms | Stunted, hardened, bronzed, or leathery new leaves; downward curling; thickened, brittle stems; distorted flowers; russeting/scabbing on fruit. | Stunted, brittle, thickened, or crinkled new leaves; upward curling; flowers fail to open or are distorted, discoloured; blackening of buds; hairy appearance on undersides of leaves. |
| Visible Mites? | No, generally not with naked eye. May appear as dust-like specks. | No, generally not with naked eye. |
Decoding Distorted Growth: Identifying Subtle Symptoms of Mite Damage
This is where the real detective work begins, and it's something I've become rather good at, often to the dismay of my plants! Because these mites are so small, their damage is usually the first, and often only, clue you'll get. And let me tell you, it can be incredibly deceptive. I've mistakenly diagnosed broad mite damage as a calcium deficiency in my greenhouse peppers, or even a weird genetic mutation in my 'Sungold' tomatoes, simply because the symptoms are so non-specific at first glance.
The trick is to look closely at the newest growth. Both broad mites and cyclamen mites target the tenderest parts of the plant, where cells are rapidly dividing.
For Broad Mites, look for these tell-tale signs:
- Stunted and hardened new leaves: They might look smaller than normal, feel unusually stiff or brittle, and often have a bronzed or reddish tinge, especially on the undersides. I've seen this on my tomato seedlings, where the very top leaves just refuse to expand properly.
- Downward curling or cupping: The edges of young leaves might curl downwards, almost as if they're trying to protect themselves.
- Thickened, brittle stems: New stems can become unusually thick and snap easily.
- Distorted flowers: Buds may fail to open, or flowers might be malformed, leading to reduced fruit set. This was a huge problem on my greenhouse aubergines one year.
- Russeting or scabbing on fruit: On plants like tomatoes or peppers, you might see rough, brown patches on the surface of young fruit, which is a classic sign of broad mite feeding.
Cyclamen Mite damage often looks a bit different:
- Stunted, thickened, and brittle leaves with an upward curl: Unlike broad mites, cyclamen mites often cause leaves to curl upwards at the edges. They'll also feel quite coarse and brittle.
- Crinkled or puckered foliage: The leaves might have a crinkled texture, almost like they've been ironed badly. I've seen this on my African violets, making them look quite sad and unhealthy.
- Distorted or blackened buds and flowers: Flower buds often turn black and die before opening, or if they do open, the flowers are severely deformed and discoloured.
- A "hairy" appearance: Sometimes, especially on plants like African violets, the undersides of leaves or growing points can develop an almost fuzzy or hairy texture due to mite feeding and plant reaction.
It's a subtle game of comparison, and it often takes a bit of experience to distinguish between these two. The key is consistent observation and knowing what healthy new growth should look like for your specific plants.
Confirming the Unseen: Diagnosis Techniques for Home Gardeners
Okay, so you've seen the distorted growth, you've narrowed down the possibilities, but how do you actually confirm that these invisible mites are the culprits? This is where my IT background comes in handy – it's all about using the right tools and systematic observation. Remember, these mites are microscopic, so you won't just 'spot' them like an aphid.
Here’s what I do in my UK garden to confirm an infestation:
Get a Magnification Tool: This is non-negotiable. Forget your basic magnifying glass; you need something stronger.
- Jeweler's Loupe (10x to 30x magnification): This is my go-to. It's portable, relatively inexpensive, and offers excellent magnification. You can find them easily online.
- Pocket Microscope (60x to 100x magnification): For serious mite hunting, a pocket microscope is fantastic. It takes a bit more practice to hold steady, but the detail you can see is incredible.
- Smartphone with a Macro Lens Attachment: If you're tech-savvy, a clip-on macro lens for your phone can turn it into a powerful diagnostic tool. The digital zoom combined with the lens can reveal a lot.
Focus on the Hottest Spots: These mites love tender, new growth.
- Growing Tips: Carefully examine the very tip of the plant, where new leaves and buds are forming. This is their prime feeding ground.
- Undersides of Young Leaves: Flip over those slightly distorted young leaves and scan the surface.
- Flower Buds: If you have distorted or unopened flower buds, gently peel back any protective layers and look inside.
The White Paper Test (with a twist): For larger leaves, you can try this, though it's less effective for broad/cyclamen mites than for spider mites due to their extreme tininess. Hold a white piece of paper under the affected foliage and gently tap the plant. Then, use your loupe to scan the paper for any tiny moving specks. You might just see them as microscopic dots, but any movement is a clue.
Look for the Mites Themselves (if you're lucky!):
- Broad Mites: They are translucent, oval-shaped, and often move quite slowly. You might see them congregating in the crevices of new growth or along the midrib of young leaves. The eggs are also distinctive – clear, oval, and covered with tiny white dots, almost like a miniature studded football.
- Cyclamen Mites: These are even harder to spot. They are also translucent and tend to hide deep within buds and crevices. They favour cooler, more humid spots. Their eggs are smoother than broad mite eggs.
This process requires patience and a steady hand. I’ve spent many an evening in my greenhouse, loupe pressed to my eye, scrutinising a struggling pepper plant. It's not glamorous, but confirming the presence of these mites is the first crucial step towards effective treatment. Without confirmation, you're just guessing, and when dealing with invisible invaders, guessing rarely pays off.
5. Organic Arsenal: Effective Treatments for Microscopic Mites
Right, so you've done the detective work, you've confirmed those microscopic nasties are indeed causing havoc. Now comes the important part: getting rid of them! Over my five years of intensive gardening here in the UK, I've tried a fair few things, and I’m a firm believer in organic solutions wherever possible. Not just because it's better for the environment, but also because I want to eat my homegrown tomatoes without worrying about chemical residues. Here's what I've found works best in my 800 sq ft Midlands garden and greenhouse.
Neem Oil: My Go-To for Many Pests
Neem oil is usually my first line of defence against most soft-bodied pests, including these mites. It's a natural insecticide derived from the neem tree, and it works by disrupting their feeding and reproduction cycles. I always make sure to get a good quality cold-pressed neem oil – it makes a difference!
I mix it according to the bottle's instructions, usually about 5-10ml per litre of water, with a few drops of a mild liquid soap (like washing-up liquid) as an emulsifier. The key is thorough coverage, especially on the undersides of leaves and the new growth where mites love to hide. I spray my plants in the late evening here in the UK, after the sun has gone down, to avoid any potential leaf burn, which can happen if the sun is too strong on wet, oily leaves. I've used it successfully on my greenhouse tomatoes, particularly 'Gardeners Delight' and 'Moneymaker', when I've spotted early signs of distortion. It needs consistent application, often every 5-7 days for a few weeks, especially if our British weather turns warm and humid, as that's when mites really thrive.
Insecticidal Soaps: Good for Delicate Situations
Another weapon in my arsenal is insecticidal soap. These soaps work by smothering the mites and breaking down their protective outer layer, leading to dehydration. They're great for smaller outbreaks and on more delicate plants where neem might be a bit too strong.
Like neem, thorough coverage is absolutely vital. You need to hit those mites directly. I once had a small cyclamen mite issue on some young chilli seedlings ('Apache' variety) in the greenhouse. A few applications of insecticidal soap really knocked them back. It's safe to use right up to harvest, which is a big plus for my herbs and salad leaves. The downside is that it has no residual effect, so you'll need to reapply frequently, usually every 3-5 days, until the problem is under control.
Sulphur Dust/Spray: A Heavier Hitter
This one’s a bit more heavy-duty and I use it sparingly, usually as a last resort or for preventative measures in the greenhouse during the dormant season. Sulphur acts as both a fungicide and a miticide. It's effective against broad mites and cyclamen mites, but you need to be very careful with it.
The main caution with sulphur is temperature. Never use it when temperatures are above 28-30°C, as it can cause severe leaf scorch. This is a real concern in a UK greenhouse on a hot summer's day! I've used sulphur dust on my greenhouse cucumbers ('Marketmore' variety) when I suspected mites alongside powdery mildew. It tackles both. I learned the hard way that using it on a scorching day can cause leaf scorch, even here in the Midlands, so always check the forecast!
Predatory Mites: The Ultimate Biological Control
For long-term, sustainable control, especially in my greenhouse, predatory mites are my absolute favourite. This is a truly satisfying solution, letting nature do the work. These tiny beneficial insects feast on pest mites, offering a continuous line of defence.
For broad mites, Amblyseius swirskii is excellent. For cyclamen mites (and also thrips, bonus!), Amblyseius cucumeris is the one to go for. You can order them online from specialist UK suppliers. I started using Amblyseius swirskii in my greenhouse a couple of years ago after a persistent broad mite issue on my 'Sungold' tomatoes. It was a game-changer! I release them every 4-6 weeks through the main growing season, especially when it's warm, and it keeps populations down beautifully. It's a bit of an investment, but for a busy gardener like me, it’s worth it for the peace of mind and significantly reduced pest pressure. They thrive in humid conditions, which can be a double-edged sword in a UK greenhouse – great for them, but sometimes tricky to manage with fungal diseases.
Here's a quick comparison of these organic treatment options based on my experiences:
| Treatment | Pros | Cons | Randy's UK Garden Notes |
|---|---|---|---|
| Neem Oil | Broad spectrum, disrupts feeding/reproduction, safe for beneficials once dry, effective with consistent use. | Requires consistent, thorough application (5-7 days), can leave residue, potential for leaf burn if applied in direct sun (especially in a hot UK greenhouse). | My first choice for most indoor/greenhouse plants like tomatoes and chillies. Always spray in the evening here in the Midlands. |
| Insecticidal Soaps | Fast-acting (smothers on contact), no residual effect (safe for harvesting soon after), good for delicate plants like seedlings or herbs. | No residual protection, requires very thorough and frequent application (3-5 days), only kills mites it directly contacts. | Great for small, targeted outbreaks on young plants. I used it on my 'Apache' chilli seedlings successfully. |
| Sulphur Dust/Spray | Effective miticide and fungicide, good for severe infestations or combined pest/disease issues. | Temperature-sensitive (never above 28-30°C), unpleasant smell, can leave visible residue, needs careful handling. | I use this as a last resort in the greenhouse, especially if powdery mildew is also present. Learned to check the forecast carefully after scorching some 'Marketmore' cucumbers! |
| Predatory Mites | Long-term, sustainable control, targets specific pests, works continuously, no spraying needed. | Initial cost, requires specific environmental conditions (humidity/temp), can take time to establish, may need repeat releases. | My favourite for greenhouse broad mite control on crops like 'Sungold' tomatoes. A fantastic proactive strategy for the main UK growing season, usually from late spring through to early autumn. |

6. Prevention is Better Than Cure: Keeping Microscopic Mites at Bay
When it comes to these invisible invaders, an ounce of prevention is worth a pound of cure, as they say. Trust me, I've learned this the hard way more times than I care to admit. Dealing with a full-blown mite infestation is disheartening and time-consuming. Building good preventative habits into your gardening routine, especially here in the UK where our variable weather can sometimes make plants more susceptible, is the real game-changer.
Quarantine New Plants: My Golden Rule
This is non-negotiable for me now. Every single plant that enters my UK garden – whether it's a new variety I've bought from a garden centre, a swap from a fellow gardener, or even seedlings I've raised indoors that are moving to the greenhouse – gets quarantined. I learned this the hard way after bringing in a lovely basil plant one spring. It looked fine, but within a few weeks, my greenhouse tomatoes started showing signs of broad mite damage.
Now, everything new gets a 2-3 week isolation period in the porch. During this time, I give it a good visual inspection daily, paying extra close attention to new growth. I might even give it a preventative neem spray just to be extra safe before it joins the rest of my plant family.
Good Airflow & Humidity: Making Them Unwelcome
Microscopic mites absolutely despise good airflow and consistent humidity. They thrive in stagnant, dry air. In my 8x6ft greenhouse, I've installed an oscillating fan. It makes a huge difference, especially during those muggy British summer days when temperatures can soar and air circulation becomes crucial. I also ensure my vents are open on warm days.
For my indoor plants, grouping them together can slightly increase local humidity, and I sometimes use pebble trays filled with water. Keeping humidity up for some plants, like my ferns, also seems to deter them, while simultaneously making those plants happier. It’s a delicate balance here in the UK – you want good airflow to deter mites, but not so much that you dry out the atmosphere too much for humidity-loving plants.
Regular Plant Inspections: My Daily Ritual
Every morning, while I'm watering, I make it a point to really look at my plants. Not just a quick glance, but a proper inspection, especially the new growth on my chillies and tomatoes. Catching that subtle cupping, bronzing, or distorted growth early is absolutely key. My trusty jeweller's loupe (the 30x one I mentioned earlier) is always in my pocket. It's much easier to deal with a few mites than a whole colony that has taken over. This regular attention allows me to spot problems before they become major infestations.
Sanitation: Cleanliness is Next to Godliness
A clean growing environment makes a huge difference. Mites can overwinter in plant debris, old pots, and even on tools. At the end of each season, my greenhouse gets a deep clean – scrubbing benches, sterilising pots with a weak bleach solution, and removing all plant debris. It helps break the pest cycle for next year. I also regularly clean my gardening tools, especially after pruning a plant that might have been stressed. This stops me from inadvertently spreading pests from one plant to another.
Healthy Plants: Stronger Resistance
Finally, and this might sound obvious, but healthy plants are simply better at fending off pests. I'm a big believer in healthy soil and balanced feeding. I use a good organic compost and a balanced liquid feed, like comfrey tea I brew myself, rather than just blasting my plants with high-nitrogen fertilisers. Overfed, lush, sappy growth is often a magnet for pests, including mites, as it's easier for them to penetrate. Well-nourished, robust plants are much more resilient to pest pressure, even here with our sometimes unpredictable British weather.
7. Reclaiming Your Plants: A Mite-Free Future
Phew! We've covered a lot, haven't we? From those initial, almost imperceptible signs of distorted growth to confirming the presence of these microscopic mites with a loupe, and finally, deploying our organic arsenal. It’s been a journey, but one that every dedicated UK gardener will likely face at some point.
The main takeaway I want you to remember is this: microscopic mites are tricky, subtle, and incredibly frustrating, but they are absolutely beatable. Don't get disheartened if you spot them. My own journey from an IT desk to digging in my 800 sq ft Midlands garden has taught me that gardening is a continuous learning curve, full of challenges and triumphs. I've certainly had my share of both when it comes to these tiny terrors!
The key, as I've learned through five years of intensive growing, is vigilance, patience, and persistence. Regularly inspecting your plants, especially new growth, with a keen eye and a trusty loupe is your best defence. When you do find them, act quickly and consistently with organic treatments like neem oil, insecticidal soap, or, for a more long-term solution in the greenhouse, those fantastic predatory mites. And remember, prevention is truly better than cure – those quarantine rules and good hygiene habits will save you a world of trouble.
Every gardener faces pests; it's part of the beautiful, messy process of growing. What truly matters is how you respond, how you learn, and how you adapt your strategies to our unique UK conditions. So, take heart, arm yourself with knowledge and a loupe, and reclaim your plants!
I'd love to hear about your experiences with broad or cyclamen mites in your UK garden or greenhouse. What treatments have you found most effective? What prevention tips have worked for you? Share your stories and wisdom in the comments below – we're all in this together, striving for healthy, happy plants here in Britain. Happy gardening!
