
Introduction: From Seed to Strong Start – Why Vigor Matters for UK Gardens
Alright, fellow green thumbs, pull up a chair and let's have a chat about something that can make or break your entire gardening season here in the UK: seedling vigour. You know that feeling, right? You've carefully sown your seeds, watched them sprout, and then those first true leaves emerge. It's a moment of pure joy! But then, sometimes, those little darlings just… stall. They look a bit pale, a bit spindly, a bit… puny. And trust me, I've been there more times than I care to admit, especially in my earlier days here in my 800 sq ft Midlands garden.
When I first started gardening five years ago, fresh out of the IT world and brimming with theoretical knowledge, I thought sprouting was the hard part. Oh, how naive I was! I quickly learned that getting a seed to germinate is just the first hurdle. The real challenge, especially with our notoriously fickle British weather and often short growing seasons, is nurturing those tiny seedlings into robust, resilient young plants that can hit the ground running once they're transplanted. A weak seedling is like a wobbly athlete at the starting line – it’s just not set up for success, and it’s far more susceptible to pests, diseases, and the inevitable stresses of transplanting into our unpredictable UK climate. In my experience, a strong start indoors means a much higher chance of a bountiful harvest, whether it's my beloved heirloom tomatoes in the greenhouse, a bed of vibrant cut-and-come-again lettuce, or a thriving patch of herbs. This article is all about how I've learned to spot the signs of a struggling seedling and, more importantly, how to get them back on track to become the sturdy powerhouses we all dream of.
Spotting the S.O.S.: Common Signs of Puny Seedlings After True Leaves Emerge
So, you've got your first set of true leaves, which are the real leaves that look like a miniature version of the mature plant's foliage, unlike the initial round or oval cotyledons. This is where the plant really starts to put down roots (literally!) and grow. But sometimes, despite your best efforts, they just don't look quite right. I've spent countless hours in my greenhouse and on my propagating bench, scrutinising trays of seedlings, trying to figure out what they're trying to tell me. Here in my UK garden, I've seen these signs with everything from 'Moneymaker' tomatoes to 'Marketmore' cucumbers, and even my perennial herbs like rosemary.
Here are the tell-tale S.O.S. signals I've learned to watch out for:
- Legginess and Stretching: This is probably the most common one I encounter, especially early in the season when natural light is still a bit weak here in the Midlands. The stems are long, thin, and often pale, with a significant gap between the true leaves. They look like they're desperately reaching for something. My first batch of 'Costoluto Fiorentino' tomatoes last year did this before I adjusted my grow lights, and they took ages to recover.
- Pale or Yellowing Leaves: Instead of a vibrant green, the leaves are a sickly pale green or even yellow, particularly the older, lower leaves. This often points to a nutrient issue, or sometimes just not enough light. I remember a tray of 'Red Russian' kale seedlings turning almost entirely yellow one spring – a classic sign.
- Stunted Growth: The seedlings just aren't growing. They sprouted, produced true leaves, and then… nothing. They stay tiny, not putting on any new growth, even when others in the same tray are powering ahead. I've had this happen with peppers, which are notoriously slow-growing in our climate anyway, but a complete halt is a red flag.
- Purple or Reddish Stems/Undersides of Leaves: This can be particularly noticeable on the stems or the veins on the underside of the leaves. It's a strong indicator, especially with tomatoes and brassicas, that something is off, often a phosphorus deficiency. I've seen my 'Sungold' tomato seedlings develop purple stems when the compost was too cold.
- Wilting or Drooping: If the leaves are looking limp and sad, even when the compost feels moist, it's a sign of stress. This can be overwatering, underwatering, or even a sudden temperature fluctuation. I learned this the hard way with my basil seedlings, which are incredibly sensitive to cold drafts in my greenhouse.
- Brown or Crispy Leaf Edges: This usually indicates a problem with watering (either too much or too little) or sometimes salt build-up in the soil.
- Lack of Root Development: If you gently tease a seedling out of its pot, you might find a sparse, weak root system instead of a healthy network of white roots. This is often the underlying issue for many of the above symptoms.
Spotting these signs early is crucial. The sooner you diagnose the problem, the quicker you can intervene and give your seedlings the best chance of thriving in your UK garden.

Root Causes of Weakness: Diagnosing Environmental & Nutritional Deficiencies
Once you've spotted the S.O.S. signals, the next step is playing detective. In my five years of intensive gardening, I've found that most issues boil down to a handful of environmental stresses or nutritional imbalances. It's rarely one thing in isolation, but often a combination. I used to jump straight to feeding them, thinking more food equals stronger plants, but I learned quickly that throwing nutrients at a plant suffering from poor light or temperature is like trying to fill a bucket with a hole in it.
Here in my UK garden, especially with our often-grey springs and chilly nights, environmental factors are usually the first culprits I check. Here’s a breakdown of the most common root causes and how I approach diagnosing them:
Environmental Factors:
- Inadequate Light: This is probably the number one cause of legginess and pale growth in UK seedlings. Our natural light levels, even by a bright window, are often insufficient during late winter and early spring. I used to rely solely on my south-facing window, but my early brassicas and peppers always stretched. Now, I use LED grow lights religiously for the first 6-8 weeks.
- Incorrect Temperature: Both too cold and too hot can stress seedlings. Too cold and growth slows dramatically, nutrient uptake is inhibited (especially phosphorus, leading to purple stems), and they become susceptible to damping-off. Too hot and they can dry out quickly, become stressed, and also stretch if light is insufficient. My greenhouse gets chilly at night in March, so I use a small fan heater on a thermostat to keep the minimum temperature for my tomatoes above 12°C (54°F).
- Improper Watering: This is a tricky one. Overwatering leads to waterlogged soil, depriving roots of oxygen and encouraging fungal diseases. The seedlings wilt, and roots can rot. Underwatering, conversely, causes wilting and stunted growth as cells can't maintain turgor. I always stick my finger into the compost – if it's dry to the second knuckle, it's time to water.
- Poor Air Circulation: Stagnant, humid air around seedlings creates a perfect breeding ground for fungal issues like damping-off. I learned this when I lost a whole tray of 'Black Krim' tomato seedlings to it. Now, I always have a small fan gently circulating air across my propagation bench.
- Pest or Disease Pressure: While less common for young indoor seedlings, tiny fungus gnats (attracted to moist compost) can damage roots, and aphids can quickly colonise tender new growth. Damping-off, a fungal disease, is a major killer of young seedlings.
Nutritional Deficiencies:
Even if your environment is spot on, sometimes the compost just doesn't have enough of what your seedlings need, or the conditions prevent them from accessing it. Most good quality seed-starting composts have enough nutrients for the first few weeks, but once true leaves develop and growth accelerates, they'll need more.
Here's a detailed comparison table to help you diagnose common issues I've faced:
| Symptom | Likely Cause (Environmental)
5. Watering Wisely & Feeding for Fortitude: Nurturing Strong Roots & Shoots
Right, so we've got the light and temperature dialled in. But even with perfect conditions, your little ones won't thrive if they’re swimming or starving. This is where I've seen many a promising seedling turn puny – including plenty of my own in my early days! It’s a fine balance, especially here in the UK where our indoor humidity can vary wildly.
The Art of Watering: Not Too Much, Not Too Little
I've learned the hard way that consistent, thoughtful watering is paramount. Overwatering is probably the number one killer of young seedlings; it starves roots of oxygen, leading to rot and damping off. Underwatering, on the other hand, stresses them out, causing wilting and stunted growth.
My go-to method for seedlings, especially in those initial small pots, is bottom watering. I place the seedling trays or individual pots into a shallow tray of water and let them soak up moisture from the bottom for about 15-20 minutes. You can literally see the surface of the compost darken as it absorbs. This encourages roots to grow downwards in search of water, creating a stronger, more robust root system. It also keeps the surface of the compost drier, which helps prevent fungal issues like damping off.
I only water again when the pots feel noticeably lighter when I lift them, or when the top inch of compost feels dry to the touch. It’s a sensory thing you learn over time. In my greenhouse, with fluctuating temperatures, I might check daily, but indoors under lights, it could be every 2-3 days. One mistake I made early on was watering on a schedule, rather than checking the plants. Now, I always check first. Our British weather often means cooler indoor temps, which slows evaporation, so less frequent watering might be needed compared to warmer climates.
Feeding for Fortitude: When and What to Offer
Seedlings don't need much in the way of nutrients initially; the seed itself provides all the energy for germination and the first set of leaves. Most good quality UK seed-starting composts also have enough nutrients to sustain them until their true leaves appear. But once those true leaves are showing, and especially after you’ve potted them up into slightly larger pots (I usually go from a 4cm module to a 9cm pot for most veg like tomatoes, peppers, or brassicas), they'll start to deplete those resources.
This is when I introduce a very gentle liquid feed. I usually start with half-strength, or even quarter-strength, of a balanced organic liquid feed, or sometimes a seaweed extract. Seaweed extract is fantastic for promoting root development and overall plant health without pushing too much leafy growth too soon. I've seen a noticeable difference in the vigour of my 'Sungold' tomato seedlings when I start them on a gentle seaweed feed after potting up. I usually feed once a week or every two weeks, always on damp compost, never on dry.
Here’s a comparison of common watering and feeding approaches I’ve used in my UK garden:
| Feature | Bottom Watering | Top Watering (Sprinkle Can) | Liquid Feed (e.g., Seaweed/Balanced) | Granular Feed (Mixed into Compost) |
|---|---|---|---|---|
| Method | Pots sit in shallow water, absorb from below. | Water poured/sprinkled onto compost surface. | Diluted liquid mixed with water, applied during watering. | Slow-release granules mixed into potting-up compost. |
| Pros | Encourages deep roots; prevents damping off; consistent moisture. | Quick; good for larger, established plants; flushes salts. | Fast absorption; precise control over dosage; immediate boost. | Long-lasting; no regular mixing needed; steady nutrient supply. |
| Cons | Can take time; difficult to flush salts; requires trays. | Can disturb seedlings; risk of damping off; compaction. | Requires frequent application; easy to overfeed; can be messy. | Less control over immediate needs; can burn roots if too much. |
| Randy's Use | Primary method for all seedlings until potting up into 9cm pots. | Sometimes for larger, established transplants once outside. | My preferred seedling feed after true leaves appear, half-strength. | Used for potting on established plants into final containers or raised beds. |
| UK Relevance | Ideal for preventing fungal issues common in humid UK indoor environments. | Less ideal for delicate seedlings, risk of cold tap water shock. | Many UK organic brands available; adaptable to our varied growing seasons. | Good for long-term feeding of crops like tomatoes in my greenhouse. |
Potting On: Giving Them Room to Grow
Once your seedlings have developed a good set of true leaves and their roots are starting to fill their current pot (gently tip one out to check!), it's time to pot them up. This is a crucial step for boosting vigour. Moving them into a slightly larger pot (I typically go from a seed cell to a 9cm pot, or a 4cm module to a 7cm pot) with fresh, nutrient-rich compost gives their roots more space to expand and access new food.
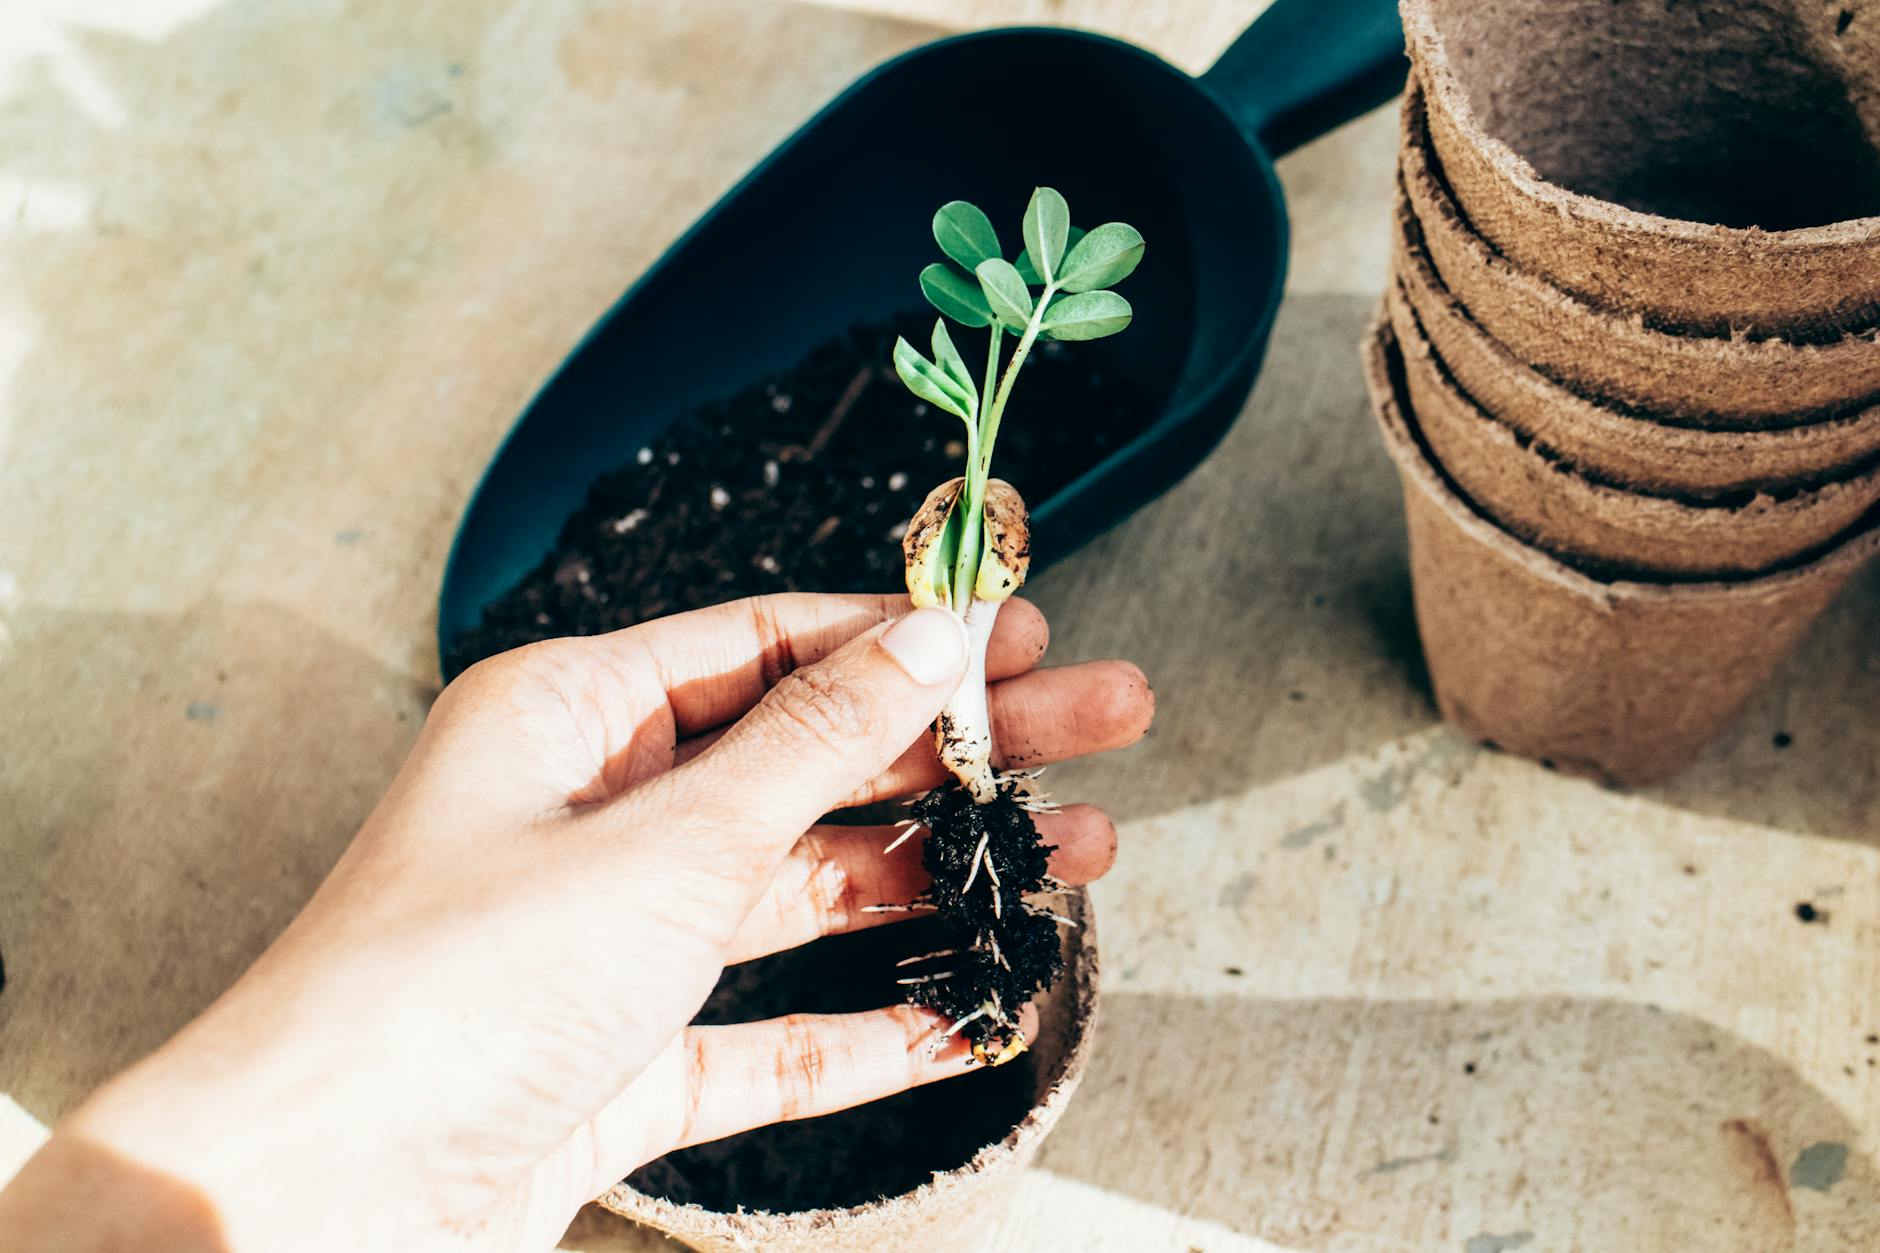
When I pot on, I'm super gentle. I handle the seedlings by their leaves, never the stem, as stems are easily bruised. I use a good quality peat-free compost, often a John Innes No. 1 or similar, as it has a bit more body and nutrients than seed compost. This provides that crucial next stage of support and food for robust growth. This step usually happens around 3-4 weeks after germination for most of my vegetables like 'Gardener's Delight' tomatoes or 'Moneymaker' cucumbers.
6. Beyond the Fix: Preventing Future Puny Problems for Stronger Transplants
Once you’ve wrestled with puny seedlings, you quickly learn the value of prevention! Over my five years of intensive gardening here in the Midlands, I've developed a routine that aims to avoid these issues altogether. It's not foolproof – our British weather always keeps you on your toes – but it drastically reduces the number of weaklings I have to deal with.
Starting Strong: Quality Inputs & Smart Choices
It all begins with the inputs. I never skimp on seed quality. I buy from reputable UK suppliers like Sarah Raven or Thompson & Morgan, ensuring fresh, viable seeds suited to our climate. Cheaper seeds can sometimes mean lower germination rates and weaker plants, and honestly, it's not worth the disappointment.
Next, seed starting mix. I always use a specific peat-free seed compost for germination, as it's fine, sterile, and drains well. Once I pot on, I switch to a slightly coarser, more nutrient-rich peat-free multi-purpose compost. I’ve experimented with making my own mixes, but for seedlings, I find a good quality commercial product gives me the best consistency, which is vital for delicate young plants.
Pot size matters too. Starting in small modules or cells (I love those 4cm square ones) and then potting up gradually ensures the roots explore the compost fully without becoming waterlogged in too large a container. It also means you’re not wasting compost!
Airflow and Hygiene: Your Unsung Heroes
Good air circulation is often overlooked, but it's a game-changer. Stagnant, humid air around seedlings is an open invitation for fungal diseases like damping off. I always have a small oscillating fan running on a low setting in my greenhouse and near my indoor grow lights. It mimics outdoor breezes, strengthens stems, and reduces humidity around the foliage. This is particularly important in our often-damp UK climate.
Hygiene is another big one. I always clean my trays and pots thoroughly between uses with a dilute bleach solution or horticultural disinfectant. This prevents the carry-over of pests and diseases from one season to the next. I learned this the hard way when a batch of 'Patio Princess' courgettes succumbed to a mystery mould that had plagued a previous crop.
Hardening Off: The British Weather Gauntlet
This is arguably the most critical preventative step for any UK gardener, and it’s where I’ve made – and learned from – my biggest mistakes. Our British spring weather is notoriously fickle. One day it's glorious sunshine, the next it's a biting north wind and a late frost. You simply cannot take a seedling that's been cosseted indoors or in a greenhouse and plonk it straight outside. It will shock, stunt, or even die.
My hardening off process takes about 10-14 days. I start by moving my strongest seedlings (like my 'Cherokee Purple' tomatoes or 'Red Russian' kale) into my cold frame in the greenhouse for a few hours on a mild, cloudy day. Over the next few days, I gradually increase the time they spend there, ensuring they're protected from strong winds and brought back into the main greenhouse or indoors at night, especially if there's any risk of frost.
After about a week in the cold frame, if the forecast is good, I’ll move them to a sheltered spot in the garden during the day – perhaps under the eaves of the house or beneath a fleece tunnel in a raised bed. I introduce them to direct sun, wind, and cooler temperatures in stages. I learned this when I put out a tray of sweet peppers too early one May; a sudden cold snap turned them purple and stunted their growth for weeks. Now, I watch the forecast like a hawk and always err on the side of caution. This gradual acclimatisation builds their resilience, toughens their cell walls, and prepares them for the rigours of my Midlands garden.
7. Conclusion: Cultivating Confidence for Successful Transplants into Your Garden
There you have it, a deep dive into diagnosing and fixing those frustratingly puny seedlings, straight from my 800 sq ft UK garden. From understanding the critical balance of light and temperature to mastering the art of watering and feeding, and finally, the essential process of hardening off, it all boils down to observation, patience, and a willingness to learn from your plants – and sometimes, from your own mistakes!
I know how disheartening it can be to see your carefully nurtured seedlings looking weak and struggling. I’ve been there, more times than I care to admit, especially in my early years when I was still figuring out how our specific British climate affects everything. But I've learned that with a bit of detective work and a few targeted adjustments, most puny seedlings can be coaxed back to vigour.
Remember the key takeaways:
- Observe your seedlings daily: They'll tell you what they need through their leaves and growth habit.
- Optimise environmental factors: Get light and temperature right first. This is foundational.
- Water wisely, feed gently: Encourage strong root growth and provide nutrients when truly needed.
- Pot on promptly: Give those expanding roots the space and fresh compost they crave.
- Prevent proactively: Good hygiene, air circulation, and especially, thorough hardening off are your best friends in the unpredictable UK growing season.
My journey from IT worker to full-time garden obsessive has been filled with trials and triumphs, and seeing a tray of strong, robust seedlings ready for transplanting into my raised beds or greenhouse is still one of the most satisfying moments. It's the promise of a bountiful harvest to come!
Don't be afraid to experiment, to try different approaches in your own UK garden, and to trust your instincts. Every garden has its own microclimate and its own challenges, but the principles remain the same. So, go forth, cultivate confidence, and enjoy the incredible reward of nurturing healthy, vigorous plants from tiny seed to abundant harvest. Happy growing, fellow UK gardeners!
