Battling Ground Elder Organically: A Gentle Yet Persistent Approach
Right, let's talk about ground elder. If you've got it, you know it's not just a weed; it's a relentless, creeping green menace that can turn a beautiful border into a battleground. Here in my 800 sq ft garden in the Midlands, every inch is precious, and every plant has a purpose. So, when I first encountered Aegopodium podagraria – ground elder, or goutweed as some call it – sneaking in from an overgrown patch next door, I knew I had a fight on my hands.
For years, I've been obsessed with growing edibles organically, from my beloved heirloom tomatoes in the greenhouse to the herbs and vegetables in my raised beds. The thought of dousing my soil with harsh chemicals to tackle ground elder just didn't sit right with me. I've learned, through more than five years of intensive UK gardening, that working with nature, even when battling its more aggressive elements, yields far better long-term results. It's a bit like my old IT job – you can patch a problem quickly, but a truly elegant solution takes understanding the system and methodical, patient work.
This article isn't about quick fixes or chemical warfare. It's about a surgical, persistent, and entirely organic strategy for reclaiming your existing flower beds from ground elder without disturbing those cherished plants you've nurtured. I've personally tried and refined these methods, often getting down on my hands and knees after a long day, fork in hand, to protect my 'Black Krim' tomatoes or my precious 'Forellenschluss' lettuce. It's a marathon, not a sprint, but the satisfaction of seeing your garden thrive without ground elder – and without chemicals – is immense.
Know Your Enemy: Identifying Ground Elder (Aegopodium podagraria)
Before you can tackle ground elder, you need to be absolutely certain you've got the right adversary. I've made the mistake early on of pulling what I thought was ground elder, only to realise it was actually something else entirely, like young cow parsley, which is much easier to manage! My background in IT instilled in me the importance of correct identification before attempting a "fix," and gardening is no different.
Ground elder is a perennial weed, meaning it comes back year after year, primarily spreading through an extensive network of brittle, white rhizomes (underground stems). These rhizomes are its superpower; even a tiny fragment left in the soil can regrow into a new plant, which is why it's such a formidable opponent.
Here's what to look for in your UK garden:
- Leaves: The most distinctive feature. They are typically divided into three groups of three leaflets, giving them a characteristic "three-times-three" appearance. They're often serrated (toothed) around the edges and have a slightly crinkled texture. Young leaves can be a lighter, brighter green, darkening as they mature. In my Midlands garden, I've noticed they're particularly vibrant after a good spring rain, growing rapidly.
- Stems: The leaf stalks are grooved and triangular in cross-section. This is a key identifier, especially when it's mixed in with other foliage.
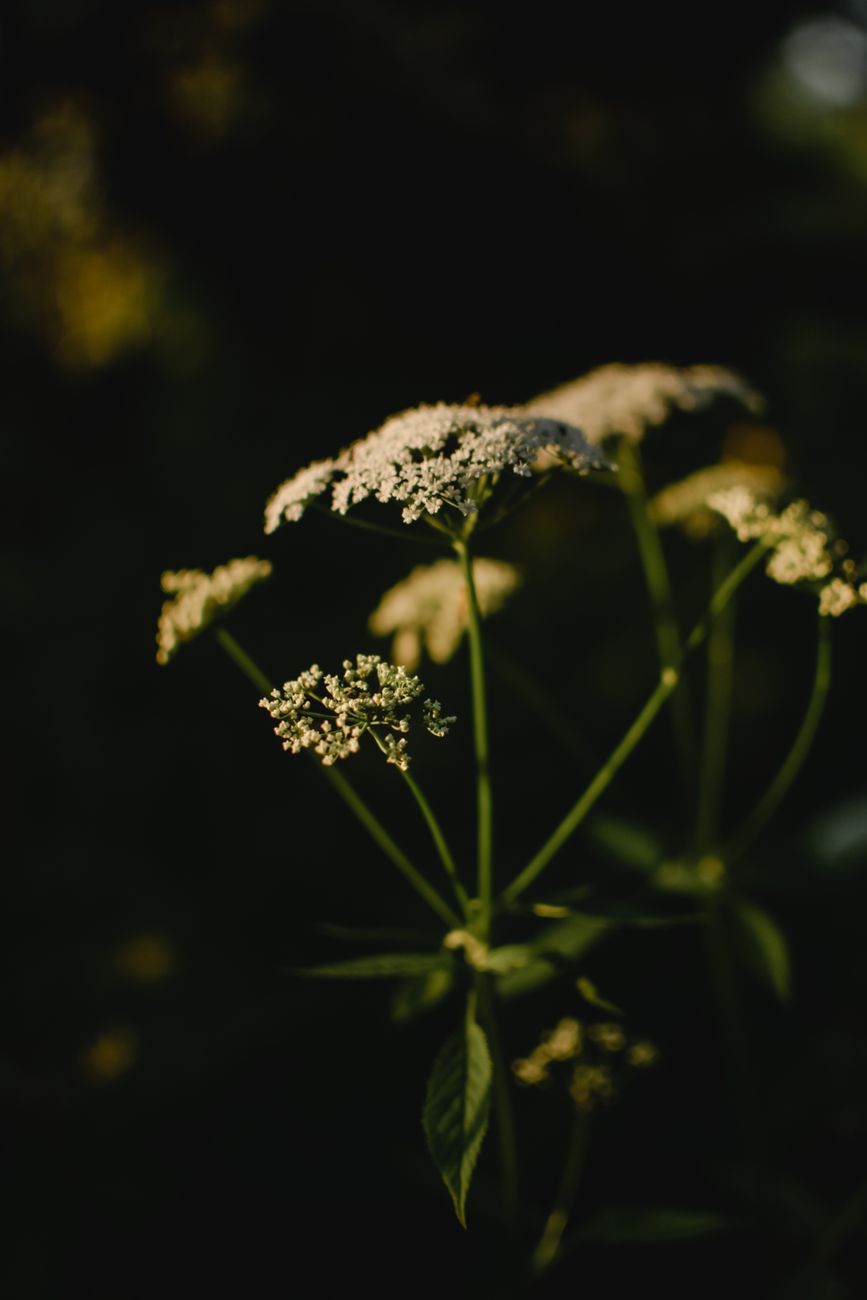
- Flowers: In summer (typically June to August here in the UK), ground elder produces delicate, umbrella-like clusters of small white flowers, similar in appearance to cow parsley or wild carrot. These flower heads can reach up to 60-90cm tall, towering over your other plants if left unchecked.
- Growth Habit: It forms dense patches, outcompeting desirable plants for light, water, and nutrients. It loves shady, damp spots but will happily colonise sunny areas too. In my own experience, it's particularly aggressive in areas that get morning sun and afternoon shade, often creeping under my garden fence where the soil stays consistently moist.

Understanding these features is crucial. Take your time, observe the plant, and compare it to known images. Once you're certain, you can implement your targeted attack.
Why Organic? The Long-Term Benefits for Your UK Garden
When I first started gardening, fresh out of the IT world and full of enthusiasm, I was tempted by the quick fix. A neighbour once suggested a strong weedkiller for a patch of ground elder that had gotten out of hand. I even bought a bottle, but it just sat there, unopened, in my shed. Why? Because I quickly realised that my passion for growing healthy, delicious food in my small 800 sq ft plot meant prioritising the health of my soil above all else.
Going organic isn't just a buzzword for me; it's a fundamental principle that underpins everything I do in my UK garden, from nurturing my 'Sungold' tomatoes to encouraging beneficial insects. Here's why I'm so committed to an organic approach for eradicating ground elder:
- Soil Health is Paramount: Chemical weedkillers, especially those designed for persistent weeds like ground elder, don't just kill the target plant. They can harm beneficial soil microorganisms, earthworms, and fungi that are vital for creating fertile, living soil. In my experience, healthy soil is the foundation of a resilient garden. It's what allows my 'Moneymaker' cucumbers to thrive even when the British weather throws a curveball.
- Protecting Your Edibles: My garden is packed with vegetables and herbs. The idea of residual chemicals leaching into the soil where I grow my 'Red Russian' kale or my fragrant basil is a non-starter. Organic methods ensure that what I harvest from my garden is pure and safe for my family.
- Encouraging Biodiversity: A healthy organic garden is a vibrant ecosystem. By avoiding chemicals, I'm creating a safe haven for pollinators like bees (which are crucial for my greenhouse tomatoes!) and natural predators that keep pests in check. I've seen first-hand how much better my garden functions when it's buzzing with life.
- Long-Term Solution, Not a Quick Fix: Chemical treatments might offer a fast knockdown, but they often don't address the root cause (pun intended!) of persistent weeds. Ground elder's robust rhizome system means it can often bounce back. Organic methods, while requiring patience, focus on systematically removing the plant and improving the overall health of your garden, making it less hospitable to invaders in the long run. I learned this the hard way when I briefly considered a chemical solution for bindweed; it returned with a vengeance. The organic route, though slower, has proven more effective for me here in the Midlands.
- Environmental Responsibility: As gardeners, we're stewards of our little patch of earth. Choosing organic methods means I'm not contributing to chemical runoff that could harm local waterways or wildlife, which is important to me and the wider UK environment.
It's a commitment, yes, but the rewards – a thriving, healthy garden teeming with life and producing delicious, chemical-free food – are immeasurable.
Precision Extraction: Hand-Weeding Ground Elder Amongst Desirable Plants
Alright, this is where the "surgical" part of our strategy truly comes into play. When ground elder has woven itself through the roots of your prized hostas, your delicate 'Bleeding Heart' dicentras, or your favourite rose bushes, you can't just go in with a rotavator. You need precision, patience, and the right technique. I've spent countless hours meticulously extracting this weed from around my more delicate plants, especially my heirloom tomato seedlings when they're first hardening off outside the greenhouse, and it's a skill worth mastering.
The goal here isn't just to pull the leaves; it's to remove as much of the brittle, white rhizome as possible without disturbing the roots of your desirable plants. Remember, even a small fragment of rhizome can regrow, so thoroughness is key.
My Step-by-Step "Surgical" Ground Elder Removal Process:
Gather Your Tools:
- Hand Fork: My absolute go-to. A sturdy, sharp hand fork is essential for gently loosening soil. I prefer one with slightly flattened tines.
- Small Trowel or Weeding Knife: Useful for smaller, tighter spots.
- Kneeling Pad or Mat: Trust me on this one. Your knees will thank you, especially during those longer sessions.
- Bucket or Container: For collecting every scrap of ground elder. Do NOT put this in your compost heap unless you have a very hot composting system; dispose of it in your green waste bin or dry it out completely on a hard surface in the sun before disposal.
- Gloves: Optional, but I find them useful for grip and protecting my hands.
Timing is Everything:
- Soil Moisture: This is crucial. The best time to hand-weed is after a good rain or a thorough watering, when the soil is moist and crumbly. Dry, compacted soil will make it almost impossible to extract rhizomes intact. Here in the UK Midlands, we often have plenty of damp days, which is both a blessing and a curse for ground elder management!
- Regularity: Consistency beats intensity. Short, regular weeding sessions (e.g., 20-30 minutes every few days) are far more effective than one long, exhausting session once a month. This ensures you catch new growth before it establishes.
The Extraction Technique:
- Observe and Locate: First, carefully part the foliage of your desirable plants to get a clear view of the ground elder stems. Gently follow the stem down to where it enters the soil.
- Loosen the Soil: Using your hand fork, gently insert it into the soil a few inches away from the ground elder stem and wiggle it to loosen the soil around the weed's roots. Work slowly and carefully, being mindful of the roots of your cultivated plants. I often use my fingers to help feel for the ground elder rhizomes.
- Follow the Rhizome: This is the most important part. Once the soil is loose, gently tease out the ground elder. Don't just pull upwards; try to follow the horizontal rhizome as far as you can. It's white, brittle, and often has small nodes where new shoots can emerge. Every piece you remove is a victory.
- Shake and Inspect: As you pull out a section of rhizome, gently shake off excess soil back into the bed, then inspect the extracted piece. Look for any breaks; if it's broken, try to find the remaining piece in the soil.
- Repeat: Move systematically through the affected area. It's a slow process, but patience pays off. I often mark cleared areas with a small stick or stone so I know where I've already worked.
Post-Weeding Care:
- Mulch: Once you've thoroughly weeded an area, apply a thick layer (at least 10-15cm) of organic mulch like wood chips, well-rotted compost, or bark. This helps suppress any ground elder fragments you might have missed and conserves soil moisture. I use a lot of homemade compost from my bins for this.
- Monitor and Re-weed: Ground elder is persistent. You will see new shoots emerge. The key is to remove them as soon as they appear. The younger the shoot, the weaker the rhizome, and the easier it is to deplete its energy reserves.
This method, while laborious, is incredibly effective for protecting your established plants and gradually weakening the ground elder. It's how I've managed to keep it at bay in my dense flower beds, allowing my 'Costoluto Fiorentino' tomatoes to thrive without competition.
Comparison: Surgical Hand-Weeding vs. Other Organic Weed Control for Existing Beds
When dealing with ground elder intertwined with desirable plants, not all organic methods are created equal. Here's a quick comparison based on my experience here in the UK:
| Feature | Surgical Hand-Weeding (My Preferred Method) | Broad Mulching (Heavy Cardboard/Wood Chip) | Solarisation (Clear Plastic Sheeting) |
|---|---|---|---|
| Suitability for Mixed Beds | Excellent. Specifically designed for precision around existing plants. | Limited. Difficult to apply effectively without smothering desirable plants. Best for clear areas. | Poor. Requires covering the entire area, killing desirable plants along with the weeds. |
| Effectiveness on Ground Elder Rhizomes | Very High. Directly removes rhizomes, depleting energy reserves over time. | Moderate. Can suppress growth, but rhizomes can persist and grow under the mulch, emerging at edges. | High. Kills rhizomes by heat, but impractical in an established bed. |
| Labour Intensity | High. Requires consistent, detailed manual effort. | Moderate. Initial effort to apply, less ongoing. | Moderate. Setup and removal; needs clear, sunny periods (tricky with British weather sometimes!). |
| Speed of Results | Slow. Gradual weakening over weeks/months, but immediate visual improvement. | Slow. Takes time for weeds to die back. | Moderate. Can kill weeds in 6-8 weeks during hot weather. |
| Soil Health Impact | Positive. Minimal disturbance, encourages beneficial microbes, improves aeration. | Positive. Adds organic matter, retains moisture, feeds soil life. | Negative. Can sterilise topsoil, harming beneficial organisms. |
| Cost | Low (tools, kneeling pad). | Moderate (cost of mulch, cardboard). | Low (cost of plastic sheeting). |
| Randy's Verdict | The ONLY truly effective method for existing beds. It's a commitment, but it works here in the UK. | Great for paths or empty beds, but not for precision work. | Only for clearing a new, empty plot. Never in my established garden. |

Creating Defences: Installing Root Barriers and Suppressive Mulches
Once you've diligently worked on the precision extraction, you might think you're done, right? Oh, if only it were that simple! Ground elder is cunning, and its rhizomes can travel a fair distance under the soil to pop up where you least expect them. That's why, in my UK garden, especially here in the Midlands where we get plenty of rain to encourage rampant growth, I've learned that creating physical and light-blocking defences is absolutely critical for long-term success. It’s like building a fortress after the initial battle – you need to prevent re-invasion.
Root Barriers: The Underground Wall
My first line of defence, particularly around established beds that I simply cannot afford to completely excavate, is a root barrier. I've found these to be incredibly effective when installed correctly. They act as a physical wall underground, stopping those creeping rhizomes in their tracks.
When I was first setting up my main perennial border, I made the mistake of not burying a barrier deep enough. A year later, ground elder was poking through from the lawn side. Lesson learned! Now, I always go for a heavy-duty, non-biodegradable barrier material, and I ensure it's buried at least 30-45 cm (12-18 inches) deep. For ground elder, which isn't the deepest rooter but can certainly spread widely, this depth is usually sufficient. I also make sure there's a slight overlap if I'm joining sections, to prevent any sneaky gaps. For my raised beds, I line the inside edges down to the natural soil level, creating an impenetrable boundary. It's a bit of work initially, but it saves hours of weeding later.

Suppressive Mulches: Smothering the Enemy
Alongside root barriers, suppressive mulches are a fantastic way to keep ground elder from getting a foothold – or at least, making it work incredibly hard for any light. Ground elder, like all plants, needs light to photosynthesise. Deny it light, and you deny it energy.
My go-to material for this, particularly in pathways or areas I'm trying to reclaim, is a thick layer of cardboard, topped with wood chips. I've had great success with this in the paths around my greenhouse and veg beds. The cardboard is brilliant because it's free (just flatten old delivery boxes), breaks down slowly, and provides a solid light block. I layer it at least two sheets thick, making sure to overlap generously, and then cover it with a good 10-15 cm (4-6 inches) of chunky wood chips or bark. Here in our often-damp British climate, organic mulches break down relatively quickly, so it's essential to top them up every 6-12 months. This constant renewal ensures the light exclusion remains effective.
I've tried using thick compost directly over ground elder too, but I've found the cardboard-and-chip method more reliable for really suppressing a strong patch. In my experience, just a thick layer of compost can sometimes still allow determined shoots to push through, especially if they've got a lot of stored energy.
Here's a quick comparison of these two crucial defence tactics:
| Feature | Root Barriers (Physical) | Suppressive Mulches (Organic) |
|---|---|---|
| Effectiveness | Excellent for long-term physical containment | Good for suppressing new growth, less so for established roots |
| Cost | Moderate initial cost for quality material | Low (cardboard) to moderate (wood chips/bark) |
| Installation | Labour-intensive, requires digging | Relatively easy, just layering |
| Maintenance | Very low once installed correctly; check for exposure | High, requires regular topping up (every 6-12 months in UK) |
| Best Use Case | Around desirable plants, borders, raised beds, fences | Pathways, open areas, under shrubs, reclaiming patches |
| UK Specifics | Crucial for preventing spread in damp, fertile soil | Breaks down faster in our wet climate, needs frequent renewal |
The Marathon, Not a Sprint: Post-Eradication Monitoring and Maintenance
Right, so you've done the surgical removal, you've put in your defences – surely now you're done? Not quite, my friend! This is where the "marathon, not a sprint" part of organic ground elder eradication really comes into play. Ground elder is incredibly tenacious, and any tiny fragment of root left behind can regenerate. I've learned this the hard way more times than I care to admit in my own 800 sq ft Midlands garden. One moment of complacency, and you'll find a new patch rearing its head.
Regular Monitoring: Your Weekly Vigil
This is perhaps the most crucial ongoing task. I make it a point to do a thorough garden walk-around every Sunday morning, cup of tea in hand. It’s a peaceful ritual, but it’s also my ground elder patrol. I’m not just admiring my heirloom tomatoes in the greenhouse or checking on my herbs; I'm actively scanning for any sign of those familiar leaves.
What am I looking for? Any new shoots, no matter how small. Ground elder can pop up surprisingly quickly, especially after a good spell of British rain. I check the edges of my beds, under the skirts of my desirable plants, right next to my root barriers, and even in seemingly clear areas. The rule in my garden is: if you see one ground elder leaf, remove it immediately. Don't wait. Don't think "I'll get to it later." That tiny leaf is a sign of a root system that's trying to re-establish itself, and the sooner you tackle it, the easier it is.
Spot Treatment: The Ongoing Battle
Even with the best root barriers and mulches, ground elder can be incredibly persistent. This is where your hand-weeding skills continue to be essential. When I spot a new shoot, I don't just pull the leaf off. Oh no, that's a rookie mistake I learned quickly! I carefully use a hand fork or a narrow trowel to loosen the soil around it, then gently follow the root as far as I can, trying to extract as much of it as possible. It’s still precision work, just on a smaller scale.
This ongoing spot treatment gets easier over time. The patches become smaller, the roots weaker. But it never truly stops for a few years. It's a continuous conversation with your garden, a gentle reminder that nature is always trying to reclaim its space.
Maintaining Defences: Keeping Your Guards Up
Those root barriers and mulches aren't set-and-forget solutions, especially with our variable British weather. I regularly check my root barriers to ensure no edges have become exposed (frost heave can sometimes push them up slightly) or that no rhizomes have found a way around them. If I see an exposed edge, I push it back down or add more soil.
For mulches, particularly the wood chip paths, I know I need to top them up every 6-12 months. Heavy rain can wash lighter mulch away, and the constant damp here in the UK means organic materials break down fairly quickly. Keeping that thick, light-blocking layer is vital to prevent ground elder from getting any sun whatsoever.
The Power of a Healthy Garden
While I wouldn't recommend specific "companion plants" to eradicate ground elder (it's too vigorous for that), creating a healthy, densely planted garden can certainly help suppress it. Strong, healthy desirable plants, especially those with dense foliage or root systems, will outcompete ground elder for light, water, and nutrients. This isn't a quick fix, but it's part of the long-term strategy. A thriving garden ecosystem makes it harder for invasive weeds to gain dominance.
Here’s a look at the different aspects of this marathon approach:
| Feature | Initial Effort (Eradication Phase) | Ongoing Effort (Monitoring & Maintenance) |
|---|---|---|
| Speed of Results | Slow, visible improvement over weeks/months | Very slow, but cumulative effect over years |
| Effectiveness | High, if diligent and consistent | Critical for preventing re-infestation; maintains progress |
| Risk of Re-infestation | High if any roots are left or vigilance drops | Low if consistent; high if complacency sets in |
| Best Approach | Surgical hand-weeding, barrier installation, deep mulch | Weekly checks, immediate spot removal, defence maintenance |
| UK Specifics | Damp, fertile soil encourages rapid ground elder growth | UK weather means consistent vigilance needed after rain/mild spells |
Patience and Persistence: The Organic Path to a Ground Elder-Free Garden
So, there you have it. My journey, shared from my 800 sq ft patch in the UK Midlands, into the heart of battling ground elder organically. It’s not an easy road, I won’t lie to you. This isn't a weekend job, or even a month-long project. Eradicating ground elder organically, especially when it's intertwined with your beloved plants, is a true marathon of patience and persistence.
But here’s the thing: it’s incredibly rewarding. I've learned so much about the resilience of nature – both the ground elder's and my own! – and about the intricate dance between plants and soil. By choosing the organic path, you're not just getting rid of a weed; you're building a healthier, more vibrant ecosystem in your UK garden. You're nurturing your soil, protecting beneficial insects, and ensuring that everything you grow is truly wholesome.
We've covered a lot: from understanding this tenacious enemy and the benefits of an organic approach, to the painstaking precision of hand-weeding amongst your treasured plants. We've talked about building those crucial root barriers and laying down suppressive mulches to create an impenetrable defence. And perhaps most importantly, we've discussed the absolute necessity of ongoing vigilance and maintenance – because ground elder will try to come back, and your consistent effort is its ultimate deterrent.
My own UK garden is a testament to this ongoing battle. While I might occasionally find a cheeky ground elder shoot, it’s nothing like the overwhelming invasion I faced five years ago. Now, my raised beds are brimming with vibrant vegetables, my greenhouse is bursting with 'Gardener's Delight' and 'Cherokee Purple' tomatoes, and my herb spirals are thriving. It's a garden I've built with my own hands, through trial and error, sweat and the occasional grumble about the British weather.
I wouldn't trade the hard work for anything. There’s a profound satisfaction in knowing you’ve tamed one of the most stubborn weeds using only elbow grease and a deep understanding of your garden. So, grab your hand fork, put the kettle on for a well-deserved brew, and get ready for a rewarding journey.
Have you battled ground elder in your UK garden? What strategies have worked for you? Share your stories and tips in the comments below – we're all in this together! Let's keep learning and growing, one weed-free patch at a time.

