
Introduction: Taming the Tide – Why Sloped Gardens Need Your Attention
I still remember the frustration, standing at the kitchen window of my UK Midlands home, watching yet another British downpour turn my gently sloped lawn into a mini-river. Water, rather than sinking gratefully into the soil, was sheeting off, rushing past my thirsty raised beds, and pooling awkwardly at the bottom near my greenhouse. It wasn't just about losing precious water; it was about losing topsoil, nutrients, and the disheartening sight of my carefully nurtured plants in adjacent beds struggling, despite what I thought was adequate watering.
My 800 sq ft backyard, packed with everything from my beloved heirloom tomatoes in the greenhouse to rows of vibrant kale and chard, has a few natural slopes. When I first started gardening five years ago, fresh from my IT career and buzzing with newfound passion, I naively thought a slope was just... a slope. Oh, how wrong I was! I quickly learned that ignoring water runoff on sloped lawns and garden edges isn't just inefficient; it leads to erosion, nutrient depletion, and ultimately, unhappy plants. Here in the unpredictable UK climate, where we can go from weeks of drizzle to sudden, torrential bursts, managing water is paramount.
Over my five years of intensive gardening, filled with plenty of trial-and-error (and a few soggy mistakes!), I've become obsessed with understanding how water moves through my garden. I've found that with a bit of strategic thinking and some hands-on effort, those problematic slopes can be transformed into areas that actively capture and hydrate your whole garden, rather than just shedding water. This isn't about expensive landscaping overhauls; it's about working with your soil and plants to build resilience.
In this article, I'm going to share the practical, tried-and-tested methods I use in my own UK garden to tackle runoff. We'll dive into strategic aeration – giving your lawn a chance to breathe and drink – the magic of organic topdressing to build a sponge-like soil structure, and how targeted planting can turn your sloped areas from erosion zones into thriving, water-wise oases. So, grab a cuppa, and let's get stuck in!
Diagnosing Your Runoff Woes: Understanding Soil Compaction & Water Flow
Before you even think about solutions, you need to become a detective in your own garden. I spent my first couple of seasons here in the Midlands just reacting to problems – seeing puddles, noticing dry, dusty soil despite rain, or finding my herbs like 'French Thyme' and 'Rosemary Miss Jessopp' looking parched in sloped beds. I used to think it was just "bad drainage" until I started digging a little deeper, both literally and figuratively.
The key is to observe how water behaves, especially after a good, proper British downpour. Is it sheeting off your lawn like a waterslide, carrying small bits of soil with it? Do you see distinct channels forming? Or does it just sit on the surface for ages before eventually (or never!) soaking in? These are all tell-tale signs of soil compaction.
Soil compaction happens when soil particles are squeezed together, reducing the air pockets and pore space that are vital for water infiltration, air circulation, and healthy root growth. Think of your lawn as a tightly packed sponge that's lost its bounce; water just can't penetrate effectively. Here in the UK, especially with our often clay-heavy soils (common around my neck of the woods in the Midlands) and the constant cycle of wet and dry, compaction is a real beast. Foot traffic, mowing, even heavy rain itself, can contribute to it.
I learned this the hard way when I noticed my 'Sungold' cherry tomatoes, planted in a raised bed at the top of a gentle slope, struggling despite consistent watering. The water was just running past their roots and down the path instead of soaking in. When I dug down, the soil felt dense, almost like concrete just a few inches below the surface. That’s when the penny dropped: my plants weren't getting enough water because the water couldn't get into the soil.
This diagram illustrates what I mean. Notice how the water, instead of soaking down, travels horizontally, taking valuable topsoil with it and leaving the plant roots high and dry.
Understanding this fundamental issue – soil compaction – is the first step towards fixing your runoff problems. Once you can "read" your garden's water flow, you're ready to start implementing solutions that truly make a difference.
Strategic Aeration: Unlocking Your Lawn's Thirst for Water (DIY vs. Professional)
Once you've diagnosed compaction, the first powerful tool in your arsenal is aeration. Think of it as giving your soil lungs to breathe and drink. This technique creates small holes or channels in the soil, which immediately relieves compaction and allows water, air, and nutrients to penetrate deeper, encouraging stronger root growth.
I first tackled this on a particularly stubborn patch of lawn near my greenhouse access path, which always turned into a muddy slide after rain. The difference after aerating was genuinely noticeable, even after the first season. It wasn't just about stopping runoff; the grass itself looked healthier and more vibrant.
For my 800 sq ft garden, I've found a combination of DIY and occasional professional methods works well. Timing is crucial here in the UK. I aim for late spring (April/May) or early autumn (September/October) when the soil is moist but not waterlogged, and the grass can recover quickly before winter sets in or summer heat stresses it. One year, I tried aerating in mid-summer during a dry spell – big mistake! The soil was too hard, and the grass struggled to recover, leaving patchy, stressed areas.
For smaller, high-traffic areas or around specific problem spots, a good old garden fork is surprisingly effective. Just push the tines in a few inches and wiggle it gently to create holes every 4-6 inches. It’s a bit of a workout, especially on heavy UK clay, but it’s cheap and allows for targeted treatment. For larger sections, I’ve used a manual hollow-tine aerator, which pulls out small plugs of soil – this is ideal for truly breaking up that dense clay and is much more effective than just spiking.
Here's a quick comparison of DIY versus professional aeration for typical UK gardens:
| Feature | DIY Aeration (Garden Fork/Manual Aerator) | Professional Aeration (Hired Machine/Service) |
|---|---|---|
| Cost | Low (cost of tool, typically £20-£50 for a manual aerator) | Moderate to High (hiring machine £50-£100/day, service £100-£300+ for average lawn) |
| Effort | High physical effort, especially on larger areas or heavy clay | Low physical effort (machine does the work) |
| Effectiveness | Good for small to medium areas, targeted spots, or light compaction. Hollow-tine pulls cores. | Excellent for larger lawns or severely compacted areas, very thorough core removal. |
| Tools | Garden fork, manual hollow-tine aerator, aerator shoes (less effective for compaction) | Petrol-powered core aerator, often a ride-on or walk-behind machine |
| Speed | Slow, labour-intensive | Fast, covers large areas quickly |
| Best For | Small UK gardens (up to 200 sq m), specific problematic slopes, budget-conscious gardeners | Larger UK lawns (200+ sq m), very dense clay, time-poor gardeners |
| UK Specifics | Great for localised problem areas common in varied UK garden layouts. | Consideration for accessibility to your garden (machine size). |
The Power of Organic Topdressing: Building a Sponge-Like Soil Structure
Aeration is the first step, but organic topdressing is where the real magic happens, truly transforming your soil into a thirsty sponge. This is a technique I swear by, especially after dealing with the unpredictable British weather where we can go from deluge to drought in a fortnight. Simply put, it's adding a thin, even layer of organic material over your lawn or garden beds. When applied after aeration, the organic matter works its way into those fresh holes, further breaking up compaction and enriching the soil.
The benefits are immense: organic matter dramatically increases your soil's water-holding capacity, meaning less runoff and more hydration for your plants. It also feeds the incredible network of soil microbes, slowly releases essential nutrients, and improves overall soil structure, making it more resilient to compaction in the future.
I primarily use my own homemade compost – a rich mix of kitchen scraps, garden waste, and shredded leaves. For me, it’s the gold standard, free, and I know exactly what’s in it. I aim for a fine, crumbly texture, sieved to remove larger chunks. For those without a robust composting system, good quality, peat-free bagged compost from your local garden centre works wonderfully. I've also used well-rotted horse manure (sourced locally, always ask about herbicides!) and leaf mould, especially for my perennial beds and around the base of my 'San Marzano' tomatoes outside the greenhouse.
Last year, after aerating and then topdressing a particularly sloped section leading to my herb garden (where I grow hardy favourites like 'English Lavender' and 'Creeping Thyme'), I noticed a significant reduction in runoff. The water actually soaked in, hydrating the herbs instead of just washing past them, and they thrived even through a drier-than-average July here in the Midlands.
The best time to apply topdressing is immediately after aeration, typically late spring or early autumn. Spread a thin layer (around 1/4 to 1/2 inch) evenly over the aerated area. You can use the back of a rake or a stiff brush to work it into the holes and ensure good contact with the existing soil. Don't apply too thickly, as it can smother your grass.
Here's a look at some common organic topdressing materials suitable for UK gardens:
| Material | Description | Pros for UK Gardens | Cons for UK Gardens |
|---|---|---|---|
| Homemade Compost | Decomposed kitchen scraps, garden waste, leaves. | Free, rich in nutrients, excellent soil conditioner, boosts microbial life. | Takes time to produce, consistency can vary, need a compost bin. |
| Shop-Bought Compost | Peat-free, general-purpose compost. | Readily available, consistent quality, easy to apply, good for quick results. | Can be expensive for large areas, quality varies between brands. |
| Well-Rotted Manure | Decomposed animal waste (cow, horse, chicken). | Nutrient-rich, excellent for heavy soils, good for clay-heavy Midlands soil. | Can be hard to source locally, ensure it's well-rotted (no fresh manure!), check for herbicide residue. |
| Leaf Mould | Decomposed leaves, usually from deciduous trees. | Improves soil structure, excellent for water retention, often free. | Takes a long time to break down (1-2 years), less nutrient-rich than compost. |
| Composted Bark/Wood Chip | Finer grades of composted bark or wood. | Improves drainage and aeration, good for paths/borders, slowly releases nutrients. | Can be acidic, slower to break down than compost, less nutrient-dense for lawns. |
Smart Planting: Choosing Erosion-Busting Plants for UK Slopes and Edges
Once you’ve got that soil breathing and feeding itself, it’s time to call in the botanical reinforcements! Plants are your final, living layer of defence against runoff, and honestly, they're the most beautiful part of the solution. They anchor the soil with their roots, slow down surface water, and help absorb moisture. I’ve spent years experimenting with what truly thrives and pulls its weight on sloped areas in my UK garden, especially with our unpredictable Midlands weather.
The key here, in my experience, is choosing plants that are tough, have good root systems, and ideally, are fairly drought-tolerant once established. Why drought-tolerant? Because even on a slope prone to runoff, the very top layers can dry out quickly between downpours.
Here are a few of my go-to heroes for tackling erosion on slopes and softening those garden edges:
- Creeping Thyme (Thymus serpyllum): This is a fantastic choice for sunny slopes. I've got swathes of it spilling over a slightly raised bed edge, and it forms a dense mat that really holds the soil. Plus, the bees absolutely adore its tiny purple flowers in summer, and it smells amazing when you brush past it. It’s incredibly resilient, even through our damp British winters.
- Sedum (Stonecrop): Oh, I love my Sedums! They come in so many forms, from low-growing mats to taller, upright varieties like 'Autumn Joy'. Their succulent leaves help them cope with dry spells, and their fibrous roots bind the soil well. I've planted various low-growing Sedums along a slightly sloped path, and they've been brilliant at preventing the soil from washing onto the gravel.
- Vinca minor (Lesser Periwinkle): If you have a shadier slope or a spot under trees, Vinca minor is an absolute superstar. It spreads vigorously, creating a thick, evergreen carpet that smothers weeds and holds the soil incredibly well. I learned this the hard way when a patch of bare soil under a hawthorn hedge kept eroding; Vinca sorted it right out within a couple of seasons.
- Cotoneaster horizontalis (Wall Spray Cotoneaster): This might be cheating a bit, as it's a shrub, but its herringbone branching pattern naturally cascades down slopes. I've got one tucked into a particularly steep bank at the back of my garden, and its dense network of roots is an absolute champion at stabilising the soil. Plus, the bright red berries in autumn and winter provide crucial food for birds – a double win!
- Ornamental Grasses (e.g., Festuca glauca, Liriope muscari): Don't underestimate the power of grasses. Their fibrous root systems are brilliant at holding soil. Blue Fescue (Festuca glauca) is a personal favourite for sunny, drier spots, offering lovely blue-grey foliage. For shadier, damper edges, I swear by Liriope muscari. I've used it as a border plant along a sloped path, and it not only looks neat but also stops soil from washing down into the path itself.
One mistake I made early on was planting too many tender, shallow-rooted perennials on a slope, thinking they’d look nice. A good, heavy Midlands downpour soon taught me that pretty isn't always practical when it comes to erosion control! Focus on plants with a purpose.
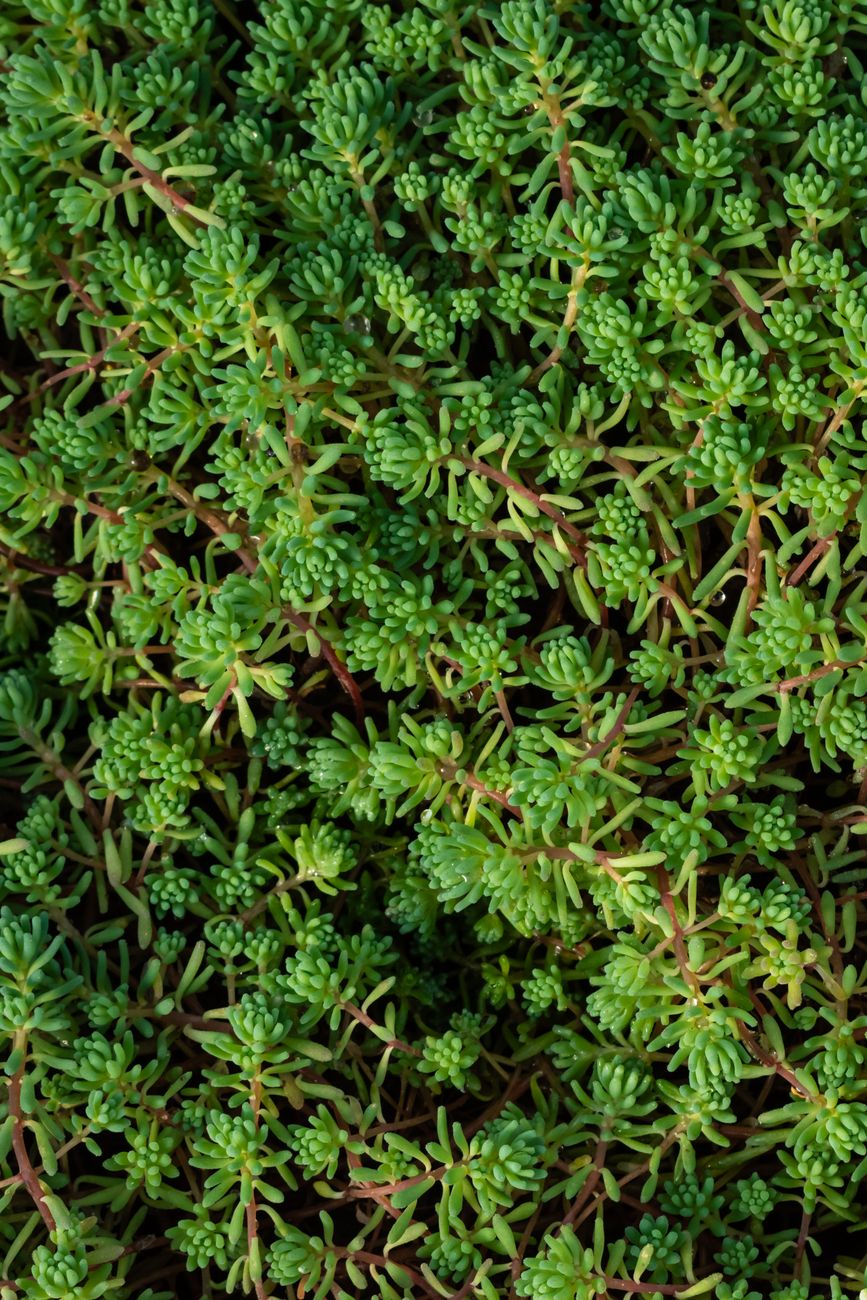
Randy's Top UK Erosion-Busting Plants
| Plant Name | Best For | Root System | UK Climate Notes | Randy's Tip |
|---|---|---|---|---|
| Creeping Thyme | Sunny, well-drained slopes, path edges | Fibrous, mat-forming | Hardy, drought-tolerant once established. Bees love it! | Plant in clumps; it will knit together quickly. |
| Sedum (low-growing) | Sunny, dry slopes, rockeries | Fibrous, shallow | Very drought-tolerant, copes with poor soil. | Mix varieties for year-round interest and texture. |
| Vinca minor | Shady slopes, under trees, damp areas | Spreading, mat-forming | Evergreen, hardy, tolerant of various soil types. | Great for problem shady spots where little else thrives. |
| Cotoneaster horizontalis | Steeper banks, tough spots | Deep, spreading | Very hardy, tolerates poor soil, provides winter berries. | Give it space; it can spread wide but is easily pruned. |
| Ornamental Grasses | Sunny to partial shade, depending on type | Fibrous, dense | Generally very hardy, adds texture and movement. | Choose varieties like Festuca for dry, sunny; Liriope for shadier edges. |
| Rosemary | Sunny, well-drained slopes | Deep, woody | Hardy in most of UK, loves full sun, good drainage. | Dual purpose: erosion control and fresh herbs for the kitchen! |
Beyond Plants: Creating Terraces, Swales, and Permeable Garden Edges
Sometimes, even with the best aeration, topdressing, and planting, a particularly steep slope or a persistent runoff problem needs a bit more structural intervention. This isn't about covering your garden in concrete, but about cleverly managing water flow with natural or permeable solutions. I've dabbled in a few of these, mostly out of necessity in my 800 sq ft Midlands garden, which has more undulations than I'd like!
Terracing: Making Slopes Productive
My biggest structural project involved creating small terraces with raised beds on a gently sloping section of my garden. I used reclaimed railway sleepers and some natural stone I sourced locally. It was hard work, I won't lie! Shifting soil and levelling beds is a proper workout.
- How I did it: I dug into the slope slightly to create a level base, then built a retaining wall (or "face" of the terrace) with the sleepers. The soil behind this was then backfilled and levelled to create a flat planting area. Each terrace acts like a step, slowing the water down and giving it time to soak into the beds rather than rushing down the entire slope.
- Benefits: Not only did it stop the soil from washing away from this area, but it also gave me perfectly level, deep beds for my vegetables. My greenhouse sits at the top of one of these terraced sections, and the water that used to rush past it now soaks into the beds below. It's a game-changer for growing hungry crops like my heirloom tomatoes.
Swales: The Gentle Rain Harvesters
A swale is essentially a shallow, broad ditch dug along the contour of a slope. It’s designed to intercept runoff, slow it down, and allow it to soak into the ground rather than flow away. Think of it as a mini, linear rain garden.
- My experiment: I have a small, slightly boggy patch at the bottom of a gentle slope, which used to get saturated from runoff from a higher lawn section. I dug a very shallow, wide swale (maybe 15cm deep, 60cm wide) just above this area, lining it with some rough compost and then planting it with moisture-loving plants like Siberian Iris and Marsh Marigolds.
- The result: The swale now captures a significant amount of the water, holding it just long enough for it to percolate into the soil, slowly hydrating the plants in the swale itself and reducing the saturation in the boggy patch below. It's a subtle solution but incredibly effective for redirecting water where you want it.
Permeable Garden Edges: Guiding Water, Not Blocking It
We often think of garden edges as barriers, but they can be part of the solution too. Instead of solid concrete edgings that just push water elsewhere, consider permeable options.
- Gravel paths: I replaced a narrow, compacted soil path that ran alongside a sloped flower bed with gravel. The gravel allows rainwater to soak through it directly into the soil below, rather than becoming a mini-river carrying soil from the bed.
- Permeable pavers: If you're paving an area near a slope, look into permeable pavers. They have gaps or porous materials that allow water to filter through, reducing surface runoff significantly. While I haven't done a huge permeable paving project myself, I've seen it work wonders in other UK gardens, especially for driveways or patio areas that adjoin lawns.
Long-Term Care: Maintaining Your Runoff-Resistant Garden for Lasting Success
Building a runoff-resistant garden isn't a one-and-done project. It's an ongoing relationship with your soil and plants, especially here in the UK where the weather loves to keep us on our toes! I've learned that regular observation and a little bit of maintenance go a long way in ensuring your hard work pays off for years to come.
- Regular Observation (Especially After Rain!): After a good British downpour, I always take a walk around my 800 sq ft garden. Where is the water still flowing too quickly? Are new channels forming? Is any topdressing washing away? This helps me spot potential issues before they become big problems. Last winter, after a particularly heavy two-day deluge, I noticed a new little rivulet forming near a raised bed. A quick re-application of wood chip mulch in that spot sorted it out.
- Annual Topdressing Top-Up: Remember that lovely organic topdressing we talked about? It will gradually break down and get incorporated into the soil. I make it a habit to apply a fresh layer of compost or well-rotted manure to my beds and sloped areas every autumn or early spring. This keeps replenishing that organic matter, ensuring the soil remains spongy and absorbent. It also provides a slow release of nutrients for my veg.
- Aeration Check-Up: While you won't need to aerate as frequently once your soil structure improves, it's a good idea to check for compaction every couple of years. If you notice water still pooling or running off quickly in certain spots despite your other efforts, a quick fork-aeration might be in order.
- Plant Maintenance: Keep an eye on your erosion-busting plants. Are they thriving? Do any need replacing? Pruning groundcovers or shrubs can encourage denser growth, making them even more effective at holding soil. I once had a patch of Vinca minor get a bit sparse in one spot; a good prune and a sprinkle of compost soon had it filling out again.
- Weeding is Crucial: Weeds compete with your chosen plants for water and nutrients, and they often have shallower root systems that aren't as effective at erosion control. Keeping your beds clear of weeds allows your erosion-busting plants to establish and spread properly, forming that vital protective mat.
- Adapting to British Weather: We all know our weather here in the UK can be... varied! Some years are exceptionally wet, others surprisingly dry. Be prepared to adapt. In a very wet year, you might need to check your drainage more often. In a dry spell, your drought-tolerant plants will prove their worth, but even they might need a drink to get established. Understanding our local climate here in the Midlands has been key to my gardening success.
Conclusion: Taming the Tide, One UK Garden at a Time
So there you have it, fellow gardeners! Fixing water runoff on your sloped lawns and garden edges might seem like a daunting task, but I promise you, it's incredibly rewarding. I’ve learned through five years of hands-on experience in my own 800 sq ft Midlands garden that by tackling soil compaction, enriching your soil with organic matter, choosing the right plants, and sometimes adding a clever structural solution, you can transform a problem area into a thriving, resilient, and beautiful part of your outdoor space.
From the initial diagnosis of compaction to the ongoing joy of watching your plants anchor the soil, every step you take brings you closer to a healthier, more sustainable garden. You’ll be nurturing your soil, preventing precious nutrients from washing away, and ensuring your adjacent beds stay hydrated – all while creating a more beautiful, vibrant space that truly works with nature, not against it.
I've made my share of mistakes along the way, battling everything from torrential British downpours to unexpected dry spells. But through it all, the principles of strategic aeration, organic topdressing, and smart planting have consistently proven their worth in my UK garden.
Don't feel like you need to tackle it all at once. Start small. Pick one problem area, try some aeration, add some compost, and plant a few hardy groundcovers. Observe, learn, and adapt. You'll soon see the difference, and feel that immense satisfaction that comes from truly understanding and working with your little patch of British soil. Happy gardening!
