
Introduction: The Gift of Volunteer Seedlings for UK Gardens
There’s a unique thrill in wandering through my 800 sq ft Midlands garden and spotting a tiny, unexpected sprout pushing its way through the soil. It's like a little secret gift from nature, a surprise package from last season's bounty. Here in the UK, with our wonderfully varied (and often unpredictable!) weather, these self-sown treasures, what we gardeners affectionately call volunteer seedlings, are a constant source of joy and often, my most robust plants. I've been intensively gardening for over five years now, turning my former IT-worker hands green, and I can tell you, some of my best harvests – from sweet 'Sungold' tomatoes popping up in my greenhouse border to a riot of calendula by the shed – have started this way.
The beauty of a volunteer seedling is its sheer resilience. These aren't pampered, greenhouse-raised youngsters; they've germinated and survived the initial challenges of our British climate all on their own. They've chosen their moment, chosen their spot, and often, they're tougher for it. But sometimes, they pick a spot that's just not quite right – perhaps too crowded, too shaded, or exactly where I planned to plant something else. That's where a bit of gentle intervention comes in. Over the years, I've learned a thing or two about giving these plucky little plants a second chance in a prime location. This article is all about sharing my tried-and-tested methods for safely transplanting these self-sown gems, ensuring they thrive and add even more beauty and bounty to your UK garden.
Identifying Your Self-Sown Treasures: Weeds vs. Wanted Plants
This, my friends, is where the keen eye and a bit of gardening detective work truly come into play. When you’re staring at a patch of dozens of tiny green shoots, the big question is always: "Friend or foe?" I can't tell you how many times I've hovered over a seedling, muttering to myself, "Is that a rogue poppy from last year, or just another pesky bindweed?" One year, I almost pulled up what turned out to be a cluster of self-sown 'Cherokee Purple' tomato seedlings that had escaped my greenhouse and germinated outside, thinking they were nettles! That was a close call, and a valuable lesson learned.
In my UK garden, especially in the raised beds where I grow a lot of my vegetables and herbs, I frequently find volunteers from 'Aunt Ruby's German Green' tomatoes, calendula, borage, dill, and even some hardy nasturtiums. The key to identification often lies in a few simple observations:
- Location, Location, Location: Are they near where a parent plant grew last season? If I find a cluster of seedlings right where my 'Moneymaker' tomatoes were, it's a pretty good bet they're tomatoes.
- Cotyledons vs. True Leaves: The first two leaves that emerge (cotyledons) can be quite generic. Wait for the "true leaves" – these will look like miniature versions of the adult plant's leaves and are your best identifier. For instance, tiny borage leaves have that distinctive fuzzy texture, and young calendula leaves are a specific lance shape.
- Scent Test: Gently rub a leaf between your fingers. Herbs like dill or mint will give off their characteristic aroma. Tomato leaves, even tiny ones, have that unmistakable tomato-y scent.
- Leaf Shape and Texture: This is often the biggest giveaway. Compare the leaves to known weeds in your area. Common UK weeds like ground elder have very distinct leaf shapes, as do dandelions or hairy bittercress. Keep a mental catalogue, or even a physical one, of your local weed population.
My approach? Often, it's a "wait and see" strategy for a little while. I'll let the seedlings grow a bit larger, past the cotyledon stage, until those true leaves confirm their identity. It’s a bit of a gamble with space, but it saves me from accidentally consigning a precious future plant to the compost heap.
Optimal Timing for the Move: When to Transplant for Best Results
Timing is absolutely crucial when it comes to transplanting, especially here in the unpredictable British climate. I've made my fair share of mistakes on this front, often driven by impatience or an unexpected cold snap swooping in. One spring, I got a bit too eager and moved a beautiful clump of self-sown calendula when they were still tiny, just after a lovely warm spell. Overnight, the temperature plummeted, and despite my best efforts with cloches, they struggled and ultimately withered. It taught me a valuable lesson: patience and paying close attention to the forecast are paramount.
The golden rule I now follow in my Midlands garden is to move volunteer seedlings when they are young but established enough to handle the stress. This generally means when they have 2-4 sets of true leaves and are still relatively small, around 2-4 inches tall. At this stage, their root systems are developed enough to recover from the move, but not so extensive that digging them up causes massive disturbance.
Consider the weather:
- Avoid Extremes: Never transplant during a heatwave (uncommon in early UK spring, but it happens later!) or a sudden cold snap. Overcast, mild days are ideal.
- Soil Moisture: The soil should be moist, but not waterlogged. A good rain the day before can be perfect.
- Time of Day: Late afternoon or early evening is always best. This gives the plant several hours of cooler temperatures and lower light to recover before facing the full sun of the next day.
Even though these volunteers have germinated outside, they're still going through a shock moving from one microclimate to another. Think of it as a mini "hardening off" process for their new home. A little TLC post-move goes a long way.
Here’s a detailed comparison table based on my UK gardening experience:
| Factor | Ideal UK Conditions (Randy's Experience) | Randy's Notes/Why it Works in Britain
5. Gentle Extraction Techniques: Minimising Root Disturbance
Right, you've identified your treasured volunteer, you've prepped your tools, and you've found the perfect window in our often-unpredictable British weather. Now for the crucial part: getting that little plant out of the ground without sending it into a complete meltdown. This is where patience and a gentle touch truly pay off, and it’s a lesson I learned the hard way with a particularly lovely self-sown borage plant a few years back! I was too eager, too quick, and it never really recovered.
The goal here is to keep the root ball as intact as possible. Think of it like a delicate operation. Those tiny feeder roots are vital for water and nutrient uptake, and any damage means a slower recovery for your seedling. In my 800 sq ft Midlands garden, with its mix of heavy clay and amended raised bed soil, I’ve found that the approach needs to be slightly different depending on what I’m moving.
First, give the area around the seedling a good, but not soaking, drink of water about an hour before you plan to move it. This softens the soil, making it easier to dig and less likely to rip delicate roots. I always do this, especially when the ground here in the UK has been a bit on the dry side, which can happen even in spring!
When you start digging, aim to give the seedling a really wide berth. Don't go straight down next to the stem. Instead, imagine a circle around the plant, at least 5-10cm (2-4 inches) out from the stem, depending on the seedling's size. My rule of thumb is usually about twice the width of the plant's current foliage. Drive your trowel or spade down outside this circle, creating a trench. Once you’ve got that trench, you can then gently undercut the root ball from underneath. The idea is to lift a generous chunk of soil with the plant, minimising any disturbance.
For smaller, more delicate volunteers like self-sown calendula or some of my wild rocket, I often use a hand trowel or even a sturdy dessert spoon. For larger, more robust plants like a volunteer squash or a particularly promising tomato seedling (which often pop up outside my greenhouse), I’ll use a small border spade, making sure to get a really good, deep scoop.
Here's a quick comparison of my go-to tools for extraction:
| Tool | Ideal For | Randy's Tip for UK Gardens |
|---|---|---|
| Small Hand Trowel | Small, delicate seedlings (e.g., herbs, petunias, nasturtiums), well-loosened soil. | Perfect for spring volunteers in raised beds. Be extra gentle with British clay soils, they can cling like mad! |
| Narrow Border Spade | Medium-sized seedlings (e.g., brassicas, larger flowers), slightly compacted soil. | Great for getting a deeper root ball. Watch out for hidden stones, a common feature in my Midlands patch. |
| Garden Fork (Small) | Loosening soil around larger volunteers before lifting, especially in heavier soils. | I use this to gently aerate around the plant first, then go in with a spade. Reduces root shearing in dense British soil. |
| Old Kitchen Spoon | Tiny seedlings, very tight spots, or when you need surgical precision. | My secret weapon for moving tiny tomato seedlings that pop up in awkward corners of the greenhouse. |
Remember, once you’ve lifted it, try to support the root ball from underneath. I often cup it in my hand or place it directly into a small pot or a trug with a bit of damp compost if I'm moving several at once. Don’t let it hang by its stem!

6. Establishing a New Home: Site Preparation and Planting
So, you've got your precious volunteer safely extracted, root ball intact – brilliant! Now, it’s time to get it settled into its new home. This stage is just as critical as the extraction, and getting it right can mean the difference between a thriving plant and one that just limps along. I've had both outcomes, believe me! One year, I carelessly plonked a self-sown squash into a poorly prepared spot, and it just sulked, refusing to put on much growth despite our best British summer efforts. Lesson learned!
Preparing the New Site
Before you even think about planting, the new spot needs to be ready. I always prepare the planting hole before I lift the seedling. This minimises the time the roots are exposed to the air, which can dry them out quickly, especially on a breezy UK day.
- Dig a Generous Hole: Make it at least twice as wide and just as deep as the root ball you’ve extracted. This gives those roots plenty of loose soil to spread into without resistance. In my raised beds, this is usually a doddle, but in the native clay soil of my 800 sq ft garden, I often have to put a bit more elbow grease into it!
- Amend the Soil (If Needed): This is where my love for good soil really comes into play. I'll often add a good handful of well-rotted compost or leaf mould to the bottom of the hole, especially if the new site isn't as rich as I'd like. This provides a gentle boost of nutrients and helps with drainage and moisture retention, both crucial for our varied British weather. For my heavy Midlands clay, a bit of grit can also work wonders for drainage.
- Water the Hole: Give the prepared hole a good drink of water. This helps settle any amendments and ensures the surrounding soil is moist, welcoming the new arrival. It also means the seedling gets immediate access to water.
Planting Your Volunteer
Now for the main event!
- Place the Seedling: Gently lower your volunteer into the prepared hole. Make sure the top of the root ball is level with, or slightly below, the surrounding soil line. Avoid burying the stem too deeply, as this can lead to rot for many plants (tomatoes are an exception, they love being planted deep!). I made this mistake with some volunteer poppies once; they just melted away.
- Backfill Gently: Carefully backfill the hole with the excavated soil, working it in around the root ball. Use your fingers to gently firm the soil around the base of the plant. You want to eliminate large air pockets, but don't compact the soil too much – the roots need to be able to breathe and grow. I usually give the soil a gentle pat, not a stomp!
- Water Again: Once planted, give the seedling another good, thorough watering. This settles the soil firmly around the roots, ensuring good soil-to-root contact and helping the plant recover from the shock of the move. Even if it's raining, I still do this initial watering to ensure that contact.
Remember, every plant is different. A volunteer 'Moneymaker' tomato seedling in my greenhouse might appreciate a deeper planting, whereas a delicate calendula in a raised bed needs to stay at its original soil level. Always think about the specific plant's needs.
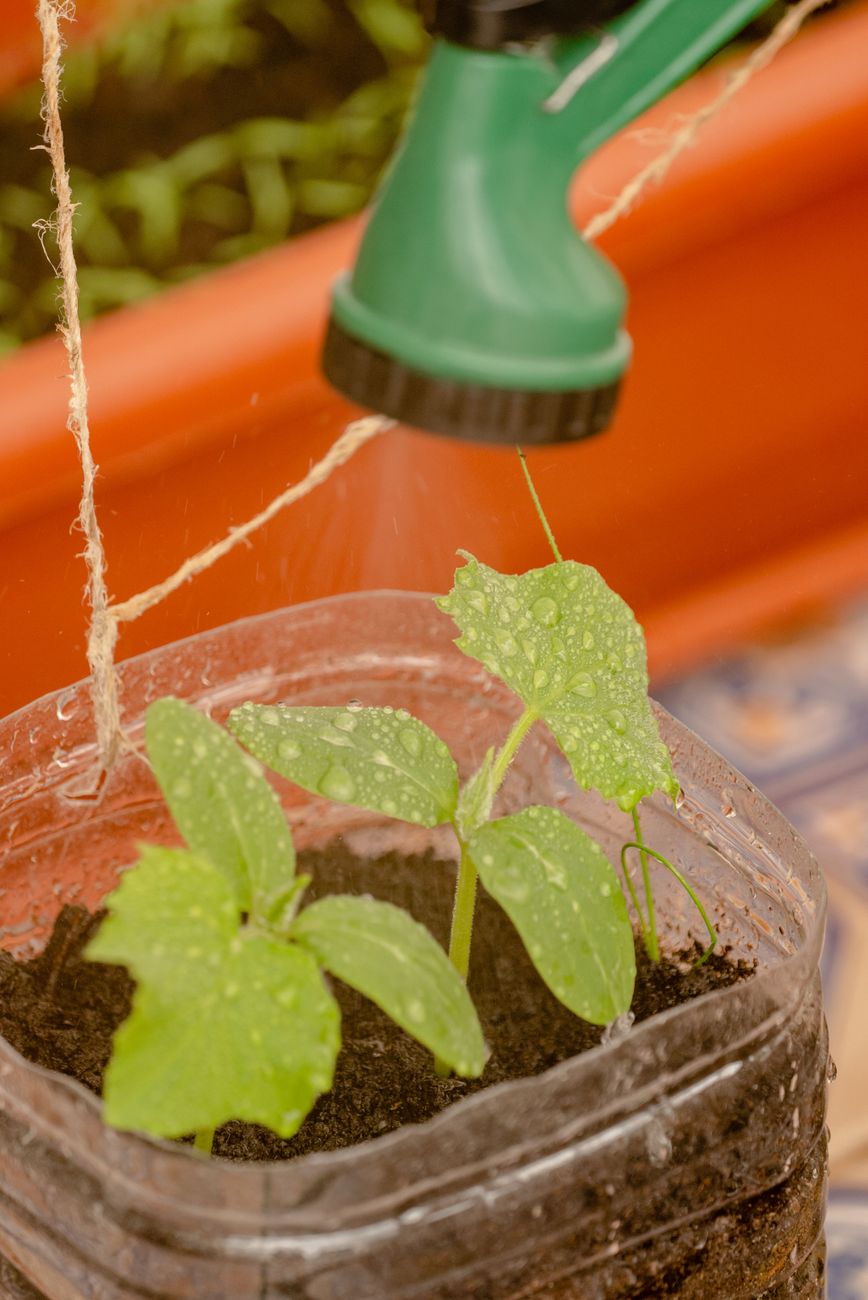
![IMAGE_PLACEER_2: planting seedling into prepared hole]
7. Post-Transplant Care & Recovery: Ensuring Your Seedlings Thrive
You’ve done the hard work of extracting and planting, and your volunteer seedling is now in its new home. But the job isn't quite finished! The next few days and weeks are absolutely critical for its survival and long-term success. This is the recovery period, and it's where vigilant care, tailored to our often-fickle British climate, truly makes a difference. I've learned that overlooking this stage can undo all the previous careful work – a harsh lesson our sudden spring frosts or unexpected heatwaves here in the Midlands have taught me more than once!
Immediate Aftercare: The First Few Days
- Consistent Watering: This is paramount. The seedling has lost some of its ability to take up water due to root disturbance. Keep the soil consistently moist, but not waterlogged. Check it daily, especially during dry spells or if it's a bit breezy, which can quickly dry out exposed roots. I usually give my newly transplanted seedlings a small drink every evening for the first week, unless we've had a proper downpour.
- Shade and Shelter: Moving a plant is stressful. The roots are trying to re-establish, and direct, strong sunlight or harsh winds can quickly overwhelm the leaves, leading to wilting and transplant shock. For the first few days, especially if it’s sunny or windy here in the UK, I try to provide some temporary shade. A piece of cardboard propped up, an old net curtain, or even a leafy branch can do the trick. I learned this when I moved some volunteer 'Early Purple Sprouting' broccoli and our late spring sun scorched them; a simple bit of shade made all the difference next time.
- Protection from Pests: Newly transplanted seedlings are vulnerable. Slugs and snails, our ever-present garden adversaries here in Britain, absolutely love tender young growth. I always put down some organic slug pellets or deploy my homemade beer traps around new transplants to give them a fighting chance. My self-sown nasturtiums are particularly attractive to slugs after a move!
Long-Term Recovery: The Weeks Ahead
As your seedling starts to settle in, you can gradually reduce the intensive care, but stay observant.
- Gradual Acclimatisation: If you've been shading them, gradually expose them to more sunlight over a few days. This is essentially a mini "hardening off" process.
- Monitor Growth: Keep an eye out for new growth. This is the best sign that your seedling has successfully recovered and is establishing itself. Yellowing leaves or continued wilting might indicate ongoing stress, so investigate watering, pest issues, or soil conditions.
- Feeding (Optional): Once you see good new growth, you can consider a very dilute feed, especially for hungry plants like brassicas or tomatoes. I usually hold off on feeding for a couple of weeks to avoid further stress.
Here’s a comparison of common post-transplant care strategies I use in my UK garden:
| Strategy | When I Use It (UK Context) | Benefits | Randy's Real-World Experience |
|---|---|---|---|
| Daily Watering | First 7-10 days after transplant, especially in dry/windy spells. | Prevents wilting, helps roots re-establish good soil contact. | Absolutely essential. Missed a day once with some volunteer sunflowers, and they looked very sorry for themselves by evening! |
| Temporary Shade | First 2-3 days if sunny or unusually warm for the time of year. | Reduces moisture loss from leaves, prevents scorching and transplant shock. | Crucial for delicate herbs or leafy greens moved in late spring/early summer. A bit of cardboard works wonders in my greenhouse. |
| Cloche/Fleece Cover | When moving plants early in spring, or if a sudden cold snap/frost is forecast. | Protects from cold, wind, and some pests. Creates a microclimate. | Saved countless early volunteer brassicas from late frosts here in the Midlands. It's a lifesaver for extending the season. |
| Slug/Snail Protection | Immediately after planting, especially for leafy edibles. | Prevents pests from decimating vulnerable young plants overnight. | A constant battle in my garden! Always deploy pellets or traps around my newly planted lettuce or calendula volunteers. |
| Seaweed Extract | Often a week or so after transplant, as a root tonic. | Contains hormones that encourage root growth and helps reduce transplant shock. | I swear by a dilute foliar feed of seaweed extract; it really seems to perk up struggling plants after a tough move. I use it on everything! |
Conclusion: Embrace the Gift of the Volunteer
And there you have it, fellow UK gardeners! From identifying those unexpected treasures in your patch to gently coaxing them into a new, thriving spot, transplanting volunteer seedlings is one of the most rewarding aspects of gardening. It's about working with nature, making the most of what your garden generously offers, and saving yourself a few quid on seeds and plug plants in the process.
I've learned so much from my volunteers in my 800 sq ft Midlands garden – from the surprising resilience of a self-sown tomato surviving outside my greenhouse, to the joy of finding a vibrant calendula popping up exactly where it's needed. It's a constant lesson in observation, patience, and adapting to whatever our glorious British weather throws at us.
Don't be afraid to experiment. You'll have successes, and yes, you'll have a few failures (I certainly have!). But each attempt is a learning opportunity. The key is to be gentle, prepare well, and provide consistent aftercare, especially in those crucial first few weeks.
So, next time you spot a little green shoot peeking out from an unexpected spot, don't just reach for the weeding fork! Take a closer look, consider its potential, and perhaps, with a bit of gentle care and the techniques we’ve discussed, you can give that little volunteer a new lease of life.
Happy gardening, and may your volunteers flourish!
