It’s Randy here, and if you’re anything like me, you’re always looking for that next gardening challenge, that little bit of horticultural magic to try in your own patch. For years, my UK garden, especially my bustling 800 sq ft here in the Midlands, has been a canvas for growing everything from heirloom tomatoes in the greenhouse to a riot of herbs in raised beds. But recently, I’ve found myself absolutely captivated by the world of cacti – those spiky, often slow-growing wonders.
Now, I know what you might be thinking: cacti in a British garden? Sounds a bit mad with our damp, often grey weather! And you’d be right to an extent. Our climate certainly presents its unique challenges. I've had my share of struggles, believe me. One winter, I nearly lost a prized Gymnocalycium mihanovichii to rot despite my best efforts to keep it dry. It was heartbreaking after nurturing it for years. That’s when I really started digging into a technique that has completely transformed my approach to these desert dwellers: cactus grafting.
Grafting might sound like something out of a science fiction novel, or maybe just too complicated for a home gardener like me, who used to spend his days staring at computer screens. But I promise you, it's a surprisingly accessible and incredibly rewarding skill. It's essentially joining two different cacti together so they grow as one plant. In my own greenhouse, I've seen it unlock a whole new level of potential for my cacti, offering solutions to problems I thought were insurmountable and opening doors to stunning, unique creations.
This isn't just about showing off fancy plants, though that's a nice bonus! For us UK gardeners, it’s about making the most of our shorter growing seasons, giving struggling plants a new lease on life, and frankly, having a blast experimenting. So, grab a cuppa, and let’s get stuck into mastering cactus grafting. I’ll share what I’ve learned, the mistakes I’ve made (plenty!), and how you can apply this brilliant technique right here in your own British garden.
Unlocking Cactus Potential: Why Grafting is a Game-Changer for Your UK Garden
When I first heard about cactus grafting, I was a bit sceptical. Why bother? My cacti were doing fine, if a little slowly. But then I saw some incredible examples online, and my curiosity got the better of me. As a former IT worker who swapped code for compost, I'm obsessed with understanding why things work, not just how. And once I understood the science behind grafting, and saw the results in my own greenhouse, I was hooked. It truly is a game-changer, especially for us battling the British weather.
One of the biggest wins I’ve found with grafting is rapid growth. Cacti, especially some of the more sought-after varieties, can grow at a snail's pace in our cooler, less sunny UK climate. I remember trying to grow a Lophophora williamsii from seed – it felt like watching paint dry! After two years, it was barely larger than a pea. Then I tried grafting a small seedling onto a robust rootstock like Hylocereus undatus (dragon fruit cactus), and the difference was astounding. That tiny seedling, which might have taken another five years to reach any decent size, plumped up and grew visibly within months. The vigorous rootstock acts like a supercharger, pumping nutrients into the slower-growing scion (the top part). This means you can enjoy mature-looking plants much faster, which is a huge bonus when our natural growing season is shorter and less intense than their native habitats. I've found this particularly useful for my Astrophytum species, which can be notoriously slow growers.
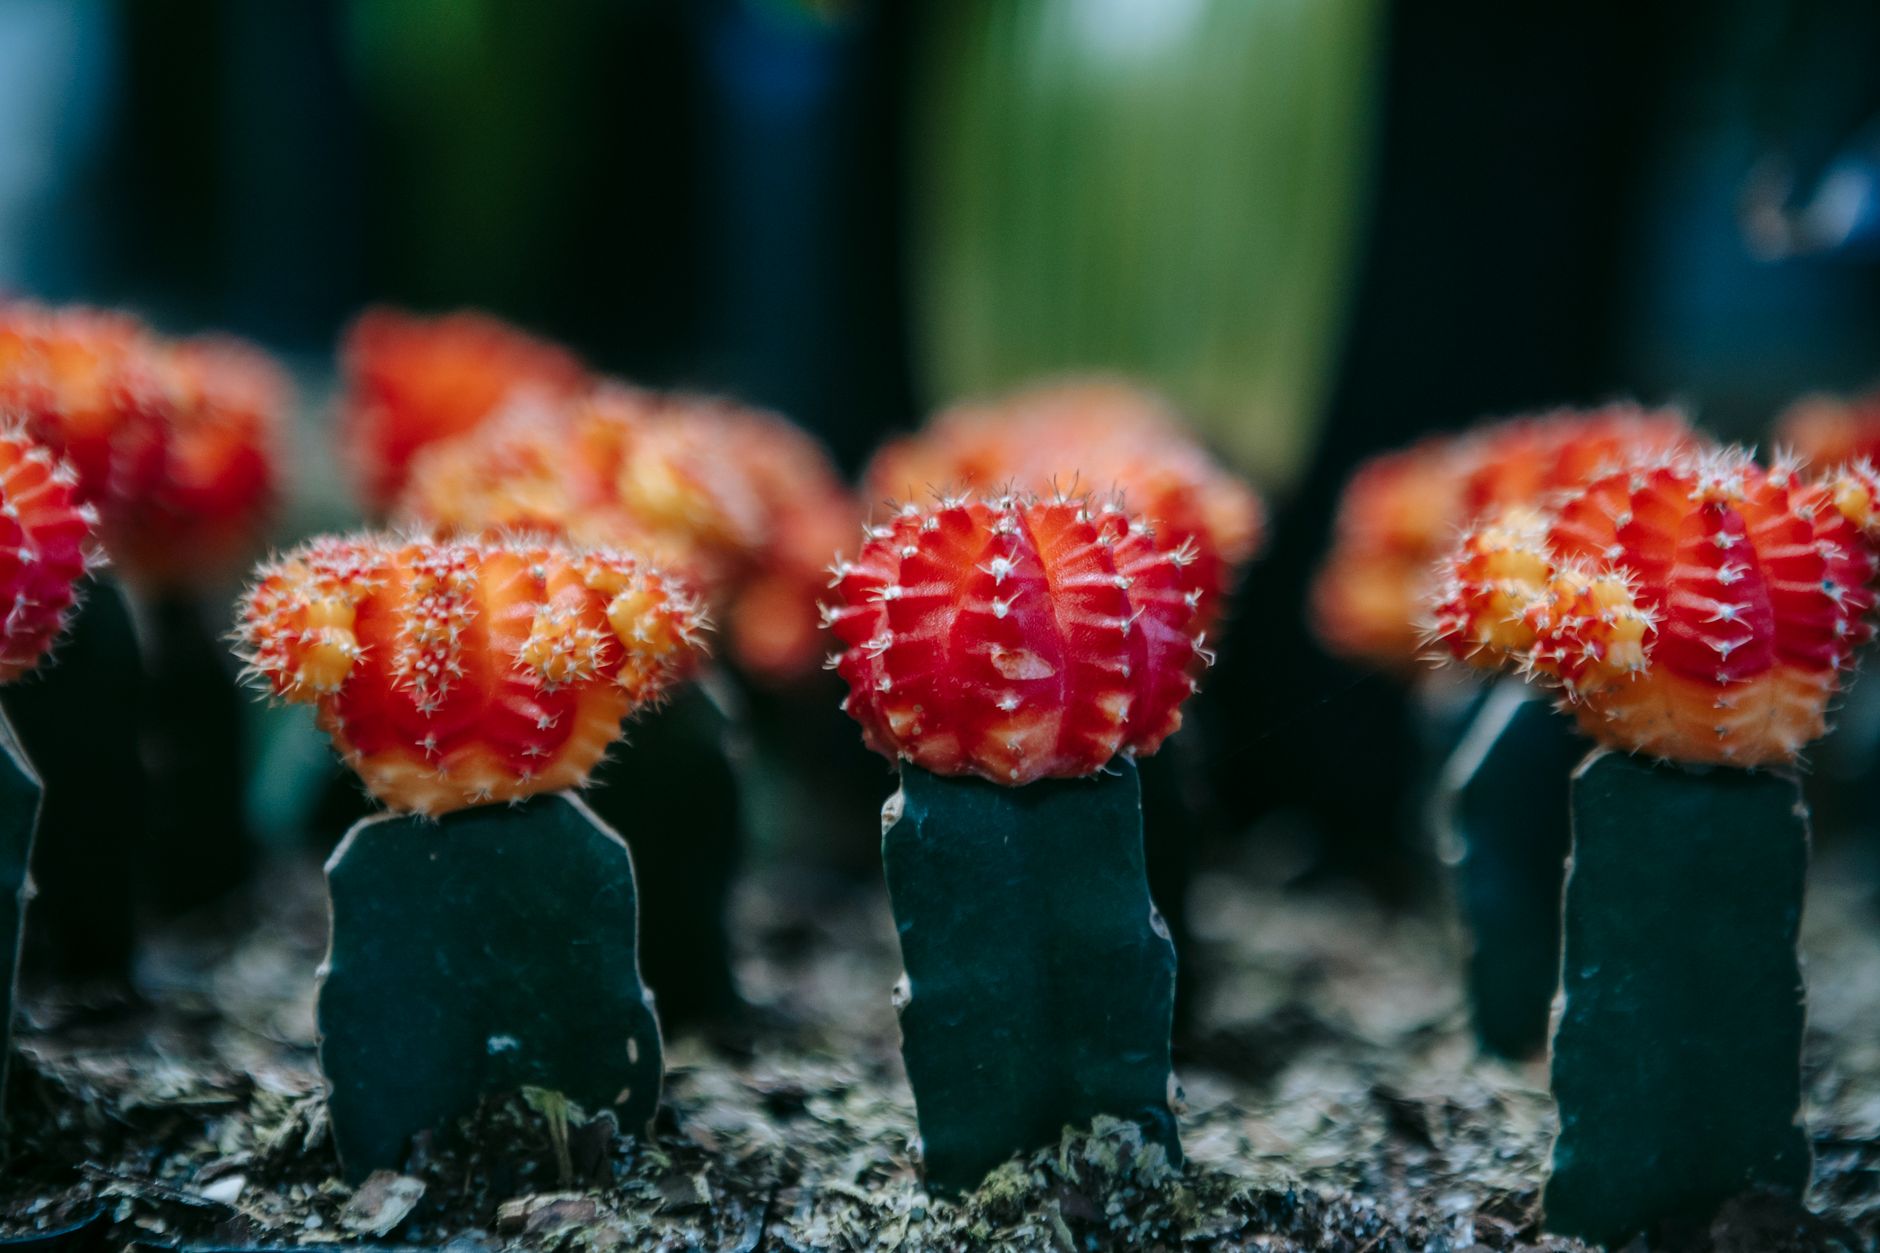
Beyond speed, grafting lets you create unique forms and displays that you simply couldn't achieve otherwise. Have you ever seen those vibrant, colourful "Moon Cacti" (Gymnocalycium mihanovichii var. friedrichii 'Rubra') in garden centres? They're often bright red, yellow, or even purple because they lack chlorophyll. They can't survive on their own. They're always grafted onto a green rootstock. This opened my eyes to the artistic possibilities. In my greenhouse, I've experimented with grafting crested forms of cacti, which tend to be weaker growers, onto strong columnar rootstocks. The result is a stunning, undulating crest atop a sturdy stem – a real centrepiece! I also love combining different textures and colours, creating multi-tiered or multi-headed plants that spark conversation. It's like a living sculpture, and it's something I often show off to my gardening club here in the Midlands.
But perhaps the most vital reason I’ve embraced grafting, and one that resonates deeply with any gardener, is its power to save rotting or damaged plants. As I mentioned earlier, our damp UK conditions can be brutal for cacti. Even with careful watering and good airflow, root rot can strike, especially during a prolonged wet spell or if I’ve been a bit too optimistic with the watering can in autumn. I learned this the hard way when a beloved Mammillaria elongata started to go soft at the base. Panic set in. I knew if the rot spread, it was gone. In a desperate attempt, I cleanly cut above the rot and grafted the healthy top section onto a spare Opuntia rootstock I had. And it worked! That little Mammillaria is now thriving on its new base, completely saved from the brink. It's a fantastic second chance for valuable or sentimental plants, turning what would be a complete loss into a triumph. This technique is invaluable for rescuing plants damaged by pests, disease, or even physical injury. It's truly like giving them a new lease on life.
Gather Your Gear: Essential Tools and Materials for Successful Cactus Grafting
Alright, before we get our hands dirty (or rather, our blades sharp!), let's talk about the kit you'll need. You don't need a professional laboratory, but having the right tools makes all the difference for a clean, successful graft. I've tried various bits and bobs over the years, and I've narrowed down what truly works in my UK setup. The key here is sharpness and cleanliness – think of it like surgery for your plants.
First up, your cutting tools. This is where many beginners, including myself initially, make a mistake. I once used a slightly blunt kitchen knife, and the cuts were ragged, leading to poor contact and failed grafts. You need something razor-sharp. A grafting knife is ideal, but a new, sharp scalpel or a fresh blade in a Stanley knife (the kind you get from any DIY shop in the UK) works perfectly. I tend to prefer a good, sturdy craft knife with replaceable blades. Always have spare blades on hand, as you'll want to use a fresh, sterile one for each grafting session.
Next, disinfectant. This is non-negotiable. I use isopropyl alcohol (rubbing alcohol), easily found at chemists or online here in the UK. You'll use it to sterilise your blades before and between each cut. This prevents the spread of diseases between plants, which can be devastating. A good spray bottle makes this easy.
You'll also need something to secure the graft. This is crucial for maintaining firm contact between the scion and rootstock while they fuse. My go-to is rubber bands. They're cheap, readily available, and provide gentle, even pressure. You can also use grafting clips or even weights if you’re grafting a larger, heavier scion. I keep a selection of different sized bands in my potting shed.
Finally, a bit of tissue paper or kitchen roll is handy for wiping away any sap or moisture from the cut surfaces. Some people like to use sulphur powder or a fungicide dust on the cut surfaces, particularly on the rootstock, to prevent fungal infections. I’ve experimented with this, and while it's not always necessary, it can offer an extra layer of protection, especially for grafts that might take longer to heal in our damper British air.
Here’s a quick comparison of some essential tools and materials:
| Tool/Material | Description & Randy's UK Experience | Pros | Cons |
|---|---|---|---|
| Sharp Knife/Scalpel | My preference is a craft knife with new, disposable blades or a dedicated grafting knife. A fresh Stanley blade from B&Q works wonders. A blunt blade is the most common cause of failure in my experience. | - Creates clean, precise cuts essential for good contact. - Reduces damage to plant tissue. - Easily sterilised. | - Requires careful handling for safety. - Blades dull quickly, so frequent replacement is needed (can add up). - Good quality grafting knives can be an initial investment. |
| Isopropyl Alcohol | Essential for sterilising blades and surfaces. I buy it in bulk online or from a local chemist. Don't skimp on this step – it's vital for preventing disease. | - Highly effective antiseptic. - Evaporates quickly, leaving no residue. - Relatively inexpensive and widely available in the UK. | - Can dry out skin, so gloves are advisable. - Flammable, so store and use with care. |
| Rubber Bands | My favourite method for securing grafts. A mix of sizes is best. You can pick these up anywhere – stationery shops, supermarkets. I’ve found the wider, stronger ones best for larger grafts. | - Provides even, gentle pressure. - Inexpensive and readily available. - Easy to apply and remove. - Flexible, adapting to different plant sizes. | - Can sometimes cut into delicate plant tissue if overtightened or left on too long. - May need to be replaced if they perish in sunlight (especially in a sunny greenhouse). - Not ideal for very large or heavy scions without additional support. |
| Tissue Paper/Kitchen Roll | Basic but essential for gently dabbing away sap. I keep a roll of good quality kitchen towel in my greenhouse. Avoid anything that might leave fibres behind. | - Absorbs excess moisture/sap. - Helps keep surfaces clean. - Disposable and hygienic. | - Can leave small fibres if cheap quality. - Needs to be used very gently to avoid damaging fresh cuts. |
| Fungicide Dust/Sulphur | An optional extra, but one I use for particularly sensitive plants or if humidity is high in the greenhouse. A small pinch dusted onto the rootstock’s cut surface can make a difference. | - Helps prevent fungal infections, especially in humid UK conditions. - Adds an extra layer of protection for valuable grafts. | - Can be messy to apply. - Not always necessary, adding an extra step. - Needs to be applied very sparingly to avoid smothering the graft. |
Nurturing Your Graft: Essential Aftercare and Troubleshooting for UK Gardeners
Right, so you've made your cuts, joined your plant partners, and secured them. Now comes the nervous waiting game, which, if you're like me, feels like watching paint dry, but with much higher stakes! Nurturing your freshly grafted cactus is crucial, especially here in our often-grey UK climate. I've learned a lot about this through trial and error in my 800 sq ft Midlands garden.
The first few weeks are critical. Keep the grafted plant out of direct sunlight. While my greenhouse gets lovely sun, a fresh graft is vulnerable. I usually tuck them away on a shaded shelf, or even under a piece of horticultural fleece for the first 7-10 days, especially if we're having one of our rare scorching British summer days. You want bright, indirect light – think of a bright kitchen window, not a south-facing conservatory.
Humidity is a bit of a balancing act. Too dry, and the union might not form; too wet, and you risk rot, especially with our naturally damp British air. I aim for moderate humidity. Sometimes, for particularly finicky grafts, I'll put a clear plastic bag loosely over the plant, propped up so it doesn't touch the cactus, to create a mini-environment. But I always make sure to air it out daily for a few minutes to prevent fungal issues. One mistake I made early on was leaving the bag on too long in a warm spell – came back to a rather sad, sweaty cactus that started to rot at the base. Lesson learned!
When it comes to watering, resist the urge! The rootstock needs to establish its connection before you start drenching it. I usually wait at least 7-10 days before any light watering, and often two weeks. When I do water, it's a gentle bottom-watering in a saucer, allowing the plant to soak up what it needs, and then I let it drain completely. Overwatering is probably the biggest killer of cacti in the UK, and even more so for grafts. In my greenhouse, during cooler autumn or winter months, I might not water a new graft for weeks.
Troubleshooting is part of the journey. If your graft isn't taking, the first sign is usually the scion starting to shrivel or discolour. Don't despair! It happens to all of us. I once tried grafting a tiny Gymnocalycium pup onto a Hylocereus and it just didn't want to bond. The most common reasons are poor contact between the vascular rings, rot from too much moisture, or insufficient pressure. If you catch it early, sometimes you can re-graft, making fresh cuts and trying again. I've salvaged a few that way, though it feels a bit like a plant emergency room! Just remember, every failure is a lesson in disguise, especially when you're trying to grow desert plants in a country known for its rain.
Selecting Your Partners: Best Rootstocks and Scions for UK Cactus Grafting
Choosing the right rootstock and scion is like picking the perfect dancing partners – they need to complement each other. In my UK garden, especially considering our often-temperate climate, I've found certain combinations work much better than others. It's not just about what looks good; it's about what thrives.
For rootstocks, you need something vigorous, readily available, and able to provide a good nutrient supply to your scion. Here in Britain, the most common and accessible rootstocks are:
- Hylocereus undatus (Dragon Fruit Cactus): This is by far the most popular choice, often found as the base for those colourful 'Moon Cacti' in garden centres. It's super vigorous and grows quickly in warm conditions, making it great for fast growth. However, it's not tolerant of cold and needs consistent warmth, making it a greenhouse or indoor plant for most of the year in the UK.
- Trichocereus pachanoi (San Pedro Cactus) / Trichocereus sp.: These are a fantastic, hardier alternative. They grow well and are more tolerant of cooler temperatures than Hylocereus, making them a better choice for an unheated greenhouse or even a sheltered spot outdoors in summer here in the Midlands. They're also long-lived and provide a very stable base.
- Pereskiopsis sp.: While smaller and less common, Pereskiopsis is brilliant for grafting very small, delicate scions, especially seedlings. It's a leafy cactus that grows incredibly fast. I've used it to give tiny cactus seedlings a massive head start, though it needs warmth like Hylocereus.
For scions, almost any cactus can be grafted. The beauty is you can take slow-growing, difficult-to-root, or highly prized specimens and give them a turbo boost. I've had great success with:
- Gymnocalycium mihanovichii (Moon Cactus): These are the classic colourful scions. They lack chlorophyll, so they must be grafted to survive. I've propagated many of these, taking offsets from my existing plants and giving them new life.
- Lophophora williamsii (Peyote Cactus) or other slow-growing globular cacti: For those extremely slow-growing or difficult-to-root species (and yes, I mean the non-psychoactive ones or just similar-looking globular cacti!), grafting provides an incredible growth spurt. I've seen cacti take years to grow a few centimetres on their own roots, but double in size in a season when grafted onto a Trichocereus.
- Ariocarpus species: These are highly sought after and notoriously slow. Grafting is often the only practical way for a home gardener like me to see them reach a decent size within a reasonable timeframe.
Here's a quick comparison table to help you choose your grafting partners:
| Feature | Hylocereus undatus (Rootstock) | Trichocereus pachanoi (Rootstock) | Pereskiopsis sp. (Rootstock) | Gymnocalycium mihanovichii (Scion) | Slow-growing Globular Cacti (Scion) |
|---|---|---|---|---|---|
| Growth Rate | Very fast, especially with warmth | Fast, good vigour | Extremely fast | Rapidly grows when grafted | Slow on own roots; fast when grafted |
| Cold Tolerance | Poor (needs minimum 10-15°C); greenhouse/indoors in UK | Good (can handle cooler temps, down to 0-5°C short-term); adaptable | Poor (needs warmth) | Depends on species, but grafting aids survival | Varies, but often sensitive; grafting boosts resilience |
| Availability | Very common (often as 'Moon Cactus' base) | Moderately available (specialist nurseries) | Less common, often from specialist growers | Very common (often as part of 'Moon Cactus') | Specialist nurseries |
| Ease of Grafting | Easy, large surface area | Easy, good vascular ring | Easy, but small diameter for tiny scions | Easy, good contact area | Easy, good contact area |
| Best For | Rapid growth, colourful Gymnocalycium, general purpose grafting | Hardier grafts, long-term stability, larger scions | Tiny seedlings, very small or delicate scions | Colourful, chlorophyll-deficient cacti | Rare, slow, or difficult-to-root species |
| UK Gardener Tip | Ideal for a heated greenhouse or indoor spot; I grow mine year-round in my heated greenhouse. | Great for an unheated greenhouse or sheltered patio in summer. My favourite for robust, long-term grafts here in the Midlands. | Use for giving tiny seedlings a massive head start in a warm propagator. | A fun, easy starter scion to see quick results. | Gives you years of growth in a single season, perfect for our short UK growing season. |
Your Grafting Journey Begins: Embrace the Art of Cactus Transformation
And there you have it, fellow gardeners! We've covered the why, the how, the what-ifs, and the what-works-best in our unpredictable British climate. Mastering cactus grafting might seem a bit daunting at first, like trying to get your head around a new IT system, but I promise you, it's an incredibly rewarding skill to cultivate.
Think back to why we started this journey: faster growth, those truly unique, sculptural forms, and most importantly, saving a beloved plant from an untimely demise. I've had more than one precious cactus, a gift from a friend or a special find, get a touch of rot from an unexpected damp spell here in the Midlands. Being able to slice off the healthy top and give it a new lease on life on a vigorous rootstock? That's not just gardening; that's plant wizardry.
I remember my very first successful graft – a little Gymnocalycium pup onto a Hylocereus rootstock. The sheer joy of seeing those tiny vascular rings fuse and the scion plump up was immense. It was a tangible success, a real testament to learning a new skill and applying it, right here in my 800 sq ft backyard greenhouse. It wasn't always smooth sailing, mind you. I've had my share of grafts that shrivelled, or rootstocks that decided to rot on me. But each 'failure' taught me something vital about moisture, light, or pressure, especially how those factors play out in our often-damp UK conditions.
So, don't be afraid to give it a go. Start with something common, like a Hylocereus rootstock and a readily available offset. Gather your sharp tools, follow the steps, and most importantly, have patience. The art of cactus transformation is waiting for you to embrace it. It's a fantastic way to expand your collection, experiment with new forms, and truly connect with the incredible resilience and adaptability of these fascinating plants.
Your grafting journey begins now. Grab those tools, choose your partners, and prepare to witness the magic unfold in your very own UK garden. Happy grafting!
