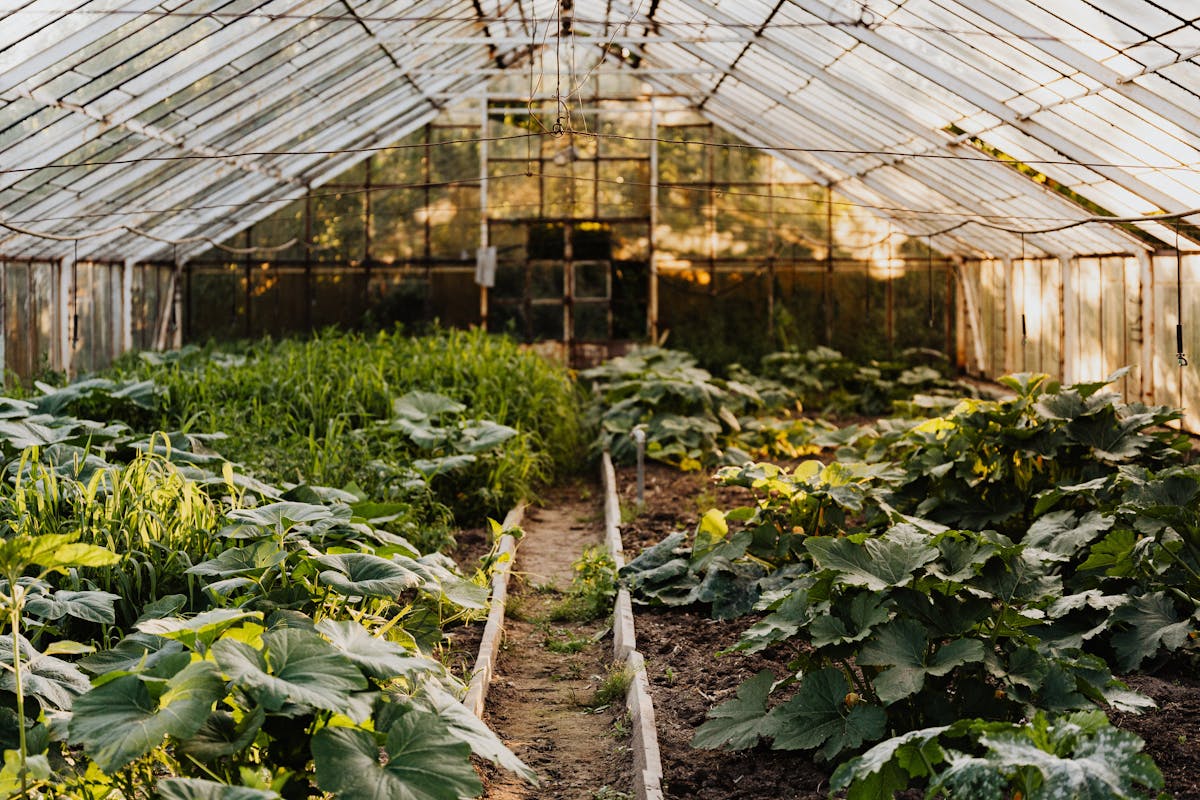
The crisp air of early spring often leaves gardeners yearning for the warmth of the sun and the rich scent of earth. But what if you could bypass the impatience of waiting for the last frost and get a significant head start on your gardening season? Mastering indoor seed starting is your secret weapon, allowing you to cultivate robust, healthy seedlings weeks or even months before they could ever brave the outdoors. This comprehensive guide will walk you through every step, from selecting the right seeds and setting up your indoor garden to nurturing tiny sprouts into strong young plants ready for the garden, ensuring an earlier, more abundant harvest.
1. Why Start Seeds Indoors? The Benefits Unveiled
Embarking on the journey of starting seeds indoors is more than just a fun gardening activity; it's a strategic move that offers a wealth of advantages for gardeners of all experience levels. It allows you to defy the constraints of your local climate and truly take control of your growing season.
- Extend Your Growing Season: This is perhaps the most compelling reason. Many popular vegetables, like tomatoes, peppers, and eggplants, require a long growing season to reach maturity and produce a good harvest. By starting them indoors 6-10 weeks before your last expected frost date, you effectively add months to their growing time, ensuring a bountiful yield even in regions with shorter summers.
- Cost Savings: Purchasing individual starter plants from nurseries can quickly add up, especially if you plan a large garden. Seeds, on the other hand, are remarkably inexpensive. A single packet often contains dozens of seeds, allowing you to grow many plants for a fraction of the cost, making gardening more accessible and budget-friendly.
- Wider Variety Selection: Nurseries typically stock only a limited selection of common plant varieties. When you start from seed, you unlock a world of possibilities! Explore unique heirloom tomatoes, specialty peppers, exotic flowers, or disease-resistant varieties that might not be available locally. This empowers you to cultivate a garden truly tailored to your tastes and climate.
- Stronger, Healthier Plants: By providing an ideal, controlled environment, you give your seedlings the best possible start in life. You can meticulously manage light, temperature, moisture, and nutrient levels, leading to more vigorous, stress-resistant plants that are better equipped to thrive once transplanted outdoors.
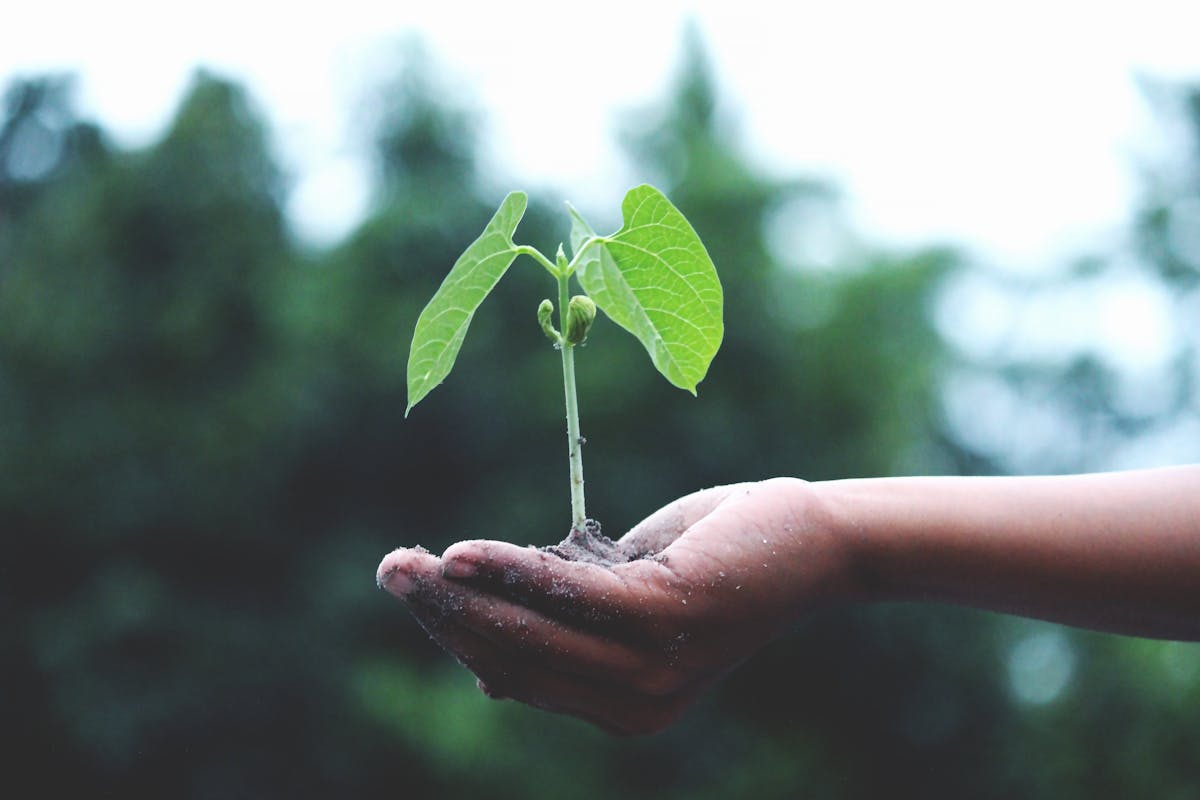
- Gardening Therapy and Satisfaction: There's an undeniable joy and sense of accomplishment in nurturing a tiny seed into a thriving plant. Observing the miracle of germination and watching your seedlings grow day by day is a deeply satisfying experience, offering a much-needed connection to nature during the colder months.
- Pest and Disease Control: Young seedlings are often vulnerable to outdoor pests and diseases. Starting them indoors provides a protective bubble, shielding them from early threats and giving them time to develop strength before facing the challenges of the outdoor environment.
- Better Germination Rates: The consistent warmth and moisture provided by an indoor setup significantly improve the germination success rate for many seed types, especially those that are slow to sprout or require specific conditions.
Ultimately, starting seeds indoors is an empowering practice that grants you greater control, variety, and satisfaction, setting the stage for your most successful garden yet.
2. Essential Tools & Materials: Building Your Indoor Garden Kit
Setting up your indoor seed-starting station doesn't require a massive investment or a dedicated greenhouse. With a few key components, you can create an efficient and effective environment for your future garden. Gathering these essentials before you begin will streamline the planting process.
Seed Starting Trays & Pots
The vessels you choose for your seeds play a critical role in their initial development.
- Standard Seed Trays: These are typically shallow plastic trays, often with drainage holes, designed to hold multiple cells or be filled with a seed starting mix for broadcast sowing.
- Cell Inserts (Divided Trays): These fit into standard trays and provide individual compartments for each seedling, making transplanting easier and minimizing root disturbance. Common sizes range from 36 to 72 cells per tray.
- Peat Pots or Coir Pots: Biodegradable options that can be planted directly into the ground, reducing transplant shock. They can dry out quickly and sometimes mold.
- Soil Blocks: A method that uses a soil blocker tool to create compressed blocks of seed starting mix. This eliminates the need for plastic pots, reduces plastic waste, and creates excellent root systems.
Seed Starting Mix
This is not the same as potting soil or garden soil. A high-quality seed starting mix is crucial for successful germination and early growth.
- Sterile: Free from weed seeds, fungal spores, and insect eggs that can harm delicate seedlings.
- Fine Texture: Allows tiny roots to penetrate easily and seeds to make good contact for germination.
- Excellent Drainage & Moisture Retention: A delicate balance is needed; it should hold enough moisture for germination but drain well to prevent waterlogging and damping-off disease.
- Low Nutrient Content: Seedlings don't need much fertilizer initially; their cotyledons (first leaves) provide early energy.
- Common Ingredients: Peat moss or coco coir (for moisture retention), perlite or vermiculite (for aeration and drainage).
Light Source
Adequate light is arguably the most critical factor for healthy indoor seedlings. Without it, they become "leggy" – tall, thin, and weak as they stretch desperately for light.
- Fluorescent Grow Lights (T5 or T8): An economical and effective choice for many home gardeners. T5s are generally brighter and more efficient. Place lights 1-2 inches above seedlings.
- LED Grow Lights: More energy-efficient and offer a broader spectrum of light tailored for plant growth. While the initial cost can be higher, their longevity and lower energy consumption make them a worthwhile investment over time.
- Adjustable Fixture: Essential for raising the light as seedlings grow to maintain the optimal distance.
- Timer: Automates the light cycle (typically 14-16 hours on, 8-10 hours off), ensuring consistent light exposure.
Heat Mat (Optional but Recommended)
Many seeds germinate best when the soil temperature is consistently warm, often warmer than typical room temperature.
- Promotes Germination: Speeds up the germination process for many crops, especially heat-lovers like peppers, tomatoes, and eggplants.
- Thermostat Control: Look for mats with a thermostat to maintain a precise soil temperature (e.g., 70-75°F or 21-24°C), preventing overheating.
Humidity Domes/Covers
These clear plastic covers fit over seed trays to create a mini-greenhouse effect.
- Maintains Moisture: Prevents the seed starting mix from drying out too quickly, which is critical for germination.
- Increases Humidity: Creates a humid environment conducive to sprouting. Remove once seeds have germinated to improve air circulation.
Watering Can or Spray Bottle
Delicate seedlings require gentle watering.
- Fine Rose Watering Can: Distributes water evenly without dislodging seeds or tiny sprouts.
- Spray Bottle: Excellent for misting the surface to keep it moist during germination.
Labels & Markers
Organization is key when starting multiple varieties.
- Waterproof Markers: Essential for labeling plant tags.
- Plant Tags/Stakes: Write down the plant variety, date planted, and any specific notes. This prevents confusion once sprouts emerge.
Small Fan (Optional)
A gentle breeze can work wonders for seedling health.
- Strengthens Stems: Mimics outdoor wind, encouraging seedlings to develop stronger, sturdier stems.
- Prevents Damping-Off: Improves air circulation, reducing the risk of fungal diseases like damping-off, which causes seedlings to suddenly collapse.
Detailed Comparison Table: Essential Seed Starting Tools
| Tool/Material | Option 1: Budget-Friendly/Common | Option 2: Advanced/Specialized | Pros | Cons | Best For |
|---|---|---|---|---|---|
| Seed Starting Trays | Plastic 72-cell inserts in standard 10x20 flat trays | Soil Blocker (creates soil blocks) | Inexpensive, widely available, good for high volume | Plastic waste, potential for transplant shock, can be flimsy | Beginners, large volume of common crops |
| Biodegradable Peat/Coir Pots | Reduces transplant shock, eco-friendly | Can dry out quickly, prone to mold, more expensive per plant | Gardeners concerned about plastic, small batches of sensitive plants | ||
| Seed Starting Mix | Pre-mixed peat-based seed starting mix | DIY blend of coco coir, perlite, vermiculite, and compost | Convenient, sterile, consistent quality | Can be expensive, peat is not renewable (though coco coir is an alternative) | Most gardeners, ensuring disease-free starts |
| Customizable, potentially cheaper in bulk, eco-friendly (coco coir) | Requires sourcing individual components, ensures proper ratios | Experienced gardeners, large-scale starting, specific plant needs | |||
| Light Source | T8 Fluorescent Shop Lights (4-foot fixture with two bulbs) | Dedicated LED Grow Light Panel (full spectrum) | Economical, good light output for most seedlings, widely available | Less energy-efficient than LED, shorter bulb lifespan, specific spectrum for growth less optimized | Budget-conscious gardeners, starting common vegetables/flowers |
| Highly energy-efficient, long lifespan, optimized light spectrum for robust growth | Higher initial cost, can be overkill for very small setups | Serious gardeners, year-round growing, maximizing plant growth/yield | |||
| Heat Mat | Basic seed germinating mat (no thermostat) | Heat Mat with Digital Thermostat Controller | Promotes faster germination, especially for warm-season crops | Can overheat soil if not monitored, no precise temperature control | Gardeners on a budget, for seeds that need warmth but aren't extremely sensitive |
| Precise temperature control, prevents overheating, ensures optimal germination | Higher initial cost, requires an extra outlet | Anyone growing heat-loving or finicky seeds, maximizing germination success |
3. Selecting the Right Seeds: Timing & Variety Choices
Choosing the right seeds is the first exciting step in your indoor gardening adventure. It's not just about picking what looks good; understanding seed packets and your local climate will pave the way for success.
Understanding Seed Packets
Every seed packet is a treasure trove of information. Before you tear it open, take a moment to decipher the details:
- Days to Maturity (DTM): This number indicates how many days it typically takes from transplanting the seedling into the garden until harvest. This is crucial for planning.
- Planting Depth & Spacing: Tells you how deep to sow the seed and how far apart to space plants in the garden (and often, how to thin seedlings).
- Germination Time: The estimated number of days it takes for seeds to sprout. This helps manage expectations.
- Light Requirements: Whether the plant prefers full sun, partial shade, etc., for its outdoor growing.
- "Start Indoors" Recommendation: Many seed packets will explicitly state if indoor starting is recommended or required, often with a timeframe (e.g., "start indoors 6-8 weeks before last frost").
- Seed Count & Year: How many seeds are in the packet and the year they were packed, which indicates their viability.
Timing is Everything: Counting Back from Last Frost
The most critical piece of information for indoor seed starting is your area's average last frost date. This date marks when it's generally safe to transplant tender seedlings outdoors. You can find this information from your local extension office, online gardening resources, or weather websites.
Once you know your last frost date, you'll count backward based on the "start indoors" recommendation on your seed packets:
- Identify your average last frost date. (e.g., May 15th)
- Look at the seed packet for "start indoors X weeks before last frost." (e.g., 6-8 weeks for tomatoes)
- Count back:
- 8 weeks before May 15th is March 20th.
- 6 weeks before May 15th is April 3rd.
- This gives you your planting window (March 20th - April 3rd).
General Guidelines for Common Crops:
- Long-Season Crops (10-12+ weeks before last frost): Onions (from seed), celery, some slow-growing herbs.
- Warm-Season Crops (6-8 weeks before last frost): Tomatoes, peppers, eggplant, tomatillos. These absolutely benefit from an indoor start.
- Cool-Season Crops (4-6 weeks before last frost): Broccoli, cabbage, kale, lettuce, Swiss chard. Can be direct-sown but get a head start indoors.
- Fast-Growing Crops (2-4 weeks before last frost): Cucumbers, squash, melons. These grow quickly and can become leggy if started too early. Only start indoors if you need a very early harvest or have a very short growing season.
Variety Selection: Heirlooms vs. Hybrids & More
Beyond timing, consider the specific variety that best suits your needs and growing conditions.
- Heirloom Seeds: Open-pollinated varieties passed down through generations. They offer unique flavors, colors, and historical significance. You can save seeds from heirlooms that will grow true to type.
- Hybrid Seeds (F1): Created by crossing two distinct parent plants. They often offer improved disease resistance, higher yields, or specific traits like uniform size. However, seeds saved from hybrids typically won't grow true to the parent plant.
- Disease Resistance: Look for varieties labeled with codes like "VFN" (Verticillium, Fusarium, Nematode resistance) if these issues are prevalent in your area.
- Climate Suitability: Choose varieties known to do well in your specific climate zone (e.g., "early maturing" for short seasons, "heat-tolerant" for hot summers).
- Determinate vs. Indeterminate (for Tomatoes):
- Determinate: Bushy plants that produce their crop all at once, then stop. Good for canning or small spaces.
- Indeterminate: Vining plants that continuously produce fruit until frost. Requires staking, but yields more over a longer period.
- Space Requirements: Consider your garden size. "Compact" or "bush" varieties are great for containers or smaller plots.
Detailed Comparison Table: Seed Starting Timing & Variety Choices
| Crop Group | Ideal Indoor Start Time (Weeks Before Last Frost) | Benefits of Indoor Start | Variety Considerations |
|---|---|---|---|
| Tomatoes & Peppers | 6-8 weeks | Essential for warm-season crops; ensures maturity & abundant harvest in most climates. | Tomatoes: Determinate (bush, main crop all at once) vs. Indeterminate (vining, continuous harvest). Choose based on space & use. Look for disease resistance (VFN). Peppers: Hot vs. Sweet, Bell vs. Specialty. Consider desired heat level & color. Jalapeños, Bell Peppers, Banana Peppers are popular. |
| Brassicas | 4-6 weeks | Gives a head start for early spring harvest before summer heat; protects from early pests. | Broccoli, Cabbage, Kale: Look for "early maturing" varieties for success in shorter seasons. Consider "bolt-resistant" varieties for warmer areas. Different types of kale (curly, Lacinato) or cabbage (green, red, savoy). |
| Lettuce & Greens | 3-4 weeks | Allows for earlier harvests; better control over germination conditions. | Lettuce: Loose-leaf (cut-and-come-again) vs. Romaine vs. Butterhead. Choose varieties for heat tolerance (slow to bolt) for later spring/early summer planting. Spinach, Arugula, Swiss Chard can also be started indoors. |
| Cucurbits | 2-3 weeks (optional) | Only if you have a very short growing season or need a very early start; prone to transplant shock. | Cucumbers, Squash, Melons: Look for "bush" varieties for smaller spaces. Vining types need trellises. Choose disease-resistant varieties. Direct sowing is often preferred for these due to sensitive roots. |
| Herbs | 6-10 weeks (depending on herb) | Ensures established plants for early season use; some herbs are slow growers. | Basil: Start 6-8 weeks. Many varieties (Genovese, Thai, Lemon). Parsley, Oregano, Thyme: Can be slow to germinate, benefit from longer indoor starts (8-10 weeks). Cilantro, Dill: Fast-growing, often best direct-sown or started indoors just 2-3 weeks before. |
4. The Planting Process: From Seed to Sprout
With your tools ready and seeds chosen, it's time for the exciting part: sowing! Following these steps carefully will give your tiny seeds the best chance to grow into robust seedlings.
Preparation is Key
Before you even touch a seed, a little preparation goes a long way.
- Clean & Sterilize: If reusing trays or pots, wash them thoroughly with warm, soapy water and then soak them in a dilute bleach solution (1 part bleach to 9 parts water) for 10-15 minutes. Rinse well and air dry. This eliminates disease-causing pathogens.
- Moisten Seed Starting Mix: This is crucial. Empty the desired amount of seed starting mix into a large tub or bucket. Gradually add warm water, mixing thoroughly with your hands until the mix is uniformly damp, like a wrung-out sponge. It should hold its shape when squeezed but no water should drip out. Pre-moistening ensures even moisture distribution and prevents seeds from being washed away during initial watering.
- Fill Trays/Pots: Fill your chosen seed cells or pots with the moistened mix, gently pressing down to remove large air pockets, but avoid compacting it too much. Fill to about 1/2 inch below the rim.
Sowing Seeds
Now for the delicate act of planting.
- Refer to Seed Packet: Always check the individual seed packet for specific planting depth. As a general rule, plant seeds at a depth roughly two to three times their diameter. Very tiny seeds (like lettuce or petunias) should be scattered on the surface and lightly pressed into the mix, or barely covered with a thin dusting of vermiculite.
- Make Indentations: For larger seeds, use a pencil, a chopstick, or your finger to make small indentations in the center of each cell or at the recommended spacing if broadcasting.
- Place Seeds: Carefully drop one or two seeds into each indentation or cell. Planting two gives you a backup in case one doesn't germinate, and you can thin later. For very tiny seeds, you might sprinkle a few.
- Cover & Gently Press: Lightly cover the seeds with the appropriate amount of seed starting mix. Gently pat the surface to ensure good seed-to-soil contact.
- Label Immediately: This step is often overlooked but incredibly important. Use your waterproof marker and plant tags to clearly label each cell or section with the plant variety and date planted. You'll thank yourself later!
Initial Watering
After sowing, a gentle watering is needed to settle the seeds and activate germination.
- Gentle Approach: Use a spray bottle on a fine mist setting or a watering can with a very fine rose to water the newly sown seeds. Avoid heavy streams of water that can dislodge seeds.
- Bottom Watering (Optional but Recommended): For subsequent waterings, many gardeners prefer to bottom water. Place your seed trays in a larger tray filled with about 1 inch of water. The mix will absorb water from the bottom, ensuring even moisture without disturbing the seeds or compacting the surface. Remove the trays once the surface of the mix appears damp.
Heat & Humidity for Germination
These two factors are critical for most seeds to sprout successfully.
- Apply Heat (if using): Place your seed trays on a heat mat set to the optimal temperature for your specific seeds (often 70-75°F or 21-24°C for many vegetables). Heat mats provide consistent warmth to the root zone, speeding up germination.
- Cover with Humidity Dome: Place the clear plastic humidity dome over your seed trays. This traps moisture and creates a mini-greenhouse effect, maintaining the high humidity seeds need to sprout.
- Monitor: Check daily for signs of germination. Once you see the first tiny sprouts emerge, it's time to adjust.
Light: Crucial After Germination
As soon as you see those first green shoots, light becomes the most important factor.
- Remove Heat Mat (for most): Once seeds have germinated, remove the trays from the heat mat. Most seedlings prefer slightly cooler temperatures (60-70°F or 15-21°C) for growth, though some heat-lovers like peppers might benefit from continued bottom warmth for a bit longer.
- Remove Humidity Dome: As soon as most seeds have germinated, remove the humidity dome. Continued high humidity can encourage fungal diseases like damping-off.
- Immediate Light: Place your seedlings immediately under your grow lights. Position the lights just 1-2 inches above the tops of the seedlings. This close proximity is essential to prevent them from stretching and becoming leggy.
- Consistent Light Cycle: Use a timer to provide 14-16 hours of light per day, followed by 8-10 hours of darkness. Darkness is also important for plant development.
- Adjust Light Height: As your seedlings grow taller, remember to raise your grow lights to maintain the 1-2 inch distance. Check daily!
Air Circulation & Strengthening Stems
Don't underestimate the power of a gentle breeze.
- Small Fan: Position a small oscillating fan near your seedlings, running on a low setting for several hours a day. The gentle air movement mimics outdoor conditions.
- Benefits: This helps strengthen the seedling stems, making them sturdier and more resilient. It also improves air circulation, which is vital for preventing fungal issues like damping-off.
Thinning for Success
If you planted multiple seeds per cell, you'll need to thin them.
- Timing: Wait until seedlings have developed their first set of "true leaves" (the leaves that appear after the initial round, or "cotyledons").
- Method: Choose the strongest, healthiest seedling in each cell. Using small scissors or snips, snip off the weaker seedlings at the soil line. Resist the urge to pull them out, as this can disturb the roots of the keeper seedling.
- Goal: Aim for one strong, healthy seedling per cell or pot to give it ample space and resources to grow.
By following these detailed steps, you'll be well on your way to a thriving nursery of young plants, ready to make their grand entrance into your outdoor garden.
5. Optimal Growing Conditions: Nurturing Healthy Seedlings
Once your seeds have sprouted and those precious cotyledons emerge, the real nurturing begins. Providing the ideal environment is paramount for transforming tiny sprouts into robust, garden-ready seedlings. Think of this stage as their nursery school – they need consistent care to grow strong and resilient before facing the big, wide world outdoors.
Light: The Fuel for Growth
Perhaps the most critical factor for healthy seedling development is adequate light. A sunny windowsill, while seemingly bright, is almost never enough to prevent leggy, weak seedlings that stretch desperately towards the light. Artificial grow lights are an investment that pays dividends in seedling quality.
- Duration: Aim for 14-16 hours of light per day. A simple timer can automate this, ensuring consistency.
- Intensity & Distance: Seedlings need bright, direct light. Position your grow lights just a few inches (2-4 inches) above the tops of your seedlings. As they grow, adjust the light upwards to maintain this distance. If seedlings are stretching, lower the light.
- Types of Grow Lights:
- Fluorescent (T5 or T8): An economical and effective choice for seedlings. T5 bulbs are brighter and more efficient than T8.
- LED Grow Lights: More energy-efficient, longer-lasting, and often offer a full spectrum of light beneficial for all stages of plant growth. While a higher initial cost, they save money on electricity and bulb replacement over time.
- Avoid Incandescent: These produce too much heat and the wrong light spectrum for seedlings.
Watering: The Right Balance
Proper watering is key to preventing common seedling ailments like damping off and nutrient deficiencies. It's a delicate balance: too little and they wilt, too much and they drown or develop fungal issues.
- Frequency: Don't water on a schedule, but rather when the seedlings need it. Check the soil moisture daily by gently touching the surface. If the top 1/2 inch feels dry, it's time to water.
- Method:
- Bottom Watering: This is often preferred. Place your seedling trays in a larger tray filled with about 1 inch of water. The soil will absorb water from the bottom up. Remove the trays once the top of the soil feels moist. This encourages stronger root development and keeps the foliage dry, reducing disease risk.
- Top Watering (Gentle): If top watering, use a gentle stream from a watering can with a fine rose or a squeeze bottle. Avoid disturbing the delicate seedlings or washing away the soil.
- Water Quality: Use room-temperature water. Cold water can shock delicate roots. If your tap water is heavily chlorinated, let it sit out for 24 hours to allow the chlorine to dissipate.
Temperature & Air Circulation: Creating a Healthy Environment
Temperature and air flow play significant roles in preventing disease and promoting sturdy growth.
- Temperature: Most seedlings thrive in temperatures between 65-75°F (18-24°C) during the day. A slight drop in temperature at night (e.g., to 60-65°F / 15-18°C) can actually be beneficial, mimicking natural outdoor conditions and promoting stronger growth. For germination, many seeds benefit from warmer temperatures (70-80°F / 21-27°C), often achieved with a seedling heat mat. Remove the heat mat once most seeds have germinated.
- Air Circulation: Stagnant air is a breeding ground for fungal diseases like damping off. Use a small oscillating fan set on a low setting to gently move the air around your seedlings for several hours a day. This not only prevents fungal issues but also strengthens seedling stems, preparing them for outdoor winds.
Fertilizing: Giving Them a Boost
Once your seedlings have developed their first set of true leaves (the leaves that appear after the initial cotyledons), they'll begin to deplete the nutrients in their starting mix. It's time to introduce a gentle fertilizer.
- Timing: Start fertilizing when seedlings have 1-2 sets of true leaves.
- Type: Use a balanced, water-soluble liquid fertilizer (e.g., 5-1-1 or 2-4-2 NPK ratio) specifically formulated for seedlings or young plants. Organic options like fish emulsion or kelp meal are also excellent choices.
- Dilution: Always dilute the fertilizer to 1/4 or 1/2 strength of what's recommended on the label for mature plants. Over-fertilizing can burn delicate roots.
- Frequency: Apply every 10-14 days, or as needed, during your regular watering routine.
Optimal Growing Conditions Comparison Table
| Condition | Ideal Range/Method | Why it's Important | Common Mistake & Solution |
|---|---|---|---|
| Light | 14-16 hours/day, 2-4 inches from LED/Fluorescent grow lights | Prevents legginess, promotes strong stem growth and photosynthesis | Too little light = Leggy seedlings. Solution: Add grow lights, adjust distance. |
| Temperature | Day: 65-75°F (18-24°C), Night: 60-65°F (15-18°C) | Supports metabolic processes, prevents stress | Too cold = Slow growth, shock. Too hot = Stressed, weak plants. Solution: Monitor with thermometer, use heat mats for germination, regulate room temp. |
| Watering | When top 1/2 inch of soil is dry; bottom watering preferred | Hydrates plants, delivers nutrients, prevents root rot (when done correctly) | Overwatering = Damping off, root rot. Underwatering = Wilting, stunted growth. Solution: Check soil moisture, bottom water, ensure drainage. |
| Air Circulation | Gentle breeze from a small fan for several hours daily | Prevents fungal diseases (damping off), strengthens stems | Stagnant air = Disease. Solution: Use small oscillating fan on low setting. |
| Fertilization | 1/4 to 1/2 strength liquid fertilizer (e.g., 5-1-1) every 10-14 days after true leaves appear | Provides essential nutrients for sustained growth after seed starting mix nutrients deplete | Too much fertilizer = Root burn. Too early = Unnecessary, can harm. Solution: Dilute heavily, wait for true leaves. |
6. Hardening Off & Transplanting: Preparing for the Great Outdoors
After weeks of careful nurturing indoors, your seedlings are cozy and accustomed to a controlled environment. However, the outdoor world is a much harsher place, with fluctuating temperatures, direct sunlight, wind, and rain. Introducing your seedlings to these elements too abruptly can cause severe shock, stunting their growth or even killing them. This crucial transition period is called "hardening off."
Hardening Off: A Gentle Introduction
Hardening off is the process of gradually acclimating your indoor-grown seedlings to outdoor conditions. This toughens their cell structures, thickens their cuticles, and prepares them to withstand the elements.
The Step-by-Step Hardening Off Process (7-14 Days):
- Preparation: About 1-2 weeks before your target transplant date (after your last expected frost date), begin the process. Choose a sheltered, shady spot outdoors, protected from strong winds. A patio, porch, or under a tree is ideal.
- Day 1-3 (Shade & Shelter): Place your seedlings in their trays in the chosen shady, protected spot for a few hours (2-3 hours) on the first day. Bring them back inside. On days 2 and 3, gradually extend their time outdoors to 4-6 hours.
- Day 4-6 (Partial Sun): Introduce them to morning sun (which is less intense than afternoon sun). Place them in a spot that receives 2-3 hours of direct morning sun, then move them back to shade for the rest of their outdoor time, or bring them indoors. Gradually increase their direct sun exposure each day.
- Day 7-10 (More Sun & Wind): Continue to increase their exposure to direct sunlight and introduce them to light breezes. You might leave them out for most of the day, moving them to a more exposed spot. However, still bring them in at night if temperatures are expected to drop significantly below 50°F (10°C).
- Day 11-14 (Full Exposure): If conditions allow and night temperatures are consistently above 50°F (10°C) for warm-season crops, you can leave them out overnight. By the end of this period, your seedlings should be able to withstand full sun, wind, and cooler night temperatures without wilting or showing signs of stress.
Important Considerations During Hardening Off:
- Watering: Seedlings will dry out faster outdoors. Check their moisture levels frequently and water as needed.
- Protection: Be prepared to bring them in quickly if there's an unexpected cold snap, heavy rain, or strong winds.
- Patience: Don't rush the process. A slow, gradual transition leads to stronger, healthier plants.

Transplanting: Moving to Their Permanent Homes
Once hardened off, your seedlings are ready for their permanent spot in the garden or larger containers.
Timing:
- Last Frost Date: Do not transplant tender, warm-season crops (tomatoes, peppers, basil) until all danger of frost has passed and night temperatures are consistently above 50°F (10°C).
- Soil Temperature: For warm-season plants, ensure the soil temperature has warmed sufficiently (at least 60°F / 15°C). You can check this with a soil thermometer. Cool-season crops (lettuce, kale, broccoli) can tolerate cooler soil.
- Cloudy Day: Ideally, transplant on a cloudy day or in the late afternoon/early evening to minimize transplant shock from intense sun.
Preparing the Planting Site:
- Garden Beds: Amend your garden soil with compost or other organic matter. Dig holes appropriate for the size of your seedling's root ball, spacing them according to the plant's mature size.
- Containers: Choose containers with adequate drainage holes. Fill them with a good quality potting mix.
The Transplanting Process:
- Water Well: Thoroughly water your seedlings in their trays a few hours before transplanting. This helps the soil cling to the roots and reduces stress.
- Handle Gently: Carefully remove each seedling from its cell. You might need to gently push up from the bottom or use a small trowel. Avoid pulling the seedling by its stem; instead, hold it by the root ball or a true leaf.
- Planting Depth: Plant most seedlings at the same depth they were growing in their trays. Tomatoes are an exception and can be planted deeper, up to their first set of true leaves, as they will grow roots along the buried stem.
- Firm the Soil: Gently firm the soil around the transplanted seedling to remove air pockets.
- Water In: Immediately after transplanting, water your seedlings thoroughly. This helps settle the soil and provides much-needed hydration.
- Protection (Optional): If the weather is still a bit uncertain, consider providing temporary shade for a day or two after transplanting, especially if it's sunny, to help them adjust.
7. Common Challenges & Solutions: Keeping Your Seedlings Strong
Even with the best intentions, indoor seed starting can present a few hurdles. Knowing what to look for and how to respond can save your seedlings and your sanity.
Leggy Seedlings
- Problem: Tall, thin, stretched-out seedlings with weak stems and sparse leaves. They often flop over.
- Cause: Insufficient light. Seedlings are desperately reaching for a light source that is too dim or too far away.
- Solution:
- Increase Light: Provide more intense light. Lower your grow lights so they are 2-4 inches above the seedling tops. Ensure they receive 14-16 hours of light per day.
- Air Circulation: Gentle air movement from a fan can also help strengthen stems.
- Repotting (if severe): For some plants (like tomatoes), you can carefully repot them deeper into the soil, burying part of the stem to encourage new root growth.
Damping Off
- Problem: Seedlings suddenly collapse at the soil line, appearing pinched and shriveled at the base, and then quickly die.
- Cause: A group of soil-borne fungi that thrive in overly wet, cool, and poorly circulated conditions.
- Solution:
- Sterile Medium: Always use a sterile seed-starting mix. Do not use garden soil.
- Proper Watering: Avoid overwatering. Allow the top layer of soil to dry slightly between waterings. Bottom watering helps keep the soil surface drier.
- Air Circulation: Use a small fan to promote air movement.
- Cleanliness: Sterilize all trays, pots, and tools with a 10% bleach solution before use.
- Ventilation: Ensure good ventilation in your growing area.
- Remove Affected Seedlings: Promptly remove and discard any affected seedlings and the surrounding soil to prevent the spread.
Pests
- Problem: Small insects visible on leaves, sticky residue, or tiny flying insects around your seedlings.
- Common Pests:
- Fungus Gnats: Small, dark, mosquito-like flies that hover around the soil. Their larvae feed on organic matter and delicate roots.
- Aphids: Tiny, pear-shaped insects, often green, black, or white, found on new growth. They suck plant sap, causing distorted leaves.
- Solution:
- Fungus Gnats: Allow soil to dry out more between waterings (their larvae need moisture). Use yellow sticky traps to catch adults. Bacillus thuringiensis israelensis (BTI) can be applied to the soil to kill larvae.
- Aphids: Gently wipe them off with a damp cloth. Spray with insecticidal soap or neem oil solution (always test on a small area first). Introduce beneficial insects like ladybugs if you have a larger infestation and an enclosed space.
- Quarantine: Isolate new plants or seedlings to prevent introducing pests to your main growing area.
Nutrient Deficiencies
- Problem: Yellowing leaves, stunted growth, purplish discoloration, or other unusual leaf colors after the true leaves appear.
- Cause: The seed-starting mix has run out of nutrients, or the pH of the soil is off, making nutrients unavailable.
- Solution:
- Fertilize: Begin regular feeding with a diluted liquid fertilizer once true leaves emerge, as described in Section 5.
- Check pH: If fertilizing isn't helping, a soil pH test might be necessary, though less common with sterile seed-starting mixes.
Wilting
- Problem: Seedlings look droopy and listless.
- Cause: Can be either under-watering (most common) or over-watering (roots are suffocating/rotting). It can also be temperature shock or transplant shock.
- Solution:
- Check Soil Moisture: Feel the soil. If dry, water thoroughly. If soggy, you may have overwatered; allow it to dry out, improve air circulation.
- Temperature: Ensure temperatures are within the optimal range.
- Transplant Shock: If recently transplanted, ensure they were hardened off properly and received immediate watering after transplanting. Provide temporary shade if needed.
By understanding these common challenges and having solutions at the ready, you can navigate the indoor seed starting journey with confidence, ensuring your seedlings grow into healthy, productive plants.
Conclusion: Your Journey to Abundant Harvests Begins Indoors
Congratulations! You've now walked through the comprehensive journey of mastering indoor seed starting, from selecting the perfect seeds to nurturing robust seedlings, and finally preparing them for their grand debut in the garden. This process, while requiring a bit of planning and consistent care, offers an unparalleled sense of satisfaction and a significant advantage for your gardening endeavors.
Remember the key takeaways from our guide:
- Early Start: Indoor seed starting grants you a head start on the growing season, especially in cooler climates, leading to earlier and often more abundant harvests.
- Control & Variety: You gain complete control over your plant's early environment, ensuring healthy, chemical-free growth, and access to a vast array of unique plant varieties not typically found as nursery starts.
- Essential Foundations: The right tools, a quality seed-starting mix, and proper planting techniques lay the groundwork for success.
- Nurturing is Key: Providing optimal light, consistent but not excessive watering, good air circulation, and timely fertilization are crucial for transforming tiny sprouts into strong, resilient seedlings.
- Gentle Transition: The hardening off process is non-negotiable, gradually acclimating your tender seedlings to the outdoor world and preventing transplant shock.
- Problem Solving: Being aware of common challenges like leggy seedlings, damping off, and pests, along with their solutions, empowers you to troubleshoot and keep your seedlings thriving.
Embrace this rewarding practice, knowing that each sturdy seedling you grow is a testament to your green thumb and a promise of future bounty. From the first tiny sprout pushing through the soil to the moment you gently tuck your well-hardened plants into their garden beds, you're actively participating in the miracle of life, fostering growth, and setting the stage for a truly exceptional harvest season.
So, gather your supplies, review these steps, and prepare to witness the magic unfold. Your journey to a more vibrant, productive, and personalized garden begins right here, indoors, with the humble seed. Happy growing!
