Introduction: The Art and Science of Potato Harvest Timing
There’s a moment in every gardener’s year that feels like pure magic to me: the first time you plunge your fork into the soil, gently levering it, and reveal a cluster of homegrown potatoes. It’s a feeling that never gets old, whether it’s the waxy tenderness of a new potato or the hearty promise of a maincrop tuber ready for winter storage. For me, Randy, a 32-year-old former IT drone who traded spreadsheets for soil here in my 800 sq ft Midlands garden, growing potatoes has become an annual obsession.
But here’s the thing I quickly learned in my five-plus years of intensive UK gardening: digging them up isn't just about waiting for a sunny day. It's an art, a science, and frankly, a bit of a gamble with our famously unpredictable British weather. When I first started out, I made the classic mistake of digging too early, too late, or just plain wrong, often sacrificing flavour or storage potential. I've had new potatoes that were too big and floury, and maincrop spuds that rotted in storage because their skins weren't properly set.
That’s why I'm so excited to share what I’ve learned through countless experiments, a few glorious successes, and certainly some soggy failures right here in my raised beds. We're going to dive deep into mastering potato harvest timing – knowing exactly when to dig for those melt-in-your-mouth new potatoes versus the robust, long-storing maincrops. My goal is to help you maximise your yields without damaging those precious tubers, all while navigating the unique challenges of our UK climate. So, grab a cuppa, and let's talk spuds!
Decoding Potato Growth: From Flower to Tuber Maturity
Understanding what’s happening beneath the soil is the first step to successful potato harvesting. Potatoes, botanically speaking, aren't roots; they're swollen underground stems called tubers. These develop from "stolons" that grow horizontally from the base of the plant. What we see above ground – the lush green foliage and sometimes beautiful flowers – is just the tip of the iceberg, or rather, the stem of the spud.
In my UK garden, I've grown a wide array of varieties, from early earlies like 'Accent' and 'Charlotte' to robust maincrops such as 'Maris Piper' and 'King Edward'. Regardless of the type, the basic growth cycle is similar. After planting a chitted seed potato, the plant develops foliage, photosynthesising vigorously to build energy. Then, it starts to produce flowers – often a lovely purple or white, depending on the variety. One mistake I made early on was thinking that flowering meant the potatoes were ready. Not quite! While it's a good indicator that tuber formation has begun, it certainly doesn't mean they're fully mature.
The tubers begin to swell after flowering, drawing energy from the leaves. For new potatoes, we're essentially harvesting these tubers while they're still young and actively growing. For maincrop potatoes, however, we want them to fully mature, developing thick skins that protect them for storage. This process continues right up until the foliage naturally dies back, indicating that the plant has put all its energy into the tubers and is shutting down. What works here in Britain, especially with our often-shorter growing seasons for maincrops, is giving them every last possible day in the ground once the plant starts to yellow and die back. This is where the magic of "skin set" really happens, which is crucial for preventing disease and extending storage life.

The Sweet Spot for New Potatoes: When to Dig for Tender Treats
Ah, new potatoes! Is there anything better than those small, waxy, thin-skinned beauties, simply boiled and tossed with a knob of butter and fresh mint? For me, harvesting new potatoes is one of the ultimate joys of summer. It’s all about that fresh, delicate flavour and texture that you just can't replicate with older, storage-ready spuds.
Here in my 800 sq ft Midlands garden, I aim to get my first earlies like 'Jazzy' or 'Casablanca' in by late March/early April, depending on the soil temperature and whether spring has actually decided to show up. For these early varieties, you're generally looking at about 10-12 weeks from planting before you can start "bandicooting" – my favourite term for gently rummaging under the plant for a few tubers without disturbing the whole root system.
The key is to start checking once the plant has flowered and the foliage looks vigorous and healthy. You don't want the leaves to be dying back yet; that's for maincrops. Carefully feel around the base of the plant, just below the soil surface, for small, marble-to-golf-ball-sized tubers. The skin should be very thin and easily rubs off with your thumb. The first time I pulled up those tiny, waxy 'Accent' potatoes, still with a hint of earthy dampness, I was hooked! They cooked up perfectly, tasting of pure summer.
I've learned that patience is key, especially after a chilly spring here in the Midlands. If you dig too early, you'll find barely-formed tubers. If you wait too long, they'll start to bulk up, lose that delicate skin, and become more floury, losing their "new potato" charm. It's a balance of getting that peak tenderness while still allowing the plant to produce a decent yield. Our British summers, even good ones, aren't endless sunshine, so timing is crucial for that sweet spot before the plants inevitably start to show signs of slowing down.
Here's a quick comparison to help you decide when to dig for those tender treats versus the long-term keepers:
| Feature | New Potatoes (Early Harvest) | Maincrop Potatoes (Late Harvest) |
|---|---|---|
| Harvest Timing | 10-14 weeks after planting (for first/second earlies) | 16-20+ weeks after planting, once foliage dies back |
| Foliage State | Lush, green, healthy, usually flowering | Yellowing, browning, dying back naturally |
| Skin Texture | Very thin, easily rubs off with thumb (delicate) | Thick, tough, firmly attached (resilient) |
| Flavour Profile | Waxy, delicate, fresh, sweet, earthy, often "nutty" | Floury, robust, earthy, often richer, good for mashing/roasting |
| Tuber Size | Small to medium (golf ball to hen's egg) | Medium to large (hen's egg to fist) |
| Yield Impact | Lower overall yield per plant (harvested before full growth) | Highest overall yield per plant (full maturity) |
| Storage Life | Very short (best eaten within days of harvest) | Long (can store for months if properly cured) |
| Ideal Use | Boiled, steamed, salads, eaten fresh | Roasting, mashing, chipping, baking, soups, stews |
Optimal Timing for Maincrop Potatoes: Ensuring Long-Term Storage
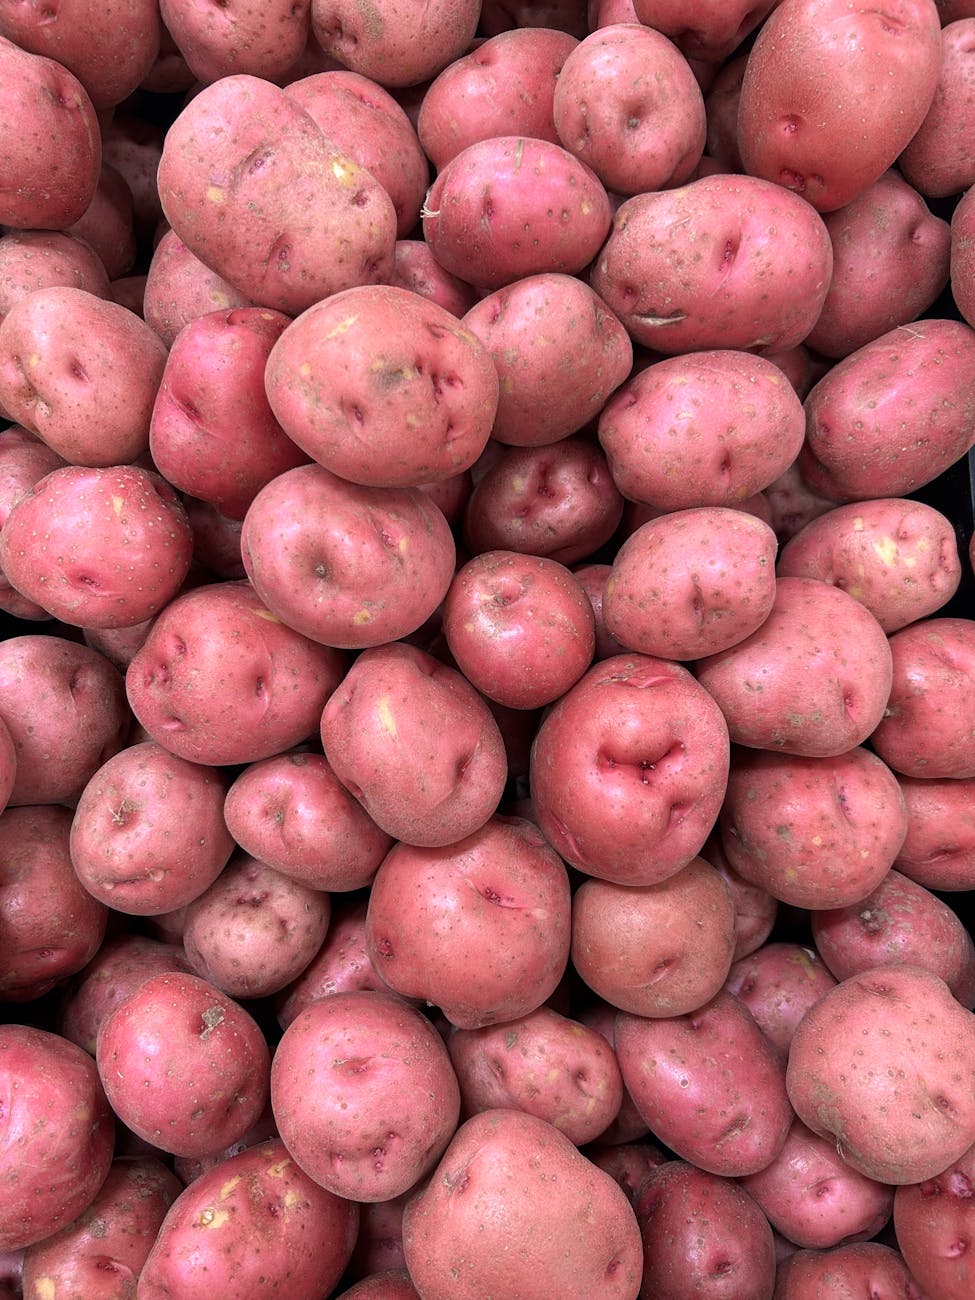
While the fleeting joy of new potatoes is wonderful, my heart also sings for a bountiful maincrop harvest – those robust tubers that will see us through the colder months. For varieties like 'Desiree', 'Rooster', or my beloved 'Cara', the goal is completely different from new potatoes: we want full maturity, maximum size, and crucially, tough, well-set skins that will protect them during storage.
For maincrop potatoes, you're playing the long game. You generally need to wait 16-20 weeks, sometimes even longer, after planting. The absolute best indicator that your maincrop potatoes are ready for harvest isn't when they flower, but when the foliage naturally starts to yellow, wither, and die back. This signals that the plant has finished its growth cycle and has sent all its energy down into the tubers for storage.
I've learned this the hard way: harvesting maincrops too early, before the skins have properly "set," is a recipe for disaster in storage. The skins will be thin and easily damaged, making them highly susceptible to bruising, rot, and disease. One year, eager to clear a bed for autumn greens, I dug up my 'Pink Fir Apple' a bit too soon after the foliage started to look a bit tired, but hadn't fully died back. Sure enough, within a month in storage, they started to shrivel and rot because their skins weren't tough enough. It was a proper learning curve!
Once the foliage has completely died back and ideally, after a couple of dry weeks, that’s when I plan my maincrop harvest. Here in the Midlands, late autumn can turn wet in a hurry, so getting those maincrops out and cured before the real downpours hit is vital. A couple of weeks after the foliage has died back, I carefully lift them on a dry, sunny day. After lifting, the crucial next step for long-term storage is curing.
Curing means leaving the potatoes out to dry for a few hours (or even a day or two if the weather is perfectly dry and warm) in the sun, or in a sheltered, airy spot away from direct rain. This toughens up the skin even further and helps to heal any minor nicks or scrapes from harvesting. What works here in Britain for long-term storage is all about that skin set and then moving them to a cool, dark, well-ventilated spot once cured. Don't wash them until you're ready to use them; the dirt acts as an extra layer of protection.

5. Digging Smart: Techniques to Maximise Yields and Prevent Tuber Damage
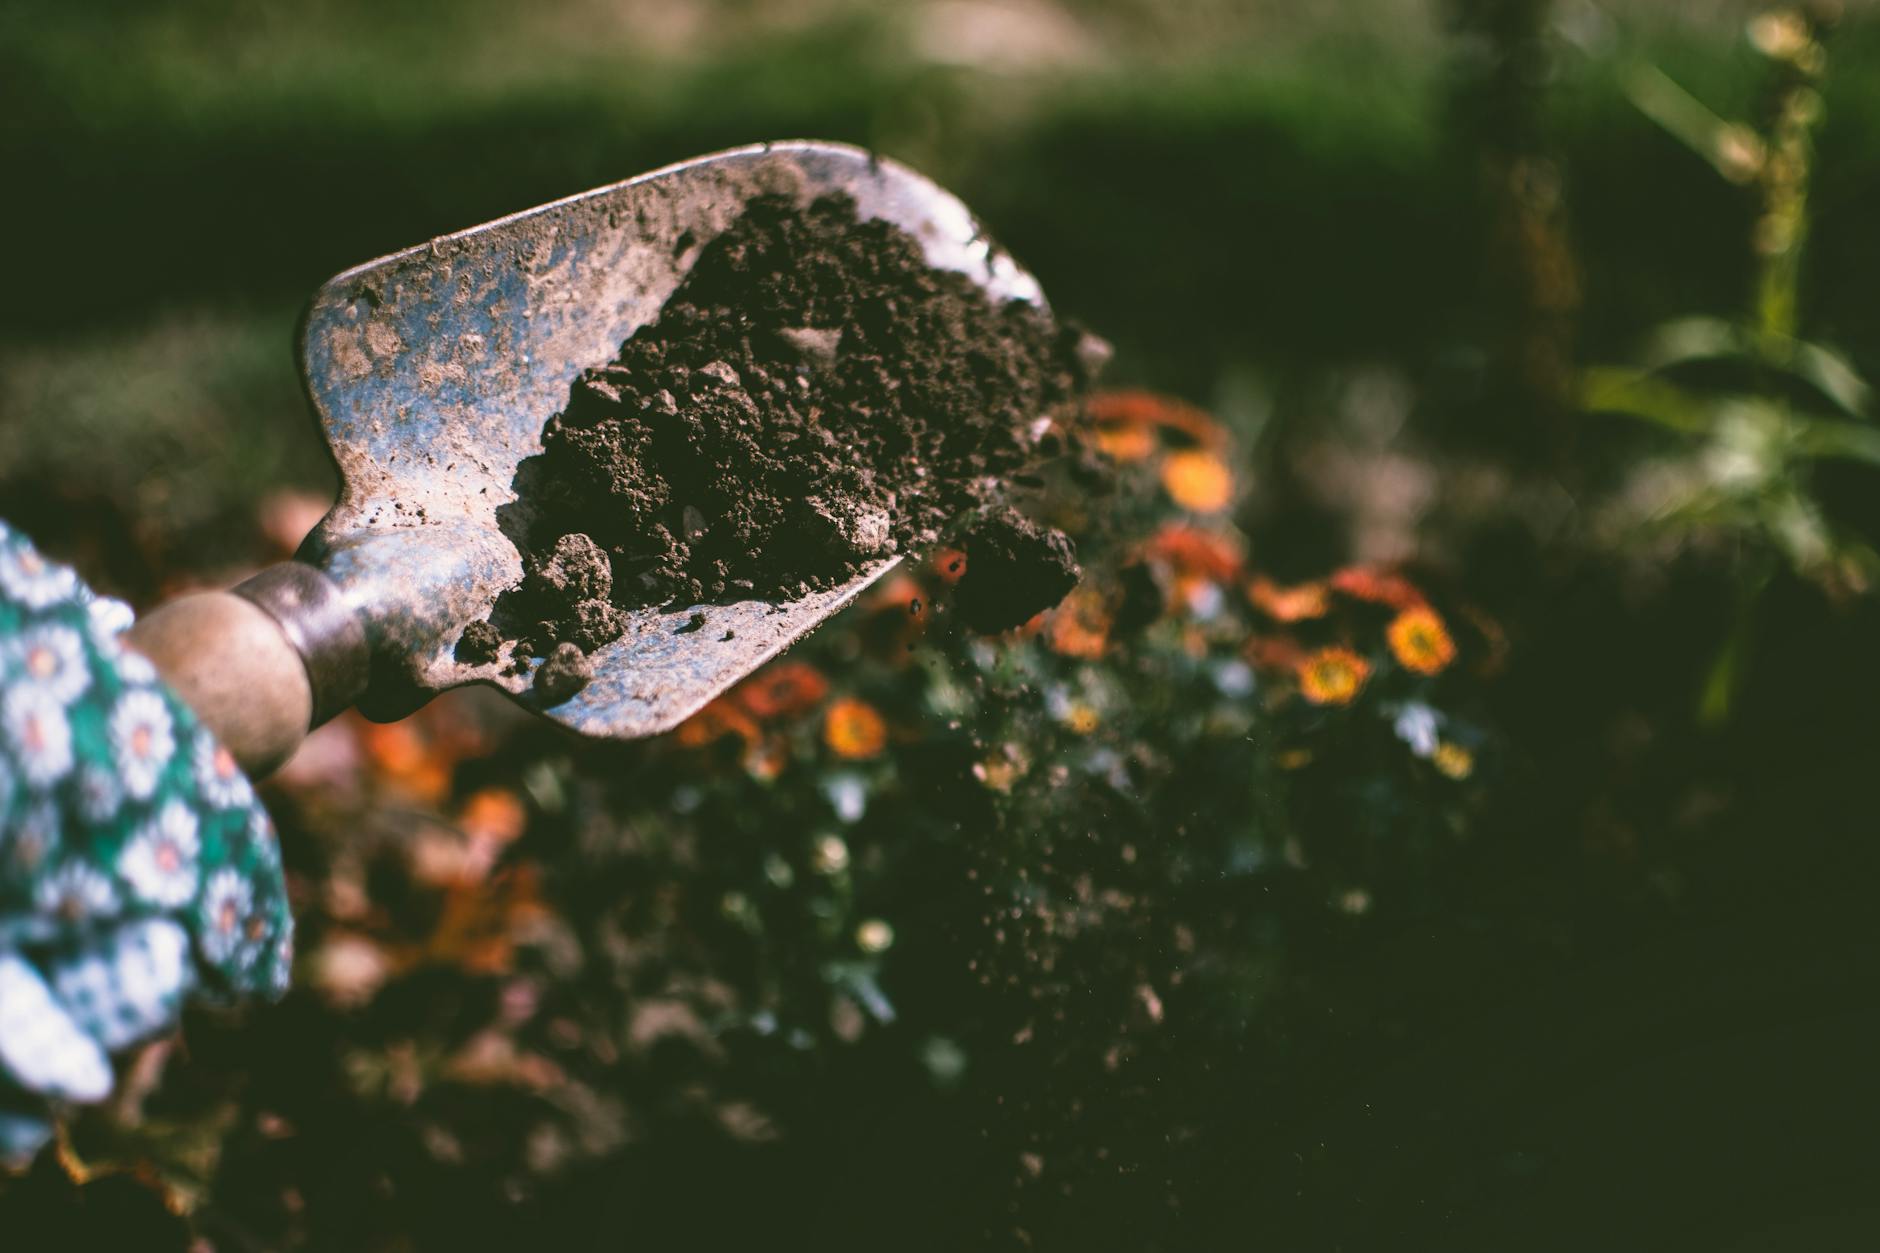
Right, so you've waited patiently, observed the foliage, maybe even snuck a peek for some new potatoes. Now it's time for the moment of truth: the dig! This isn't just about getting the spuds out of the ground; it's about doing it efficiently, maximising your yield, and crucially, avoiding stabbing a good chunk out of your hard-won tubers. I’ve made that mistake more times than I care to admit, especially in my early days when I was just too eager with the spade!
First things first, choose your day wisely. I always aim for a dry day, ideally after a few days without heavy rain. Digging in waterlogged soil is a nightmare – it's heavy, sticky, and you end up with soil clinging to every potato, making them harder to clean and potentially more prone to disease if not properly dried. Here in my Midlands garden, we get our fair share of rain, so sometimes I have to wait a little longer than I'd like, but it’s always worth it for cleaner, happier potatoes.
When it comes to tools, it's often a debate between a digging fork and a spade. Personally, I lean heavily towards a sturdy digging fork for most of my potato patches in my raised beds. My soil, while improved with years of compost, still has a good bit of clay, and a fork helps to gently loosen the earth without slicing through tubers.
My Go-To Digging Technique (Randy's Midlands Method!)
- Start Wide: Don't plunge your fork right next to the main stem. Potatoes can spread out quite a bit, so I usually start about 12-18 inches (30-45 cm) away from the stem of the plant. Imagine the potato plant as the centre of a clock face, and you're starting your dig at, say, 3 o'clock.
- Loosen Gently: Push your fork or spade deep into the soil. If using a fork, gently lever it upwards to loosen the soil and lift the plant. Don't go for a full heave-ho straight away; you're trying to gently unearth the treasure, not attack it!
- Work Inward and Around: Once the main plant is lifted, carefully shake off the loose soil. You'll often find a cluster of potatoes still attached to the roots. Now, this is where the real hunt begins. I then meticulously work my way around the area where the plant was, often on my hands and knees, feeling for hidden spuds. It's amazing how many can be lurking just a few inches deeper or further out than you expect. I’ve had seasons where I thought I’d cleared a bed, only to find rogue volunteers popping up the next year from missed tubers – a clear sign I wasn't thorough enough!
- Careful Handling: As you find each potato, gently brush off the excess soil. Avoid scrubbing or washing them at this stage, as this can damage their skins and shorten their storage life. Place them carefully into a trug or a bucket. I remember one season I was in such a rush, I just chucked them into a wheelbarrow and ended up with bruised spuds that rotted quickly. Lesson learned!
Here's a quick comparison of digging tools I've used in my UK garden:
| Feature | Digging Fork (My Preference) | Spade |
|---|---|---|
| Pros | - Less likely to damage tubers (tines slip between) | - Good for breaking up heavy, compacted soil |
| - Better for loosening soil in my clay-rich Midlands garden | - Can lift larger sections of soil quickly | |
| - Easier to get under the root ball | ||
| Cons | - Can be slower for large areas | - High risk of slicing or spearing tubers |
| - Might miss smaller, deeper tubers if not thorough | - More effort in very heavy clay | |
| Best For | - Most home gardens, especially for maincrop | - Initial bed preparation, very loose soil, or if very careful |
| - Minimising damage and maximising whole tubers | - New potatoes where precision is less critical |
6. Beyond the Dig: Curing and Storing Your Potato Bounty Successfully
So, you’ve got your haul! A satisfying pile of earthy goodness from your very own UK soil. But the job isn't quite done. For long-term storage, especially for maincrop varieties, a crucial step often overlooked by new gardeners (and certainly by me in my first year!) is curing.
The Art of Curing: Toughening Up for the Long Haul
Curing potatoes is essentially a process of toughening their skins and allowing any small cuts or bruises to heal. This makes them much more resistant to diseases and moisture loss during storage. If you skip this, you’ll find your potatoes shrivelling, sprouting, or rotting much faster.
In my UK garden, I’ve refined my curing method over the years. Here’s what I do:
- Brush, Don’t Wash: As mentioned, gently brush off any large clumps of soil. Do not wash them. The moisture will encourage rot.
- Spread Them Out: I spread my harvested potatoes in a single layer on newspaper or old hessian sacks on the floor of my shed. It’s important they have good air circulation around them. If you pile them up, they’ll sweat, and that’s a recipe for disaster.
- Ideal Conditions: I aim for a cool, dark, and moderately humid spot. My shed, thankfully, fits the bill perfectly. I try to maintain temperatures around 10-15°C (50-60°F) and moderate humidity. Here in Britain, humidity isn't usually an issue, but extreme heat can be during a summer heatwave, which can cause them to sprout prematurely. I keep them out of direct sunlight – sunlight causes potatoes to turn green, indicating the presence of solanine, which is toxic.
- Duration: I leave them to cure for about 1-2 weeks. During this time, I’ll occasionally check them, gently turning them and removing any that show signs of damage or disease. It’s better to lose one bad potato than for it to infect the whole batch!
Storing Your Spuds: Keeping Them Fresh Through Winter
Once cured, your maincrop potatoes are ready for their long sleep. Proper storage is key to enjoying your harvest for months.
- Cool, Dark, and Ventilated: This is the mantra for potato storage. The ideal temperature is around 4-7°C (40-45°F). My shed works well for this, but an unheated garage or a cool pantry can also be perfect. Fluctuating temperatures, especially warmth, will encourage sprouting. I once stored a batch in a corner of my garage that got too much afternoon sun, and by Christmas, they were all sending out long, spindly shoots!
- No Light: Absolute darkness is essential to prevent greening.
- Good Airflow: Potatoes need to breathe. Don't store them in sealed plastic bags, as this traps moisture and encourages rot. I swear by hessian sacks or old wooden apple crates. They allow for excellent air circulation while keeping the potatoes contained. I’ve picked up old wooden crates from local markets and even built a simple slatted box for my 'King Edward' potatoes, which store brilliantly.
- Keep Away from Other Produce: Particularly onions and apples. These release ethylene gas, which can accelerate sprouting in potatoes. This is another mistake I made early on, storing my onions and potatoes together in my larder – cue early sprouts!
- Check Regularly: Even with perfect conditions, it's wise to check your stored potatoes every few weeks. Remove any that are soft, shrivelled, or showing signs of rot. One bad potato can quickly spoil the bunch.
Some varieties, like 'Desiree', 'Rooster', and 'King Edward', are known for their excellent storage capabilities here in the UK. Others, like 'Charlotte' (a fantastic second early) or early maincrops, might not last quite as long, so I plan to use those up first.

7. Conclusion: Your Guide to a Bountiful and Well-Timed Potato Harvest
Well, there you have it, fellow gardeners! From those hopeful little seed potatoes nestled into the soil to a glorious bounty ready for the kitchen, understanding potato harvest timing is truly an art and a science that rewards patience and observation. I’ve loved sharing my experiences from my 800 sq ft Midlands garden, from my early fumbles with new potato timing to perfecting the cure for my maincrop haul.
We’ve covered the crucial differences between harvesting tender new potatoes for those immediate culinary delights and timing your maincrop dig for maximum yield and long-term storage. Remember, new potatoes are all about that early gratification – usually 10-12 weeks after planting, when the flowers are blooming, and the lower leaves are just starting to yellow. Maincrop, on the other hand, is a game of patience, waiting for that foliage to fully die back and for the tubers to mature and develop those tough, protective skins – typically 16-20 weeks.
Then we delved into the practicalities of the dig itself: how to wield your fork (or spade, if you dare!) like a pro, minimising damage and ensuring you unearth every last precious spud. And finally, we discussed the often-underestimated but vital steps of curing and proper storage, which are the secret to enjoying your homegrown potatoes well into the winter months, avoiding those frustrating green patches and premature sprouts.
My biggest takeaway from five years of intense UK vegetable gardening is this: every garden is unique, and our British climate keeps us on our toes! What works perfectly for me in my specific patch might need a slight tweak for you, whether you’re up in Scotland or down in Cornwall. So, observe your plants, feel your soil, and learn from each season. Don’t be afraid to experiment a little, try different varieties, and yes, make a few mistakes – I certainly still do! Each challenge is just another lesson in becoming a better, more seasoned gardener.
There’s nothing quite like pulling up a potato plant and discovering a cascade of perfect, earthy tubers beneath. It’s a moment of pure gardening joy, a testament to your hard work and connection with the land. So, get out there, embrace the mud, and look forward to that incredible feeling of serving up your very own, perfectly timed, homegrown potatoes. Happy digging, and happy eating!
