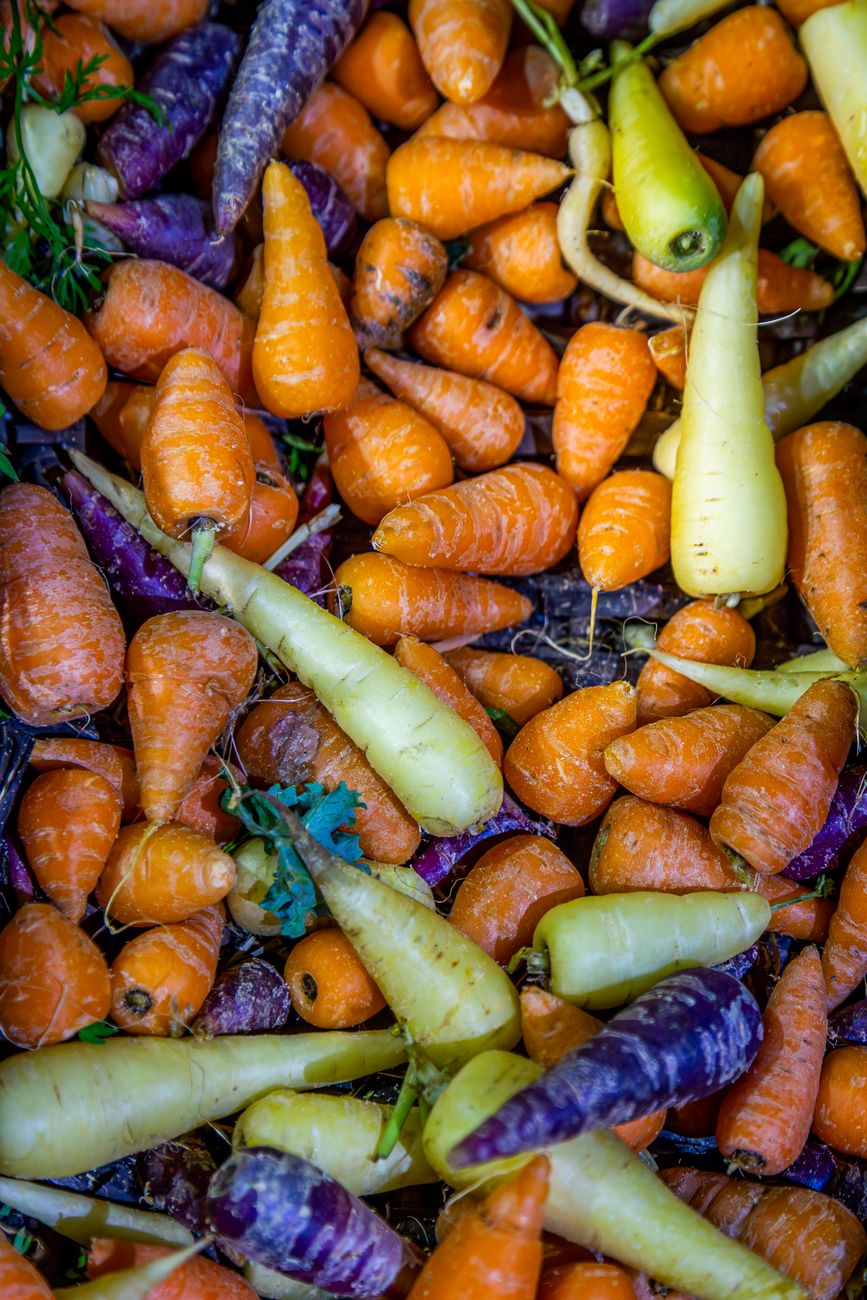
Say Goodbye to Forked Roots: The Ultimate Guide to Perfect Root Vegetables
Alright, fellow UK gardeners, let's have a frank chat about one of the most frustrating things in the vegetable patch: those stubbornly forked, stumpy, or otherwise misshapen carrots, parsnips, and daikon. You know the ones – you carefully sow the seeds, tend them lovingly, and then when harvest day comes, instead of pulling up a magnificent, straight taproot, you get something that looks like it’s been through a wrestling match with a badger. I've been there, trust me. When I first started gardening five years ago here in the UK, fresh out of the IT world and totally green-fingered in the wrong way, my carrot harvests were more 'abstract art' than 'dinner plate perfection'.
My 800 sq ft garden in the Midlands, a mix of raised beds and a small patch of original heavy clay, has been my personal laboratory. For years, I battled with our notoriously unpredictable British weather and that dense, unforgiving soil. I learned the hard way that just chucking seeds into the ground, even in a raised bed, simply doesn't cut it for these deep-rooting beauties. But through countless experiments, a fair few failures (oh, the tales I could tell of waterlogged parsnips and rock-solid clay!), and a relentless obsession with getting it right, I've finally cracked the code.
This isn't about some fancy, expensive gadget or a secret miracle fertiliser. This is about understanding your soil, getting down and dirty with your bed preparation, and giving those roots the absolute best chance to grow long, straight, and true. We're talking about mastering the art of cultivating perfect 'Autumn King 2' carrots, 'Tender and True' parsnips, and even impressive 'Mino Early' daikon, even if your garden, like mine, started life as a challenging patch of UK clay or a rocky wasteland. Forget those sad, twisted roots; it's time to harvest flawless, magnificent specimens you'll be genuinely proud of. Let's get stuck in!
Decoding Your Soil: Identifying and Understanding UK Clay & Rocky Patches
Before we even think about sowing a single seed, we need to talk about soil. This is where so many UK gardeners, myself included, stumble right out of the gate. For years, I just assumed "soil is soil," but oh, how wrong I was! My initial patch here in the Midlands was a classic example of heavy, compacted UK clay. It was so dense, you could practically sculpt with it when wet, and it set like concrete when dry. Attempting to grow a deep-rooted parsnip in that was like asking it to tunnel through a brick wall!
Understanding your soil type is the absolute foundation of successful root vegetable growing, especially here in Britain where soil conditions can vary wildly, even within a single garden. Is it heavy clay that holds water for ages and then cracks? Is it full of stones and rubble from a previous build, or just naturally rocky? Or perhaps you're lucky enough to have a lovely loam, but it still needs a little encouragement for those really deep roots. I spent my first season digging holes, literally, and getting my hands dirty to really feel what I was working with. It's a crucial step, and it informs every decision you make afterwards.
Here's a quick guide to help you identify what you're dealing with, focusing on those common UK challenges:
| Characteristic | Heavy Clay Soil (Common in UK) | Rocky Soil (Variable in UK) | Ideal Loamy Soil (Goal) |
|---|---|---|---|
| Feel (Wet) | Sticky, greasy, can be rolled into a long, thin 'sausage'. | Gritty, lumpy, stones clearly visible and palpable. | Crumbly, slightly moist, holds shape briefly but breaks easily. |
| Feel (Dry) | Hard, compacted, forms large clods, cracks when very dry. | Loose around rocks, very fast draining, can feel dusty. | Soft, friable, easy to dig, retains some moisture. |
| Drainage | Very poor, water pools on surface, slow to drain. | Excellent (often too good), water drains very quickly through gaps. | Good, drains steadily but retains sufficient moisture. |
| Workability | Very difficult to dig when wet or dry; narrow 'window' for working. | Difficult to dig due to obstruction from stones; can be tiring. | Easy to dig, light, pleasant to work with. |
| Nutrient Retention | High, but nutrients can be locked up. | Poor, nutrients wash away quickly. | Excellent, holds nutrients well and makes them available to plants. |
| Aeration | Very poor, roots struggle for oxygen. | Variable, good between rocks, but roots can be physically restricted. | Good, allows air and water movement, promotes healthy root growth. |
| Root Growth Impact | Causes forking, stunting, 'club-foot' roots, rot. | Causes forking, stunting, physical damage to roots. | Promotes straight, deep, healthy root development. |

Beyond Basic Digging: Advanced Bed Preparation for Deep Roots
Once you've decoded your soil, it's time to roll up our sleeves and get serious about bed preparation. For carrots, parsnips, and daikon, "basic digging" simply won't cut it, especially in those challenging UK clay or rocky conditions. These vegetables are taproots; they want to plunge straight down, unimpeded, for a good 25-30cm, sometimes even more! Anything that gets in their way – a compacted layer, a rock, a dense clod of clay – will cause them to fork or stunt. I learned this the hard way when my first few attempts at parsnips in my Midlands garden resulted in roots that looked more like gnarled hands than vegetables.
My go-to method for preparing my raised beds and even the improved ground-level patches for these deep-rooting crops is what’s often called double digging, or a variation of it. Now, I know what you're thinking – "Randy, that sounds like a lot of work!" And yes, it is. But trust me, the results are absolutely worth it, and you only need to do it thoroughly once every few years for a particular bed, topping up with amendments annually. It creates a deep, friable zone that these roots absolutely adore, making them far more resilient to our sometimes-dry UK summers and preventing waterlogging in our wet springs.
Here’s how I tackle it in my UK garden:
- Clear the Bed: Remove any weeds and debris. If it's an existing bed, gently lift any current crops you're not planning to keep or that might be in the way.
- Dig the First Trench (The Spade's Depth): At one end of your bed, dig a trench about a spade's width (around 25-30cm) deep and a spade's length wide. Wheelbarrow this soil to the other end of the bed – you'll use it later to fill the final trench.
- Loosen the Subsoil (The Fork's Depth): Now, this is the crucial part for those deep roots. In the bottom of that first trench, take a garden fork and plunge it as deep as you can, loosening the soil below. Don't turn it over; just wiggle the fork back and forth to break up any compaction. If you hit rocks, carefully lever them out. This is where you're creating that vital, deep, unhindered zone for your taproots. For heavy clay, this also helps with drainage immensely.
- Incorporate Amendments (Optional but Recommended here in the UK): While the trench is open, I often sprinkle in a layer of well-rotted compost, some grit (if I'm battling really heavy clay), and a handful of bone meal or a good slow-release organic fertiliser. This gets the goodness right down where those deep roots will be heading. We'll talk more about specific amendments in the next section!
- Dig the Second Trench: Now, move to the next section of your bed. Dig another spade-deep trench, turning this soil into the first loosened trench.
- Repeat: Continue this process across the entire bed: dig a trench, loosen the subsoil with a fork, add amendments, then fill it with the soil from the next trench.
- Fill the Final Trench: When you reach the end of the bed, the last trench will be filled with the soil you originally wheelbarrowed from the very first trench.
- Rake and Refine: Once the whole bed is "double-dug," gently rake the surface level. You should now have a deep, loose, friable bed that's ready for those perfect root vegetables. It's a noticeable difference underfoot – it feels springy and soft.
This method, while intensive, gives carrots like 'Nantes 2' and parsnips like 'Gladiator' the absolute best start in life, allowing them to grow long and straight, even in the challenging soil conditions we often face across Britain.

Tailored Soil Amendments for UK Conditions: What to Add and Why
So, you've put in the hard graft with the double digging – brilliant! But for truly flawless root vegetables in our often-challenging UK soils, we can't stop there. The next step is enriching and conditioning that newly loosened soil with the right amendments. This isn't just about adding nutrients; it's about improving soil structure, drainage, and aeration, which are absolutely critical for those deep, straight roots. I've experimented with so many different concoctions in my Midlands garden, and I've found that a targeted approach makes all the difference.
For my heavy clay patches, the goal is always to lighten it up and improve drainage without losing its natural fertility. For rocky areas, it's about adding bulk and nutrient-holding capacity. What works here in Britain often comes down to good old organic matter and a few specific mineral additions.
Here’s a breakdown of what I add to my beds and why, tailored for UK conditions:
| Amendment | Primary Benefit for Root Veg | Best for (UK Soil Type) | Why I Use It (Randy's Experience) |
|---|---|---|---|
| Well-rotted Composted | Improves structure, boosts biological activity, adds nutrients, improves water retention in dry and drainage in clay. | All, but especially for heavy clay and very poor soils. | "This is my absolute go-to. I make my own compost, and I pile it on. It's transformed my heavy clay into something workable and rich. It’s like giving your soil a superfood boost." |
| Sharp Sand / Horticultural Grit | Improves drainage and prevents compaction in clay soils. | Heavy Clay, Compacted Soils | "Not builder's sand! I learned that one the hard way. Horticultural grit is sharper, creating tiny air pockets. I mix a good spadeful per square metre into my clay beds and it really helps stop it setting like concrete." |
| Well-rotted Manure | Adds organic matter, improves structure, provides slow-release nutrients. | All, especially hungry soils | "I get a delivery of well-rotted horse manure every autumn. It's fantastic for building up the soil. Just make sure it's well-rotted – fresh manure can scorch roots and encourages forking, especially for carrots." |
| Biochar | Improves water and nutrient retention, provides habitat for microbes, long-lasting. | All, beneficial for long-term improvement | "I'm still experimenting with biochar, but the science behind it is fascinating. I activate it with a liquid feed before mixing it in. It's a long-term investment in soil health, especially important for the longevity of my raised beds." |
| Green Manure (Cover Crops) | Suppresses weeds, adds organic matter when dug in, improves soil structure, prevents erosion. | All, especially empty beds over winter | "In autumn, if a bed is empty, I'll sow a green manure like 'Phacelia' or 'Crimson Clover'. It protects the soil over winter, and then I dig it in in spring. It's a brilliant, natural way to add organic matter and improve texture without buying anything." |
| Gypsum (Calcium Sulphate) | Helps break up heavy clay by flocculating soil particles, improves drainage, adds calcium. | Heavy Clay, particularly saline soils | "I've used gypsum sparingly on my most stubborn clay patches. It's not a magic bullet, but it can help those clay particles clump together, making the soil more crumbly. Always follow the packet instructions for our UK conditions, as too much can cause other issues." |
The key, I've found, is not to just dump one thing in, but to create a balanced mix. For my heavy clay, I'll typically layer in a generous amount of well-rotted compost, a decent dose of horticultural grit, and some well-rotted manure every year. I fork these in during the double-digging process or when I'm topping up my beds in early spring. This combination gives my 'Amsterdam Forcing' carrots and 'White Icicle' daikon the light, rich, and well-draining environment they need to grow long, straight, and utterly delicious. It's all about giving those roots an easy ride!
Precision Sowing & Cultivation: Nurturing Your Carrots, Parsnips & Daikon
Right, you’ve put in all that hard graft getting your beds just right. Now comes the moment of truth: getting those tiny seeds into the ground. This isn't just about scattering them willy-nilly; precision here is absolutely vital for developing those straight, unhindered roots we're aiming for.
Sowing for Success in the UK Climate
Timing is everything, especially with our wonderfully unpredictable British weather. For carrots, I usually start my first outdoor sowings here in the Midlands around late March to early April, as soon as the soil is workable and has warmed up a touch. I then do succession sowings every 3-4 weeks until early July for a continuous harvest. Parsnips, on the other hand, need a longer growing season and are best sown earlier, typically from late February to mid-April – they can handle a bit more chill. Daikon, being a type of radish, is quicker, and I tend to sow mine from late spring through to late summer, often as a catch crop after early potatoes.
When it comes to the act of sowing, I aim for shallow drills, usually about 1-2cm deep. The trick is to sow thinly. I know, I know, it feels counter-intuitive to waste seeds, but trust me, a sparse sowing saves you a lot of heartache (and backache) later. I often mix my tiny carrot seeds with a bit of sand or spent coffee grounds to help spread them out evenly. For parsnips and daikon, which have slightly larger seeds, it’s a bit easier to get the spacing right. I aim for about 2-3cm between seeds in the row, with rows about 30cm apart.
After sowing, gently firm the soil over the seeds and water them in very carefully. A fine rose on your watering can or a gentle spray is key to avoid washing those tiny seeds away. Consistent moisture is crucial for germination, especially in those initial weeks. I’ve learned this the hard way; one dry spell after sowing can completely scupper your chances, leaving you with patchy germination and a lot of frustration.

The Art of Thinning: A Crucial Step
This is probably the most important step after germination, and honestly, it’s where many new (and sometimes experienced!) gardeners fall down – myself included in my early days. Thinning. It feels brutal, pulling out perfectly good seedlings, but it’s non-negotiable for straight roots. If seedlings are too close, their roots will tangle, compete for nutrients, and inevitably deform each other.
I wait until my carrot and parsnip seedlings have developed their first true leaves (not the initial two seed leaves). Then, on a damp, overcast day (or in the evening to minimise stress), I meticulously thin them out. For carrots, I aim for about 5-8cm apart, depending on the variety. For 'Autumn King', which gets massive, I go for 8cm. For 'Nantes', maybe 5cm. Parsnips need more space, so I thin them to 10-15cm apart. Daikon, being a speedy grower, can be thinned to 10cm quite quickly.
Always water the bed thoroughly before thinning to loosen the soil, making it easier to pull out seedlings without disturbing their neighbours. And here's a Randy tip: try to avoid leaving the thinned seedlings lying around, especially carrots, as the smell can attract carrot fly. I bag them up and put them straight in the green bin.
Watering, Weeding & Earthing Up
Consistent watering is vital. These deep-rooted crops need steady moisture to swell their roots evenly. Irregular watering – especially periods of drought followed by deluges, which our British summers are prone to – can lead to splitting and bitterness. I aim for deep watering every few days if it’s dry, rather than frequent shallow sprinkles. In my 800 sq ft Midlands garden, I’ve found that a good soak once or twice a week is usually enough, unless we’re in a proper heatwave.
Weeding is another non-negotiable. Weeds are fierce competitors for water, nutrients, and light, especially when your seedlings are young and vulnerable. I hand-weed carefully, making sure not to disturb the developing roots. Once the plants are bigger, a shallow hoe can be used, but again, be mindful of those roots just below the surface.
Finally, earthing up. This is particularly important for carrots and parsnips. As their shoulders emerge from the soil and are exposed to sunlight, they can turn green and become bitter. I simply draw a bit of soil up around the crowns as they grow, keeping those shoulders covered and sweet.
Protecting Your Investment: Pest, Disease & Weed Management for Root Crops
After all that careful preparation and sowing, the last thing you want is for pests or diseases to decimate your potential harvest. Here in the UK, we’ve got a few common culprits that love our root crops as much as we do, and a proactive approach is always best. I've certainly learned this the hard way, losing entire rows of carrots to the dreaded carrot fly in my early days.
Battling British Garden Pests
Carrot Fly (Psila rosae): Oh, the nemesis of many a UK carrot grower! These tiny flies lay their eggs at the base of carrot plants, and the hatching larvae tunnel into the developing roots, causing rust-coloured scars and making the carrots inedible. I've tried everything from companion planting (marigolds, rosemary) to elaborate physical barriers. What has actually worked consistently in my UK garden is physical exclusion. I now use fine-mesh insect netting (often called Enviromesh) draped over hoops, creating a barrier at least 60cm high. The carrot fly is a low-flying insect, so even a shorter barrier can offer protection. I install it as soon as the seedlings emerge and keep it on until harvest. This has been my biggest breakthrough in getting flawless carrots.
Parsnip Canker: This isn't a pest, but a fungal disease that causes dark brown or orange patches on the crown of parsnips, making them rot. It's often linked to poor drainage or damage to the crown. My solution? Firstly, ensuring that fantastic soil drainage we talked about earlier. Secondly, selecting resistant varieties like 'Avonresister' or 'Gladiator'. And thirdly, avoiding damage to the crowns when weeding or earthing up.
Slugs and Snails: These slimy characters are a particular problem for young seedlings, especially in our damp British climate. They can decimate a row of freshly germinated carrots or parsnips overnight. My approach is multi-faceted: I keep the area around the beds tidy to reduce hiding places, hand-pick them at dusk, and occasionally use beer traps for a more targeted attack. I'm not a fan of chemical slug pellets, preferring more organic methods in my backyard.
Weed Warriors: Keeping the Competition Down
Weeds are not just unsightly; they're direct competitors for the water and nutrients your root crops desperately need. They can also harbour pests and diseases. For young seedlings, a dense canopy of weeds can literally smother them out.
My strategy is constant vigilance. I regularly hand-weed between rows and around individual plants, especially when they are small. Once the plants are a bit bigger, I use a Dutch hoe for shallow weeding between rows, being careful not to go too deep and damage those precious developing roots. Mulching with a layer of well-rotted compost or straw can also suppress weeds significantly, retain moisture, and regulate soil temperature – a win-win in my book!
Comparison Table: Common Root Crop Woes & Randy's UK Solutions
Here’s a quick rundown of the main challenges I face here in the Midlands and how I tackle them:
| Pest/Disease Issue | Symptoms | UK Impact (Randy's Experience) | Randy's UK Solution |
|---|---|---|---|
| Carrot Fly | Rust-coloured tunnels in roots, stunted growth | My biggest headache, can ruin entire crops if unprotected. Especially bad in spring/early summer. | Physical barrier: Fine-mesh insect netting (Enviromesh) over hoops from sowing until harvest. Ensure it's sealed at the edges. |
| Parsnip Canker | Dark, rotting patches on parsnip crowns | Prevalent in damp, heavy soils or with crown damage. Makes parsnips inedible. | Resistant varieties: 'Avonresister', 'Gladiator'. Good drainage: Essential soil prep. Careful cultivation: Avoid damaging crowns when weeding/earthing up. Crop rotation. |
| Slugs & Snails | Chewed leaves, especially on young seedlings | A constant battle, particularly after rain or in damp conditions. Can wipe out new sowings. | Hand-picking: At dusk or dawn. Beer traps: Shallow dishes of beer. Clean beds: Remove debris where they hide. Mulch strategically: Can help, but avoid thick, damp mulches directly around seedlings. |
| Weed Competition | Stunted growth, poor root development | Reduces yields, steals nutrients. Can be overwhelming if left unchecked, especially for slow growers. | Regular hand weeding: When seedlings are small. Shallow hoeing: Between rows for larger plants. Mulching: With compost or straw to suppress weeds and retain moisture. |
The Sweet Reward: Optimal Harvesting & Storage for Flawless Produce
This is it, the moment you’ve been dreaming about since you first decided to tackle those stubborn UK soils! Pulling up your first perfect, unblemished carrot, parsnip, or daikon is an incredibly satisfying feeling. But knowing when and how to harvest, and then how to store your bounty, is key to truly enjoying your hard-won produce.
The Perfect Pull: Knowing When to Harvest
Timing is crucial for flavour and texture.
Carrots: Most carrot varieties are ready to harvest in 10-16 weeks from sowing. I tend to judge them by size – when the crowns start to show and they look like they’re a decent diameter, I gently scratch away a bit of soil to check. Don't be afraid to pull a test carrot! Younger carrots are often sweeter and more tender. I practice succession harvesting, pulling the largest carrots first and leaving the smaller ones to grow on, which helps extend the harvest period in my Midlands garden.
Parsnips: Ah, the parsnip. The common wisdom, and one I wholeheartedly agree with here in the UK, is that parsnips taste best after a good frost. The cold temperature converts their starches into sugars, making them incredibly sweet and flavourful. This means I typically don't start harvesting my parsnips until late autumn, usually November or even into December, after we've had a few decent frosts here. They can happily stay in the ground all winter, provided the soil doesn't freeze solid, and you can dig them as needed. This is a huge bonus for fresh winter veggies!
Daikon: These are much faster growers than carrots or parsnips, often ready in 6-10 weeks. I keep an eye on the size of the root emerging from the soil; generally, they're ready when they're about 2-4cm in diameter at the shoulder, depending on the variety. Don't leave them too long, especially in warmer weather, or they can become woody and overly pungent.
When harvesting, the technique is simple but important: loosen the soil around the root with a fork if your soil is still a bit firm (even after all your efforts!). Then, grasp the greens firmly at the base and pull gently but steadily. You want to avoid snapping the root or leaving part of it in the ground.

Storing Your Flawless Harvest
Once harvested, proper storage means your hard work continues to pay off for weeks, or even months.
Preparation: First, brush off most of the soil, but don't wash them until just before use, as moisture can encourage rot. Crucially, twist or cut off the green tops immediately. The greens will continue to draw moisture and nutrients from the root, making it go limp and lose flavour quickly.
Storage Methods for My UK Garden:
- In the Ground (Parsnips & some Carrots): As mentioned, parsnips are fantastic left in the ground and dug as needed throughout winter. Some hardier carrot varieties (like 'Autumn King') can also be left in situ under a thick layer of straw or leaves to prevent the soil from freezing too hard. This is my preferred method for winter parsnips, as it means truly fresh produce even in January!
- Sand/Sawdust Pit: For longer-term storage of carrots and parsnips, a traditional method works wonders. Layer your roots in a box or bin with damp sand or sawdust, ensuring they don't touch each other. Store this in a cool, dark, frost-free place – my shed or garage is perfect for this here in the Midlands. This keeps them firm and prevents dehydration.
- Fridge: For shorter-term storage (a few weeks), place unwashed carrots, parsnips, or daikon in a perforated plastic bag or a container with a damp paper towel in the crisper drawer of your fridge. This maintains humidity and prevents drying out. Daikon, in particular, stores well this way for 2-3 weeks.
Conclusion: The Deep Roots of Your Gardening Success
So there you have it, fellow green-fingered enthusiasts! From decoding the nuances of our unique UK soils to savouring that first crisp bite, mastering straight, deep-rooted carrots, parsnips, and daikon is an incredibly rewarding journey. It’s a testament to patience, observation, and a willingness to get your hands dirty – often quite literally!
I've shared my own triumphs and tribulations from my 800 sq ft Midlands garden, highlighting the techniques that have consistently yielded flawless harvests for me. Remember, the core principles are simple: impeccable bed preparation to give those roots an unobstructed path, precision sowing and diligent thinning for optimal growth, vigilant protection against our common UK pests and diseases, and finally, knowing when and how to harvest and store your bounty to maximise enjoyment.
Don't be disheartened if your first attempt isn't perfect. My early forked carrots were legendary (for all the wrong reasons!). Gardening is a continuous learning process, an ongoing experiment with nature. Each season brings new challenges – a late frost, an early heatwave, an unexpected pest outbreak – but with each challenge, we gain invaluable experience.
So, roll up your sleeves, embrace the mud, and get ready to experience the unparalleled satisfaction of pulling up your very own, perfectly formed root vegetables. There’s truly nothing quite like it. Happy growing, and I can't wait to hear about your own successes (and maybe a few funny failures!) in your British gardens. Go forth and grow deep!
