
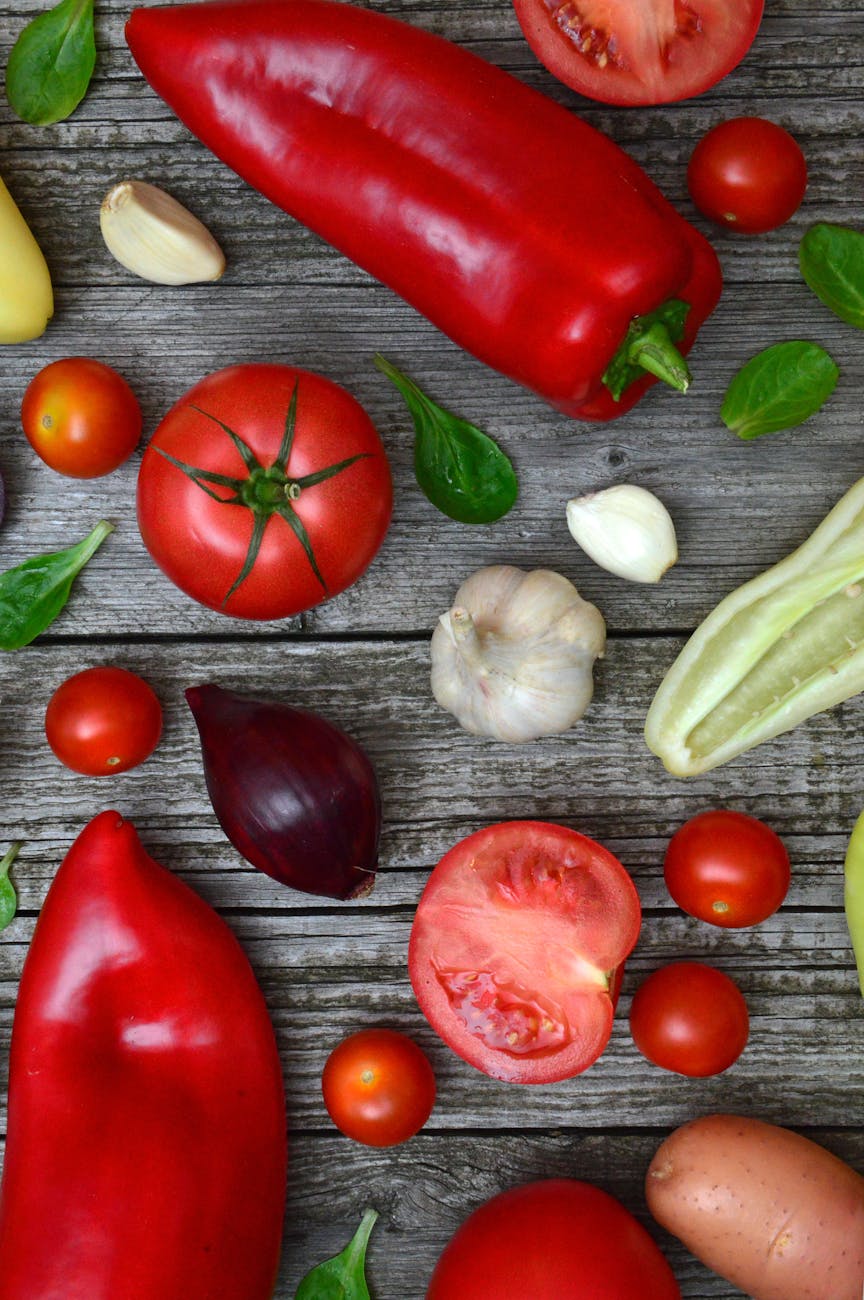
Introduction: Why Curing Your Garlic & Onions is a Game-Changer for UK Gardeners
Alright, fellow UK gardeners, let's talk about a game-changer that often gets overlooked once the thrill of harvest is done: curing your garlic and onions. When I first started my intensive gardening journey five years ago here in the Midlands, I was so chuffed with my first proper crop of 'Thermidrome' garlic and 'Stuttgarter Riesen' onions. I’d spent months nurturing them in my raised beds, battling slugs, and praying for just the right amount of British sunshine. But then, a few weeks after pulling them up, I started noticing soft spots, mould, and a general decline in quality. My heart sank. All that effort, only for them to rot away in the pantry!
That was my big "aha!" moment. I realised I was missing a crucial step, one that transforms a good harvest into a phenomenal, long-lasting supply of home-grown goodness. Curing isn't just some fancy term for professional growers; it's an absolutely essential process for us home gardeners in the UK, especially with our often damp and unpredictable climate. It's the secret sauce that locks in that pungent garlic flavour and that crisp, sweet onion bite for months on end, allowing you to enjoy your hard work right through winter and beyond. Believe me, learning this simple art has utterly revolutionised my kitchen and my gardening year.
Understanding the Curing Process: The Science Behind Long-Lasting Flavour and Storage
So, what exactly is curing, and why is it so vital? Think of it as putting your garlic and onions into a controlled state of dormancy. When you pull them from the ground, they're still alive and full of moisture, especially in their outer skins and necks. This moisture is their Achilles' heel when it comes to storage; it’s a perfect breeding ground for moulds, bacteria, and rot. Our goal with curing is to gently dry out these outer layers and, crucially, to seal off the neck of the bulb.
This drying process creates a tough, papery outer skin that acts as a natural barrier against pathogens and moisture loss. At the same time, the neck of the bulb, where the stem meets the bulb itself, dries and tightens, closing off the entry point for disease. It's a bit like creating a natural, self-sealing package. Without proper curing, that moist neck remains open, inviting all sorts of trouble, and the bulbs will quickly succumb to rot or sprout prematurely. I've learned this the hard way in my 800 sq ft Midlands garden; skipping this step, particularly with our British humidity, is a recipe for disappointment.
Let's break down the key differences between uncured and properly cured bulbs:
| Feature | Uncured Garlic/Onion (Freshly Harvested) | Cured Garlic/Onion (Ready for Storage) | Randy's UK Garden Notes |
|---|---|---|---|
| Moisture Content | High throughout the bulb, especially outer layers & neck. | Significantly reduced, particularly in outer skins and neck. | Crucial for preventing mould in our often damp UK climate. |
| Outer Skin | Soft, moist, often easily bruised or peeled. | Dry, papery, tight, protective; forms a natural barrier. | This barrier is key to warding off rot caused by humidity. |
| Neck of Bulb | Moist, open, still pliable. | Dry, shrunken, tightly sealed; no longer an entry point for pathogens. | A sealed neck is the single biggest factor for long-term storage here. |
| Flavour | Can be sharper, more pungent, less developed. | Mellows and concentrates, developing deeper, richer flavour. | I find 'Thermidrome' garlic's flavour truly shines after a good cure. |
| Storage Life | Very short (days to a few weeks), prone to rot/sprouting. | Long (months, up to a year for some varieties) in ideal conditions. | Aim for 6-9 months for garlic, 4-6 for onions in my shed. |
| Disease/Pest Resistance | Low; moisture invites fungal and bacterial issues. | High; dry skin and sealed neck deter most common storage problems. | Essential defense against common UK storage pests and diseases. |
Perfect Harvest: Timing is Everything for Optimal Garlic & Onion Curing
You can have the best curing setup in the world, but if your garlic and onions aren't harvested at the right time, you're already fighting an uphill battle. Timing is absolutely crucial for optimal curing and long-term storage, and it's something I've paid close attention to in my UK garden over the years. Pull them too early, and they won't have fully developed, leading to smaller bulbs that don't store well. Leave them in the ground too long, especially here in Britain with our unpredictable summer downpours, and the outer skins can split, making them vulnerable to disease and significantly reducing their storage life.
For garlic, I'm usually looking to harvest my 'Thermidrome' and 'Elephant' garlic around late July to early August here in the Midlands. The key visual cue I rely on is the foliage. When the bottom third to half of the leaves have turned yellow and started to flop over, it’s harvest time. Don't wait until all the leaves are brown and dry – that's often too late, and the outer wrappers will have begun to disintegrate. I learned this the hard way one particularly wet summer when I left a patch in too long; the bulbs started to split, and many didn't make it past October. Carefully loosen the soil around them with a fork, then gently lift them out, being careful not to bruise the bulbs.
Onions generally follow a similar pattern, but usually a little later, typically late August to early September for my 'Stuttgarter Riesen' and 'Red Baron'. The sure sign for onions is when their tops naturally fall over and start to yellow. This indicates that the plant has stopped putting energy into leaf production and is now directing all its goodness into the bulb. Once about 50-75% of the tops have fallen, I stop watering completely for about a week to allow the soil to dry out a bit, which helps with the initial drying process. Then, on a dry, sunny day, I gently lift them. I always try to pick a day when there's been no rain for at least 24-48 hours, if our British weather allows, to ensure they aren't waterlogged when they come out of the ground.
The Garlic Cure: Step-by-Step Guide to Drying and Preparing for Storage
Right, you've got your beautiful garlic bulbs out of the ground. Now for the crucial curing stage. This is where we transform them from fresh produce into those hard-wearing, flavour-packed bulbs that will see you through the darkest winter days. My approach has been refined over five years of trial and error in my Midlands garden, battling everything from scorching sun to persistent drizzle.
The absolute key to successful garlic curing is good airflow and protection from direct rain. Here's how I tackle it:
- Initial Shake-Off, No Washing: As soon as I lift the garlic, I gently shake off any loose soil. Resist the urge to wash them! Any added moisture at this stage is detrimental to curing. I also don't trim the roots or the tops yet – we want the plant to continue drawing nutrients from the leaves into the bulb for the first few days.
- Immediate Placement: I immediately move the bulbs to my chosen curing spot. For me, that's usually hanging in bunches of 5-7 in my greenhouse (if it's not too hot and humid) or in the eaves of my potting shed. Crucially, the location needs to be dry, well-ventilated, and out of direct sunlight. Direct sun can cook the bulbs, leading to soft spots, and rain will obviously negate all your drying efforts. Here in the UK, I've found that a slightly breezy, shaded spot is far better than a hot, stuffy one.
- The Drying Period (3-6 Weeks): This is the main event. For the next three to six weeks, you're just letting nature do its work. The outer skins will gradually dry and become papery, and the neck of the bulb will shrivel and seal. I check on them regularly, especially if we have a particularly muggy spell, just to ensure there's no mould developing. If I see any signs of mould on a bulb, I remove it immediately to prevent it from spreading. In a good year, with decent airflow, my 'Thermidrome' garlic usually takes about 4 weeks.
- Final Trim & Inspection: Once the skins are thoroughly dry and papery, and the neck is completely sealed (it should feel firm and dry, not pliable), it's time for the final trim. I use sharp secateurs to trim the roots down to about half an inch and the stems down to about 1-2 inches above the bulb. This makes them neat for storage. Before storing, I give each bulb a final inspection, discarding any that feel soft, show signs of disease, or haven't cured properly. These can be used immediately, but won't store well.
- Storage: Now your garlic is ready for its long sleep! I store mine in mesh bags or old onion sacks, hung in the coolest, driest, darkest part of my unheated garden shed. Good airflow is still important even in storage.
Here's a comparison of common garlic curing mistakes I've made or seen, versus the best practices I now follow for UK conditions:
| Randy's Common Garlic Curing Mistakes (UK Specific) | Randy's Best Practices for UK Garlic Curing | Why it Matters for British Weather |
|---|---|---|
| Leaving bulbs in the ground too long (wet summers). | Harvest when 1/3 to 1/2 of leaves yellow, on a dry day if possible. | Prevents splitting and rot in our unpredictable summer downpours. |
| Washing bulbs post-harvest. | Gently shake off soil, do NOT wash. | Introduces excess moisture, a breeding ground for mould in high humidity. |
| Curing in a damp, poorly ventilated shed. | Curing in a well-ventilated, dry, shaded spot (e.g., open-sided shed, airy greenhouse). | Essential to dry out bulbs thoroughly and prevent fungal growth. |
| Direct sunlight during curing. | Out of direct sun; indirect light is fine. | Direct sun can cook the bulbs and cause soft spots, especially in a greenhouse. |
| Trimming tops/roots immediately. | Trim roots/tops after curing is complete (3-6 weeks). | Allows nutrients to draw back into the bulb, improving quality. |
| Storing uncured or partially cured bulbs. | Only store fully cured bulbs with sealed necks and papery skins. | Uncured bulbs will rot quickly, spreading disease to others. |
5. Onion Perfection: Essential Steps for Curing Your Onions for Extended Freshness
Right, so we've nailed the garlic, which, let's be honest, is a bit more forgiving with its tough papery skins. Now it's time to talk about their milder, rounder cousins: onions. Curing onions is just as vital for long-term storage, and honestly, after a season of nurturing those beauties from tiny sets or seeds, you want them to last! I've learned that getting this right means enjoying my homegrown 'Sturon' and 'Red Baron' well into the winter months here in my Midlands kitchen.
The process for onions is quite similar to garlic, but with a few key differences I've picked up over the years in my 800 sq ft garden. The main goal is to dry down the neck and outer skins, creating a protective barrier against moisture and disease.
Harvesting Your Onions:
Just like garlic, timing is everything. For onions, you're looking for the tops to naturally start falling over and yellowing. This usually happens around late July to mid-August in my UK garden, depending on the variety and, of course, what our unpredictable British summer weather decides to throw at us. Don't rush it! Let about 50-75% of the tops fall over before you even think about lifting them. This allows the bulbs to really swell and mature properly.
The Curing Process for Onions:
- Lift with Care: When the time is right, gently lift your onions from the soil. I usually use a fork to loosen the soil around them to avoid damaging the bulbs. Knock off any excess soil – don't wash them!
- Initial Field Drying (Weather Permitting): If we're lucky enough to have a few days of dry, sunny weather (a rare gift here in the UK!), I'll leave them on the soil surface for a day or two. This kickstarts the drying process. However, if there's even a hint of rain, get them under cover immediately. I learned this the hard way one year when a surprise downpour turned my beautiful harvest into soggy, mould-prone disappointments.
- Under Cover Curing: This is where the real work happens. I spread my onions out in a single layer on wire racks in my greenhouse or sometimes even on old pallets in a dry, airy shed. The key is good air circulation. You want a warm (20-30°C is ideal), dry spot with plenty of airflow. I've found that hanging them in old tights or string bags also works brilliantly, as it maximizes air exposure around each bulb.
- The Wait: This stage can take anywhere from 2 to 4 weeks, sometimes longer if it's been a particularly damp growing season here in the UK. You'll know they're ready when the necks are completely dry and tight, the outer skins are papery and crisp, and they rustle when you handle them. The roots should also be brittle and dry.
- Trim and Store: Once fully cured, trim the roots back to about half an inch and the tops to about 1-2 inches. Leave a bit of stem to help seal the neck.
Here's a quick comparison of the curing conditions for garlic and onions, based on my experiences in the UK:
| Feature | Garlic Curing (UK Context) | Onion Curing (UK Context) |
|---|---|---|
| Harvest Sign | Lower leaves yellowing, 3-5 green leaves remaining. | Tops falling over, 50-75% yellowed/fallen. |
| Initial Drying | Often hung immediately, less field drying due to damp risk. | Brief field drying if weather permits, otherwise straight to cover. |
| Ideal Temp. | 25-30°C (warmer helps dry necks quickly). | 20-30°C (good warmth, but less critical than garlic). |
| Airflow | Absolutely critical; hanging in bundles is best. | Very important; single layer on racks or hanging in nets. |
| Humidity | Low (below 70%) to prevent mould. | Low to moderate (below 75%). |
| Duration | 2-4 weeks (can be quicker in very warm conditions). | 3-4 weeks (sometimes longer, especially for larger bulbs). |
| Ready When... | Necks dry, skin papery, cloves easily separable. | Necks dry and tight, outer skins papery and rustle. |
| Key UK Concern | Damp weather during harvest/curing can lead to mould. | Damp weather can slow curing, increase rot risk. |
6. Post-Cure Care: Storing Your Bounty for Maximum Shelf Life and Flavour
Right, you've put in the hard graft, the curing is done, and you're standing proud with a bounty of beautiful, papery-skinned garlic and onions from your UK garden. Now, the final, crucial step: proper storage. Get this wrong, and all your meticulous efforts can go to waste. I've learned that understanding the ideal conditions for each is key to keeping them fresh, firm, and flavourful for months, rather than finding them soft, mouldy, or sprouting in your pantry.
The aim here is to maintain that dormant state and prevent them from thinking it's time to grow again or, worse, rot.
Storing Cured Garlic
For my garlic, especially my beloved 'Elephant Garlic' and 'Wight Crystal', I've found the following works best here in the Midlands:
- Temperature: Cool is key, but not cold. Aim for around 10-15°C (50-60°F). My unheated shed, pantry, or even a cool corner of the garage works perfectly during the autumn and winter. Avoid the fridge; it's too cold and humid, which can trigger sprouting and soften the cloves.
- Humidity: Low is vital, ideally around 50-60%. High humidity is garlic's arch-nemesis, inviting mould and rot.
- Air Circulation: Keep that airflow going! I store my cured garlic in mesh bags, old onion bags, or even hang them in decorative braids (which look rather lovely, if I do say so myself). Avoid storing them in airtight containers, as this traps moisture.
- Darkness: Store them in a dark place to prevent sprouting. Light encourages growth, and we want them to stay dormant.
I usually hang my garlic braids from hooks in my shed – it's cool, dry, and dark enough, and I can just snip off a head when I need it. I've had garlic last well into March or April this way, sometimes even longer!
Storing Cured Onions
Onions, like my 'Stuttgart Giant' and 'Kelsae', have slightly different preferences to garlic, but the principles are similar:
- Temperature: Cooler than garlic, but again, not freezing. Around 0-10°C (32-50°F) is ideal. My unheated shed or garage is my go-to spot. A cool, dry cellar would be perfect if you're lucky enough to have one in your UK home.
- Humidity: Low to moderate, around 60-70%. They can tolerate slightly more humidity than garlic but still hate damp.
- Air Circulation: Absolutely essential. I store my onions in net bags, old tights, or baskets, hung up or placed on shelves where air can circulate freely around them. Never pile them up in a solid container.
- Darkness: Like garlic, store them in a dark place to prevent premature sprouting.
I've learned that keeping them separate from potatoes is a good idea. Potatoes release moisture and a gas that can encourage onions to sprout, and onions can make potatoes spoil faster. It's a classic UK storage mistake I made early on – lessons learned!

Regular Checks
No matter how perfectly you've cured and stored them, it's always a good idea to check your stored bounty regularly, say once a week or every couple of weeks. Look for any signs of softening, mould, or sprouting. If you find a bad one, remove it immediately to prevent it from affecting its neighbours. One bad apple (or onion!) really can spoil the bunch.
7. Troubleshooting & Common Mistakes: Avoiding Curing Catastrophes in Your Harvest
Let's be honest, gardening isn't always perfect, especially with our wonderfully unpredictable British weather! I've certainly had my share of curing mishaps over the years, and believe me, there's nothing more frustrating than seeing your hard-earned harvest go bad. Sharing these common pitfalls and how I've learned to avoid them might just save your precious garlic and onions.
1. Mouldy Garlic or Onions (The UK Gardener's Bane)
- The Mistake: This is usually down to insufficient air circulation or too much humidity during the curing process. One year, I tried to cure a huge batch of 'Wight Crystal' garlic in a slightly too-cramped corner of my shed during a particularly damp August. Disaster!
- My Solution: Ensure absolutely excellent airflow. If curing indoors, use fans if needed. Don't pile them up; spread them out or hang them individually. If the weather turns damp during initial field drying, get them under cover immediately – don't risk it! Keep an eye on humidity levels, especially in a greenhouse, which can get very humid after rain.
2. Soft or Mushy Bulbs
- The Mistake: Often linked to harvesting too late, especially for onions, or damage during harvesting. It can also happen if they get wet during curing.
- My Solution: Harvest at the right time – pay attention to those visual cues (yellowing tops, fallen leaves). Be gentle when lifting. If you accidentally nick a bulb, use that one first; it won't store well. Make sure your curing area is dry and protected from rain.
3. Premature Sprouting
- The Mistake: This is usually a sign that they're stored in conditions that are too warm, too bright, or too humid. Sometimes, it's just the variety or a natural inclination as they get older.
- My Solution: Store in cool, dark, dry conditions. For garlic, 10-15°C; for onions, 0-10°C. Keep them out of direct sunlight. If you see a few starting to sprout, use them up quickly! I've found that some varieties, particularly certain soft-neck garlics, are more prone to sprouting earlier than others in my garden.
4. Rotting from the Neck Down
- The Mistake: This is almost always caused by not allowing the neck to fully dry and seal during curing. If the neck stays moist, it's an open invitation for bacteria and fungi.
- My Solution: Be patient with the curing time! Don't rush it. Ensure the necks are completely dry, tight, and papery before trimming and storing. It's better to over-cure by a few days than under-cure.
5. Insufficient Drying (Still Green/Soft Necks)
- The Mistake: You've simply not given them enough time or the conditions weren't warm/airy enough. This is a common one in our cooler UK summers.
- My Solution: Extend the curing period. If your initial spot isn't doing the job, try moving them to a warmer, better-ventilated area – perhaps a sunny windowsill indoors for a few extra days (if dry enough) or a warmer part of the greenhouse. Good air circulation is paramount.
Remember, every gardener, even after 5+ years like me, makes mistakes. The key is to learn from them and adapt your methods to your specific UK garden and its microclimate. Our British weather certainly keeps us on our toes, but with a bit of attention and these tips, you'll be well on your way to perfectly cured garlic and onions!
Conclusion: Savour Your Season's Success!
Well, there you have it, fellow UK gardeners! We've journeyed through the entire process of mastering the art of curing garlic and onions, from perfect harvest timing right through to optimal long-term storage. What started as a simple IT worker's hobby for me has grown into an absolute obsession, and sharing these real-world experiences from my 800 sq ft Midlands garden is what it's all about.
Curing isn't just an extra step; it's the game-changer that transforms your fresh harvest into a lasting pantry staple. It's the difference between a few weeks of enjoyment and months of savouring your homegrown efforts. By investing a little time and attention into proper drying, you're locking in that incredible flavour, extending shelf life, and protecting your precious bulbs from rot and spoilage – all crucial for us dealing with the unique challenges of the British climate.
From the firm, papery skins of your cured garlic to the crisp, rustling outer layers of your onions, each bulb is a testament to your hard work and understanding of the plant's needs. Imagine reaching for your own homegrown 'Mona Purple' garlic in February or slicing into a 'Sturon' onion in January, knowing you grew it yourself right here in the UK! It's an incredibly satisfying feeling, believe me.
So, don't shy away from this essential post-harvest practice. Embrace the curing process, experiment with what works best in your shed or greenhouse, and enjoy the phenomenal reward: a continuous supply of your own delicious, long-lasting garlic and onions. Give it a go, share your successes (and even your learning curves!) with me in the comments, and let's keep those homegrown flavours alive all year round! Happy gardening!
