
Unlock the Secrets to Tiny Seed Success: Why Delicate Seeds Need Special Care
Hello fellow UK gardeners! Randy here, from my bustling 800 sq ft patch in the Midlands. If you're anything like I was when I first started out five years ago, the thought of sowing those minuscule, dust-like seeds probably fills you with a mix of dread and resignation. Petunias, Lobelia, Foxglove, even some of our beloved Carrots – they all seem to demand a level of precision that feels utterly daunting. I remember my early attempts; I'd scatter them, hope for the best, and usually end up with either nothing, or a dense, tangled mess of spindly seedlings that quickly succumbed to the dreaded damping off. It was soul-destroying!
But here's the thing: mastering tiny seeds isn't about magic, it's about understanding their unique needs and adapting your approach. After years of experimenting in my UK greenhouse and raised beds, dealing with our often-unpredictable British weather, I've learned that these delicate little bundles of potential simply don't have the same energy reserves as their larger counterparts. A big bean seed has a substantial food store to push through soil, but a tiny Petunia seed barely has enough to sprout, let alone fight its way out of heavy compost or survive a deluge of water.
What I've discovered is that success with these delicate beauties like 'Silver Fox' Foxglove or vibrant 'Trailing Blue' Lobelia comes down to three critical factors: a perfectly prepared environment, precise sowing, and incredibly gentle watering. Get these right, and you'll transform your tiny seed experience from frustrating to fantastically rewarding. I'm talking about trays full of strong, healthy seedlings ready to thrive in your UK garden, not just a few stragglers. Let me show you how I do it here in the Midlands.
The Right Foundation: Preparing Your Seed-Starting Environment for Tiny Seeds
Before you even think about scattering those precious seeds, setting up the right environment is absolutely crucial. Think of it like preparing a nursery for a newborn – everything needs to be just so. In my UK garden, especially for tiny seeds like 'Atomic Red' Carrots or 'Petunia grandiflora', I've found that the wrong compost or seed tray can doom your efforts before they even begin. Last season, I nearly lost an entire tray of 'Cherokee Purple' heirloom tomato seedlings (yes, even larger seeds benefit!) because I got complacent with my compost choice.
Choosing the Perfect Compost for Tiny Seeds
This isn't the time for heavy, clumpy garden soil or even general-purpose potting compost. Tiny seeds need a fine, sterile, and well-draining medium that also retains moisture consistently. I've experimented with various peat-free options widely available here in the UK, and consistency is key. You want something that's light enough for delicate roots to penetrate easily, but won't dry out in an hour, especially when our British spring can throw anything from warm sunshine to biting winds at us.
Here’s a breakdown of what I've tried and what works for me in my greenhouse:
| Compost Type | Pros for Tiny Seeds (UK Context) | Cons for Tiny Seeds (UK Context) | Randy's Take (Midlands Garden) |
|---|---|---|---|
| Specialist Seed Compost | Fine texture, usually sterile, good drainage & moisture retention. | Can be more expensive, sometimes harder to find peat-free options locally. | My go-to! Worth the investment for precious varieties like 'Silver Fox' Foxglove. |
| Fine Vermiculite | Excellent drainage, moisture retention, sterile, very light. | No nutrients, needs supplementing later. Can be dusty. | I often use a thin layer on top of my seed compost for tiny seeds; it works wonders. |
| Coir-based Compost | Sustainable, good water retention, lightweight. | Can dry out quickly if not managed, may need buffering. | Good, but I find it needs more vigilant watering in my greenhouse than specialist seed compost. |
| General Potting Compost | Readily available, cheaper. | Often too coarse, can contain weed seeds/pathogens, poor drainage for tiny seeds. | One mistake I made early on – led to significant damping off. Avoid for tiny seeds. |
| Garden Soil / Loam | Free! | Too heavy, full of weed seeds, pests, and diseases. Absolutely unsuitable. | Never, ever use for seed starting. I learned this the hard way! |
Selecting the Right Seed Trays
Just as important as the compost are your seed trays. For tiny seeds, I generally favour trays that allow for consistent moisture from below and have good drainage. Over the years, I've used everything from recycled plastic containers to purpose-built propagators.
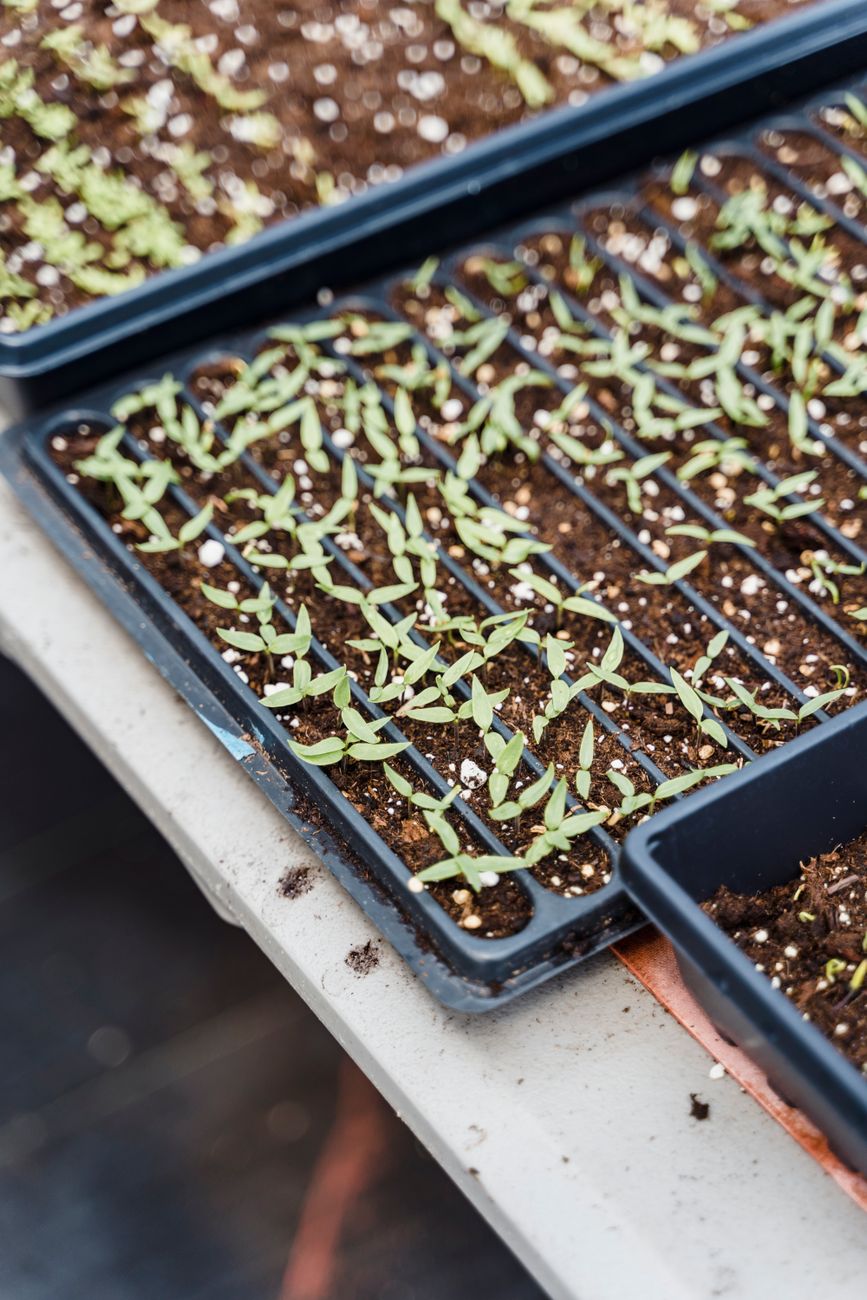
I find shallow trays or even recycled takeaway containers (with drainage holes added, of course!) work well for a broad scatter of seeds like Lobelia, which I then prick out. For slightly larger but still tiny seeds like Carrots, individual cell trays prevent overcrowding from the start.
| Tray Type | Pros for Tiny Seeds (UK Context) | Cons for Tiny Seeds (UK Context) | Randy's Take (Midlands Garden) |
|---|---|---|---|
| Open Seed Trays (Shallow) | Good for scattering many tiny seeds, easy to bottom water. | Can lead to overcrowding, harder to prick out individual plants. | Perfect for Lobelia or Petunia where I want a dense mat, then prick out clumps. |
| Small Cell Trays (24-40 cells) | Prevents overcrowding, easy to handle individual seedlings. | Each cell dries out faster, more fiddly to sow tiny seeds individually. | Great for 'Atomic Red' Carrots or Foxglove where I want strong, individual plants from the start. |
| Propagator (Heated/Unheated) | Consistent warmth/humidity, excellent for germination. | Can get too humid leading to damping off if not vented. | Essential for me in early spring here in the Midlands, especially for heat-loving Petunias. |
| Recycled Containers | Free, sustainable. | Requires adding drainage holes, inconsistent sizes. | I use these for experiments or less critical sowings, always with added drainage. |
Before sowing, always clean your trays thoroughly to prevent disease. I use a weak bleach solution, rinse well, and let them dry in the sun. Then, fill your chosen trays with your selected seed compost, gently firming it down to remove large air pockets but keeping it light. Leave about 1cm space from the top of the tray.
Precision Sowing Techniques: Mastering Even Distribution for Dust-Like Seeds
Now for the fun part – getting those tiny seeds evenly distributed without ending up with a clump in one corner and bare compost everywhere else! This is where many gardeners, myself included, falter initially. I remember trying to sow 'Petunia grandiflora' by just tapping the packet, only to find a solid green strip where they all landed, and empty space elsewhere. It's frustrating, but with a few tricks, you can master this.
The 'Sand Method': My Secret Weapon
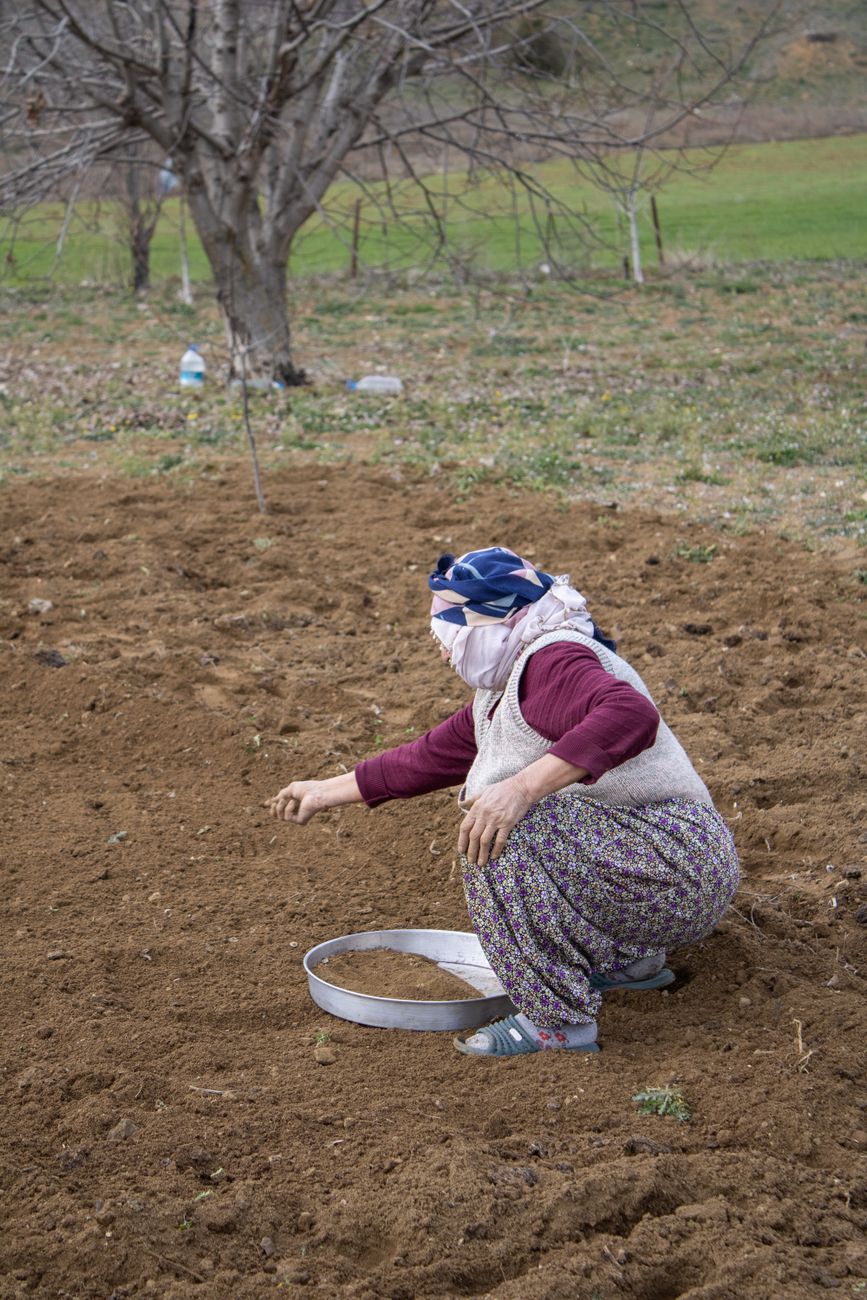
For truly dust-like seeds like Petunias, Lobelia, or even some herbs, the sand method is a game-changer. It sounds simple, but it really works wonders for achieving an even spread.
- Prepare your seeds: Pour a small amount of your tiny seeds into a small, dry bowl.
- Add fine, dry sand: Mix in about 5-10 times the volume of fine, dry horticultural sand. The sand provides bulk and visual contrast, making it much easier to see where you're sowing. I often use play sand (ensure it's clean and dry) if I'm out of horticultural sand.
- Mix thoroughly: Gently mix the seeds and sand together.
- Sprinkle evenly: Lightly sprinkle the mixture over your prepared compost surface. The sand helps to space out the tiny seeds, preventing them from clumping.
- No covering (usually!): For most tiny seeds, especially Petunias and Lobelia, they need light to germinate, so do not cover them with compost. If your seed packet specifically says to cover, use a very fine dusting of vermiculite (about 1-2mm) – this provides just enough cover without suffocating the tiny seedlings.
The 'Toothpick Method': For Precision Placement
For slightly larger, but still tiny seeds where you want very specific spacing, like my 'Atomic Red' Carrots in cell trays, or even individual Foxglove seeds, the toothpick method is incredibly effective, if a little fiddly.
- Dampen a toothpick: Moisten the tip of a toothpick or a fine craft stick.
- Pick up a single seed: Gently touch the damp tip to a single seed. It should stick to the toothpick.
- Place the seed: Carefully transfer the seed to your desired spot on the compost surface.
- Release: Gently nudge the seed off the toothpick with your finger or another dry toothpick.
- Repeat: Continue for all your seeds. This method takes time, but ensures perfect spacing and minimizes the need for thinning later, which can disturb delicate roots.
After sowing, gently mist the surface of the compost with water (we’ll get to watering in more detail next!) to settle the seeds. Then, place your trays in a warm, bright spot. For me here in the Midlands, that's usually on a heated mat in my greenhouse, especially in early spring when the air temperature can still be quite chilly.
The Art of Gentle Watering: Keeping Tiny Seeds Moist, Not Drowned
Once your precious tiny seeds are sown, watering becomes the next critical hurdle. This is where I've made some of my biggest mistakes over the years, often to the detriment of a whole tray of promising seedlings. Our unpredictable British climate means consistent moisture management is absolutely key, but a heavy-handed approach can be fatal. Too much water, and your tiny seeds can suffocate, float away, or succumb to damping off. Too little, and they'll simply dry out and perish. It's a delicate balance!
I vividly remember one particularly humid spring in my Midlands garden when I thought a quick splash from a watering can would be fine for a tray of 'Silver Fox' Foxglove. Within a day, half the tray had collapsed. Lesson learned: tiny seeds need moisture, not a monsoon.
Watering Techniques for Delicate Seeds
The goal is consistent, gentle moisture from below or a fine mist from above, without disturbing the seeds or compacting the compost.
| Watering Method | Pros for Tiny Seeds (UK Context) | Cons for Tiny Seeds (UK Context) | Randy's Take (Midlands Garden) |
|---|---|---|---|
| Bottom Watering (My Favourite!) | Prevents disturbance of seeds, promotes strong root growth, even moisture. | Requires monitoring water level, can take time for water to wick up. | My absolute go-to for all tiny seeds. I use a capillary mat in my greenhouse for consistency. |
| Fine Mist Spray Bottle | Very gentle, ideal for surface-sown seeds, prevents dislodging. | Can lead to surface drying if not thorough, may not penetrate deep enough. | Good for initial wetting of surface-sown seeds, but not for sustained moisture. |
| Capillary Matting | Consistent, hands-off moisture, great for multiple trays. | Can encourage algae if not kept clean, needs good air circulation. | I use this extensively in my greenhouse; it's a lifesaver for busy UK gardeners. |
| Watering Can with Fine Rose | More controlled than open pour. | Still risks dislodging seeds or creating channels if not extremely careful. | I only use this for established seedlings, never for freshly sown tiny seeds. |
| Automated Irrigation (e.g., drip) | Highly consistent, reduces manual effort. | Complex setup, can be overkill for small batches of tiny seeds. | I have a system for my tomatoes, but it's too aggressive for tiny seeds. |
For bottom watering, I place my seed trays into a larger tray (like a gravel tray) filled with about 1-2 cm of water. The compost will slowly wick up the moisture. Once the surface of the compost looks damp, I remove the tray from the water. This ensures the entire compost block is moist, not just the top layer. I check my trays daily, sometimes twice a day during warmer spells in my greenhouse, feeling the weight of the tray or gently touching the compost surface. If it feels light or dry, it's time for another drink.
Remember, the aim is consistently moist, not soggy. Good air circulation is also vital to prevent damping off, especially in our often-damp British climate. If you're using a propagator, make sure to vent it regularly once seeds have germinated. It's a fine balance, but one that pays dividends for healthy, thriving tiny seedlings!
Optimising Light & Temperature: Essential Conditions for Vigorous Germination
Once your tiny seeds are precisely sown and gently watered, the next crucial step in my UK gardening journey is dialling in the perfect light and temperature. This is where I've seen the biggest difference between a patchy germination and a tray full of vibrant seedlings ready to thrive in my Midlands patch. Here in Britain, we're often battling less-than-ideal natural light early in the season, and temperature fluctuations can be a real killer for delicate young plants.
For most of these tiny seeds – think Petunia, Lobelia, Foxglove, and even those notoriously slow carrots – a consistent, warm temperature is key to kickstarting germination. I aim for a steady 18-24°C (65-75°F). In my greenhouse, I rely on a heated propagator with a thermostat, especially in early spring when the nights are still biting. I remember one season trying to germinate Lobelia on a windowsill in March; the cold night temperatures stalled them completely. Lesson learned!
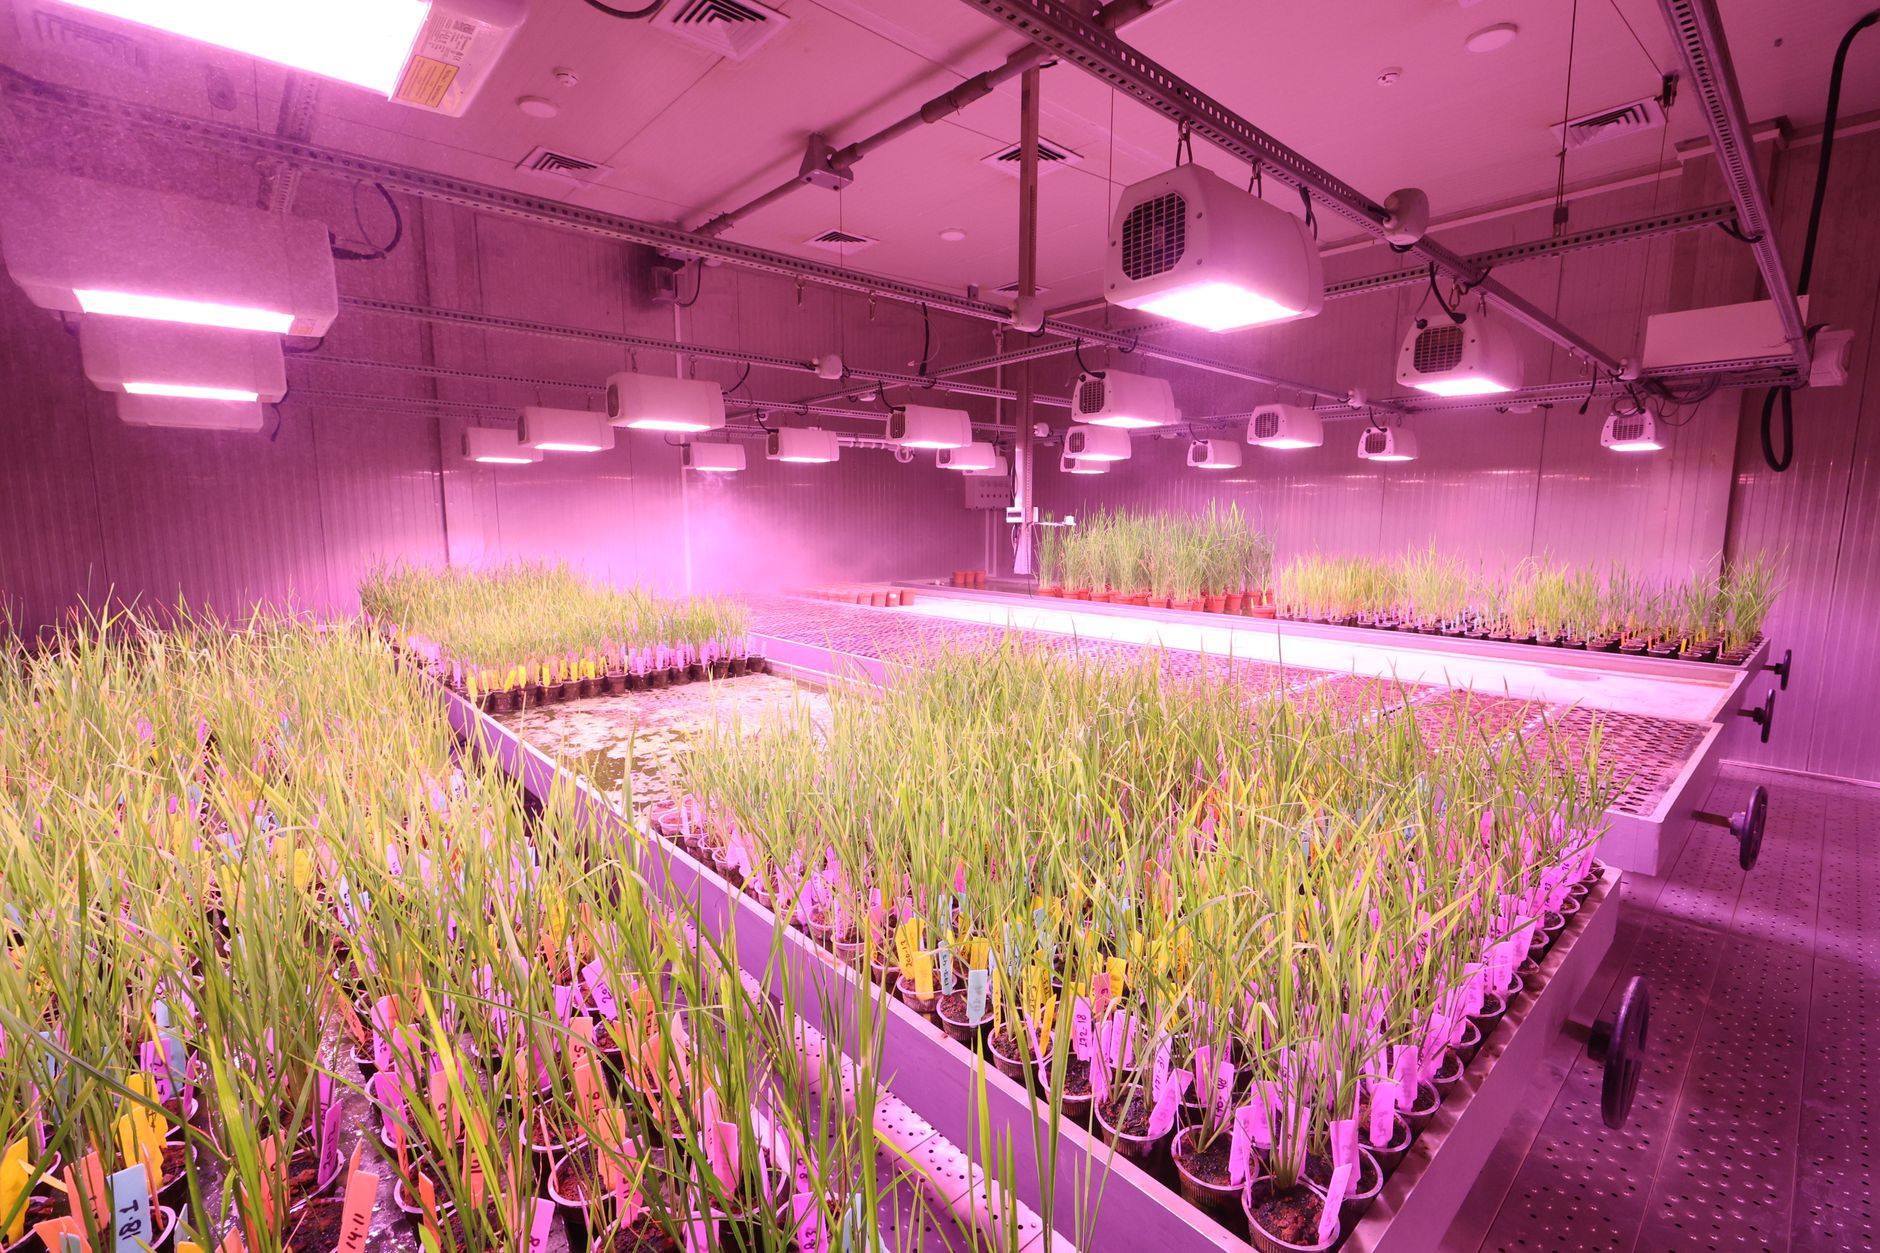
Light is just as vital, and for many tiny seeds, it's actually a germination trigger. Petunias and Lobelia, for instance, are known as "light germinators," meaning they need light to sprout. This is why we don't bury them deep! Once they sprout, they need bright, consistent light to prevent them from becoming leggy and weak. Natural windowsill light here in the UK often just isn't enough, especially on those grey, drizzly February and March days. I've personally invested in LED grow lights for my seedling setup, and it's been a game-changer. They provide the consistent intensity and duration that our natural light often lacks, especially crucial for young plants in their first few weeks. I set mine on a timer for 14-16 hours a day.
Here's a quick comparison of light and temperature considerations I've found useful in my UK garden:
| Condition | Natural Window Light (UK) | LED Grow Lights (My Setup) |
|---|---|---|
| Intensity | Varies wildly with weather, often too low in winter/spring | Consistent, adjustable, optimal for seedling growth |
| Duration | Limited by daylight hours (especially short in early spring) | Controllable (14-16 hours is ideal), independent of outside light |
| Heat Output | Minimal | Very low (LEDs are efficient), won't scorch seedlings |
| Legginess Risk | High without rotation and strong light | Low with proper placement and intensity |
| Cost | Free (but often insufficient) | Initial investment, low running costs for efficient LEDs |
| Condition | Room Temperature (UK Home) | Heated Propagator/Mat (My Greenhouse/Shed) |
|---|---|---|
| Consistency | Fluctuates, especially overnight; can be too cool | Consistent, thermostatically controlled (18-24°C target) |
| Germination Rate | Can be slow or patchy, especially for heat-lovers | Significantly higher and faster for most tiny seeds |
| Energy Use | Included with home heating | Specific, targeted heating; more efficient than heating a whole room for seedlings |
| Pest Risk | Lower (indoors) | Can be slightly higher in a humid propagator, requires good ventilation |
My advice? If you're serious about tiny seeds, a good grow light and some form of bottom heat (even a propagation mat) are worth their weight in gold for success in our variable British climate.
Post-Germination Care: Nurturing Your Delicate Seedlings to Strong Plants
Seeing those first microscopic green shoots emerge from the seed-starting mix is, for me, one of the most exciting moments in the gardening year. It’s like magic! But the journey isn't over; these tiny babies are still incredibly delicate and need very specific care to grow into robust plants.
The moment I see signs of germination, the first thing I do is remove the lid from the propagator or any covering. This is crucial for air circulation and preventing damping off, a fungal disease that can wipe out a whole tray overnight in humid conditions. I learned this the hard way when I lost a beautiful batch of Salvia seedlings in my first year. The air here in the Midlands can be damp, so good ventilation is non-negotiable.
Light Immediately After Germination
As soon as they sprout, those seedlings need intense light to prevent them from stretching and becoming 'leggy'. Leggy seedlings are weak and prone to snapping. If you’re using grow lights, move them closer – I typically aim for 2-4 inches above the top of the seedlings, adjusting daily as they grow. If you're relying on natural light, ensure they're in the brightest spot possible and rotate the trays regularly to give all sides equal light.
Watering Post-Germination
Continue with gentle watering techniques. Bottom watering is still my preferred method, allowing the seedlings to drink from below as needed. However, as they grow and develop true leaves, their water needs will increase slightly. I keep an eye on the weight of the trays and the colour of the compost – if it looks lighter, it's time for a drink. Always aim for consistently moist, not soggy, conditions.
Pricking Out Tiny Seedlings
This is the task that often makes people nervous, but it’s essential to give each seedling enough space to grow. Once your seedlings have developed their first set of "true leaves" (the leaves that look like the mature plant, not the initial cotyledons), they're ready to be pricked out.
I use a small dibber or even a toothpick for this. Gently hold one of the true leaves (never the stem, it’s too fragile!) and carefully lift the seedling, trying to get as much root as possible. Then, I transplant each seedling into its own small pot or a cell tray filled with a slightly richer, but still fine, potting mix. For Petunias and Lobelia, I often go into 4cm or 6cm cell trays. Carrots, of course, are direct sown, so no pricking out there! After transplanting, give them a gentle water and place them back under grow lights for a few days to recover.
First Feed & Hardening Off
About two weeks after pricking out, or when they're looking a bit bigger, I start giving my seedlings a very dilute feed – usually half-strength liquid seaweed or a balanced organic fertiliser. This provides the nutrients they need for strong growth.
Before they go out into the big wide world of my UK garden, they need to be 'hardened off'. This means gradually acclimatising them to outdoor conditions over 7-10 days. I start by putting them out in a sheltered spot in my backyard for a few hours on a mild, cloudy day, bringing them in overnight. Each day, I increase their exposure to sunlight, wind, and cooler temperatures. This step is absolutely vital for success in our often unpredictable British weather; skipping it can lead to shock and stunted growth. I've seen too many promising seedlings wilt after being plonked straight outside!
![IMAGE_PLACEAR_6: Pricked out tiny seedlings in cell trays UK]
Troubleshooting & Top Tips: Avoiding Common Pitfalls for Tiny Seed Growers
Even with the best intentions and meticulous care, gardening throws curveballs, especially here in the UK with our ever-changing climate. I’ve certainly had my share of challenges over my five years in the Midlands, and I’m always learning. Here are some common problems I've encountered with tiny seeds and my top tips to avoid them:
Common Pitfalls & Randy's Solutions:
- No Germination: This is a heartbreaker.
- My Mistake: Not checking seed viability, old seeds, incorrect temperature.
- Solution: Always use fresh seeds from a reputable UK supplier. Check the packet for specific temperature requirements and ensure your propagator or mat is consistent. Some seeds (like Foxglove) benefit from a cold stratification period – a few weeks in the fridge before sowing can trick them into thinking winter has passed.
- Damping Off: Seedlings suddenly collapse at the soil line.
- My Mistake: Overwatering, poor air circulation, unsterilised compost. I remember one damp spring, I lost an entire tray of Petunias this way because I left the propagator lid on too long.
- Solution: Use sterile seed-starting mix. Ensure excellent air circulation immediately after germination – remove lids, use a small fan. Water from the bottom and avoid overwatering. A sprinkle of horticultural grit on top can also help.
- Leggy Seedlings: Long, spindly stems reaching for light.
- My Mistake: Insufficient light, too much heat. Early in my journey, I underestimated how much light our British winters lack.
- Solution: Provide bright, consistent light for 14-16 hours a day (grow lights are best). Keep temperatures appropriate – warm for germination, slightly cooler (16-18°C) once sprouted to encourage stocky growth.
- Slow Growth/Yellowing: Seedlings look stunted or unwell.
- My Mistake: Lack of nutrients after true leaves appear, incorrect pH of compost.
- Solution: After true leaves develop, start with a very dilute liquid feed. Ensure your potting mix is designed for seedlings; sometimes, the initial seed-starting mix runs out of nutrients.
Randy's Top Tips for UK Tiny Seed Success:
- Embrace Bottom Heat: For most tiny seeds, consistent warmth is a game-changer for germination, especially in our cooler UK springs. A heated propagator or mat is a worthwhile investment.
- Invest in Good Light: Don't rely solely on a UK windowsill for tiny seedlings. LED grow lights will give you stronger, stockier plants every time, combating those dark British days.
- Sterilise Everything: Clean trays, pots, and use fresh, sterile seed-starting mix. This is your best defence against fungal issues like damping off.
- Patience is a Virtue (and a Necessity): Tiny seeds can take time. Don't give up if you don't see sprouts in a few days. Some, like Foxglove, can be slow.
- Label, Label, Label! Seriously, you think you’ll remember what’s what, but once they’re tiny green specks, it’s impossible. I use permanent markers and plastic labels for everything in my 800 sq ft garden.
- Don’t Rush Hardening Off: This is perhaps the most critical step before planting out in the UK. Gradually introduce your seedlings to outdoor conditions. Our British weather can turn on a dime, and shocking your young plants can set them back significantly, or even kill them.
- Learn from Every Batch: Every year in my UK garden is a learning experience. Keep a small journal – what worked, what didn't, specific dates, weather conditions. This will build your own invaluable knowledge base for our specific climate.
Conclusion: Tiny Seeds, Mighty Rewards
So there you have it – my tried-and-tested approach to mastering tiny seed germination here in my UK Midlands garden. It might seem like a lot of steps, a bit fiddly perhaps, but I promise you, the reward is utterly worth the effort. From the precise sowing of those dust-like Petunia seeds to watching your delicate Lobelia seedlings flourish under the grow lights, and finally transplanting strong Foxglove plants into your borders, every stage is incredibly satisfying.
I've learned, often through my own glorious failures (like that Lobelia disaster, or the time I tried to germinate carrots in freezing compost!), that success with these delicate seeds isn't about luck. It's about understanding their specific needs for a sterile environment, gentle moisture, consistent warmth, and abundant light. It's about paying attention to detail and adapting your techniques to our unique British climate.
Don't be intimidated by their size. Armed with these techniques – from preparing the perfect seed-starting mix and precision sowing, to gentle watering, optimising light and temperature, and nurturing those delicate seedlings – you're set for success. There’s a profound joy in knowing you’ve brought these tiny specks of life into being, nurturing them from dust to robust plants that will grace your garden with beauty and bounty.
Go on, give it a try! Pick a packet of those tiny Petunia, Lobelia, Foxglove, or even those tricky carrot seeds, and embark on your own journey. I guarantee, the first time you see those minuscule true leaves unfurl, you'll feel an immense sense of accomplishment. Happy growing, fellow UK gardeners!
