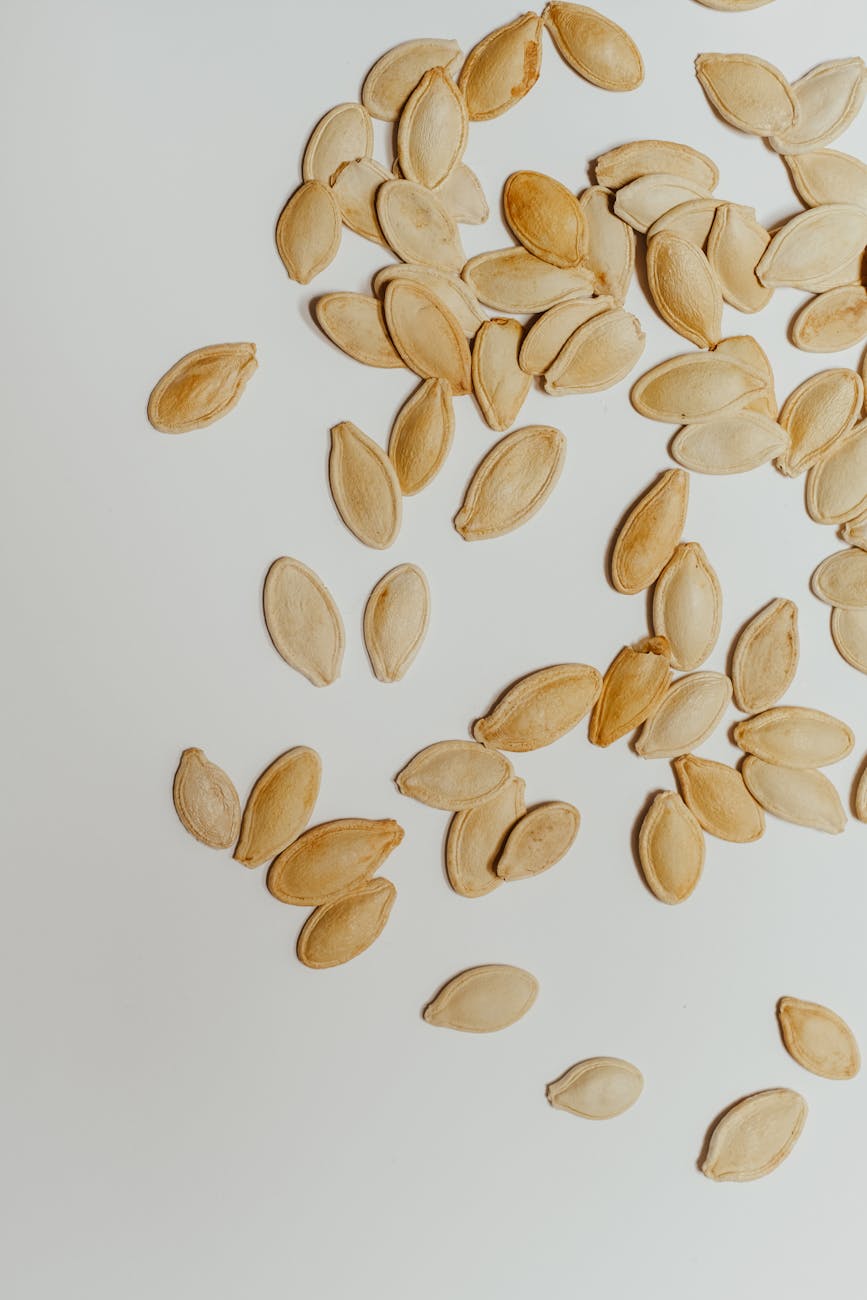
It's Randy here, and if you're anything like me, the thought of saving your own seeds is both thrilling and a little daunting. Especially here in the UK, where our growing season can feel like a precious, fleeting gift, ensuring every seed you sow has the best possible chance of germinating is absolutely paramount. For years, I’ve been meticulously saving seeds from my 800 sq ft backyard haven in the Midlands – from those glorious heirloom tomatoes in my greenhouse to the sprawling cucumbers and squash that take over my raised beds. I started out like many, just drying them on kitchen roll, and honestly, the germination rates were… hit and miss, to say the least. It was frustrating, especially after putting in all that effort to grow the parent plants.
That's when I stumbled into the world of wet processing, and let me tell you, it was a revelation. It felt a bit like a science experiment – which, coming from my old IT background, I actually quite enjoyed! This method, involving a little fermentation magic, has completely transformed my seed-saving game, particularly for those fleshy fruits like tomatoes, cucumbers, and squash. I've seen my germination rates soar, and I’m now far more confident that the seeds I'm tucking away for next spring are robust and ready to thrive, even when our British weather decides to throw a curveball. If you're keen to give your home-saved seeds the very best start and ensure they’re viable for years to come, then stick with me. I’m going to walk you through exactly how I do it in my UK garden.
Unlock Superior Seed Viability: Why Wet Processing is Key for Your UK Garden
For a long time, I just wasn't getting the consistent results I craved from my home-saved seeds. I'd carefully collect them from my prized 'Marmande' tomatoes, spread them out to dry, store them diligently, and then come spring, I'd find myself with patchy germination trays. It was disheartening, especially when a particularly damp summer meant fewer fruits, and thus fewer seeds, to begin with. I needed a way to guarantee a higher success rate, something that felt more robust and reliable for our sometimes-fickle British climate. That's where wet processing, specifically fermentation, steps in.
I've learned over my five years of intensive gardening that for certain types of seeds – those from fruits like tomatoes, cucumbers, and squashes – simply scraping them out and drying them isn't enough. These seeds come encased in a gelatinous coating, and while it protects them inside the fruit, it can actually inhibit germination once dried. Think of it as a natural germination inhibitor. Beyond that, the surface of these seeds can harbour diseases that, while not affecting the current fruit, could spell disaster for your seedlings next season. This is particularly crucial for me, as I pour so much effort into growing heirloom tomatoes like 'Black Krim' and 'Gardener's Delight' in my greenhouse; I absolutely can't afford to pass on a disease from one year to the next. Wet processing addresses both of these issues head-on, giving you cleaner, healthier seeds with a much higher chance of sprouting. It’s a little extra effort, yes, but in my experience here in the Midlands, the payoff in superior viability and healthier plants is absolutely worth it.
Understanding the 'Why': Benefits of Fermentation for UK Seeds
So, why does this fermentation process work so well for seeds from fruits like tomatoes, cucumbers, and squash? It's all down to a couple of really clever natural processes. Firstly, that gooey, jelly-like substance surrounding the seeds? It contains germination inhibitors. In the wild, this stops the seeds from sprouting inside the fruit. Fermentation breaks down this layer, effectively stripping away the inhibitors and giving the seeds a much clearer path to germination once they’re sown. It’s like giving them a head start before they even hit the compost.
Secondly, and perhaps even more importantly for us UK gardeners battling damp conditions and various fungal issues, fermentation acts as a powerful cleaning agent. Any fungal spores or bacterial diseases clinging to the surface of the seeds are often destroyed during this controlled decomposition. I learned this the hard way when I had a minor blight scare on some outdoor tomatoes; cleaning those seeds properly became a top priority. By getting rid of these potential pathogens, you're not only increasing the immediate germination rate but also dramatically reducing the risk of damping-off or other seedling diseases in your propagating trays next spring. This means healthier, stronger seedlings right from the get-go, which is essential for giving them the resilience they need to cope with our often-unpredictable British weather.
Here’s a quick comparison of wet vs. dry processing for common UK garden seeds:
| Feature | Wet Processing (Fermentation) | Dry Processing (Simple Drying) |
|---|---|---|
| Seed Types | Fleshy fruits (Tomatoes, Cucumbers, Squash, Melons) | Dry fruits/pods (Beans, Peas, Lettuce, Peppers, Radishes) |
| Germination Inhibitors | Effectively removed by fermentation | Often remain, potentially reducing germination |
| Disease Control | Fermentation kills many surface-borne pathogens | No active pathogen removal; diseases can persist on seed surface |
| Seed Cleanliness | Seeds are thoroughly cleaned, free of pulp and debris | Seeds may retain some pulp, affecting storage and hygiene |
| Viability & Storage | Significantly improved long-term viability (3-5+ years) | Good viability for appropriate seeds, but can be shorter for others |
| Process Difficulty | Slightly more involved, requires monitoring | Simpler, less time-consuming initially |
| Time Investment | Moderate (2-5 days fermentation + drying) | Low (drying only) |
| My UK Garden Use | Essential for my heirloom tomatoes, 'Marketmore' cucumbers, and 'Crown Prince' squash | Used for my runner beans, 'Crimson Flowered' broad beans, and 'Little Gem' lettuce |
Gather Your Kit: Essential Tools for Wet Seed Cleaning at Home
Right, before we get our hands delightfully mucky, let's talk tools. The beauty of wet seed processing is that you don't need any fancy, expensive equipment. Most of what you'll use, I'd bet you already have knocking about in your kitchen cupboards, just like I did when I first started. As a former IT chap, I appreciate a simple, effective toolkit, and this process definitely delivers on that front.
Here’s what I typically gather on my kitchen counter when it’s time to process seeds from my 'Sungold' tomatoes or a particularly good 'Spacemaster' cucumber:
- Ripe Fruit: This is crucial! You want the ripest fruit possible, as the seeds will be fully mature and ready. For my tomatoes, that means letting them get really soft on the vine or in the greenhouse before picking.
- Jars or Containers: Small, clean glass jars (jam jars, pickle jars, etc.) are perfect. I usually use a few different sizes depending on the amount of seeds I'm processing. Make sure they're transparent so you can keep an eye on the fermentation.
- Water: Just tap water will do the trick.
- Sieve or Strainer: A fine-mesh kitchen sieve is absolutely essential for rinsing the seeds. I have a couple of different sizes, and the really fine ones are best for tiny tomato seeds.
- Spoon or Knife: For scooping out the seeds and pulp.
- Labels and Pen: Trust me on this one – label everything immediately! I've made the mistake of thinking I'd remember which jar was which, especially when processing several varieties of squash. 'Butternut' and 'Uchiki Kuri' can look surprisingly similar when they're just starting to ferment!
- Paper Plates, Coffee Filters, or Non-Stick Baking Paper: These are for the final drying stage. Avoid kitchen roll as the seeds will stick to it. I've found old paper plates work brilliantly for my larger squash seeds, and coffee filters are perfect for tomato seeds.

That's it! Nothing too complex, just good old kitchen essentials. Having everything laid out and ready makes the whole process smoother and more enjoyable.
The Fermentation Stage: Step-by-Step for Tomato, Cucumber & Squash Seeds
This is where the magic happens! The fermentation stage is critical, and while the general principle is the same for tomatoes, cucumbers, and squash, there are a few subtle differences in timing and approach based on my experience in my UK garden. What works here in Britain, with our often cooler ambient temperatures, might mean slightly longer fermentation times than you read in a generic guide. Always trust your nose and eyes!
Here's how I tackle it, broken down by type:
Tomatoes (My Greenhouse Babies!)
- Extracting the Seeds: I usually cut my ripe tomatoes in half horizontally. Then, using a spoon, I gently squeeze and scoop out the seeds and the surrounding jelly directly into a clean glass jar. Don't worry about getting every last bit of pulp, a little extra is fine. I find a small teaspoon is ideal for my 'Moneymaker' and 'Gardener's Delight' seeds.
- Adding Water: I add a splash of water to the jar, just enough to cover the seeds and pulp, maybe an inch or two above the seed mass. This helps get the fermentation going.
- Fermentation: I give it a good stir, then loosely cover the jar (a piece of kitchen roll secured with an elastic band works well, or just rest the lid on top – you want some airflow). I then place it in a consistently warm spot in my kitchen, usually near the window, but out of direct sunlight. In my relatively cool Midlands kitchen, this typically takes 2-4 days. You'll start to see a foamy, mouldy layer develop on top, and it will smell a bit yeasty or slightly sour, but not putrid. This is a good sign! I always check it daily.
- Ready to Rinse: The seeds are ready when most of the pulp has sunk to the bottom, the mouldy layer is quite thick, and the viable seeds have also sunk. If seeds are still floating, they might be hollow or unviable, but I always rinse them anyway just in case.
Cucumbers & Squash (My Raised Bed Conquerors!)
- Extracting the Seeds: For cucumbers and squash, I cut the fruit lengthwise and scoop out the seeds and stringy pulp into a separate jar. For a large 'Crown Prince' squash, this can be quite a lot of material! I make sure to scrape the cavity clean.
- Adding Water: Again, I add enough water to cover the seeds and pulp. For squash, which has more fibrous material, I sometimes add a bit more water to ensure everything is submerged and can ferment properly.
- Fermentation: Similar to tomatoes, I cover the jar loosely and place it in a warm spot. Because cucumbers and squash have tougher seed coats and often more surrounding pulp, their fermentation can sometimes take a little longer – usually 3-5 days in my experience. Keep an eye out for that mouldy layer and a slightly sour smell.
- Ready to Rinse: Once the pulp has broken down and sunk, and the viable seeds have also settled at the bottom, they're ready for the next stage.

Here's a quick guide to fermentation specifics for these popular UK garden seeds:
| Seed Type | Pulp Extraction Method | Water Ratio (approx.) | Fermentation Time (UK kitchen) | Visual/Olfactory Cues for Readiness |
|---|---|---|---|---|
| Tomato | Scoop out seeds & jelly | 1 part seeds/pulp to 1-2 parts water | 2-4 days | Foamy top layer, slight mould, yeasty/sour smell, seeds sunk, clear liquid |
| Cucumber | Scoop out seeds & stringy pulp | 1 part seeds/pulp to 2-3 parts water | 3-5 days | Similar to tomato, often thicker mould, seeds sunk |
| Squash | Scoop out seeds & fibrous pulp | 1 part seeds/pulp to 2-3 parts water | 3-5 days | Robust mould layer, strong sour smell, seeds clearly separated and sunk |
Remember, these timings are a guide based on my experience here in the UK. If your kitchen is particularly warm, it might be quicker; if it's chilly, it could take a day or two longer. The key is to watch for those visual cues and that distinctive sour, but not rotten, smell. If it starts to smell truly putrid, you've gone too far, and it's best to discard and try again. One mistake I made early on was leaving a batch of 'Pattypan' squash seeds too long during a heatwave; they ended up smelling awful and weren't viable. So, regular checking is crucial!
Rinsing & Separation: Achieving Pristine Seeds from the Pulp
Once your seeds have had their fermentation party – usually a couple of days in my Midlands greenhouse, though it can be quicker indoors – it's time for the big clean-up. This stage is absolutely crucial for separating those precious seeds from any remaining pulp, mould, or duds. I’ve learned over my five years in the UK garden that thorough rinsing directly impacts your seed's cleanliness and, ultimately, its long-term viability.
What you're looking for is for the viable seeds to sink and the non-viable ones, along with the pulp and any surface mould, to float. This is pure magic, really, and it's how I know my 'Shirley' tomato seeds are ready for their next step.
My Rinsing Method: A Simple Sieve and Running Water
Here’s how I tackle this in my tiny UK kitchen:
- Pour and Swirl: Carefully pour the fermented mixture into a measuring jug or a deep bowl. Give it a gentle swirl to dislodge anything clinging to the bottom.
- Initial Skim: You’ll likely see a layer of pulp, mould, and often some lighter, non-viable seeds floating on top. Gently skim this off using a spoon or even just by carefully tilting the bowl and letting it run over the edge. I learned this trick after trying to scoop out every bit, which just made more mess!
- Water Works Wonders: Add fresh, cool tap water to the bowl, filling it up. Stir gently. The good, heavy seeds will sink to the bottom almost immediately. The lighter material will float.
- Decant and Repeat: Carefully pour off the floating debris and cloudy water, leaving the sunken seeds behind. Repeat this process – adding fresh water, stirring, pouring off the floaters – until the water runs clear and you’re left with nothing but clean seeds at the bottom. For my 'Moneymaker' tomatoes, this usually takes 5-7 rinses. For larger squash seeds like 'Crown Prince', it might be fewer, but you still need to be diligent.
- Final Strain: Once the water is crystal clear, pour the seeds and the remaining water through a fine-mesh sieve. Make sure the holes are small enough that your seeds won't escape! For my smallest tomato varieties, I use a really fine tea strainer. Give the sieve a good shake and tap to drain as much water as possible.

Sometimes, especially with squash or cucumber seeds, you might find some stubborn bits of flesh still clinging on. I've found that a gentle rub between your fingers under running water can help dislodge these. Just be careful not to damage the seed itself. This is all about patience, particularly when dealing with the rewards of a good British summer harvest!
Crucial Drying Techniques for Long-Term Seed Storage Success
This is where many a good batch of seeds has met its demise in my UK garden. You can do all the fermentation and rinsing right, but if you don't dry your seeds properly, you're just inviting mould, rot, and a very disheartening germination test next spring. I've personally lost a whole batch of my cherished 'Black Krim' heirloom tomato seeds one damp autumn because I thought leaving them on a windowsill was enough. It wasn't.
The goal is to remove as much moisture as possible without cooking them or letting them mould. This means good air circulation and avoiding direct heat or sunlight.
My Go-To Drying Methods in the UK
The Plate/Tray Method (My Favourite):
- Preparation: Spread your rinsed seeds in a single layer on a non-stick surface. I use old ceramic plates, baking trays lined with parchment paper, or even paper plates. Avoid kitchen roll directly under the seeds, as they can stick to it fiercely when dry. This happened to me once with 'Marketmore' cucumber seeds, and it was a proper faff to peel them off without damage.
- Placement: Place the plates in a warm, dry spot with good air circulation. In my house in the Midlands, this is often on top of a bookshelf in a spare room, or on a high shelf in the kitchen – anywhere away from direct sunlight, radiators, or damp corners.
- Airflow: Crucial for UK conditions. If it's a still day, I sometimes set up a small, low-powered fan to gently blow across the seeds for the first 24-48 hours. This prevents any surface moisture from lingering and encouraging mould.
- Turning: Stir or gently flip the seeds once or twice a day to ensure even drying.
- Drying Time: This varies hugely depending on the seed type, ambient humidity (hello, British weather!), and temperature. Tomato and cucumber seeds typically take 1-2 weeks. Larger squash seeds might take 2-3 weeks or even longer. They should be completely dry, brittle, and snap rather than bend.
Using a Dehydrator (Carefully!):
- I've experimented with my food dehydrator for seeds, but you have to be very careful with the temperature. High heat can kill the embryo.
- Low Heat Only: Use the absolute lowest setting your dehydrator has, ideally below 30°C (85°F). I usually stick to around 25°C.
- Monitor Closely: Check frequently. This method can be much faster, but there's a higher risk of damage. I mostly reserve this for when I'm really up against it with damp weather.
Drying Method Comparison for UK Gardeners
Here's a quick comparison of the methods I've tried and tested in my UK garden:
| Feature | Plate/Tray Method (Air Drying) | Dehydrator Method (Low Heat) |
|---|---|---|
| Pros | Safest for viability, no special equipment, cost-free, reliable if done right. | Faster drying, good for humid UK conditions, consistent environment. |
| Cons | Slower, susceptible to high UK humidity, requires monitoring for mould, takes up space. | Risk of heat damage to seeds, requires specialist equipment, uses electricity. |
| Randy's Verdict | My preferred method for most seeds. Reliable, low-risk, and what I recommend for fellow UK gardeners. | Use with extreme caution and only on the lowest setting. Good for very damp periods. |
| Best For | All seed types, especially heirloom tomatoes and delicate varieties. | Larger, robust seeds like squash when time is limited and humidity is high. |
The "Snap Test": Knowing When They're Truly Dry
How do you know if your seeds are really dry? The "snap test" is your friend. Take a few seeds and try to bend them. If they bend, they need more drying time. If they snap cleanly and feel brittle, they're ready. For smaller seeds like tomatoes, it’s more about feeling completely hard and not pliable at all. I made the mistake of thinking my 'Costoluto Fiorentino' seeds were dry enough after only a week during a particularly humid stretch, and they went mouldy in storage. Never again! Patience is key.
Store Smart: Ensuring Viability for Next Year's UK Harvest
You've put in all that hard work – fermenting, rinsing, and meticulously drying. Now, don't let it go to waste with poor storage! Proper storage is the final piece of the puzzle to ensure those precious seeds from your UK garden remain viable for seasons to come.
The enemies of seed viability are heat, light, and moisture. Your goal is to keep them cool, dark, and dry.
My Storage System in the Midlands
Label, Label, Label! This is non-negotiable. I use small self-adhesive labels or even just a permanent marker directly on the seed packet. Each label includes:
- Variety Name: E.g., 'San Marzano' Tomato, 'Patisson Golden' Squash.
- Date Collected: E.g., Aug 2023.
- Any Notes: E.g., "from greenhouse plant 2".
I learned this the hard way after mixing up my 'Gardeners Delight' with my 'Sungold' one year. What a surprise that was!
Seed Packets: Once completely dry, I transfer my seeds into small paper coin envelopes or purpose-made seed packets. Paper is great because it allows for a tiny bit of breathability, preventing any residual moisture from getting trapped (though they should be bone dry before this step!). I avoid plastic bags for long-term storage, as they can trap any minuscule moisture and lead to mould.
Airtight Containers: I then place these individual seed packets into a larger, airtight container. This could be a sturdy plastic food container, a biscuit tin, or even a glass jar with a good seal. The airtight container adds an extra layer of protection against humidity fluctuations, which we get plenty of here in Britain.
Desiccant Packs (Optional but Recommended): To combat our often-damp UK climate, I often pop a small desiccant pack (like the silica gel packets you find in new shoes or electronics) into my main storage container. These absorb any stray moisture, adding another layer of security. Just make sure they are food-safe if you're using them near food seeds.
Cool, Dark Location: The ideal storage spot is cool and dark. I store my seed collection in a cupboard in our spare room – it stays consistently cool, dark, and relatively dry all year round. Avoid storing them in sheds (too much temperature fluctuation, too damp in winter) or near heat sources like radiators. A fridge can work too, but ensure the seeds are extremely dry and in an airtight container to prevent moisture absorption from the humid fridge air.
How Long Will They Last?
The good news is that properly processed and stored seeds can remain viable for several years!
- Tomatoes: Typically 4-6 years, sometimes even longer. I've had 'Ailsa Craig' seeds germinate well after 7 years.
- Cucumbers: Around 5-10 years.
- Squash: Often 4-6 years.
Always remember that viability gradually decreases over time, so while older seeds might still germinate, the percentage will likely be lower. I always try to use my oldest seeds first each spring.
My Conclusion: Your Journey to Seed Saving Success
Mastering wet-processed seed cleaning has been one of the most rewarding journeys in my five years of intensive gardening here in the UK Midlands. It started as a bit of an experiment in my 800 sq ft backyard, trying to save seeds from my beloved heirloom tomatoes in the greenhouse, and it's grown into a core part of my annual gardening cycle.
You've now walked through the entire process: understanding the 'why' behind fermentation, gathering your simple kit, carefully fermenting your tomato, cucumber, or squash seeds, meticulously rinsing away the pulp, and finally, drying and storing them for long-term success. I've shared my own experiences, the successes, and yes, the soggy failures that have taught me valuable lessons about dealing with our glorious, unpredictable British weather.
Saving your own seeds isn't just about saving a bit of cash; it's about connecting more deeply with your plants, adapting varieties to thrive in your specific UK garden conditions, and preserving the unique genetics of your favourite edibles. There's nothing quite like planting a seed that you've personally processed, knowing that you've helped carry that plant's legacy forward.
So, go forth, fellow UK gardener! Embrace the satisfying, slightly messy, and ultimately incredibly rewarding process of wet seed cleaning. Your future self, and your future garden, will thank you for it. Happy seed saving!
