
Introduction: Why Bigger Garlic Bulbs Matter for Your UK Garden
If there’s one thing I’ve learned in my five years of intensive UK gardening, it’s that there’s immense satisfaction in pulling up a harvest that truly thrives in our unique British climate. And when it comes to garlic, that satisfaction comes in the form of fat, robust bulbs, packed with flavour. Here in my 800 sq ft Midlands garden, garlic is a staple. I use it in practically everything, from the simplest pasta sauce to slow-cooked roasts, and nothing beats the taste of homegrown.
But let's be honest, we've all been there: you diligently plant your cloves in autumn, nurture them through the winter, only to unearth disappointing, small, or even split bulbs come summer. I certainly have! When I first started out, my garlic harvests were often a bit pathetic, and I'd wonder if our unpredictable UK weather was just too much for them. I tried different varieties like 'Wightstar' and 'Mersley White', thinking the problem was my choice, but the bulbs remained stubbornly modest. It was disheartening, especially after all that effort.
That's when I really started digging into the specifics – experimenting, observing, and learning from every success and failure right here in my own backyard. I discovered that a couple of key mid-season interventions can make an absolutely monumental difference to your final bulb size. We're talking about taking your garlic from "meh" to "wow!" And trust me, once you've experienced the joy of harvesting a truly magnificent garlic bulb that you've grown yourself, you'll never look back. It not only means more cloves for your kitchen but also stronger, healthier bulbs that store better through our damp British winters. So, if you're ready to transform your garlic harvest and impress your neighbours (and yourself!), let's dive into the optimal timing and techniques that have worked wonders in my UK garden.
Identifying Garlic Scapes: Your First Step to Larger Bulbs
Right, let's get down to business. The first, and arguably most crucial, step in maximising your garlic bulb size is understanding and identifying garlic scapes. Many new gardeners, myself included when I first started, aren't even aware these exist, or what their purpose is. Think of them as the plant's attempt to reproduce sexually, forming a flower stalk and eventually seeds. But for us home gardeners, especially those of us growing hardneck varieties here in the UK, these scapes are a signal and an opportunity.
Garlic scapes typically emerge from hardneck garlic varieties – the ones that usually perform so well in our colder UK climates, like 'Red Duke' or 'Elephant Garlic' (though technically a leek, it acts like a giant hardneck). Softneck varieties, like 'Solent Wight', which are often easier to braid, generally don't produce true scapes, or if they do, they're much less prominent. In my raised beds, I predominantly grow hardneck varieties because I love their robust flavour and the reliable way they handle our British winters.
So, what are you looking for? Around late May to early June, here in the Midlands, you'll start to see a sturdy, central stalk emerging from the middle of your garlic plant. It's distinctively different from the flat, leafy green foliage. This scape usually starts as a straight, rigid shoot, but as it grows, it will often curl and coil into a beautiful, almost whimsical spiral or 'pig's tail' shape. At the very tip of this curl, you'll notice a small, bulbous swelling, which is the spathe or flower head, where tiny bulbils (small, aerial cloves) would eventually form if left to mature.
The reason these scapes are so important is simple: energy. If you allow the plant to put its energy into producing a flower stalk and seeds, that's energy being diverted away from the main event – the underground bulb we want to eat! By removing the scape, you're essentially telling the plant, "No, mate, all your efforts go into plumping up that bulb!" It's a game-changer for size, trust me. I learned this the hard way one year when I left a few plants un-scaped as an experiment, and the difference in bulb size was stark. The scaped plants produced bulbs easily 30-40% larger.
 (https://example.com/garlic_scape_identification_uk.jpg)
The Golden Window: Precisely When to Remove Garlic Scapes for Maximum Size
Knowing what a scape looks like is one thing, but when to remove it is where the magic truly happens. This isn't just about hacking them off as soon as you see them; there's a "golden window" that, in my experience in the UK, makes all the difference to achieving those truly impressive garlic bulbs. Get it right, and your bulbs will be significantly larger. Get it wrong, and you might either lose out on size or even inadvertently stress your plant.
The key is to remove the scape when it has formed one or two full curls, but before it has started to straighten out and certainly before the flower head begins to swell significantly or split open. In my Midlands garden, this typically falls in early to mid-June, though our famously unpredictable British weather can always shift this a week or two either way. You need to be vigilant and check your plants regularly during this period.
Why this specific timing? If you remove the scape too early, before it's developed much of its curl, the plant might still try to produce another, smaller scape, wasting energy. Alternatively, the plant might not have fully committed its energy to scape production yet, and removing it too soon doesn't give it a clear signal to shift all resources to the bulb. On the other hand, if you wait too long – if the scape has straightened out or the flower head is visibly swollen – the plant has already expended a significant amount of energy on that reproductive effort. The goal is to catch it at that sweet spot where the plant has fully committed to scape growth, but not yet spent too much energy on it.
I've experimented with this over the years. One season, I removed some scapes almost immediately they emerged, just a tiny stub. The resulting bulbs were decent, but not as big as the ones where I waited for the first full curl. Another year, I got busy and missed the window on a few plants; the scapes had straightened out significantly. Those bulbs were noticeably smaller, almost as if I hadn't removed the scape at all. It was a clear lesson for me on the importance of timing.
Here's a detailed comparison table based on my UK gardening experience:
| Scape Removal Timing | Description (My UK Observations) | Pros for UK Gardeners | Cons for UK Gardeners | Resulting Bulb Size (My Experience) |
|---|---|---|---|---|
| Too Early | Scape is just emerging, straight, or with only a slight bend. No distinct curl yet (e.g., late May). | Some energy saved from early on. | Plant may attempt to produce a secondary, smaller scape, wasting energy. May not fully redirect resources. | Good, but often not optimal. Slightly smaller than 'optimal'. |
| Optimal Window | Scape has formed 1-2 full curls but hasn't started to straighten. Flower head is still tight and small (e.g., early-mid June in Midlands). | Maximises energy redirection to bulb. Scapes are still tender and delicious for cooking. | Requires careful observation in our variable UK weather. Can miss window if not vigilant. | Significantly larger and firmer bulbs. This is the goal! |
| Too Late | Scape has straightened out considerably, and the flower head is noticeably swollen or has started to split (e.g., late June onwards). | Still prevents seed formation. Scapes might be tougher, less palatable. | Significant energy already diverted from bulb to scape/flower. Less effective for bulb sizing. | Smaller bulbs, often not much larger than if scape was left on. |
The takeaway? Keep a close eye on your garlic plants from late May. When you see those beautiful, curling scapes, mark your calendar or make a mental note. That perfect window usually only lasts for about a week or two, so being observant is key!
Mastering the Snip: Proper Technique for Scape Removal Without Harming Your Plant
Once you've identified that optimal golden window, the next step is to actually remove the scapes. This might sound straightforward, but there's a proper technique that ensures you don't inadvertently damage your precious garlic plant, inviting disease or stressing it unnecessarily. Remember, we're trying to help the plant, not hurt it!
First off, let's talk tools. You want something clean and sharp. My go-to is a pair of bypass secateurs that I always wipe down with rubbing alcohol before and after use. A sharp knife can also work, but secateurs give you more control and a cleaner cut, which is crucial for preventing disease entry. A dull or dirty tool can crush the plant tissue, leaving an open wound that's susceptible to fungal infections or pests – something we definitely want to avoid, especially with our often damp British weather creating perfect conditions for such issues.
Now, for the cut itself. You want to snip the scape as low as possible above the top-most leaf. Don't cut into the leaves themselves, and definitely don't pull or snap the scape off, as this can tear the plant tissue and potentially damage the growing bulb below ground. The goal is a clean, precise cut. Imagine where the scape emerges from the cluster of leaves, and make your cut just above that point.
I learned this the hard way during my first couple of seasons. I was so eager to get rid of them, I sometimes just yanked them off. Big mistake! A few times, I noticed the plant looking a bit ragged afterwards, and I even had one or two instances where the main stalk seemed to struggle. It taught me that gentle precision is far better than brute force. Another time, I used my old, rusty secateurs without cleaning them, and a few plants later showed signs of stress. Now, hygiene is paramount in my garden, especially when making cuts.
The reason for cutting above the top leaf is twofold: it removes the energy-sapping flower stalk, and it leaves the plant's main structural integrity intact. The remaining leaves are vital for photosynthesis, which is still feeding that developing bulb. You want to ensure the plant can continue to gather as much energy as possible in the final weeks before harvest.
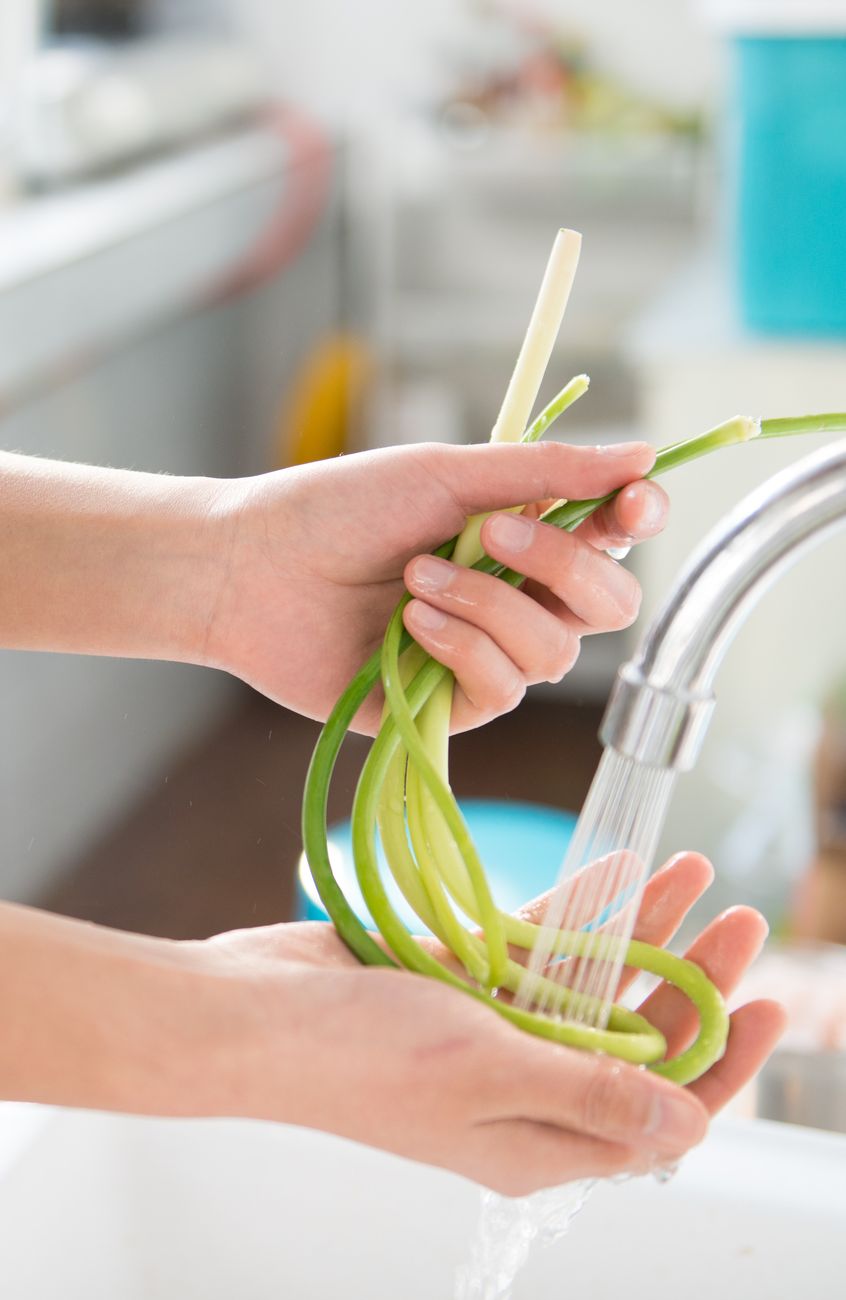
And what to do with the removed scapes? Don't even think about composting them! Garlic scapes are an absolute gourmet delight. They have a milder, sweeter garlic flavour, with a hint of green onion. Here in my UK kitchen, I love to chop them up and sauté them with butter, roast them with new potatoes, or make a vibrant scape pesto. It's a fantastic bonus harvest and a brilliant way to enjoy the fruits (or rather, scapes!) of your labour even before the main garlic harvest. So, snip them cleanly, collect them, and get cooking!
(https://example.com/how_to_remove_garlic_scape_correctly.jpg)
Mid-Season Nutritional Boosts: Feeding Your Garlic for Optimal Growth in UK Soil
Right, so you've snipped those scapes, giving your garlic the green light to focus all its energy on bulbing up. But even with the best intentions, our British soil, especially here in the Midlands, can sometimes need a helping hand. I’ve learned this the hard way! For the first couple of years, I just let my garlic get on with it after planting, assuming the soil was good enough. The bulbs were fine, but never quite the monsters I dreamed of. That's when I started experimenting with mid-season boosts.
Once those scapes are off, typically from late May to early July depending on your planting time and our wonderfully unpredictable UK spring, your garlic switches gears. It’s less about leaf growth now and all about plumping up those cloves. This means its nutritional needs shift. While nitrogen is crucial early on for strong leafy growth, too much nitrogen now will give you lush foliage and smaller bulbs. What we really want is a good dose of phosphorus (P) for root and bulb development, and potassium (K) for overall plant health and disease resistance.
In my 800 sq ft garden, I’ve found that a balanced approach works best, often leaning slightly heavier on the P and K side for that crucial bulbing phase. I usually give my garlic a feed about two to three weeks after scape removal. This gives the plant time to recover from the snip and really absorb those nutrients.
Here’s a quick rundown of some of the options I’ve tried and what works well in our UK climate:
| Feed Type | Best For UK Gardeners | Randy's Take (from my Midlands garden) |
|---|---|---|
| Comfrey Tea | Organic, P&K rich, free if you grow comfrey! | My absolute favourite! I swear by this. I brew it in a trug with rainwater for a couple of weeks. It’s stinky but incredibly effective, providing a gentle, balanced boost. I dilute it 1:10 with water. |
| Tomato Feed | Readily available, high in P&K, easy to use. | A brilliant standby if you don't have comfrey. Most tomato feeds (like a general NPK 4-2-8 or similar) are perfect for this bulbing stage. I use a liquid one and follow the dilution rates on the bottle. |
| Bone Meal | Slow-release phosphorus, good for long-term health. | I tend to incorporate this at planting time for a slow release, but a light top-dressing before the bulbing stage can be beneficial if your soil is very poor in phosphorus. Rake it in gently. |
| Wood Ash | Good source of potassium, raises soil pH. | Use sparingly and only if your soil is acidic, as it raises pH. I sometimes sprinkle a very thin layer from my wood burner around plants, but it's not my primary feed for garlic. Check your soil pH first! |
One year, I decided to skip the mid-season feed entirely on one of my raised beds, just to see what would happen. Big mistake! The garlic in that bed was noticeably smaller than the garlic in the beds I’d fed with my trusty comfrey tea. It really hammered home to me that even in decent soil, a little extra love goes a long long way for those big, juicy bulbs.

Essential Watering and Mulching: Keeping Your Garlic Thriving Through Summer
Feeding your garlic is only half the battle; consistent moisture is the other, especially as we head into what can be a notoriously dry spell for many parts of the UK. Here in the Midlands, our summers can swing wildly from torrential downpours to weeks of parched earth. Garlic, particularly when it's swelling its bulbs, absolutely hates inconsistent watering.
The key is to keep the soil consistently moist, but never waterlogged. I aim for about an inch of water per week, either from rainfall or from my watering can. During a dry spell, I check the soil moisture by sticking my finger about an inch or two deep. If it feels dry, it’s time to water. I water deeply and slowly, aiming for the water to penetrate at least 6-8 inches down to encourage deep root growth. Shallow watering just encourages surface roots, making your plants more vulnerable to drought.
My biggest watering mistake when I started was either not watering enough during dry spells, or overwatering too frequently, leading to soggy soil. Garlic roots need oxygen, and waterlogged soil suffocates them, making them prone to rot and disease. It's a fine balance, but feeling the soil is always your best guide.
This is where mulching becomes an absolute game-changer in a UK garden. Mulch is like a blanket for your soil – it helps retain moisture, keeps soil temperatures more stable, and suppresses those pesky weeds that compete for water and nutrients. For my garlic, once it's established and after the scape removal, I lay down a good 2-3 inch layer of organic mulch.
I've experimented with various mulches over the years. My current go-to is straw, as it breaks down nicely, adds organic matter, and doesn't tend to bring in weed seeds like some hay can. Wood chip is another good option, though it can take longer to break down. Last summer, during a particularly dry spell in July, the difference between my mulched garlic beds and a small experimental patch I left un-mulched was astonishing. The un-mulched garlic suffered from stress, showing yellowing tips, and the bulbs were noticeably smaller. The mulched garlic, however, remained vibrant and healthy. It's one of those simple techniques that yields huge dividends, especially with our unpredictable British weather!

Beyond Scapes and Feeds: Other Factors for a Bumper Garlic Harvest in Your UK Garden
While scape removal and timely feeding are massive players in bulb size, there are a few other bits and bobs that, from my five years of intensive UK gardening, I've found to be absolutely crucial. These might seem small, but they add up to a truly bumper harvest.
Weed Control: The Silent Competitors
This is perhaps the most overlooked factor, and honestly, one of my early struggles. When I first started, I was so focused on planting and watering that I'd let the weeds get a bit out of hand. Big mistake! Weeds are fierce competitors. They steal water, nutrients, and precious sunlight from your garlic plants. A thick carpet of weeds can seriously stunt your garlic's growth, leading to smaller, less impressive bulbs.
I've learned that regular, gentle weeding is key. I try to hoe or hand-weed my garlic beds at least once a week, especially after rain when the soil is soft. If you’ve mulched, this job becomes much, much easier, as the mulch suppresses most of the weed seeds. Don't pull weeds too close to the garlic plant, as you might disturb its roots. My method is usually a shallow hoeing or carefully pulling by hand if they're right next to the stem. One year, I had a particularly aggressive patch of bindweed invade a garlic bed – it was a nightmare to remove and definitely impacted the size of that year's harvest. Never again!
Pest and Disease Watch: Early Detection is Key in the UK
Our UK climate, with its damp spells, can sometimes invite fungal issues like garlic rust. I’ve battled with it myself! Garlic rust appears as orange-brown spots on the leaves. While a minor case usually won't destroy your crop, a severe infection can weaken the plant and reduce bulb size. My approach is to ensure good air circulation between plants (proper spacing helps here), avoid overhead watering if possible, and remove any heavily infected leaves to stop the spread.
Another pest I keep an eye out for is the allium leaf miner. It's becoming more prevalent in the UK. The larvae tunnel into the leaves, weakening the plant. The best defence is prevention, usually with fine insect mesh (Enviromesh) placed over the bed from autumn planting until late spring. I've only had a minor encounter with them, luckily, but I know gardeners who've lost entire crops. Vigilance is key!
Sunshine and Spacing: Giving Them Room to Breathe and Bask
Garlic needs full sun – at least 6-8 hours a day. While our British summers can sometimes be a bit on the cloudy side, choosing the sunniest spot in your garden is paramount. I've found that garlic grown in even partial shade in my Midlands garden just doesn't bulk up as well. It's a sun-lover, through and through.
Finally, spacing. I know we all want to cram in as much as possible into our raised beds, especially in smaller UK gardens like mine. But giving your garlic plants enough room (I aim for 4-6 inches between cloves, in rows about 8-12 inches apart) is vital. Good spacing ensures each plant gets adequate light and air circulation, which helps prevent disease and allows the bulbs ample room to expand without competing with their neighbours. It's a balance between yield per square foot and individual bulb size, and I've found that generous spacing almost always leads to bigger, healthier bulbs.
Conclusion: Your Journey to Giant Garlic Bulbs in the UK
Phew! We've covered a fair bit, haven't we? From those crucial first steps of identifying and removing garlic scapes at just the right moment, through giving your plants the mid-season nutritional boosts they crave, to ensuring consistent watering and mulching, and finally, keeping an eye on weeds, pests, and spacing – it's all about providing the optimal conditions for your garlic to thrive here in the UK.
I've shared everything I've learned, often through trial and error (and plenty of cups of tea contemplating my raised beds!), from my own 800 sq ft Midlands garden. Growing impressive garlic isn't some secret art; it's a combination of understanding your plants' needs and responding to the unique challenges and opportunities our British climate throws at us.
Remember, every garden is different, and what works perfectly for me here in the Midlands might need a slight tweak for your specific soil or microclimate. But by following these principles – the golden window for scape removal, smart mid-season feeding, diligent watering and mulching, and thoughtful care – you'll be well on your way to harvesting the biggest, most flavourful garlic bulbs you've ever grown.
So, go on, give it a go! Pay attention to your garlic plants, experiment a little, and enjoy the satisfaction of pulling up those magnificent, home-grown bulbs. I promise you, the taste of your own 'grown-in-Britain' garlic is unparalleled. Happy gardening, fellow enthusiasts! I'd love to hear your own garlic-growing experiences and tips in the comments below!


