
Thriving in the Shadows: Unlocking Productive Vegetable Gardens in Partial Shade
When I first traded my IT desk for a trowel five years ago, diving headfirst into the wonderful world of UK home gardening, I pictured endless rows of sun-drenched tomatoes and sprawling courgettes. Then I moved into my 800 sq ft backyard here in the Midlands, and reality, along with a rather imposing sycamore from next door, quickly set in. My dream garden, as glorious as it was in my head, had significant patches of partial shade. For a while, I thought my ambitions for a productive vegetable patch were doomed.
But here’s the thing about being an ex-IT guy: you learn to troubleshoot. You learn to find solutions to tricky problems, even if that problem is a lack of sunshine on your prize-winning lettuce. Over the past five years, through countless experiments in my raised beds and even in the greenhouse for my heirloom tomatoes, I’ve learned that partial shade isn't a death sentence for a productive vegetable garden – it's just a puzzle waiting to be solved. In fact, some of my most surprising successes have come from areas I initially thought were too dark. It’s all about working with your garden’s unique conditions, not against them, especially with our often-unpredictable British weather.
I'm obsessed with squeezing every last bit of potential out of my little patch, and that means making every square foot count, even the shadier ones. I've discovered that with the right strategies, you can absolutely achieve bountiful harvests, even if you don't have all-day sun. Today, I want to share my top three game-changing approaches that have transformed my partially shaded spots into surprisingly productive oases: strategic plant selection, smart pruning of nearby obstacles, and clever techniques to bounce more light into those dimmer corners. Trust me, if I can do it in my bustling Midlands garden, you can too!
Choosing Wisely: Top Vegetable Varieties for UK Partial Shade Gardens
This is probably the biggest breakthrough for any gardener dealing with limited sun: understanding that not all vegetables are sun-worshippers. When I first started, one mistake I made was trying to grow everything everywhere. My early attempts at sun-loving peppers in a spot that only got four hours of morning sun were, shall we say, utterly depressing. Tiny plants, no fruit, just a lot of wasted effort and compost. I learned the hard way that understanding your shade – whether it’s morning sun, afternoon sun, or dappled light – is crucial.
For my 800 sq ft garden here in the UK, I've found that plants needing 4-6 hours of sun (often morning sun, which is less intense than afternoon sun) can thrive beautifully. The key is to select varieties known for their shade tolerance and to accept that yields might be slightly smaller or take a little longer to mature than their full-sun counterparts. But a harvest is a harvest, right? I've grown many of these for 3+ years in my UK garden, and here’s what I’ve learned truly works well in our British climate.
Randy's Top Picks for UK Partial Shade
| Vegetable Type | Specific UK Variety (Randy's Pick) | Ideal Shade Type (Hours/Day) | Randy's Experience/Tips for UK Conditions | Best For |
|---|---|---|---|---|
| Leafy Greens | Lettuce 'Winter Gem' (or 'Salad Bowl') | 3-5 hours (morning sun best) | 'Winter Gem' holds up well to cooler UK temps. I sow successionally for continuous harvest. 'Salad Bowl' is cut-and-come-again. | Salads, sandwiches |
| Spinach | Spinach 'Perpetual' | 3-5 hours (dappled or morning) | My absolute favourite! It's incredibly resilient, rarely bolts in cooler shade. Keep it watered, especially in drier spells. | Steaming, stir-fries, salads |
| Kale | Kale 'Cavolo Nero' (Tuscan) | 4-6 hours (tolerant of afternoon) | Surprisingly good in partial shade. The leaves might be a bit smaller, but the flavour is still fantastic. Very hardy for UK winters. | Chips, soups, sautéing |
| Swiss Chard | Swiss Chard 'Bright Lights' | 4-6 hours (any shade type) | The colours are vibrant even in lower light! It provides a steady harvest and tastes great. It's less prone to bolting than spinach in warmer UK summers. | Steaming, sautéing |
| Radishes | Radish 'French Breakfast' | 4-5 hours (morning sun best) | Quick and easy! They appreciate the cooler soil in partial shade, which can prevent them from getting too hot and woody in our UK summers. | Quick snacks, salads |
| Carrots | Carrot 'Paris Market' (round) | 5-6 hours (dappled or morning) | Round varieties like 'Paris Market' don't need deep soil and are more forgiving in slightly less sun. They might take longer to size up. | Roasting, snacking |
| Beetroot | Beetroot 'Detroit Dark Red' | 5-6 hours (dappled or morning) | I've had good success with beetroot in partial shade. You'll get smaller roots, but the leaves are also edible and delicious. | Roasting, pickling, salads |
| Peas | Pea 'Mangetout Dwarf Grey Sugar' | 5-6 hours (morning or dappled) | Dwarf varieties are better for shade as they need less energy. Keep them well-watered. Yields are decent, not massive, but worth it. | Snacking, stir-fries |
| Bush Beans | Bush Bean 'Provider' | 5-6 hours (morning or dappled) | I've found bush beans do okay in partial shade, especially if it's morning sun. They might produce a bit less, but they're still productive. | Steaming, sautéing |
| Potatoes | Potato 'Charlotte' (early/salad) | 5-6 hours (morning or dappled) | Early varieties can do surprisingly well. Plant them in large containers in the shadiest spots. Harvest when flowers appear. | Boiling, salads, roasting |

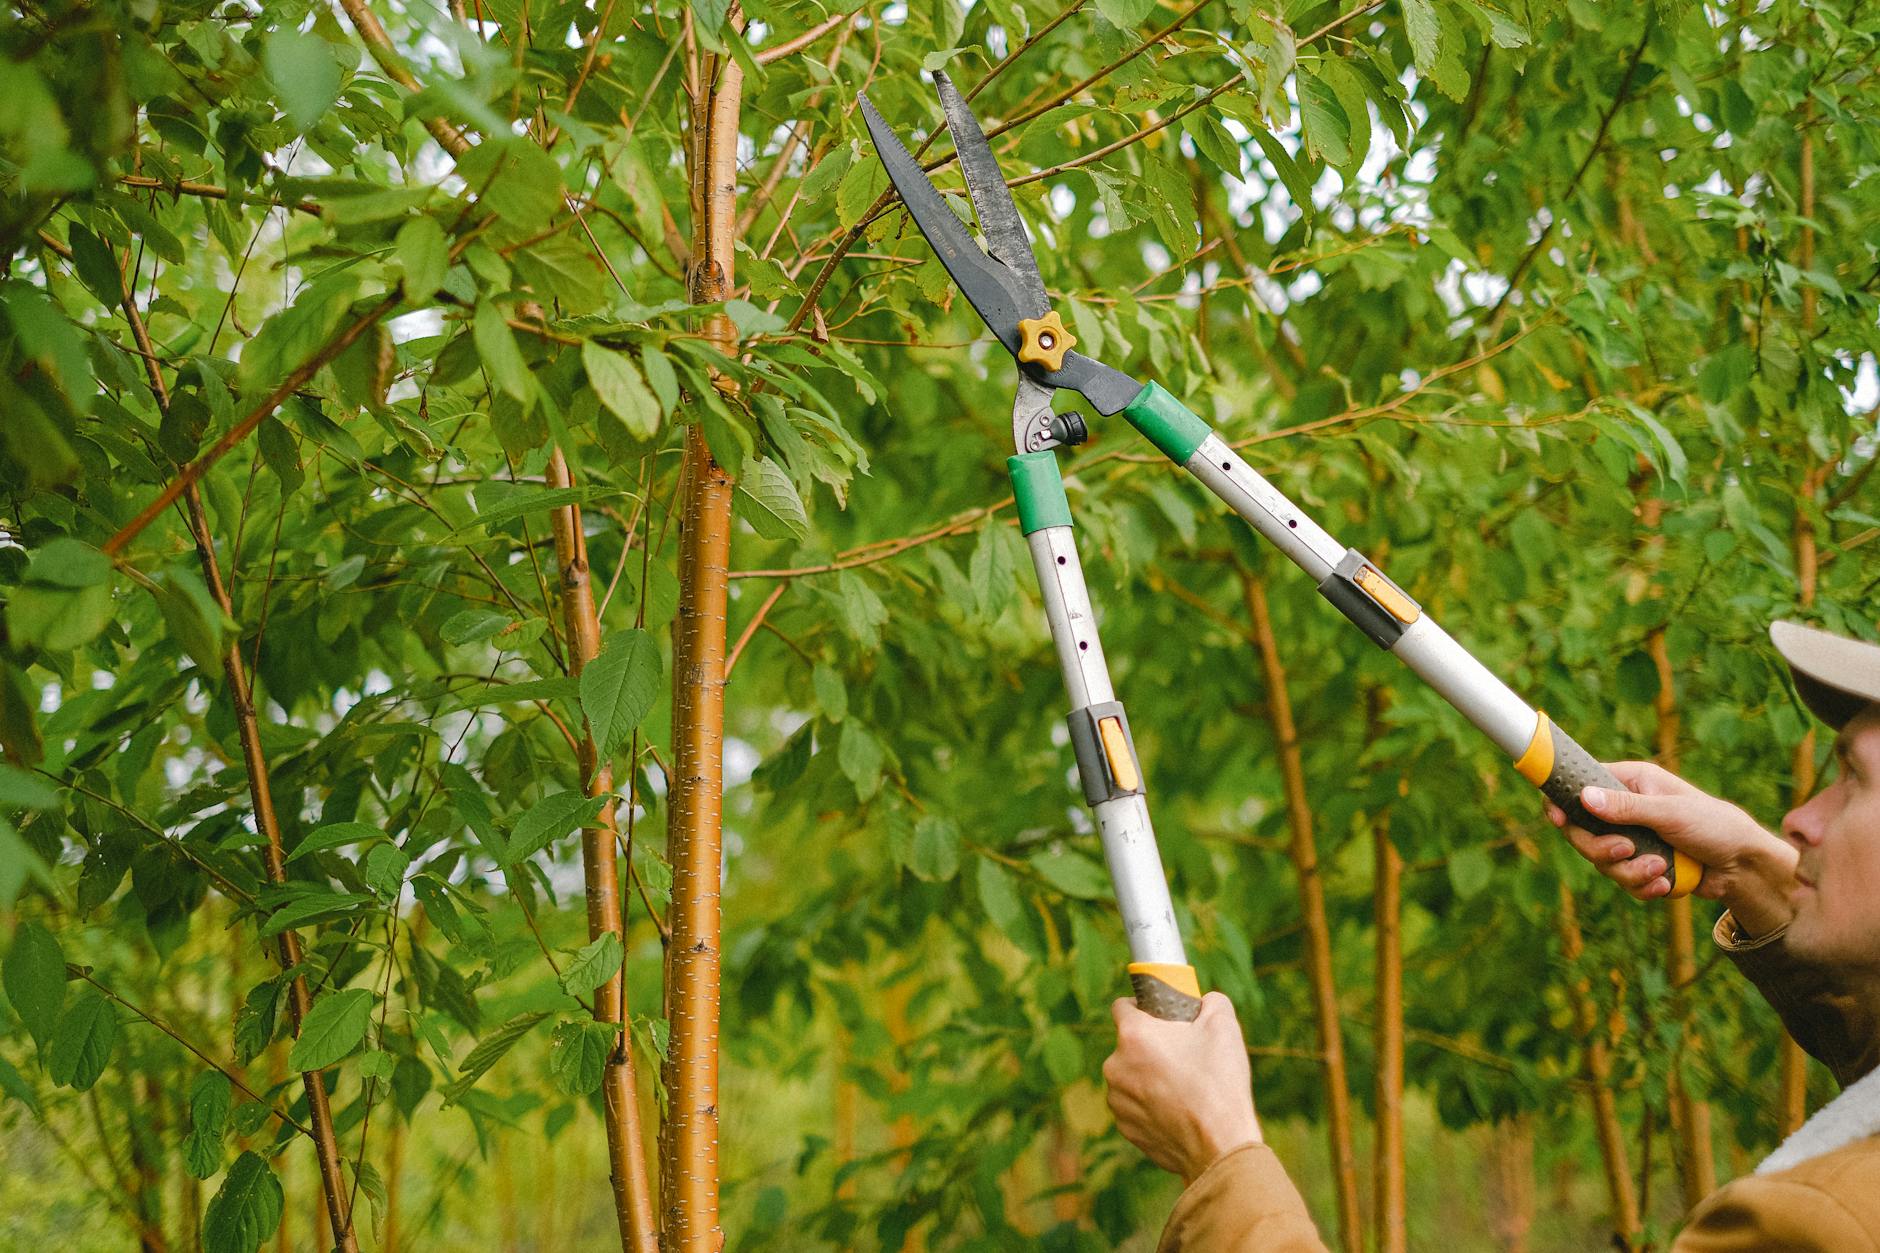
Opening Up the Canopy: Pruning Trees and Shrubs for More Sunlight
Sometimes, the simplest solution is right above your head – literally! When I first started, my garden was overshadowed by a couple of overgrown shrubs and a rather enthusiastic sycamore belonging to my neighbour. I remember standing there, scratching my head, wondering how on earth I could get more light into my raised beds. I was hesitant to prune anything, worried I'd mess it up or upset the neighbours, but after a season of paltry harvests, I knew I had to act.
Observing the sun's path throughout the day and across the seasons is key. I spent a full day with a cuppa in hand, noting exactly when and where the shadows fell. It was an eye-opener! I realised a lot of the problem was just a few lower branches on my neighbour's sycamore, and a couple of my own overgrown Viburnum shrubs.
For the sycamore, a polite chat with my neighbour (with biscuits, of course!) led to me carefully pruning the lowest branches on my side that were blocking the crucial morning sun. Always check with your local council about Tree Preservation Orders (TPOs) before touching any large trees, especially if they're not on your property. For my own shrubs, I employed a technique called 'thinning out' and 'raising the crown'. Instead of just hacking off the top, I selectively removed some of the oldest, thickest branches from the base and lifted the lower canopy. This allowed light to penetrate through and underneath, without destroying the overall shape or health of the shrub.
I usually do this in late autumn or winter for deciduous trees and shrubs here in the UK, when they're dormant. For spring-flowering shrubs, I wait until immediately after they've finished flowering to avoid sacrificing next year's blooms. One mistake I made early on was pruning too much at once; it's always better to take a little off and see the effect, rather than going too hard and regretting it. My biggest regret was not doing it sooner – the difference in light levels was immediate and dramatic, and my vegetables thanked me for it!
Bouncing Light In: Simple Reflective Strategies for Shady Beds
Even after strategic plant selection and a bit of judicious pruning, you might still have areas that just don't get enough direct light. This is where my former IT problem-solving brain really kicked in, thinking about how to manipulate the environment. If I couldn't get more direct light from above, could I get it from the side? The answer, I discovered, is a resounding yes! Reflective surfaces can work wonders, especially in those spots that get just a few hours of weak sun.
I've experimented with a few different things in my Midlands garden over the years. One year, I even tried painting an old wooden pallet white and propping it behind a particularly dim raised bed – it definitely helped, but it wasn't the prettiest solution! The principle is simple: light hits a bright or shiny surface and bounces off, illuminating the plants that would otherwise be in shadow. This 'extra' light, while not as intense as direct sunlight, can still significantly boost photosynthesis and lead to better growth and yields.
What works here in Britain, with our often-grey skies, is focusing on capturing and redirecting any available light. Here are some of the most effective reflective strategies I’ve used:
| Reflective Material | Pros (Randy's Experience in UK) | Cons (Randy's Experience in UK) | Randy's Tips for Use |
|---|---|---|---|
| White Walls/Fences | Excellent, long-term light boost. Easy to maintain. Looks smart. Retains some warmth. | Requires a permanent structure. Initial painting effort. | Paint any south or west-facing fences/sheds white or a very pale colour behind your beds. I used exterior masonry paint. |
| Aluminium Foil | Cheap, readily available, highly reflective. Great for temporary boosts or small areas. | Can tear easily. Looks a bit 'ghetto garden'. Can get blown away in UK winds. | Wrap cardboard or thin plywood with foil and place behind plants. Use to line the inside of containers for extra reflection. |
| Reflective Mulch (Silver) | Increases light, suppresses weeds, conserves moisture. Can deter some pests. | Can look unnatural. Can get hot in direct sun (less of an issue in shade). | Lay silver-side-up reflective plastic mulch around the base of plants. I found this particularly good for brassicas in shadier spots. |
| Mirrors | Very effective at redirecting specific beams of light. | Breakable, potentially dangerous if poorly placed. Can focus light too intensely. | Use with extreme caution! Only small, well-secured mirrors, angled carefully to avoid scorching plants or dazzling neighbours. |
| Light-Coloured Gravel/Pebbles | Natural-looking, permanent, improves drainage. Retains heat. | Less reflective than pure white/foil. Can become dirty, reducing reflection. | Use as a mulch around the base of plants. I've found light gravel helps warm the soil a little in cooler, shadier beds. |
When placing reflective surfaces, consider the angle of the sun at different times of the day and year. Often, aiming to bounce morning sun into a bed that only gets afternoon shade, or vice-versa, is the most effective. It's a bit of an art, but with a little experimentation, you'll find what works best for your specific shady spots. I've found that even a small increase in light can make a massive difference to the vigour and productivity of shade-tolerant plants.
5. Healthy Roots in the Shade: Tailoring Soil and Watering for Shadier Spots
Even with the right plants and a bit more light, your partial shade garden still needs the right foundation: healthy soil and careful watering. This is one area where I’ve learned a lot through trial and error in my 800 sq ft Midlands garden. Shady spots behave differently from sun-drenched ones, and treating them the same can lead to unhappy plants or, worse, root rot.
The Shady Soil Difference
In my experience, soil in shadier areas tends to retain moisture for longer. This can be a blessing during dry spells, but a curse during our notoriously damp British summers, especially here in the Midlands where we get our fair share of rain. The key is balance. You want soil that's rich in organic matter to hold nutrients and some moisture, but also incredibly well-draining to prevent waterlogging.
When I started my first raised bed in a partly shaded corner, I just used my standard raised bed mix – good stuff, but not specifically tailored. I quickly learned my lesson with a batch of Swiss chard that looked a bit yellow and stunted, despite being a shade-lover. The soil was just too consistently wet.
Now, for my shadier beds, I amend my base soil (a mix of compost and topsoil) with extra grit or perlite – usually about 10-15% by volume. This significantly improves drainage without sacrificing the nutrient-holding capacity of the organic matter. I also add a generous amount of well-rotted leaf mould, which is fantastic for improving soil structure and providing a slow release of nutrients, perfect for the slower growth often seen in partial shade. It’s also brilliant at promoting a healthy fungal network, which many shade-tolerant plants appreciate.
Watering Wisdom for Shady Spots
Watering is where many (including my younger self!) go wrong. In sunny spots, you often water deeply and frequently. In partial shade, "less is more" is often the mantra. Because the sun isn't evaporating moisture as quickly, and the soil stays cooler, plants simply don't dry out as fast.
I've learned to always check the soil moisture with my finger before watering. Stick it down a good two inches. If it feels damp, hold off. Overwatering is the quickest way to invite fungal diseases and root rot, especially during our often-humid UK weather. I prefer to water deeply but infrequently, encouraging roots to grow down rather than staying near the surface.
One common mistake I made was watering on a schedule, regardless of the weather. Last summer, during one of our typical British 'four seasons in a day' weeks, I watered my brassicas in a shadier bed on a Tuesday, only for it to pour down for the next two days. They looked distinctly unhappy for a while. Now, I'm much more reactive, especially after a downpour. Drip irrigation or soaker hoses can be good in shadier spots too, as they deliver water directly to the roots and keep the foliage drier, reducing the risk of powdery mildew, which can be more prevalent in humid, low-air-circulation areas.
6. Beyond Light: Companion Planting and Succession for Shady Yields
Maximising yields in partial shade isn't just about light; it's also about making the most of every inch and every season. This is where companion planting and strategic succession planting really shine, especially in my packed 800 sq ft backyard.
Companion Planting in the Mellow Light
Companion planting is something I'm obsessed with, and it's particularly useful in partial shade. While some traditional companion pairings are geared towards sun-loving plants, many principles still apply.
- Pest Deterrence: In shadier, often more humid conditions, slugs and snails can be a bigger problem. I've found that strong-smelling herbs like mint (in pots, always!), thyme, and sage can help deter them from nearby leafy greens like lettuce and spinach. I also interplant marigolds, especially the French varieties, around my brassicas (cabbage, kale) in the shadier parts of my garden. They're often said to deter nematodes and other pests, and even in partial shade, they produce enough flowers to make a difference. Last year, my kale patch in a spot that gets only about 4-5 hours of direct sun was almost slug-free thanks to a perimeter of marigolds and a few strategically placed chives.
- Beneficial Insects: Even in shade, you want to attract beneficial insects. Plants like dill, coriander (which bolts slower in shade, a bonus!), and calendula are excellent for attracting hoverflies and other predators that feast on aphids. I sprinkle these among my leafy greens and root crops.
- Soil Health: Legumes like bush beans or peas (some varieties tolerate partial shade well, like 'Oregon Sugar Pod' snap peas) can fix nitrogen in the soil, benefiting hungry leafy greens growing nearby. I often have a row of peas climbing a small trellis behind a bed of spinach or lettuce in a slightly shadier spot.
| Shade-Friendly Companion Plant | Benefits for Shady Veggies | My UK Garden Experience |
|---|---|---|
| Marigolds (French) | Deters slugs, nematodes, aphids | Effective around kale and chard in a 4-hour sun spot; still flower well enough. |
| Chives | Deters aphids, slugs; mild anti-fungal | Great around lettuce and carrots; easy to grow and reliable. |
| Dill / Coriander | Attracts beneficial insects (hoverflies, lacewings) | Coriander bolts slower in shade, extending harvest; dill attracts pollinators. |
| Bush Beans / Peas | Nitrogen fixation for leafy greens | 'Oregon Sugar Pod' peas on a small trellis behind spinach have been a successful combo. |
| Lettuce (Loose-leaf) | Ground cover, keeps soil cool; good under taller plants | Excellent under my taller tomato plants in the greenhouse (north side) or courgettes outside. |
Succession Planting for Continuous Harvests
Succession planting in partial shade requires a bit more thought, as growth can be slower. The goal is to keep planting small batches of crops every few weeks to ensure a continuous harvest rather than a glut.
- Adjusting Timelines: I've learned that crops in partial shade often take a little longer to mature than the packet suggests. So, if a lettuce variety says 30 days to harvest in full sun, I'll typically factor in 35-40 days for my shadier spots here in the Midlands. This means adjusting my planting intervals. Instead of planting every two weeks, I might stretch it to every three weeks, especially for slower growers.
- Focus on 'Cut and Come Again': Leafy greens like spinach, chard, and loose-leaf lettuces ('Salad Bowl', 'Lollo Rosso') are perfect for this. I'll plant a small bed, harvest the outer leaves, and they'll keep producing for weeks. As they start to fade or bolt (which happens later in shade, another bonus!), I'll have a new batch coming on in another nearby shady bed.
- Greenhouse Head Start: To really maximise my shady yields, I often start seeds for these crops in my greenhouse, even if they're destined for a partial shade bed outside. Getting them a bit bigger and stronger before transplanting them into the cooler, dimmer conditions outside gives them a significant head start. This is especially true for spring plantings when our British weather can still be quite unpredictable. I'll sow batches of rocket, spinach, and spring onions every 3-4 weeks from early spring right through to late summer.

7. Harvesting Success: Embracing the Potential of Your Partial Shade Garden
Well, we've come a long way, haven't we? From scrutinising plant labels to strategic pruning, bouncing light, nurturing the soil, and smart planting, the journey to a productive partial shade garden is a hugely rewarding one. I genuinely hope my experiences from my own 800 sq ft UK garden – the successes, the occasional damp squibs, and the sheer joy of it all – have given you the confidence and practical know-how to look at your shadier spots not as a limitation, but as an exciting opportunity.
When I first started gardening here in the Midlands five years ago, I definitely saw my limited sunny patches as the only 'proper' growing areas. Those shadier corners felt like wasted space, good only for hostas or maybe a struggling fern. But through countless hours of experimentation, a fair few mistakes (like that first overwatered chard!), and a lot of learning from fellow UK gardeners, I've completely transformed my perspective. Now, I see every corner of my backyard as potential.
Key Takeaways for Your Shady Success:
- Choose Wisely: Start with the right plants! Varieties like leafy greens (spinach, lettuce, kale), root vegetables (carrots, radishes), and some brassicas are your best friends in partial shade. Look for varieties specifically bred for cooler conditions or shorter days.
- Light is Gold: Even a little extra light makes a huge difference. Don't be afraid to prune nearby trees and shrubs, or strategically place reflective surfaces. Every hour of direct sun or bright indirect light counts.
- Nurture the Roots: Tailor your soil to retain moisture but drain exceptionally well. Be mindful with watering; shadier spots dry out slower.
- Think Smart: Employ companion planting to deter pests and succession planting to ensure a continuous bounty, adjusting for slightly slower growth rates.
- Embrace Experimentation: Gardening, especially in specific conditions like partial shade, is an ongoing experiment. What works for my specific microclimate in the Midlands might need a slight tweak for yours. Keep a gardening journal, observe your plants closely, and don't be afraid to try new things.
My small greenhouse is a fantastic asset for getting things started, even for plants destined for shadier outdoor spots. It gives them the initial boost they need to thrive when transplanted into those less-than-ideal light conditions.
Ultimately, gardening in partial shade is about working with nature, not against it. It’s about appreciating the unique microclimates in your own UK garden and discovering the incredible resilience and adaptability of vegetables. The harvests might be slightly different – perhaps not the huge, sun-ripened tomatoes I get in my greenhouse, but instead, an abundance of tender spinach, crisp lettuce, or sweet, earthy carrots that you grew yourself in a spot you once thought was useless.
There’s a profound satisfaction that comes from pulling a perfect bunch of carrots from a bed that only gets a few hours of afternoon sun, or harvesting a continuous supply of rocket from a corner by the fence. It’s proof that with a bit of strategy, passion, and a willingness to learn from our uniquely British weather, you absolutely can have a productive, thriving vegetable garden, no matter how much shade you're dealing with. So get out there, experiment, and enjoy the bounty! Happy growing!

