Introduction: Why On-Vine Ripening is Key for UK Winter Squash & Pumpkins
There's nothing quite like the satisfaction of pulling a hefty winter squash or pumpkin from your own UK garden. That deep orange glow of a 'Crown Prince' or the intricate patterns of a 'Turk's Turban' are truly autumn treasures. But let's be honest, getting these beauties fully ripened and ready for long-term storage here in the British climate can feel like a bit of a race against the clock. Our summers, bless them, are often too short and our autumns too quick to turn chilly.
When I first started gardening five years ago here in the UK Midlands, I made the mistake of rushing my squash harvest. I’d pick them as soon as they looked big, thinking that was the main goal. Oh, how wrong I was! Those early harvests, while impressive in size, lacked that deep, sweet flavour and, crucially, they just didn't store for very long. They'd often start softening or rotting within a couple of months. I quickly learned that true success with winter squash and pumpkins isn't just about growing them big; it's about getting them perfectly ripe on the vine.
On-vine ripening isn't just a fancy term; it's absolutely vital for developing those complex sugars that give winter squash its incredible flavour, and for hardening the skin and stem, which are essential for long-term storage. Imagine biting into a slice of roasted 'Sweet Dumpling' that tastes like pure autumn sunshine, even in the depths of winter – that's the magic of proper on-vine ripening. It’s what allows me to enjoy my home-grown produce from my 800 sq ft backyard well into the new year. Over the years, through plenty of trial and error (and a few disheartening failures!), I've figured out some key strategies that really make a difference here in our unpredictable British weather. So, let’s get stuck into how we can maximise that precious ripening time before the inevitable chill truly sets in.
Strategic Sun Exposure: Maximising Light for Sweeter Fruit
Sunlight is the powerhouse behind all that incredible sweetness in your winter squash and pumpkins. It’s where the magic of photosynthesis happens, converting light energy into sugars that get stored in the fruit. Here in the UK, especially as we head into late summer and early autumn, every ray of sunshine counts. Our British sun isn't always as strong or as consistent as in warmer climates, so we need to be clever about making the most of what we get.
In my UK garden, I've found that strategic sun exposure starts long before the fruits are nearing ripeness, but it becomes absolutely critical in those final weeks. One thing I always do is ensure the developing fruits aren't overly shaded by their own sprawling foliage. Squash plants are incredibly vigorous, and their large leaves can easily block light from reaching the fruit. I usually prune back any leaves that are directly shading the fruit once it's nearing its full size. I'm careful not to overdo it, as the leaves are still needed for photosynthesis, but a bit of selective trimming around the fruit can make a huge difference. Last season, I did this for my 'Hunter' F1 squashes, and the difference in their final colour and sweetness was noticeable.
Another trick I swear by, especially for larger pumpkins like my 'Atlantic Giant' (yes, I have tried to grow one, with varying success!), or even my more manageable 'Crown Prince' squashes, is to elevate the fruit slightly off the damp ground. I often put a slate tile, an old terracotta pot base, or a piece of salvaged wood under each squash. Not only does this stop the underside from rotting in our often-damp conditions, but it also reflects a bit more light back onto the fruit, helping it ripen more evenly. Plus, it ensures the ground spot gets some air and light too. Sometimes, I'll even gently re-position a pumpkin to get its sunniest side facing south, giving it a bit of a tan! What works here in Britain is often a series of small, consistent efforts rather than one grand gesture.

Battling the Chill: Essential Frost Protection for Maturing Crops
As much as we wish our glorious UK summers would stretch forever, the reality for us gardeners in the Midlands is that autumn can bring unexpected chills, and often, early frosts. A single sharp frost can be devastating for ripening winter squash and pumpkins still on the vine. I learned this the hard way one year when an unseasonably cold night in late September caught me off guard. Most of my beautiful 'Rouge Vif d'Etampes' pumpkins were still out, and the frost caused irreparable damage to their skins, turning them soft and compromising their storage potential. It was heartbreaking!
Frost damages the skin cells, making the fruit susceptible to rot and significantly shortening its storage life. It also halts the ripening process, meaning those vital sugars won't develop further. So, protecting your almost-ready squash from the chill is paramount. It’s a balancing act: you want to keep them on the vine for as long as possible to soak up that last bit of sun and ripen fully, but you absolutely cannot risk a frost.
My go-to for frost protection is usually some horticultural fleece. It’s lightweight, lets light and air through, but offers crucial insulation. For smaller squashes or those grown in pots, moving them to a sheltered spot or even into the greenhouse for a night or two is often the best solution. For the larger, immovable plants sprawling across my raised beds, I employ a few different tactics depending on the forecast.
Here's a comparison of common frost protection methods I've used in my UK garden:
| Method | Pros (UK context) | Cons (UK context) | Randy's Experience (UK specific)
to get the most out of your harvest here in the UK.
The Ripeness Check: Signs Your Squash & Pumpkins Are Ready for Harvest
Knowing exactly when to harvest your winter squash and pumpkins is crucial for both flavour and storage. I've definitely picked a few too early in my time, only for them to lack that characteristic sweetness, and conversely, left some out a tad too long, risking frost damage. The key isn't necessarily a specific calendar date, but rather a combination of visual and tactile cues that tell you the fruit is fully mature and ready for its next stage.
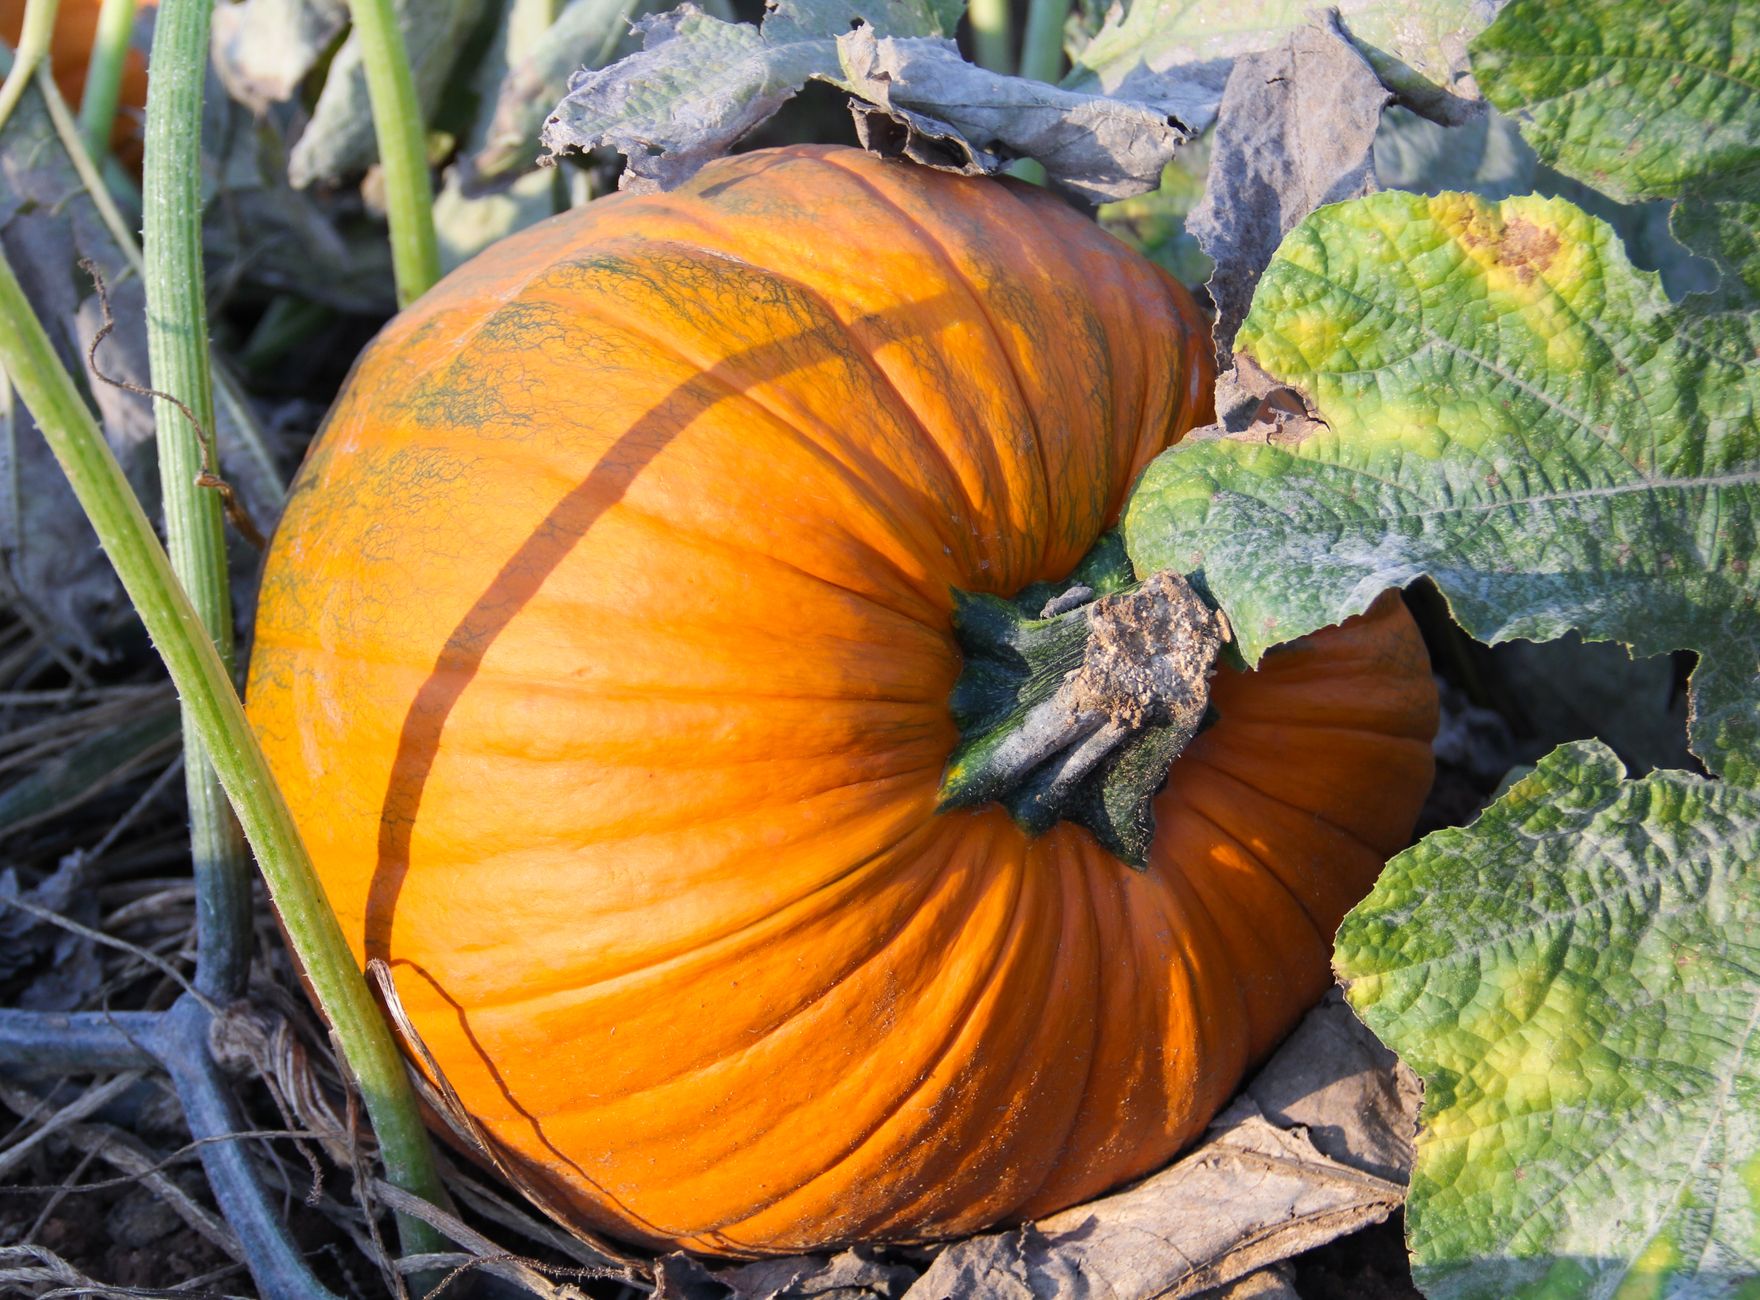
The first thing I look for is the stem. It's probably the most reliable indicator. For a winter squash or pumpkin to be truly ripe, that stem needs to be hard, dry, and starting to shrivel. It won't be green and supple like it was earlier in the season. Often, little cracks will appear at the base where it joins the fruit. This woody stem tells you that the plant has finished feeding nutrients into the fruit and it's sealed itself off, ready for storage. If you try to twist or pull a green stem, it's likely not ready.
Next, I check the skin. It needs to be uniformly hard and firm. You should not be able to easily dent or scratch the skin with your fingernail. If you can, it needs more time on the vine. The colour should also be fully developed and true to the variety. For my 'Crown Prince', that's a deep blue-grey without any green patches. For 'Uchiki Kuri', it's a vibrant orange. A paler or inconsistent colour often means it hasn't fully ripened. Lastly, give it a good tap! A truly ripe squash will sound hollow, not dull or soft.
Here's a quick guide to what I look for to determine if my squash and pumpkins are ready for harvest in my UK garden:
| Sign | Description of Ripe (UK context) | Why it Matters (Storage & Flavour) | Randy's Tip (Personal UK Advice)
Gentle Harvest: Proper Cutting and Handling for Damage-Free Produce
You've put in all the hard graft, haven't you? From carefully nurturing those tiny seedlings in your greenhouse to protecting the developing fruit from the Midlands' unpredictable chills. Now, with your winter squash and pumpkins showing all the classic signs of ripeness, the final step before storage is the harvest itself. This might sound simple, but a clumsy harvest can undo weeks of hard work and dramatically shorten your squash's storage life. I've learned this the hard way more than once!
My biggest mistake when I first started growing 'Crown Prince' squash was being a bit too eager. I'd just yank them off the vine or snip too close to the fruit. What I didn't realise then was that a damaged stem or even a small nick in the skin is an open invitation for bacteria and fungi. Last year, I had a beautiful 'Uchiki Kuri' that I harvested a bit too roughly, and despite my best efforts, it started to rot within a month. Heartbreaking!
The key is to treat your mature squash like precious cargo. You need to leave a good stem on each fruit – I aim for at least 2 to 3 inches. This stem is essentially a natural seal, preventing moisture loss and keeping pathogens out. Think of it like a protective 'belly button' for your squash. I always use a clean, sharp pair of secateurs or a sturdy knife for this. Snip the stem cleanly from the main vine, making sure not to cut too close to the squash itself.
Once cut, handle your squash gently. Avoid dropping them or bumping them together, as any bruising can lead to soft spots and premature spoilage. I usually give them a quick, gentle wipe with a dry cloth to remove any loose soil, but I never wash them at this stage. You don't want to introduce any extra moisture that could encourage rot. And here's a crucial tip I learned from experience: never, ever carry a squash by its stem. That stem, as robust as it might look, can snap right off, and then you're back to square one with an unprotected fruit. Instead, cradle it in your arms or carry it from the base.

The Curing Process: Preparing Your Harvest for Long-Term Storage
So, you've got your perfectly ripe, carefully harvested squash and pumpkins. Congratulations! But before you tuck them away for the winter, there's one more absolutely vital step that often gets overlooked, especially by new UK gardeners: curing. This isn't just an optional extra; it's the secret sauce for truly long-storing, sweeter squash. I missed this step with my first few harvests, and my 'Harlequin' squash barely lasted past Christmas.
What exactly is curing? It's a short period where the squash are held in warm, well-ventilated conditions. This process does two amazing things:
- Hardens the skin (suberisation): Any tiny scratches or nicks on the skin heal over, forming a tough, protective barrier. This makes the squash much more resistant to rot and pest damage during storage.
- Concentrates sugars: The warmth helps convert starches within the flesh into sugars, intensifying the flavour and sweetness. This is why a properly cured squash tastes so much better than one eaten straight off the vine.
Here in the UK Midlands, especially as autumn progresses, finding consistently warm conditions can be a bit of a challenge. Ideally, you want temperatures between 25-30°C (75-85°F) with good air circulation and moderate humidity (around 70-80%).
In my 800 sq ft garden, my unheated greenhouse often gets pressed into service for curing in early autumn. I'll lay the squash out on benches or on a dry pallet, making sure they're not touching each other, and open the vents to encourage air circulation. If it's a particularly sunny September or early October, that's often enough. However, if the weather turns typically British and wet, or if I'm harvesting later, I've had to get creative. I've used a sunny windowsill indoors, or even a spare room with a small fan heater running for a few hours a day to get the temperature up, placing the squash on old towels to protect surfaces. The curing process usually takes between 1 to 2 weeks, depending on the variety and the conditions. You'll notice the skin will feel noticeably harder and tougher to the touch.
Here's a quick guide to how some of my favourite UK-friendly varieties respond to curing and how long they'll typically store for:
| Squash Variety (UK Favourites) | Curing Time (Approx.) | Ideal Curing Temp (°C) | Expected Storage Life (Once Cured) | Randy's Notes from My UK Garden |
|---|---|---|---|---|
| Crown Prince | 10-14 days | 25-30 | 4-6 months, sometimes longer | My go-to for reliability. Stores brilliantly, lovely blue skin. |
| Uchiki Kuri (Red Kuri) | 7-10 days | 25-30 | 3-5 months | Stores well, but I find it's best eaten within 3-4 months for peak flavour. |
| Butternut (e.g., 'Hunter') | 7-14 days | 25-30 | 3-6 months | Needs good curing for that classic sweet flavour. |
| Harlequin | 7-10 days | 25-30 | 2-4 months | Smaller, quicker to cure. Great for individual portions. |
| Spaghetti Squash | 7-10 days | 25-30 | 2-4 months | Good for mid-winter, but usually not quite as long as 'Crown Prince'. |
| Turk's Turban | 10-14 days | 25-30 | 3-5 months | More decorative, but also a decent keeper if properly cured. |
Once cured, store your squash in a cool, dark, dry, and well-ventilated place. I use shelves in my garage where the temperature stays consistently cool (around 10-15°C or 50-60°F) and the humidity isn't too high. Make sure they're not touching each other, and check them regularly for any signs of spoilage. A good curing process means you'll be enjoying your harvest well into the depths of winter!

Beyond the Harvest: Enjoying Your Homegrown Winter Bounty
The journey from a tiny seed to a perfectly ripened, cured winter squash is one of the most rewarding parts of gardening here in the UK. It takes patience, a bit of strategic thinking to outsmart our British weather, and a good dose of elbow grease, but the payoff is immense. There’s nothing quite like walking into your larder in January and picking out a squash that you grew yourself, knowing it's packed with flavour and hasn't travelled thousands of miles.
I remember one particularly dreary, wet November here in the Midlands when I was feeling a bit down about the garden being dormant. Then, I went to my garage and saw the rows of 'Crown Prince' and 'Marina di Chioggia' squash, glowing like edible treasures. I made the most amazing squash soup that evening, and it was a real pick-me-up, a taste of summer sunshine in the heart of winter. That's the magic of it, isn't it?
So, let's quickly recap the key takeaways for maximising your winter squash and pumpkin harvest this season:
- Prioritise On-Vine Ripening: This is non-negotiable for flavour and storage. Don't rush it!
- Strategic Sun Exposure: Keep those leaves clear and ensure your fruits are basking in as much UK sunshine as possible.
- Vigilant Frost Protection: Be ready to cover your precious fruits at the first whisper of a frost, especially in late autumn.
- Know Your Ripeness Cues: Learn the signs – hard skin, dull colour, corky stem – for each variety you grow.
- Gentle Harvest: Always leave a good stem and handle with care to prevent damage.
- Crucial Curing: Don't skip this step! It hardens skins and sweetens the flesh for long-term enjoyment.
Gardening is a continuous learning curve, and I've certainly had my share of challenges and triumphs in my 800 sq ft patch. Every season brings new lessons, especially with our wonderfully unpredictable British climate. But by focusing on these steps, you'll be well on your way to enjoying the sweetest, longest-lasting winter squash and pumpkins you've ever grown.
So, go on, give it a go! Experiment with a new variety next year, share your bounty with neighbours, and most importantly, savour every single bite of your hard-earned, homegrown winter gold. Happy gardening, everyone!
