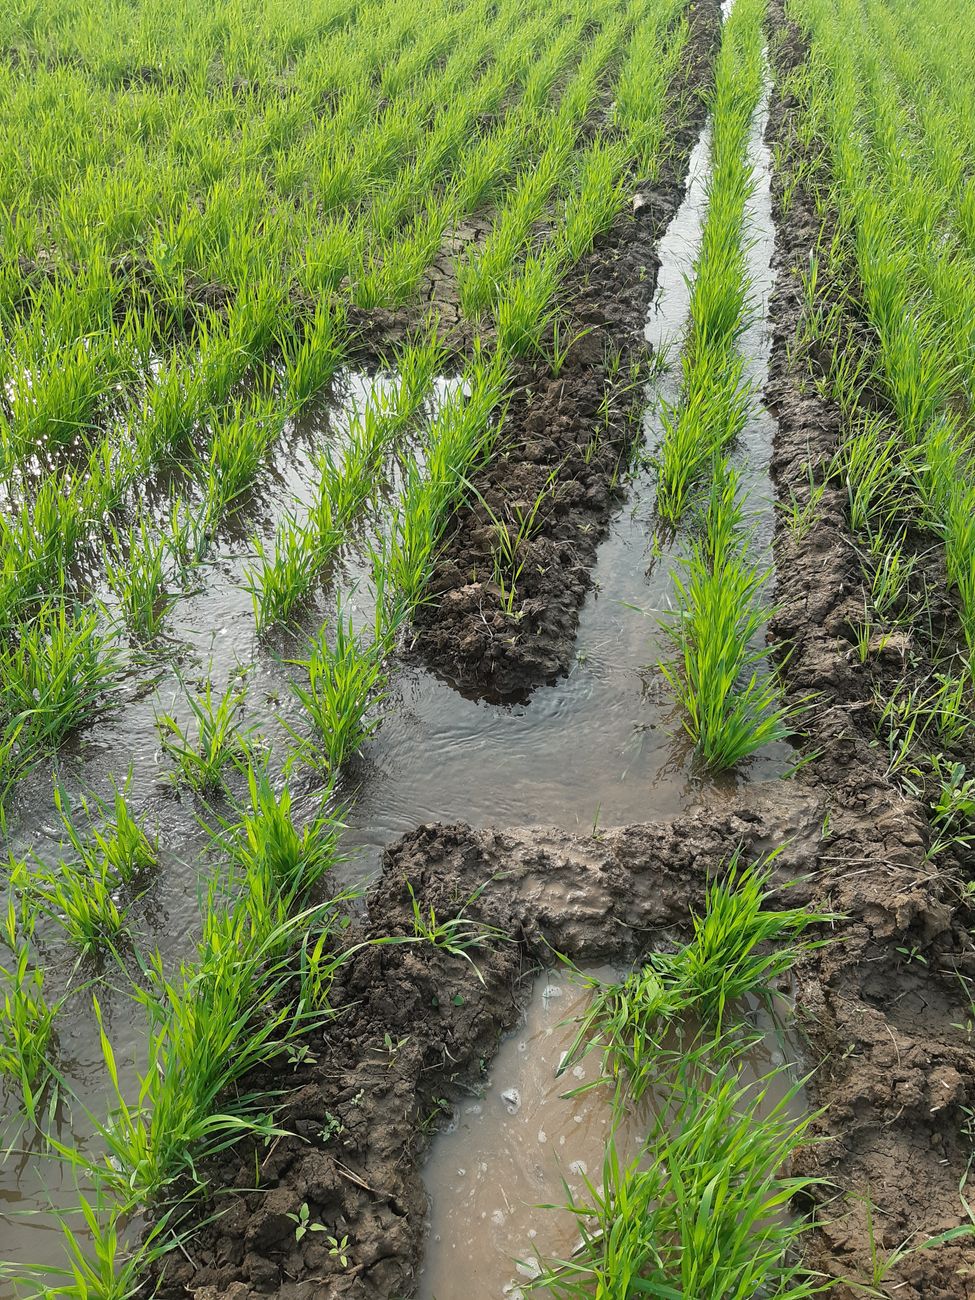
Introduction: The Aftermath of Deluge – Understanding Garden Bed Stress
Oh, the British weather! Just when you think you've got a handle on it, it throws a curveball. Here in the UK Midlands, where my 800 sq ft backyard is bursting with raised beds and a bustling greenhouse, I’ve learned this lesson more times than I care to count. One minute you're fretting over a late frost, the next you're bailing out your potato patch. If you're anything like me, you've probably just emerged from a spell of prolonged, heavy rain feeling like your garden has taken a proper beating. That sinking feeling as you look out at waterlogged paths and drooping plants? I know it all too well.
I started this journey into intensive home gardening about five years ago, leaving my IT desk job behind for the muddy reality of cultivating my own patch. And let me tell you, those first few seasons were a steep learning curve, especially when it came to dealing with our famously unpredictable climate. I remember one particularly soggy spring, my beautifully prepped carrot bed turned into a swamp overnight. My heart sank, thinking all my hard work was literally washed away. But that’s where the passion kicks in, isn't it? We learn, we adapt, and we figure out how to nurse our green friends back to health.
This article is for all of us who have faced the deluge and are now wondering how on earth to restore some vigour to our stressed-out garden beds. Prolonged heavy rain isn't just about surface puddles; it can wreak absolute havoc below ground, leading to three main culprits that steal our plants' vitality: soil compaction, nutrient leaching, and outright waterlogging. I've personally battled all three in my UK garden, and I’ve learned a thing or two about bringing beds back from the brink. We'll explore how to spot the damage, what immediate first aid to administer, and crucially, how to rebuild your soil's health for renewed plant vigour. Let's get our hands dirty and get those gardens thriving again!
Assessing the Damage: Identifying Compaction, Leaching, and Waterlogging Signs
After a long spell of rain, my first instinct is always to grab a cuppa, pull on my wellies, and head out for a full garden inspection. It's like a post-storm triage, really. Over my five years of intensive gardening here in the Midlands, I've developed a pretty good eye for the tell-tale signs of distress caused by excessive moisture. Understanding what you're dealing with is half the battle, as the recovery steps for compacted soil are quite different from those for leached nutrients.
Let me walk you through what I look for, focusing on compaction, leaching, and waterlogging. These aren't always mutually exclusive, of course; often, a heavy downpour will cause a nasty cocktail of all three!
Identifying Compaction:
Soil compaction happens when the air spaces in the soil are squashed together, usually by the weight of water or foot traffic on wet ground (a mistake I definitely made early on, walking on my wet raised beds – never again!). When these spaces disappear, roots struggle to breathe and grow, and water can't drain properly.
Signs I look for:
- Hard, dense surface: The top layer of soil feels like concrete, even after it's dried out a bit.
- Poor water penetration: When you try to water, it just sits on the surface or runs off rather than soaking in.
- Stunted root growth: If I carefully dig up a struggling plant (like a brassica or lettuce), the roots are shallow and sparse.
- Standing water: Puddles remain for a long time after rain, indicating water can't percolate down.
- Cracking: As compacted clay soil dries, it often forms deep cracks.
Identifying Leaching:
Leaching is when essential nutrients – particularly nitrogen, which is highly soluble – are washed out of the soil profile by excessive water. It's like your plants' dinner being rinsed away before they can eat it. My 'Cherokee Purple' tomatoes in the greenhouse, usually so robust, are particularly sensitive to this if their raised beds get overwatered.
Signs I look for:
- Pale or yellowing leaves (chlorosis): Especially older leaves, as the plant sacrifices nutrients from them to try and keep new growth going. This often looks like a general pallor rather than specific patterns.
- Slow, stunted growth: Plants just aren't putting on new growth, or it's very weak and spindly.
- Poor fruiting/flowering: Reduced yields or flowers that drop off prematurely. My 'Sungold' cherry tomatoes, which usually produce prolifically, will drastically reduce their fruit set if nutrients are leached.
- General lack of vigour: Plants just look 'unhappy' and lack their usual vibrancy.
Identifying Waterlogging:
Waterlogging is simply when the soil remains saturated with water for an extended period, displacing all the air. Most plant roots need oxygen to survive, and without it, they effectively drown. This is a common problem in heavy clay soils, which we have a fair bit of here in the Midlands.
Signs I look for:
- Soggy, squishy soil: It feels like a sponge when you step on it or press down.
- Foul smell: Anaerobic conditions (lack of oxygen) often lead to a rotten egg smell from the soil.
- Drooping, wilting plants: This is counter-intuitive, but plants can wilt even when waterlogged because their roots are damaged and can't take up water effectively.
- Leaves turning yellow and dropping: Starting from the bottom of the plant.
- Root rot: If you carefully examine roots, they might be dark, mushy, and smell bad. I've had this happen to my precious greenhouse cucumbers – a real heartbreaker.
- Pests and diseases: Waterlogged conditions can encourage slugs, snails, and various fungal diseases like damping-off in seedlings. I'm always on high alert for slugs after heavy rain, they absolutely love it!
To help keep things clear, here’s a little comparison table I've put together based on my observations in my own UK garden:
| Symptom / Condition | Soil Compaction | Nutrient Leaching | Soil Waterlogging |
|---|---|---|---|
| Soil Texture/Feel | Hard, dense, difficult to dig, cracks when dry. | Normal to crumbly (if well-drained), may feel silty. | Squishy, soggy, muddy, often with surface puddles. |
| Water Behaviour | Sits on surface, runs off, slow to penetrate. | Drains quickly, perhaps too quickly in sandy soils. | Remains saturated, standing water persists. |
| Plant Appearance | Stunted growth, shallow roots, general poor vigour. | Pale, yellowing leaves (especially older ones), weak growth. | Wilting despite water, yellowing/dropping leaves, root rot. |
| Odour | Earthy or none. | Earthy or none. | Foul, stale, "rotten egg" smell. |
| Common Causes (UK) | Heavy rain on bare soil, foot traffic on wet soil, heavy machinery. | Prolonged heavy rain, sandy/light soils. | Heavy rain, poor drainage, clay soil, low spots. |
| Immediate Effect | Restricted root growth, poor drainage. | Nutrient deficiency, reduced plant health. | Root death due to lack of oxygen, fungal diseases. |
| Long-term Effect | Reduced yields, poor soil structure, erosion risk. | Chronic nutrient deficiencies, weak plants, increased pest susceptibility. | Permanent plant damage/death, anaerobic soil. |
Immediate Actions: First Aid for Waterlogged and Stressed Plants
Right, you’ve done your assessment, you know what you’re up against. Now it’s time for some rapid response – essentially, garden bed first aid! When I see my plants looking miserable after a downpour, my immediate goal is to stabilise the situation and prevent further damage. This isn't about long-term fixes yet, but rather about buying your plants some time to recover.
Here’s what I jump to first in my UK garden:
- Stop Further Waterlogging (If Possible): This might sound obvious, but it's crucial. If you have raised beds, check that drainage holes aren't blocked. For ground-level beds, gently open up any small channels to direct standing water away from the immediate plant root zones. I’ve even dug temporary shallow trenches around particularly vulnerable plants like my greenhouse peppers to help channel water away from the base if the surrounding soil is saturated.
- Relieve Surface Compaction: Once the very worst of the water has receded, and only if the soil isn't still squelching underfoot (walking on wet soil makes compaction worse!), I'll very gently scratch the surface with a hand fork or a trowel. I’m not digging deeply, just breaking up any hard crust that might have formed. This allows a little more air in and helps the surface dry out faster. It’s a delicate operation, especially around young plants.
- Provide Support for Leaning Plants: Heavy rain can knock plants sideways, especially taller ones like my heirloom tomatoes or broad beans. I get out the bamboo canes and twine and gently stake them back up. This not only prevents stem breakage but also gets leaves off the wet ground, which reduces the risk of fungal diseases. I learned this the hard way when a strong gust after a deluge snapped the main stem of my best 'Marmande' tomato plant – heartbreaking!
- Remove Damaged or Diseased Foliage: This is a tough one because you don't want to stress the plant further, but it’s vital. Any leaves that are yellow, mushy, or show signs of fungal spots (often encouraged by humid, wet conditions) need to go. I use sharp, clean secateurs and prune carefully, ensuring good air circulation around the plant. This redirects the plant’s energy to healthy growth and prevents disease spread. For example, after a very wet spell, I always check my 'Cavolo Nero' kale for slug damage and fungal spots.
- Hold Off on Fertilising: Your plants might look hungry, but adding more fertiliser to already waterlogged or leached soil can do more harm than good. The roots are stressed and might not be able to take up nutrients effectively, and any added fertiliser could just get washed away, contributing to further leaching and potential runoff issues. Wait until the soil has started to dry out and the plants show signs of recovery before considering a gentle feed.
- Protect from Pests: Slugs and snails absolutely thrive in wet conditions. After a deluge, my garden becomes a slug paradise. I do my rounds, picking them off by hand (my preferred method) or deploying beer traps. Also, keep an eye out for aphids or other sap-suckers; stressed plants are more vulnerable. My 'French Breakfast' radishes are often the first to suffer from slug damage after a particularly wet week.
These immediate actions are about mitigating the immediate crisis. Think of it as triage in the plant hospital. Once the immediate danger has passed and the beds have started to drain a bit, we can move on to the more strategic recovery work.
Alleviating Soil Compaction: Gentle Aeration and Organic Amendments
Once the immediate crisis is over and the worst of the water has drained, the next big battle in my UK garden is always against soil compaction. It’s an insidious problem, especially with our heavy clay soils here in the Midlands. Compaction chokes roots, prevents water from soaking in properly (leading to more runoff), and makes it incredibly difficult for beneficial soil organisms to do their vital work.
My goal here is to gently break up that compacted soil without completely disturbing the delicate soil web, and then to rebuild its structure for the long term.
Gentle Aeration: Letting Your Soil Breathe
The key word here is "gentle." You're not rototilling, which can destroy soil structure. You're trying to create channels for air and water.
The Broadfork Method (My Favourite for Raised Beds): For my raised beds, a broadfork is an absolute game-changer. It's a tool with long tines and two handles that you step on to push into the soil. You then rock it back and forth to loosen the soil deeply without inverting it. This maintains the soil layers and minimises disruption to the fungal networks and worm tunnels. I usually do this in autumn or early spring, but after a serious compaction event, I'll use it carefully between established rows if I can. I’ve found it makes a huge difference to the drainage and root development of my greenhouse tomatoes, which need deep, well-aerated soil.
The Garden Fork (My Go-To for Smaller Areas and Between Plants): For smaller patches or in beds where plants are already established, a good old garden fork is my best friend. I push the tines into the soil to their full depth, rock the fork slightly back and forth, and then pull it out. I repeat this every 6-12 inches across the compacted area. Again, the goal isn't to turn the soil over but just to create those much-needed air pockets. I’m especially careful around root vegetables like parsnips or carrots, making sure to aerate just beside them rather than directly into their root zone.

Dibbers or Sticks for Targeted Aeration: For really tight spots, or right next to individual plants that are struggling, I’ll use a sturdy wooden stick or a metal dibber. I push it into the soil a few inches deep, wiggle it gently, and then pull it out. It's slow work, but it can make a big difference to a specific plant’s ability to recover.
Organic Amendments: The Long-Term Solution for Soil Structure
Aeration is a quick fix, but for lasting improvement, you need to amend your soil with organic matter. This is where the real magic happens, especially for our often-heavy UK soils. Organic matter acts like a sponge, improving drainage in clay soils and water retention in sandy soils, while also providing a slow release of nutrients.
Here are my go-to amendments:
- Well-Rotted Garden Compost: This is the absolute king. I make my own in my compost bins, and it’s a constant supply of black gold. After aerating, I generously spread a 2-4 inch layer of well-rotted compost over the bed. I then very lightly fork it into the top few inches of soil, or simply let the worms do the work. It dramatically improves soil structure, feeds the soil microbes, and buffers against future compaction. I apply a thick layer to all my raised beds every autumn or spring.
- Well-Rotted Manure: If I can get my hands on some (usually from a local farmer here in Warwickshire), well-rotted horse or cow manure is fantastic. It’s richer in nutrients than compost and excellent for improving heavy soils. I use it similarly to compost, though perhaps a slightly thinner layer due to its potency. Just make sure it’s well-rotted – fresh manure can burn plants.
- Horticultural Grit or Sharp Sand: For extremely heavy clay soils, incorporating some horticultural grit (not building sand, which can actually make clay worse!) can help open up the soil structure. I've used this sparingly in a couple of my outdoor beds that tend to get particularly waterlogged. It’s more of a permanent structural change. I usually mix about 1 part grit to 5-10 parts soil and compost.
- Leaf Mould: Another fantastic soil conditioner, especially for improving structure and water retention. It takes longer to break down than compost but is excellent for long-term benefits. I make big piles of leaf mould every autumn from the leaves collected from our street.
Here’s a comparison of some common aeration tools and organic amendments I use, based on my experience:
| Feature / Item | Garden Fork | Broadfork | Well-Rotted Compost | Horticultural Grit |
|---|---|---|---|---|
| Purpose | Spot aeration, general loosening, light digging. | Deep, gentle aeration, minimal soil disturbance. | Soil structure improvement, nutrient addition, water retention. | Improves drainage in heavy clay, permanent solution. |
| Depth of Aeration | 6-12 inches (depending on tine length and soil). | 12-18 inches (deeper than a fork). | Top 2-4 inches (or worked into deeper layers). | Integrated into the soil profile. |
| Effort Level | Moderate, can be tiring for large areas. | Moderate to high initial cost, less effort for deep aeration. | Low (spreading), moderate (lightly forking in). | High (mixing into soil). |
| Soil Disturbance | Moderate. | Minimal. | Minimal (if top-dressed), moderate (if forked in). | Moderate to high. |
| Best For (UK Garden) | Smaller beds, between plants, general maintenance. | Raised beds, new beds, established beds with space. | All beds, annual application, nutrient boost. | Extremely heavy, poorly draining clay soils. |
| Cost | Low (if you already own one). | High initial investment. | Free (if homemade), moderate (bought). | Moderate. |
| My Experience | Essential tool for regular use, versatile. | Game-changer for deep soil health in raised beds. | The backbone of my garden's fertility and structure. | Used sparingly where drainage is a severe problem. |
By combining gentle aeration with a generous helping of organic amendments, you’re not just fixing the immediate problem of compaction; you’re investing in the long-term health and resilience of your garden beds. It’s a process, but the results – happier plants, better yields, and less stress from the next British downpour – are absolutely worth it.
Replenishing Leached Nutrients: Targeted Feeding for Renewed Plant Vigor
Right, so you’ve got your soil breathing again, the immediate waterlogging is under control, and your plants are looking a little less like they've just survived a shipwreck. But hold on a minute – all that rain, while a blessing for some things, is also a notorious nutrient thief! Think of it like giving your garden a good rinse. Nitrogen, in particular, is highly soluble and easily washed away, but potassium and even some micronutrients can also say "ta-ra!" to your soil.
I've learned this the hard way more times than I care to admit here in the Midlands. One year, after a particularly grim stretch of weather in early June, my 'Moneymaker' tomatoes in the greenhouse, usually thriving, started looking distinctly anaemic – pale green leaves, stunted growth. And my outdoor brassicas? They were completely yellowing, practically screaming for help. That's when I realised the true impact of nutrient leaching. It's not just about what's missing, but how quickly you can get it back to your hungry plants.
So, how do we get those essential building blocks back into the soil and into our plants without overdoing it? Targeted feeding is key. You don't want to just chuck everything at it; we need to replace what's been lost and support specific plant needs.
Here's a breakdown of my go-to methods for replenishing leached nutrients, tried and tested in my UK garden:
| Feeding Method | Best For | My Experience (UK Garden) | Pros | Cons |
|---|---|---|---|---|
| Liquid Feeds | Fast-acting boost, immediate deficiency signs, hungry fruiting plants (e.g., tomatoes, squash). | After that dreadful June, I used a diluted seaweed extract on my tomatoes and a balanced organic vegetable feed on my brassicas. Saw noticeable improvement in leaf colour and vigour within a week. I make my own comfrey tea for hungry feeders too – the potassium hit is brilliant. | Quick uptake, easy to adjust dosage, excellent for stressed plants needing an immediate lift. | Requires frequent application, can be washed away by further heavy rain, easy to over-feed if not careful. |
| Granular/Pelleted Feeds | Slow-release, general soil health, building long-term fertility. | I regularly top-dress my raised beds with pelleted chicken manure or a good quality organic fertiliser (like blood, fish, and bone) at the start of the season, and again after a major nutrient-leaching event. It slowly breaks down, providing a steady supply. Great for my 'Charlotte' potatoes and 'Crimson King' beans. | Provides sustained nutrient release, improves soil structure over time, less prone to quick leaching. | Slower to show results than liquid feeds, can attract pests (e.g., foxes digging up blood meal), difficult to apply precisely to individual plants. |
| Foliar Sprays | Micronutrient deficiencies, quick emergency boost for stressed plants, direct absorption. | If a plant is looking really unhappy, especially with yellowing between leaf veins (often iron or magnesium deficiency), I'll reach for a foliar spray. I've had good success with diluted Epsom salts (magnesium) on struggling peppers in the greenhouse. It's like giving them a direct injection of goodness. | Very fast absorption, bypasses soil issues, good for specific micronutrient deficiencies. | Only delivers small amounts of nutrients, won't fix major NPK issues, needs precise application. |
| Compost/Mulch | Long-term soil health, nutrient replenishment, moisture retention, weed suppression. | This is my absolute bedrock. After any major weather event, I'll top up my raised beds with another inch or two of my homemade compost. It’s packed with slow-release nutrients, beneficial microbes, and just generally makes the soil a happier place. | Builds soil structure, provides diverse slow-release nutrients, improves drainage and water retention. | Slower release of nutrients, may not provide enough immediate boost for severely deficient plants. |
My advice? Start with a gentle liquid feed to give plants an immediate boost, then follow up with a slow-release granular feed and a fresh layer of compost or mulch for sustained recovery. And always, always follow the dilution instructions – it’s better to under-feed slightly than to burn your precious plants!
Long-Term Drainage Solutions: Preventing Future Waterlogging in UK Gardens
Okay, so we’ve patched things up and got the garden breathing again. But what about the next deluge? Because let's be honest, here in the UK, another proper British downpour is never far away. Dealing with waterlogging is exhausting, so prevention is definitely better than cure. This is where we need to think long-term about improving drainage in our gardens.
In my 800 sq ft Midlands garden, which started with quite heavy clay soil, drainage has been a constant battle and a huge learning curve. I've made mistakes, like planting potatoes in a low-lying spot that turned into a muddy pond one exceptionally wet spring! Never again. Now, my garden is practically a city of raised beds, and for good reason.
Here are the strategies I've implemented and recommend for creating a more resilient, well-drained UK garden:
The Power of Raised Beds
This is probably the single best improvement I've made. Raised beds immediately lift your growing medium above any underlying compacted soil or heavy clay. You can fill them with a custom blend of good quality topsoil, compost, and grit, ensuring excellent drainage from day one. I've got various sizes, from small herb beds to large vegetable plots, and they've transformed my ability to grow successfully, even through our notoriously soggy winters.
Amending Existing Soil: The Organic Matter Miracle
If digging up and building raised beds isn't an option, focus on improving your existing soil. The key, particularly for heavy UK clay, is organic matter.
- Compost, Compost, Compost: I can't stress this enough. Regularly digging in generous amounts of well-rotted garden compost or farmyard manure will break up heavy clay, create air pockets, and improve soil structure. It also acts like a sponge, helping sandy soils retain moisture, so it's a win-win for all soil types. I top-dress my beds with at least an inch of homemade compost every autumn, which slowly works its way down.
- Grit and Sharp Sand: For truly stubborn clay, incorporating horticultural grit or sharp sand (not builder's sand!) can help. I've done this sparingly in a couple of my problem areas, digging in a 1-inch layer deep into the topsoil. It's a lot of work, but it does help create channels for water to escape.
Embracing No-Dig Gardening
This technique has been revolutionary for my soil health. Instead of disturbing the soil structure by digging, you simply layer organic matter on top. Over time, worms and other soil organisms do the work of incorporating it, creating a naturally open, crumbly soil structure with fantastic drainage. I've been slowly converting sections of my garden to no-dig over the last three years, and the difference in soil texture and water absorption is incredible. It’s also less work for me – bonus!
Strategic Planting and Site Assessment
Take a good look at your garden. Are there natural low spots where water collects? Can you divert excess water with shallow swales or French drains, especially if you have a larger plot? For my smaller urban garden, it’s more about placing plants appropriately. Water-loving plants can go in slightly wetter spots, while Mediterranean herbs that hate wet feet should be in the driest, most well-drained areas (or in pots!).
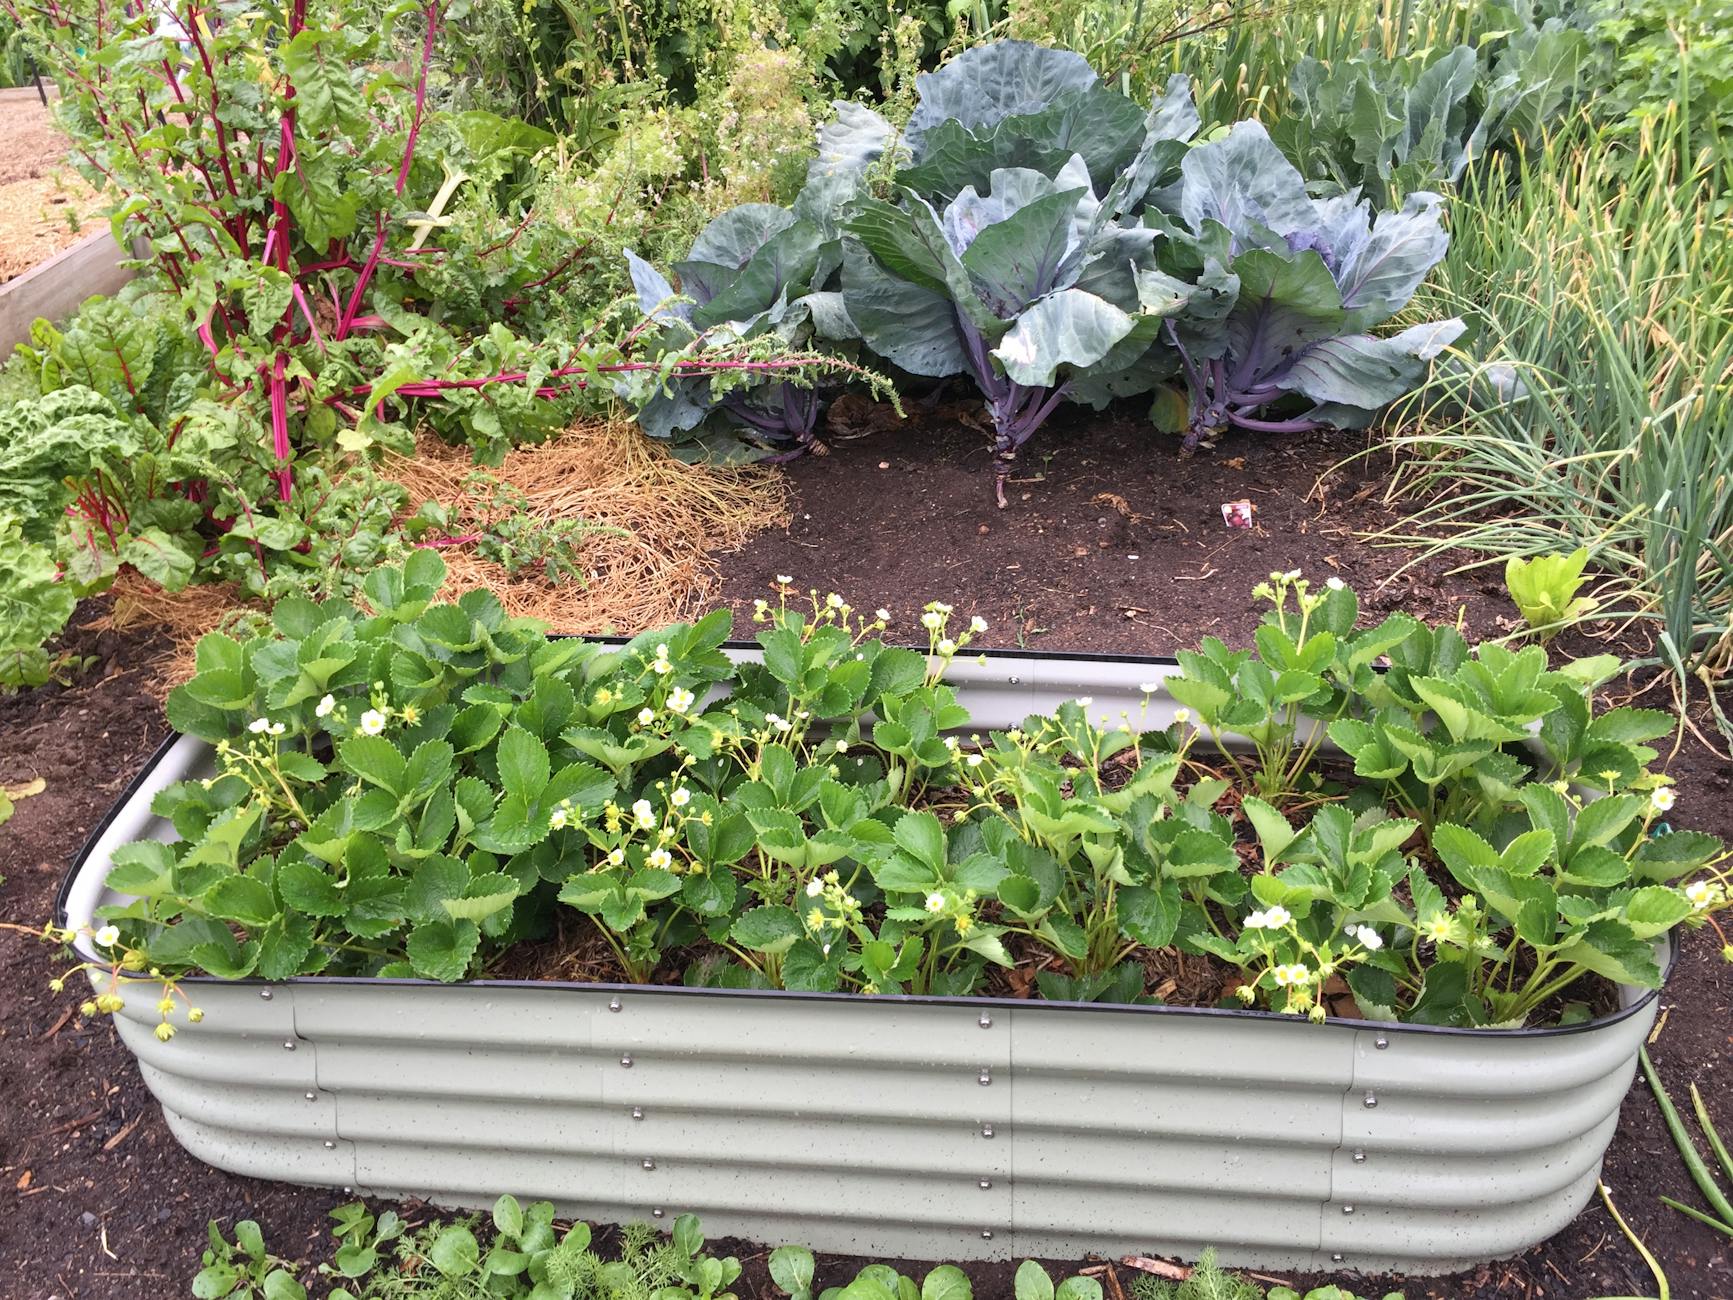
Remember, improving drainage is a long-term project. It’s not a one-and-done job, especially with our unpredictable British weather. But every bit of organic matter you add, every raised bed you build, is an investment in a more resilient and productive garden.
Supporting Plant Recovery and Building Resilience for Future Weather Extremes
So, you’ve navigated the storm, nursed your soil back to health, and replenished those hungry plants. Give yourself a proper pat on the back! But recovery isn't just about fixing the immediate damage; it's about building stronger, more resilient plants that can shrug off the next curveball our British weather throws at them. This final stage is all about nurturing your garden back to full vigour and equipping it for the future.
Ongoing Care: The Road to Full Vigor
Even after the initial recovery, your plants will be a bit delicate. Think of it like a human recovering from an illness – they need good food, rest, and careful attention.
- Mindful Watering: This might sound obvious, but after a period of waterlogging, it's easy to overcompensate. Resist the urge to drench them! Monitor soil moisture carefully, sticking a finger a few inches deep. Water only when the soil feels dry, and do so deeply to encourage roots to grow down, not just at the surface.
- Pest and Disease Watch: Stressed plants are like a beacon for pests and diseases. They're more vulnerable and less able to defend themselves. I've found that aphids seem to sniff out a struggling plant from miles away! Regularly inspect your plants, especially the undersides of leaves. Early detection is key – a quick blast of soapy water or a targeted organic spray can often save the day.
- Mulch, Mulch, Mulch: Once your soil has dried out a bit and your plants are looking stronger, apply a good thick layer of organic mulch. Straw, wood chippings, or well-rotted compost are excellent. Mulch does wonders: it helps regulate soil temperature, suppresses weeds (which compete for nutrients), and, crucially, helps retain moisture, preventing future drying out or soil capping.
Building Resilience: The Long Game
The ultimate goal for any UK gardener is to build a garden that can withstand whatever comes its way. For me, after five years of intense experimentation in my 800 sq ft Midlands garden, it always comes back to one thing: soil health.
- Feed the Soil, Not Just the Plant: A vibrant, living soil teeming with microbes is the absolute bedrock of plant resilience. It provides a steady supply of nutrients, regulates moisture, and even helps plants fight off diseases. Continue to add organic matter regularly – compost, leaf mould, worm castings. This is your long-term investment.
- Embrace Diversity: A diverse garden ecosystem is a strong one. Grow a variety of plants, including beneficial insect attractors. Companion planting isn't just pretty; it can enhance plant health and reduce pest pressure.
- Learn from Every Season: Gardening is a constant dance with nature, especially here in Britain. Every year, every downpour, every heatwave (yes, we get those too!) is a chance to learn. What worked? What didn't? Keep a garden journal – it’s invaluable for remembering what you tried and the results you got in our specific climate.
Conclusion: A Resilient Garden, A Rewarding Journey
Dealing with the aftermath of prolonged heavy rain can feel utterly defeating. I’ve been there, staring at beds that looked more like muddy swamps than thriving vegetable patches. It's easy to feel like throwing in the trowel! But every challenge in the garden is a chance to learn, adapt, and ultimately, grow into a more experienced and capable gardener.
By understanding the signs of compaction, leaching, and waterlogging, taking immediate action, gently aerating, replenishing lost nutrients, and implementing long-term drainage solutions, you're not just recovering your garden – you're transforming it. You're building a healthier, more robust ecosystem that can better withstand the unpredictable whims of our British weather.
So, take a deep breath, grab your fork, and get stuck in. Your garden, and your future harvests, will thank you for it.
What are your top tips for post-deluge recovery, or your favourite long-term drainage solutions for your UK garden? I'd love to hear your experiences and learn from them – sharing our triumphs and struggles is what makes this gardening community so brilliant! Drop a comment below!
