
Introduction: Saving Your UK Tomato Harvest from Early Blight Organically
Let's be honest, there's nothing quite like the taste of a homegrown tomato, still warm from the sun, picked fresh from your own plant. Here in my 800 sq ft Midlands garden, nestled in my trusty greenhouse, those vibrant red (and sometimes purple or striped!) beauties are the absolute crown jewel of my summer efforts. I've spent the last five years obsessively growing heirloom tomatoes, coaxing them to perfection in our often-challenging British climate. From the juicy 'Cherokee Purple' to the prolific 'Sungold', each season is a labour of love, and a bit of an experiment!
But then, it happens. You walk into your greenhouse one morning, cup of tea in hand, ready to admire your ripening crop, and you spot it. Small, dark spots on the lower leaves, perhaps with a tell-tale bullseye pattern. Your heart sinks. Early Blight. It's a cruel blow, threatening to derail months of nurturing and that glorious summer harvest you've been dreaming of. I’ve been there, more times than I care to admit, especially in my earlier gardening days. I remember one particularly damp August when I nearly lost an entire bed of 'Moneymaker' outside due to a combination of poor ventilation and my own inexperience. That sting of disappointment taught me a valuable lesson: prevention and early intervention are absolutely key, especially when you're committed to organic methods like I am.
Over the years, through countless trials, a few spectacular failures, and plenty of muddy-kneed successes right here in the UK, I've developed a robust, organic strategy for dealing with Early Blight. It's about understanding the enemy, being proactive, and having a clear action plan when those unwelcome spots appear. This isn't about magic sprays; it’s about good gardening practice, observation, and a bit of grit. So, grab another cuppa, and let's dive into how you can save your precious UK tomato harvest from Early Blight, the organic way.
Identifying Early Blight: Spotting the Signs on Your UK Tomato Plants
Knowing your enemy is half the battle, and when it comes to tomato diseases in the UK, Early Blight (caused by the fungus Alternaria solani) is a common culprit often confused with its more notorious cousin, Late Blight. But trust me, once you know what to look for, it's fairly distinctive. I've spent enough time staring intently at my tomato leaves, practically with a magnifying glass, to recognise the early warning signs.
The first place I usually spot Early Blight is on the lower, older leaves of the plant. Think of it – these leaves are often the first to touch the soil, get splashed with water, and have less airflow, creating the perfect damp environment for fungal spores to thrive. You'll be looking for small, dark brown spots, typically 0.5 to 1 cm in diameter. The crucial identifying feature, and one that separates it from many other leaf spots, is the presence of concentric rings within these spots, giving them a target-like or "bullseye" appearance. It's a bit like looking at a tree's growth rings, but much smaller and darker.
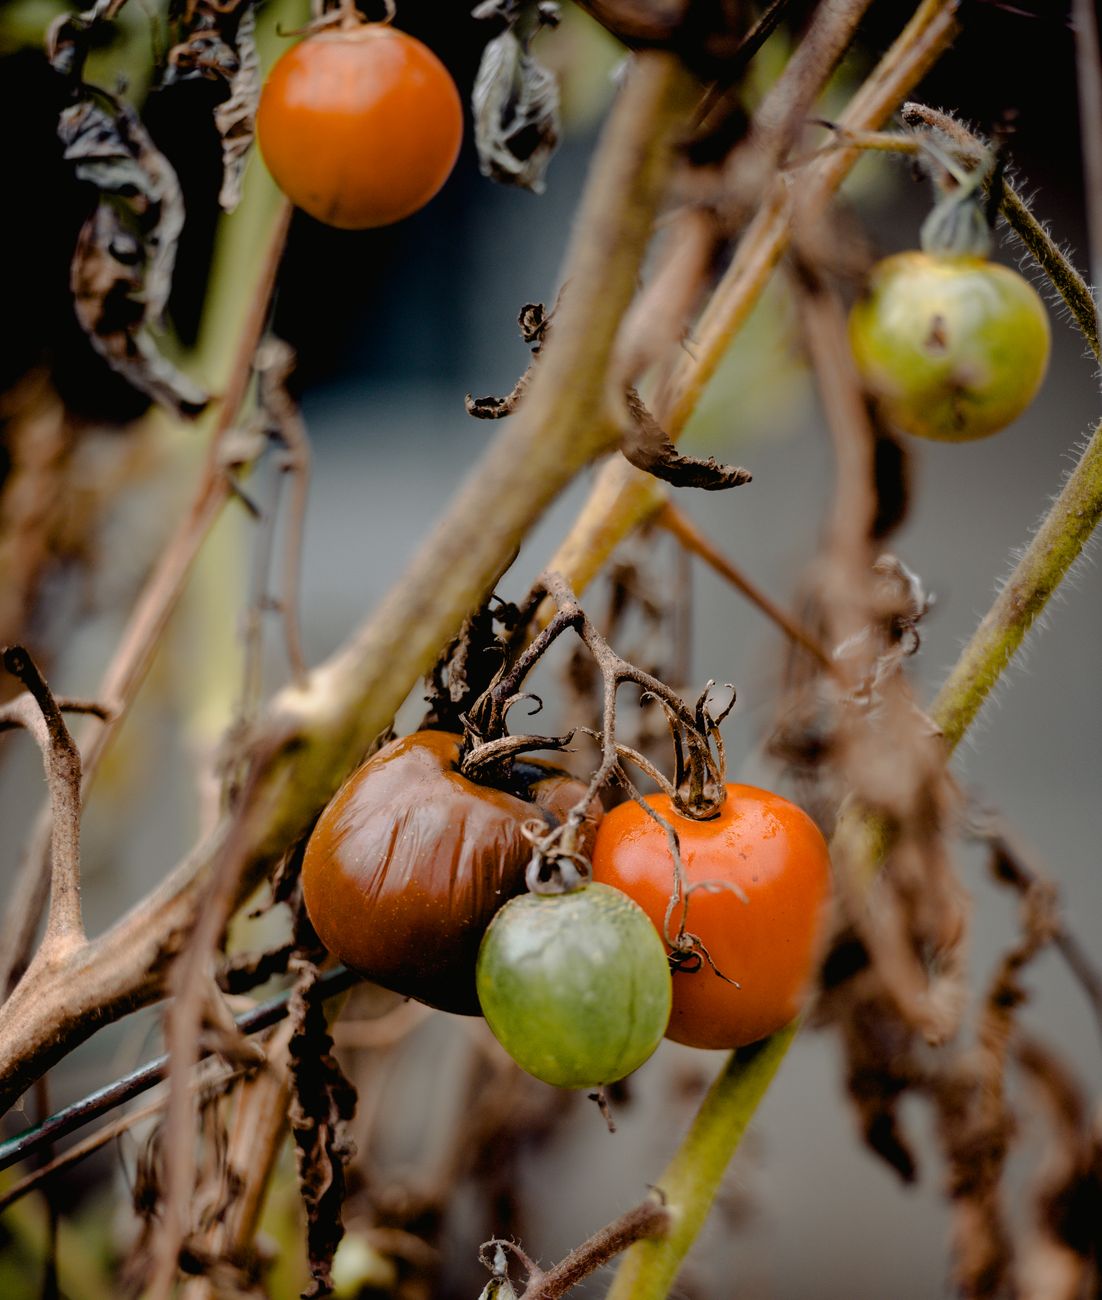
As the disease progresses, these spots will enlarge and may merge, causing the affected leaves to turn yellow and eventually wither and drop off. You might also see similar spots develop on the stems, particularly near the soil line, and even on the fruit itself, though this usually happens later and presents as dark, leathery spots, often with those tell-tale concentric rings, usually near the stem end.
I remember one year, I mistook some initial spots for general leaf senescence on my 'Gardener's Delight' plants because they were the lowest leaves. I thought nothing of it. Within a week, the bullseye patterns were undeniable, and it had spread further up the plant. Lesson learned: always investigate those initial brown spots, especially if they're appearing after a period of warm, humid weather, which we get plenty of here in the Midlands! Unlike Late Blight, which can wipe out a plant in days with its large, irregular, water-soaked lesions, Early Blight tends to be a slower burner, often giving you a window for intervention.
Proactive Organic Prevention: Strategies for a Blight-Free Tomato Season
Prevention, as any seasoned gardener will tell you, is far easier than cure, especially when you're sticking to organic principles. Over my years of growing tomatoes in my 800 sq ft garden, I've come to realise that a healthy, resilient plant grown in the right conditions is your best defence against Early Blight. It's all about creating an environment where the fungus struggles to take hold and thrive. This isn't guesswork; it's a culmination of trial and error, learning from our British climate, and understanding basic plant pathology.
My approach combines several key strategies, all aimed at reducing moisture on leaves, improving air circulation, and boosting plant immunity. I've learned that you can't just pick one; it's a holistic approach. For instance, in my greenhouse, where I grow most of my heirloom varieties like 'Brandywine' and 'Black Krim', humidity can be a real issue. So, ventilation is paramount. Outside in my raised beds, where I might grow more robust varieties like 'Legend' or 'Crimson Crush' (which have some blight resistance), managing splash-back from rain is a bigger concern.
Here’s a breakdown of the proactive steps I take in my UK garden:
Crop Rotation: Don't Repeat Yourself!
This is fundamental. Early Blight spores can overwinter in plant debris and in the soil. Planting tomatoes in the same spot year after year is like rolling out the red carpet for the fungus. I always rotate my crops, ensuring that tomatoes (and other solanaceous plants like potatoes, peppers, and aubergines) don't return to the same bed for at least three, preferably four, years. In my smaller garden, this requires careful planning, but it's worth the effort.
Spacing and Airflow: Give Them Room to Breathe
Good air circulation is crucial, especially in our often-humid UK summers. Crowded plants are a haven for fungal diseases. I aim for at least 60-75cm (2-2.5 feet) between my tomato plants in the greenhouse and outside. Regular pruning of the lower leaves and any suckers also helps immensely. I remove any leaves touching the soil as soon as the plant is established, and I keep the bottom 30cm (1 foot) of the main stem clear of foliage. This allows air to move freely and helps leaves dry quickly after watering or rain. I learned this the hard way after overcrowding 'Tigerella' one year; the dense canopy was a blight breeding ground!
Mulching: A Protective Barrier
Applying a thick layer of organic mulch (like straw, wood chips, or compost) around the base of your tomato plants is a game-changer. It acts as a physical barrier, preventing fungal spores from splashing up onto the lower leaves from the soil when you water or when it rains. It also helps retain soil moisture and suppress weeds, which compete for nutrients and can further restrict airflow. In my garden, I usually put down a good 5-10cm (2-4 inches) layer once the plants are established.
Proper Watering: Hydrate Smart
How you water matters immensely. Always water at the base of the plant, directly onto the soil, rather than overhead. Wet foliage, especially if it stays wet for extended periods, creates the perfect conditions for Early Blight. I use a watering can without a rose, or a soaker hose, to direct water exactly where it's needed. I also try to water in the morning so any accidental splashes on leaves have time to dry out completely before evening. This is particularly important in my greenhouse, where dew and humidity can linger.
Healthy Soil, Healthy Plants: Feed the Foundation
A strong, healthy plant is more resilient to disease. I focus heavily on building rich, living soil by regularly incorporating plenty of homemade compost and well-rotted manure. I also give my tomatoes regular feeds of organic liquid seaweed or compost tea once they start setting fruit. This provides a balanced array of micronutrients and beneficial microbes, boosting the plant's natural defences. It’s like giving them a good immune system!
Resistant Varieties: Choose Wisely
While no tomato is completely immune, some varieties show better resistance to Early Blight than others. I always check seed packets and descriptions for varieties noted for disease resistance. For outdoor growing in the UK, varieties like 'Crimson Crush' or 'Mountain Magic' offer a good fighting chance. Inside the greenhouse, my heirloom favourites might be more susceptible, but I compensate with rigorous preventative measures.
Here's a detailed comparison of some of my go-to organic prevention strategies:
| Strategy | Why it Helps (UK Context) |
|---|
Saving Your UK Tomato Harvest from Early Blight Organically
There's nothing quite like the taste of a homegrown tomato, still warm from the sun, picked fresh from your own plant. Here in my 800 sq ft Midlands garden, nestled in my trusty greenhouse, those vibrant red (and sometimes purple or striped!) beauties are the absolute crown jewel of my summer efforts. I've spent the last five years obsessively growing heirloom tomatoes, coaxing them to perfection in our often-challenging British climate. From the juicy 'Cherokee Purple' to the prolific 'Sungold', each season is a labour of love, and a bit of an experiment!
But then, it happens. You walk into your greenhouse one morning, cup of tea in hand, ready to admire your ripening crop, and you spot it. Small, dark spots on the lower leaves, perhaps with a tell-tale bullseye pattern. Your heart sinks. Early Blight. It's a cruel blow, threatening to derail months of nurturing and that glorious summer harvest you've been dreaming of. I’ve been there, more times than I care to admit, especially in my earlier gardening days. I remember one particularly damp August when I nearly lost an entire bed of 'Moneymaker' outside due to a combination of poor ventilation and my own inexperience. That sting of disappointment taught me a valuable lesson: prevention and early intervention are absolutely key, especially when you're committed to organic methods like I am.
Over the years, through countless trials, a few spectacular failures, and plenty of muddy-kneed successes right here in the UK, I've developed a robust, organic strategy for dealing with Early Blight. It's about understanding the enemy, being proactive, and having a clear action plan when those unwelcome spots appear. This isn't about magic sprays; it’s about good gardening practice, observation, and a bit of grit. So, grab another cuppa, and let's dive into how you can save your precious UK tomato harvest from Early Blight, the organic way.
Identifying Early Blight: Spotting the Signs on Your UK Tomato Plants
Knowing your enemy is half the battle, and when it comes to tomato diseases in the UK, Early Blight (caused by the fungus Alternaria solani) is a common culprit often confused with its more notorious cousin, Late Blight. But trust me, once you know what to look for, it's fairly distinctive. I've spent enough time staring intently at my tomato leaves, practically with a magnifying glass, to recognise the early warning signs.
The first place I usually spot Early Blight is on the lower, older leaves of the plant. Think of it – these leaves are often the first to touch the soil, get splashed with water, and have less airflow, creating the perfect damp environment for fungal spores to thrive. You'll be looking for small, dark brown spots, typically 0.5 to 1 cm in diameter. The crucial identifying feature, and one that separates it from many other leaf spots, is the presence of concentric rings within these spots, giving them a target-like or "bullseye" appearance. It's a bit like looking at a tree's growth rings, but much smaller and darker.
As the disease progresses, these spots will enlarge and may merge, causing the affected leaves to turn yellow and eventually wither and drop off. You might also see similar spots develop on the stems, particularly near the soil line, and even on the fruit itself, though this usually happens later and presents as dark, leathery spots, often with those tell-tale concentric rings, usually near the stem end.
I remember one year, I mistook some initial spots for general leaf senescence on my 'Gardener's Delight' plants because they were the lowest leaves. I thought nothing of it. Within a week, the bullseye patterns were undeniable, and it had spread further up the plant. Lesson learned: always investigate those initial brown spots, especially if they're appearing after a period of warm, humid weather, which we get plenty of here in the Midlands! Unlike Late Blight, which can wipe out a plant in days with its large, irregular, water-soaked lesions, Early Blight tends to be a slower burner, often giving you a window for intervention.
Proactive Organic Prevention: Strategies for a Blight-Free Tomato Season
Prevention, as any seasoned gardener will tell you, is far easier than cure, especially when you're sticking to organic principles. Over my years of growing tomatoes in my 800 sq ft garden, I've come to realise that a healthy, resilient plant grown in the right conditions is your best defence against Early Blight. It's all about creating an environment where the fungus struggles to take hold and thrive. This isn't guesswork; it's a culmination of trial and error, learning from our British climate, and understanding basic plant pathology.
My approach combines several key strategies, all aimed at reducing moisture on leaves, improving air circulation, and boosting plant immunity. I've learned that you can't just pick one; it's a holistic approach. For instance, in my greenhouse, where I grow
Comparing Organic Treatments: Fungicides and DIY Remedies for Early Blight
So, you've spotted the signs, you've removed the infected leaves, and you're ready to hit it with something more robust. This is where the decisions start getting a bit more nuanced in organic gardening. Over my five years of growing tomatoes here in the Midlands, I've tried a fair few options, both shop-bought and homemade, and each has its place – or its limitations, especially when our British weather decides to be particularly unhelpful.
When it comes to organic treatments, we're generally looking at two main categories: commercially available organic fungicides and various DIY remedies that gardeners swear by. I've found that understanding how each works, and what its strengths and weaknesses are for our UK climate, is key to making the right choice for your particular blight situation.
Let's break down some of the most common options I've come across and even experimented with in my 800 sq ft garden.
| Treatment Type | Organic Fungicides (e.g., Copper-based, Bacillus subtilis) | DIY Remedies (e.g., Baking Soda, Milk Spray) |
|---|---|---|
| How it Works (Randy's take) | These usually create a protective barrier on the leaf surface, preventing fungal spores from germinating or inhibiting their growth. Copper-based ones release copper ions, which are toxic to fungi. Bacillus subtilis is a beneficial bacterium that outcompetes and inhibits pathogens. | Baking soda (sodium bicarbonate) is thought to alter the pH of the leaf surface, making it less hospitable for fungal growth. Milk spray's exact mechanism isn't fully understood, but it's believed to have some antimicrobial properties and possibly boost the plant's natural defences. |
| Pros (UK Specific) | Generally more robust and longer-lasting, offering better protection against persistent damp and humidity, which we get a lot of here in the UK. They can be particularly effective if you're battling an established outbreak. Many are readily available in UK garden centres. | Cheap, non-toxic, and incredibly easy to make with household ingredients. Great for very early, minor signs of blight or as a preventative if you're meticulous with application. You're not adding any chemicals to your soil. |
| Cons (UK Specific) | Copper can accumulate in the soil over time, which isn't ideal for long-term organic health, so use sparingly and responsibly. Both types require reapplication, especially after our frequent UK rain showers, to maintain their protective layer. Some can be a bit pricier. | Their efficacy against established early blight, especially in a wet British summer, is often limited. They act more as a deterrent or very mild treatment. They wash off easily with rain, meaning very frequent reapplication is needed – sometimes daily if the weather's really against you. |
| My Experience (Randy's) | I've used a copper-based spray in my greenhouse as a last resort on my 'Moneymaker' tomatoes when blight got a bit out of hand after a particularly humid spell. It definitely helped slow its spread and gave the plants a fighting chance. For prevention, I've dabbled with Bacillus subtilis products, especially on my more susceptible heirloom varieties like 'Black Krim', and I feel they do offer a good baseline of protection. | I tried the baking soda spray pretty religiously one year on my outdoor 'Gardeners Delight' plants when I first saw a few spots. It seemed to slow it down slightly, but it definitely wasn't a magic bullet when the inevitable grey, damp week hit. The milk spray I've used more as a general pick-me-up and mild preventative, but again, it's not going to save your harvest if blight truly takes hold in our climate. |
| Application Tips (UK) | Always apply on a dry day, ideally in the morning so it has time to dry before evening dew. Reapply according to product instructions, usually every 7-14 days, but always after heavy rainfall. Ensure good coverage, especially on the undersides of leaves. | Spray thoroughly in the morning on dry leaves. For baking soda (1 tsp per litre of water with a drop of soap), apply every 5-7 days or after rain. For milk (1 part milk to 9 parts water), apply every 7-10 days. Consistency is key, which can be tough with our unpredictable British weather! |
Ultimately, my approach here in my UK garden is a layered one. For prevention, I lean heavily on good cultural practices and sometimes use Bacillus subtilis. If I spot early signs, I'll try the DIY remedies or a very targeted copper spray on the affected plants. It's about finding that balance and not reaching for the strongest thing unless you absolutely have to.
Post-Treatment Care and Long-Term Organic Blight Management
So, you’ve battled the blight, you’ve applied your treatments, and hopefully, your tomato plants are looking a little happier. But the fight isn't over. Think of it less as a one-off skirmish and more as an ongoing campaign, especially here in the UK where our weather can turn on a sixpence. Post-treatment care and long-term management are crucial for keeping your plants resilient and ensuring you get that delicious harvest.
Nurturing Your Plants Back to Health
Once you've treated an outbreak, your plants will likely be a bit stressed. They've been fighting off a fungal infection, and you've probably removed a fair few leaves. This is the time to give them some TLC to help them recover and build up their strength.
- Boost with Organic Feed: I always give my plants a good feed after a blight scare. I reach for a liquid seaweed or a balanced organic tomato feed. These provide essential micronutrients and help the plant recover from stress. Last summer, after a particularly bad early blight episode on my outdoor 'Sungold' plants, a weekly seaweed feed really seemed to perk them up and encourage new, healthy growth.
- Water Wisely: Continue with consistent, deep watering at the base of the plant. Avoid overhead watering completely. If you're growing in a greenhouse like I do with my 'Cherokee Purple' and 'Brandywine' varieties, make sure you're watering in the morning so the foliage has all day to dry out.
- Maintain Airflow: This is paramount, especially in a greenhouse. Keep those vents open and doors ajar when possible. For outdoor plants, ensure there’s no dense foliage around them that traps humidity. I'm constantly pruning lower leaves and side shoots to keep the air moving, even if it feels a bit ruthless.
Long-Term Blight Management: Planning for the Future
Preventing blight isn't just about what you do in the current season; it's about setting up your garden for long-term success.
- Crop Rotation is Non-Negotiable: This is probably the most important long-term strategy in my book. Early blight spores can overwinter in the soil. If you plant tomatoes in the same spot year after year, you're practically inviting blight back. In my raised beds, I practice a strict 3-4 year rotation, moving my tomatoes to a different bed each season. It requires a bit of planning, but it's worth it.
- Soil Health is Plant Health: A healthy soil microbiome is your best defence. I regularly top-dress my beds with good quality compost – my homemade stuff, full of worms and goodness! Healthy soil supports healthy, vigorous plants that are naturally more resistant to disease. I've found that plants grown in rich, living soil are far more resilient to stress and disease than those struggling in poor ground.
- End-of-Season Cleanup: This is where I learned a tough lesson one year. After a particularly busy autumn, I got a bit lazy with my greenhouse cleanup. The following spring, I had an early blight outbreak much earlier than usual. Now, I’m meticulous. At the end of the season, all tomato plant debris is removed (and never composted – it goes straight in the bin or to a bonfire if allowed). I also thoroughly clean my greenhouse, scrubbing down surfaces and sterilising pots. This removes any lingering spores.
- Consider Resistant Varieties: While no tomato is completely blight-proof, some varieties show better resistance. I always keep an eye out for these in seed catalogues, especially for my outdoor crops. While I love my heirlooms, for outdoor growing in a challenging UK summer, sometimes a more robust hybrid is a sensible choice.

Keeping on top of blight, particularly early blight, is a continuous effort. It requires vigilance, quick action, and consistent good practice. But trust me, the taste of a perfectly ripe, homegrown tomato from your own resilient plant makes every bit of that effort worthwhile.
Conclusion: Nurturing a Resilient, Blight-Free Organic Tomato Harvest
Phew! We've covered a fair bit, haven't we? From spotting those tell-tale bullseye spots to proactively preventing the dreaded blight and acting swiftly with organic treatments, it's clear that growing healthy tomatoes organically here in the UK takes dedication, observation, and a good dose of patience.
As a passionate gardener in the Midlands, I've learned these lessons through my own hands-on experience – some of them the hard way, like that time I thought I could get away with planting tomatoes in the same bed two years running (spoiler: I couldn't!). But every challenge has been a learning opportunity, deepening my understanding of our unique British climate and how to work with it, rather than against it.
The core message I want you to take away is this: prevention is always better than cure. By focusing on good cultural practices from the outset – selecting suitable varieties, ensuring good airflow, watering correctly, and nurturing healthy soil – you're laying the strongest possible foundation for a blight-free season. But if early blight does rear its ugly head, don't despair! Early detection and swift, targeted organic intervention can absolutely save your precious summer harvest.
It’s about being observant, being consistent, and understanding that every plant is part of a larger ecosystem in your garden. There's immense satisfaction in nurturing a resilient tomato plant, especially when you know you've done it all organically, giving your family the healthiest, most flavourful fruit possible.
So, go forth, fellow UK gardener! Keep a keen eye on those leaves, arm yourself with knowledge, and be ready to act. Your delicious, homegrown tomatoes are within reach. I'm already looking forward to my next batch of 'San Marzano' passata, knowing the effort that went into every single organic fruit. You've got this!
