
Battling the Washout – Why Nutrient Leaching Matters in UK Gardens
If you're anything like me, you've probably stood in your UK garden, watching a proper downpour, and thought, "Well, there go my nutrients!" It’s a common worry, especially for us who’ve embraced the fantastic world of raised beds and containers. Here in the Midlands, our weather can be, let's just say, characterful. We can go from a blistering sunny week to what feels like a monsoon overnight, and while the plants often love the drink, our precious soil nutrients can literally be washed away.
When I first started gardening five years ago, fresh out of the IT world and brimming with enthusiasm but short on practical know-how, I quickly learned this lesson the hard way. My raised beds, filled with what I thought was good compost, would start the season strong. My 'Charlotte' potatoes would be powering away, and my 'Black Krim' tomatoes (even outside, I was ambitious back then!) looked vibrant. But come mid-summer, after a few weeks of our notoriously damp British weather, the leaves would start to yellow, growth would slow, and my plants just looked… sad. I was feeding them, but it felt like I was pouring money down the drain – or rather, out the bottom of my beds.
That's when I dug deep (pun intended!) into understanding nutrient leaching. In raised beds and containers, where soil volume is finite and drainage is often excellent (which is usually a good thing!), nutrients can easily get flushed out with heavy rain or overwatering. For us UK gardeners, with our often unpredictable and rain-heavy climate, this isn't just a minor inconvenience; it's a major challenge to plant health and, ultimately, to our harvests. I've learned that preventing this washout isn't just about saving your wallet; it's about building truly resilient plants that can thrive, even when the British weather throws its worst at them. If you want consistently healthy, productive plants without constantly chasing their nutritional needs, then tackling nutrient leaching head-on is a game-changer.
Understanding the Drain: How Leaching Affects Raised Beds & Containers
So, what exactly is nutrient leaching? In simple terms, it's the process where water moves soluble nutrients down through the soil profile, eventually draining out the bottom of your raised bed or container. Imagine a cup of coffee: when you pour hot water through the grounds, the coffee (nutrients) is extracted and carried away by the water. The same principle applies in our gardens. Essential nutrients like nitrogen, potassium, and magnesium, which are highly soluble, are particularly susceptible to this escape act.
For gardeners like me, who rely heavily on raised beds and containers in their 800 sq ft backyards, this process is magnified. Unlike in-ground gardens with a vast, deeper soil profile and often a more complex microbial ecosystem, our raised systems have a limited volume of soil. This means there's less 'buffer' for nutrients to hang around, and the excellent drainage we deliberately aim for in these systems can become a double-edged sword. While it prevents waterlogging – a common killer of plant roots – it also provides a superhighway for nutrients to exit stage left. I remember one season, my 'Bush Bean Provider' plants in a large fabric pot just stalled after a particularly wet June. Despite regular feeding, they looked anaemic. It was a clear sign of nutrient drain, and it drove home just how vulnerable these systems are.
Raised Beds vs. Containers: A Nutrient Retention Showdown
While both raised beds and containers face challenges with nutrient leaching, there are some key differences in their susceptibility and how we can mitigate the loss. I've experimented with both extensively in my UK garden, from large timber beds to 20-litre fabric pots for my greenhouse heirloom tomatoes, and here's what I've observed.
| Feature | Raised Beds | Containers (Pots, Grow Bags) |
|---|---|---|
| Soil Volume | Larger, offering more buffering capacity. | Smaller, limited buffering capacity. |
| Drainage | Usually good, can be linked to subsoil. | Excellent, often too efficient. |
| Leaching Risk | Moderate to high, depends on depth and soil structure. | High to very high, especially with heavy rain/watering. |
| Water Retention | Better due to volume, but still needs attention. | Poor, dries out quickly, requiring more frequent watering. |
| Temperature | More stable than containers, less stress on roots. | Fluctuates wildly, stressing roots and affecting nutrient uptake. |
| Nutrient Loss | Slower, but significant over time. | Rapid and pronounced, particularly with highly soluble nutrients. |
| Mitigation | Focus on deep organic matter, mulching, strategic feeding. | Crucial for soil amendments, very careful feeding, pot choice. |
| Randy's Take | Easier to manage, but still needs careful attention to soil building. | My biggest challenge; requires constant vigilance and smart strategies. |
Building a Resilient Base: Essential Soil Amendments for Nutrient Retention
The absolute best defence against nutrient leaching starts before you even plant a seed: it's all about building a robust, nutrient-retentive soil structure. Think of your soil as a sponge. A poor, sandy soil is like a sieve, letting everything pass through. A rich, organic-matter-filled soil is like a super-absorbent sponge, holding onto water and nutrients. This is especially vital for us here in the UK, where our soil often needs a good boost to perform at its best.
For years, I've spent my autumns and springs religiously amending my raised beds and refreshing my container mixes. It's not the most glamorous part of gardening, but it's the bedrock of success. My heirloom tomatoes in the greenhouse – varieties like 'Costoluto Fiorentino' and 'Gardener's Delight' – wouldn't produce half as well without a fantastic starting soil.
Here are the key amendments I swear by for locking in those vital nutrients:
- High-Quality Compost (Homemade is Best!): This is the king of soil amendments. Compost doesn't just add a slow trickle of nutrients; it fundamentally improves soil structure. It creates humus, which has a negative charge, allowing it to bind positively charged nutrient ions (like calcium, magnesium, and potassium) and prevent them from washing away. I make my own compost from kitchen scraps, garden waste, and shredded cardboard, and every spring, a thick layer goes into my raised beds. It's transformed my heavy clay-loam in my Midlands garden into something truly workable.
- Well-Rotted Manure: If you can get your hands on it, well-rotted horse or cow manure is fantastic. Like compost, it's rich in organic matter and slowly releases nutrients, but it also significantly boosts the soil's cation exchange capacity (CEC) – its ability to hold onto nutrients. Just make sure it's well-rotted (at least 6 months to a year old) to avoid burning plants or introducing too much nitrogen too quickly. I add a generous forkful to my brassica beds every autumn.
- Coconut Coir: This is a fantastic, sustainable peat alternative that excels at water and nutrient retention. It's especially useful in containers where volume is limited. Coir fibres act like tiny sponges, holding onto moisture and dissolved nutrients, making them available to roots for longer. I typically mix about 20-30% coir into my potting mixes for containers, particularly for my thirsty greenhouse cucumbers and peppers.
- Vermiculite & Perlite: While often confused, both are excellent for improving soil structure and drainage, but vermiculite also has a secret weapon: it actually holds onto nutrients. Vermiculite is a hydrated magnesium aluminium silicate mineral that expands when heated, creating tiny accordion-like structures that can trap water and nutrients. Perlite, on the other hand, is a volcanic glass that primarily improves aeration and drainage. I use a mix of both in my potting composts – typically 10-15% vermiculite for nutrient retention and 5-10% perlite for aeration in my seed-starting mixes and container planting.

My strategy is always to build the soil first. If you create a living, breathing soil teeming with organic matter, it does a lot of the heavy lifting for you. I remember one year, I skimped on the compost in a new raised bed for my carrots, thinking the bagged soil mix would be enough. The carrots grew, but they were pale, thin, and just didn't have that vibrant orange colour or sweetness. The next year, after incorporating a good 6 inches of homemade compost and some well-rotted manure, the difference was night and day. Fat, healthy 'Autumn King 2' carrots that practically jumped out of the ground!
Feeding Smart: Choosing & Applying Slow-Release Nutrients Effectively
Even with the best soil structure, our hungry plants in raised beds and containers will eventually deplete the available nutrients, especially after a few good British downpours. That's where strategic, smart feeding comes in. For me, the key to preventing nutrient leaching while still providing a steady diet for my plants is to favour slow-release nutrients over quick-fix liquid feeds, especially in our often rainy climate. Liquid feeds are great for an immediate boost, but they're also the first to wash away with heavy rain.
My goal is to mimic nature's slow-and-steady approach. This means choosing fertilisers that break down gradually, making nutrients available to the plant roots over weeks or even months. This way, the plants get a continuous supply, and there's less risk of excess nutrients being leached out before the plant can use them. I've found this approach particularly effective for my long-season crops like 'Moneymaker' tomatoes in the greenhouse and 'Kelsae' onions in the raised beds, which need consistent feeding.
Choosing & Applying Your Slow-Release Arsenal
There's a fantastic range of slow-release options available for UK gardeners, both organic and synthetic. I lean heavily towards organic options as they also feed the soil's microbial life, which in turn helps retain nutrients.
- Initial Application: I always incorporate a good slow-release granular or pelleted feed into my soil at planting time. This forms the foundational feed for the season. For my tomatoes and peppers, I'll mix in a handful of a balanced organic granular feed like blood, fish, and bone meal into the planting hole.
- Top Dressing: For longer-season crops, I'll often top-dress with an additional dose mid-season, usually around late June or early July here in the Midlands, especially after the first flush of fruit or if growth seems to be slowing. I'll gently scratch the pellets into the top few inches of soil around the plant.
- Mulching: As an added bonus, a good organic mulch (like straw, wood chip, or grass clippings) on top of your raised beds and containers not only suppresses weeds and retains moisture but also slowly breaks down, adding a continuous trickle of nutrients back into the soil, further reducing leaching.
Here's a comparison of some popular slow-release nutrient options I use in my UK garden:
| Nutrient Type | Pros (for UK Gardening) | Cons (for UK Gardening) | Randy's Application |
|---|---|---|---|
| Blood, Fish & Bone Meal | Excellent all-rounder, organic, good source of N, P, K. Slow release. | Can attract pests (foxes, cats) if not well-integrated into soil. Odour. | Mix into beds/pots at planting. Top-dress mid-season for hungry crops. |
| Comfrey Pellets/Liquid | Organic, rich in potassium (great for fruiting), deep-rooted. | Making liquid feed is smelly! Pellets can be harder to find. | Use pellets for a slow release in pots. Comfrey tea for a quick K boost (after initial leaching concerns). |
| Seaweed Meal/Granules | Organic, trace minerals, natural growth stimulants. Improves soil. | Lower NPK values, so often used as a supplement. | Add to potting mixes or sprinkle around plants as a soil conditioner and mild feed. |
| Chicken Manure Pellets | High nitrogen, good for leafy greens. Organic. | Can be strong; use sparingly to avoid burning. Need rain to break down. | Work into soil for brassicas and leafy greens like 'Red Russian' kale. |
| Slow-Release Granules | Convenient, balanced NPK, often coated for precise release. | Can be synthetic, environmental concerns for some. More expensive. | For plants needing very consistent feeding, like my greenhouse peppers. |
| Mycorrhizal Fungi | Not a nutrient, but enhances nutrient uptake and drought resistance. | Needs direct root contact, not a direct fertiliser. | Always add to planting holes for tomatoes, peppers, and most veg for stronger roots. |
Water Wise: Optimizing Irrigation & Drainage to Keep Nutrients in Place
Now, you can have the most nutrient-rich soil in the world, but if your watering regime is off, you're still going to lose those precious goodies. This is a lesson I learned the hard way in my early days. I remember one particularly dry spell here in the Midlands, followed by a sudden downpour, and I just went out with the hosepipe, blasting water onto my raised beds. I thought I was helping, but all I was doing was flushing everything right out the bottom!
The Drainage Debate: Too Much vs. Just Right
First off, let’s talk drainage. In raised beds and containers, good drainage isn't just about preventing root rot (though that's crucial too!). It’s about allowing excess water to escape without taking all your soluble nutrients with it. I always ensure my raised beds have at least 6-8 inches of good, coarse drainage material at the very bottom – broken terracotta, chunky gravel, even old branches. For containers, every single pot needs drainage holes. No exceptions! I once tried to repurpose an old metal bucket for growing potatoes, drilling only a couple of small holes, and the soil became waterlogged almost instantly after a typical British summer shower. The spuds were tiny and tasted watery. Never again!
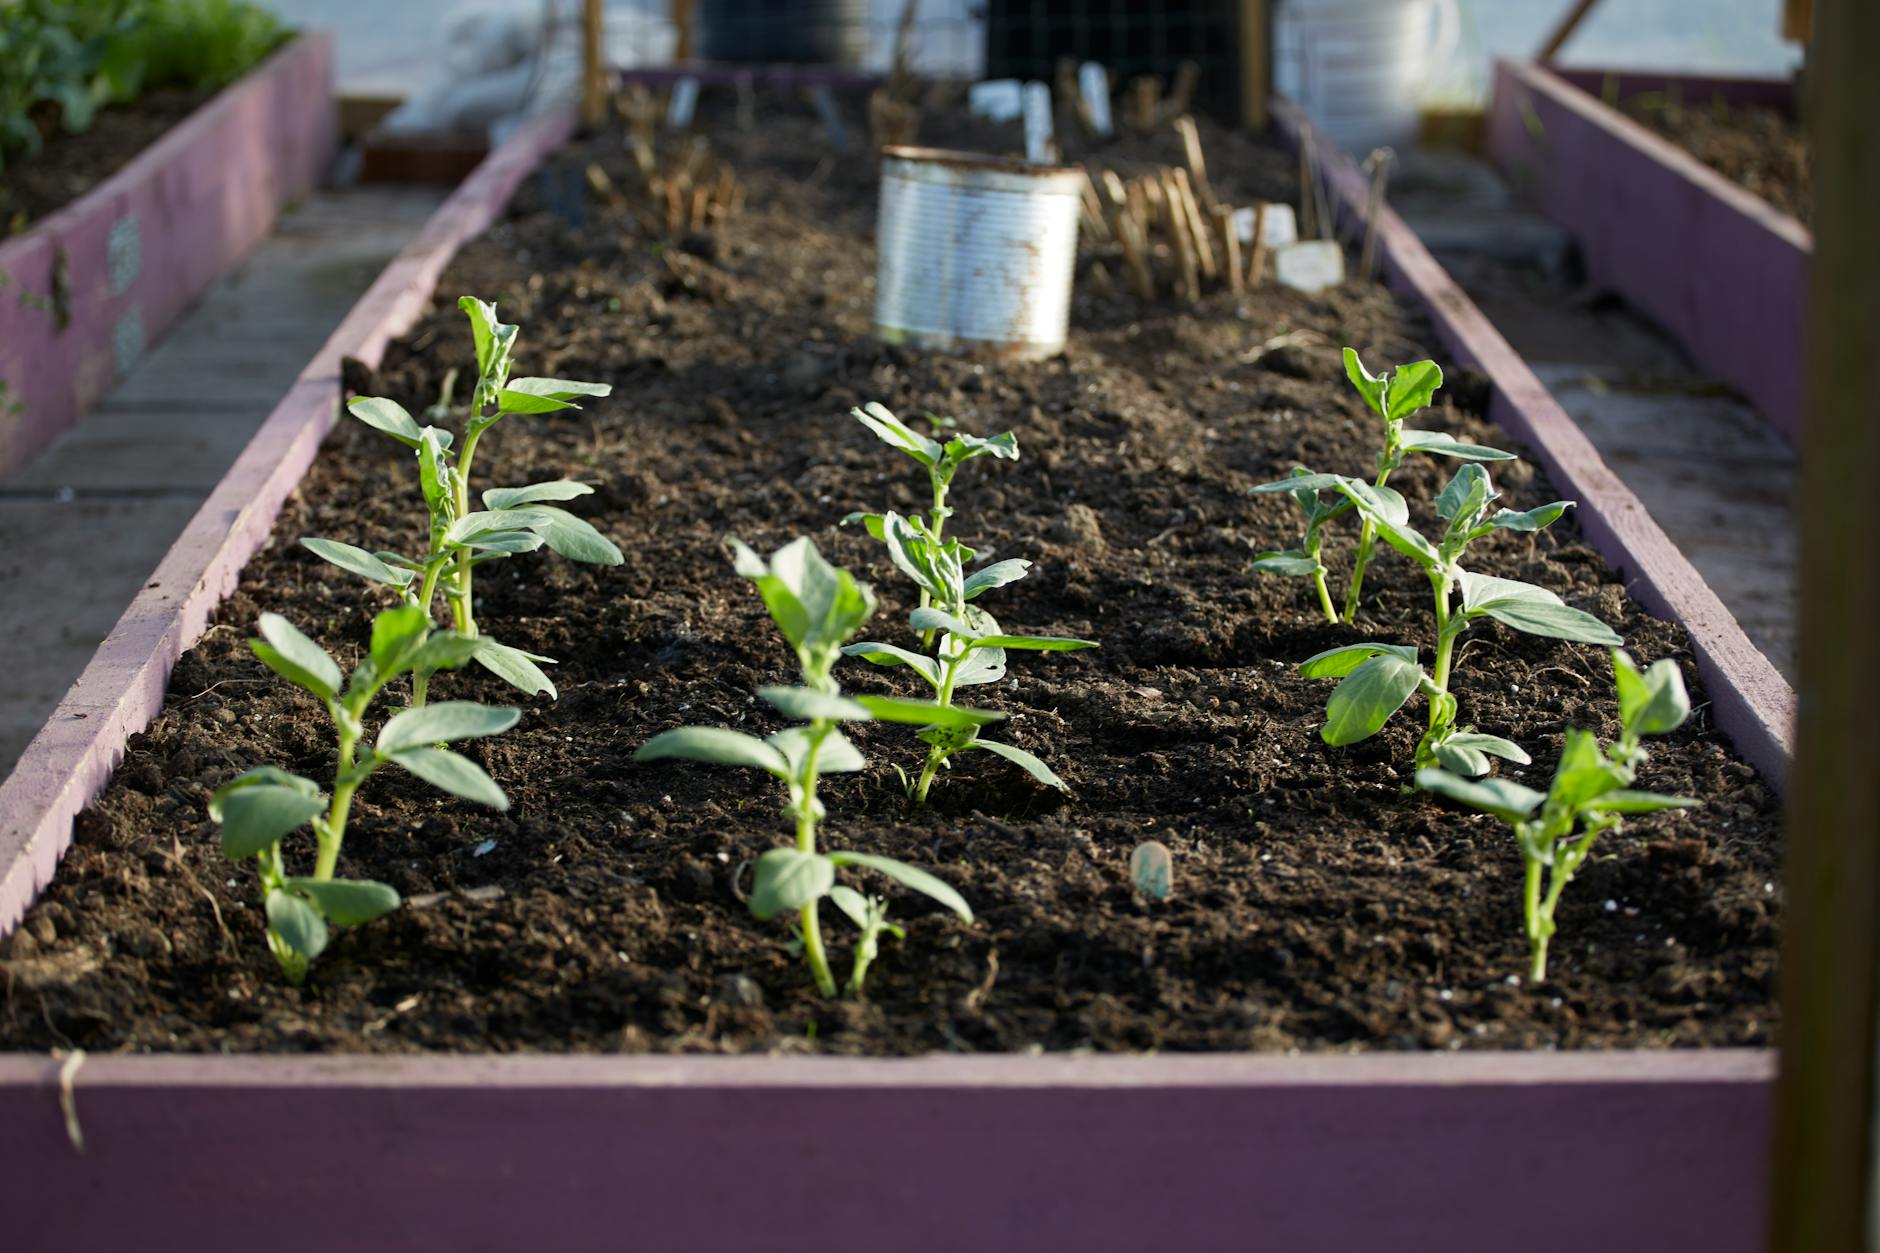
Smart Watering for UK Climates
Here in Britain, we're often at the mercy of unpredictable weather. One day it's scorching, the next it's biblical rain. My approach has evolved significantly.
- Deep, Infrequent Watering: Rather than little sprinkles every day, I aim for deep, thorough watering when the soil actually needs it. This encourages plant roots to grow deeper, making them more resilient and better able to access nutrients lower down, away from the surface wash-out. I'll stick my finger down into the soil – if it feels dry an inch or two down, it's time to water.
- Targeted Delivery: For my thirsty greenhouse tomatoes like 'Sungold' and 'Gardener's Delight', I use drip irrigation or soaker hoses. This delivers water directly to the root zone, minimising evaporation and, crucially, preventing water from just running off the surface and carrying nutrients away. For my raised beds, especially after a dry spell, I often use a watering can with a rose attachment, taking my time to let the water soak in gradually.
- Working With the Rain: This is a big one for us UK gardeners. I monitor the weather forecast like a hawk. If heavy rain is predicted, I'll hold off on any supplemental watering for my outdoor beds. In fact, if I've recently applied any liquid feeds, I might even cover very delicate plants briefly to prevent an immediate washout, though this isn't practical for all my beds. The aim is to let the plants get what they need from the rain, but not let it become an overwhelming flood that leaches everything.
One year, I got a bit overzealous with a liquid seaweed feed just before a week of solid Midlands rain. The plants looked good initially, but after the deluge, they seemed to sag and lose vibrancy. I realised I'd effectively just flushed all that goodness away. Now, I always apply liquid feeds when there's a good dry spell predicted for a few days, giving the plants time to absorb it.
Plant Power: Selecting Crops & Practices to Minimize Nutrient Loss
It's not just about what you put in the soil; it's also about what you ask of your soil and how your plants interact with it. Different crops have different demands, and by making smart choices, we can further reduce nutrient leaching.
Choosing Wisely: Heavy Feeders vs. Light Touch
Some plants are like hungry teenagers – they devour nutrients at an alarming rate. Think brassicas like my 'Cavolo Nero' kale or my 'Romanesco' broccoli, and especially those thirsty greenhouse tomatoes. These are known as "heavy feeders." If you plant too many of them in a single raised bed year after year, they’ll deplete the soil quickly, making it more susceptible to nutrient loss, and you’ll be constantly trying to replenish.
I've learned to rotate my crops carefully. After a season of heavy feeders, I'll often follow with "light feeders" such as carrots, parsnips, or herbs like coriander and dill. These plants have lower nutrient demands and can even benefit from the residual nutrients left by their predecessors. Even better, I'll follow with a legume like peas or beans, which actually fix nitrogen back into the soil, acting as nature's own fertiliser. My 'Mangetout Oregon Sugar Pod' peas are a regular feature in my rotation for this very reason.
The Magic of Mulch (Again!) & Cover Crops
We talked about mulch for building soil structure, but it’s also a superstar for keeping nutrients in place. A good 2-3 inch layer of organic mulch – whether it’s straw, wood chips, or my homemade compost – acts like a blanket. It slows down the rate at which rain hits the soil, preventing surface runoff that carries topsoil and nutrients away. It also moderates soil temperature and retains moisture, meaning I need to water less, further reducing leaching risk. In my UK garden, especially for my permanent fruit bushes like gooseberries and currants, I keep a thick layer of wood chip mulch year-round.
And then there are cover crops. For those of us with raised beds, the idea of cover crops might seem like a grand agricultural concept, but it's totally applicable even in small spaces! When a bed is going to be empty for a few months – perhaps over winter after my late potatoes are harvested – I'll sow a quick cover crop. Green manures like 'Crimson Clover' or 'Winter Vetch' are fantastic. They put down roots that hold the soil, preventing erosion and nutrient washout during our wet British winters. When spring comes, I just chop them down and dig them into the soil, adding valuable organic matter and, in the case of legumes, nitrogen. It’s a simple, natural way to keep the soil alive and fed, even when it’s not actively producing food for me.
Long-Term Vitality: Monitoring Soil Health & Replenishing Lost Nutrients
Okay, so we've done our best to build robust soil, feed smartly, water wisely, and choose our plants carefully. But gardening is a dynamic process, especially with our challenging UK climate constantly trying to wash things away. We need to stay on top of our soil's health to ensure long-term vitality.
Get to Know Your Soil: The Power of Testing
The absolute best way to know what's going on beneath the surface is to get a soil test done. I know, it sounds a bit scientific and maybe even daunting, but it's incredibly insightful. I use a local UK agricultural lab – a quick Google for "UK soil testing for gardeners" will bring up several options. You send them a small sample from your beds, and they send back a detailed report on pH, and levels of key nutrients like nitrogen (N), phosphorus (P), and potassium (K), along with micronutrients.
I usually do this every 2-3 years for my main raised beds. The first time I did it, I was surprised. I thought I was doing everything right, but it turned out my phosphorus levels were a bit low in one bed, and another was slightly too alkaline for my brassicas. This information is gold! It means I can stop guessing and start applying exactly what's needed, rather than blindly adding general fertilisers that might create an imbalance or, worse, just leach away because they weren't needed in the first place.
Replenishing the Goodness: Targeted Approach
Once you know what your soil needs, you can replenish lost nutrients strategically. Even with the best practices, some nutrients will inevitably be taken up by plants or lost to the elements over time.
- Compost, Compost, Compost: This is my number one go-to. Every spring, I top-dress my raised beds with a good 2-3 inch layer of my homemade compost. It's a slow-release marvel, packed with a balanced array of nutrients and teeming with beneficial microbes. It's the backbone of my soil health.
- Liquid Feeds for Quick Boosts: For hungry plants like my greenhouse tomatoes or courgettes during their fruiting phase, a liquid feed (like organic seaweed extract or comfrey tea) can provide a rapid nutrient boost. I apply these after a good watering, and always check the weather forecast to avoid a washout.
- Granular Organic Fertilisers: If my soil test shows a specific deficiency, I might use a targeted organic granular fertiliser. For example, if phosphorus is low, I might add some bone meal. I work these into the top few inches of soil in early spring so they can break down slowly over the season.
Here's a quick comparison of some common replenishment methods I use here in my Midlands garden:
| Replenishment Method | Pros (for UK conditions) | Cons (for UK conditions) | Best Use Cases (Randy's Garden) |
|---|---|---|---|
| Homemade Compost | - Excellent all-rounder, improves structure & fertility - Slow-release, good for long-term health - Reduces waste, free! - Holds moisture, reduces leaching | - Nutrient composition varies (not precise) - Takes time to break down/release nutrients - Need a consistent supply | Annual top-dressing for all beds (spring), general soil conditioning |
| Liquid Seaweed/Comfrey Tea | - Rapid absorption by plants - Good for quick boosts during growth/fruiting - Contains micronutrients - Easy to apply via watering can | - Very prone to leaching in heavy rain if not absorbed quickly - Short-term effect, needs regular reapplication - Can be costly if bought | Greenhouse tomatoes, courgettes, chillies during fruiting; post-transplant shock |
| Granular Organic Fertiliser (e.g., Blood, Fish & Bone) | - More targeted nutrient ratios (e.g., higher P or K) - Slower release than liquids, lasts longer - Easy to incorporate into soil | - Still susceptible to leaching if applied excessively before heavy rain - Can be expensive for large areas - Not always immediately available to plants | Addressing specific soil test deficiencies (e.g., bone meal for P); heavy feeders at planting |
| Cover Crops (Green Manures) | - Prevents erosion & nutrient washout over winter - Adds organic matter & fixes nitrogen (legumes) - Improves soil structure naturally | - Requires an empty bed for a period - Can be seen as 'wasting' space in small gardens - Needs to be cut down/dug in before flowering | Winter fallow beds, rotation after heavy feeders (e.g., peas/vetch after brassicas) |
Conclusion: Cultivating Resilience, One Raindrop at a Time
So there you have it, fellow gardeners! Preventing nutrient leaching in our raised beds and containers, especially with the glorious unpredictability of British weather, is a multi-faceted challenge. But it's one we absolutely can tackle. It's not about finding a magic bullet; it's about building a robust, resilient system.
From the very foundation of your raised beds to the way you water, the plants you choose, and how you monitor your soil, every step plays a crucial role. I've learned these lessons over five years of getting my hands dirty in my Midlands garden, through plenty of trial and error (and more than a few soggy plant failures!). The journey from an IT desk to a thriving 800 sq ft vegetable patch has been one of constant learning and adapting, and this quest to keep my soil happy and my plants fed has been one of the most rewarding aspects.
Remember, healthy soil equals healthy plants. By focusing on building that rich, living soil with plenty of organic matter, feeding strategically with slow-release options, watering intelligently, and letting nature (and a bit of clever planting) do its work, you'll be well on your way to a vibrant, productive garden, come rain or shine.
What are your go-to strategies for preventing nutrient leaching in your UK garden? Have you had any major breakthroughs or disastrous washouts? I'd love to hear your experiences in the comments below – we're all in this wonderfully muddy journey together!
