
Introduction: The Silent Struggle - Why Your New Plants Might Be Stalling
There’s nothing quite like the buzz of bringing home a tray of vibrant annuals or a promising new perennial to tuck into your UK garden. The anticipation, the planning, the sheer joy of adding more life to your little patch of green – it’s what keeps us going through those grey British winters, isn't it? But then, sometimes, you plant them out, give them a good drink, and... nothing. They just sit there. No new growth, leaves looking a bit lacklustre, maybe even a yellow tinge creeping in. It’s a frustrating sight, especially when you’ve put in the effort, and it’s a struggle I’ve seen countless times in my own 800 sq ft Midlands backyard.
For years, I'd just shrug it off, blame the weather, or assume I’d picked a weak plant. But after five years of intensive gardening, turning my former IT-worker brain to the soil, I’ve learned a secret that's transformed how my new plants establish themselves: it's all about what's going on under the soil, specifically with the root ball. That initial shock and 'stalling' that many of us UK gardeners experience? It often comes down to roots that aren't ready to spread their wings – or rather, their tendrils – into their new home. Today, I want to share my hard-won knowledge on strategically teasing and scoring those root balls, a technique that has made a world of difference for everything from my greenhouse heirloom tomatoes to my cottage garden perennials, ensuring they don't just survive, but truly thrive, even with our often-unpredictable British weather.
Understanding the Root of the Problem: Root-Bound Plants & Their Predicament
When you buy a plant from a garden centre here in the UK, it's usually been growing in that small pot for a while. Nurseries grow thousands of plants this way, and for efficiency, they aim for the roots to fill the pot, but not necessarily to become a solid, impenetrable mass. However, sometimes they sit on the shelves a bit too long, or they’re particularly vigorous growers, and their roots start to circle. This is what we call 'root-bound' or 'pot-bound'. I’ve pulled countless plants from their pots over the years, only to find a dense, tangled mat of roots that perfectly mirrors the shape of the container. My first season growing 'Shirley' tomatoes in the greenhouse, I lost a few to this very issue, not understanding why they just wouldn't grow despite perfect feeding and watering.
A root-bound plant is like a person trying to run a marathon with their shoelaces tied together. Those circling roots continue to grow inwards, choking each other, rather than reaching outwards into the new, fertile soil you’ve prepared. This dramatically hinders the plant's ability to absorb water and nutrients from its new environment. In my experience here in the Midlands, especially during a dry spell in early summer, these plants struggle to establish, quickly showing signs of stress like wilting, yellowing, and stunted growth. They're essentially stuck in their pot-shaped prison, unable to access the resources they desperately need to flourish. It’s a silent struggle, but once you know what to look for, it’s a problem that’s easily remedied.
Healthy Roots vs. Root-Bound Roots: A Comparison
To help you identify the issue, here’s a quick comparison of what you might see when you gently slide a plant out of its pot before planting. This is a crucial step I always take, whether it's a tray of bedding plants or a potted perennial for one of my raised beds.
| Feature | Healthy Root Ball | Root-Bound Root Ball |
|---|---|---|
| Appearance | Visible soil, white or light-coloured roots throughout | Dense mat of roots, often brown/yellow, little visible soil |
| Root Pattern | Roots generally growing downwards and outwards | Roots circling the perimeter of the pot, often tangled |
| Texture | Loose, crumbly, roots easily separated | Solid, compact, difficult to pull apart |
| Smell | Earthy, fresh soil scent | Can be slightly sour or stagnant if severely neglected |
| Growth Potential | Ready to expand into new soil, quick establishment | Stunted initial growth, slow establishment, prone to stress |

To Tease or Not To Tease? Identifying When and How Aggressively to Intervene
This is where the art of root ball intervention comes in, and it's something I’ve experimented with extensively in my UK garden. Not all plants need the same treatment, and going too aggressive on a delicate annual can be just as detrimental as doing nothing for a severely root-bound perennial. I've learned this the hard way, for instance, by being too heavy-handed with some 'Busy Lizzie' seedlings one spring, only for them to sulk for weeks. Conversely, I once just plonked a pot-bound 'Rudbeckia' straight into the ground, and it barely put on any growth all season, despite plenty of sun and rain.
The key is observation and understanding the plant's natural vigour. When you slide the plant out of its pot, take a good look. Is it just a few roots peeking out, or is it a solid block of white, or even brown, roots circling the container? This visual cue, combined with the plant's type, will guide your decision. Annuals and delicate perennials generally need a gentler touch, while robust perennials and woody shrubs can often handle, and indeed benefit from, a more assertive approach. My heirloom tomatoes, grown from seed in my greenhouse, usually only need a gentle tease if they've been in their pots a bit long before planting out in late May/early June here in the Midlands.
Plant Type vs. Recommended Root Intervention
Here's a guide based on my personal experience with various plants in British growing conditions:
| Plant Type | Root Ball Condition | Recommended Intervention | Randy's Experience (UK) |
|---|---|---|---|
| Annuals (e.g., Petunia, Marigold, Pansy, Basil) | Slightly root-bound (roots just visible) | Gentle teasing: Loosen bottom 1/4 of roots, fan outwards. | Crucial for quick establishment in bedding. My 'African Marigolds' for pest control benefit massively from this. |
| Moderately root-bound (roots circling) | Gentle teasing: Similar, but ensure outer roots are freed. | I find this prevents early bolting in herbs like basil and ensures a long flowering season for 'Surfinia' petunias. | |
| Delicate Perennials (e.g., Heuchera, Campanula, smaller Hostas) | Slightly to moderately root-bound | Gentle teasing: Carefully separate circling roots, especially at the bottom. | My 'Caramel' Heucheras respond well; too aggressive and they can take weeks to recover in our often-damp British soil. |
| Robust Perennials (e.g., Echinacea, Rudbeckia, larger Hostas, ornamental grasses) | Moderately to severely root-bound | Aggressive teasing/scoring: Use fingers or knife to break up the root ball, make vertical cuts. | Absolutely essential for plants like my 'Magnus' Echinacea. If not scored, they often sit stunted for a full season. |
| Woody Shrubs & Trees | Always check, can be very root-bound if in pot long | Aggressive teasing/scoring: Often requires a knife to make vertical cuts and loosen the base. | For my fruit bushes or new rose varieties, failing to do this has led to very slow growth and poor flowering in subsequent years. |
The Gentle Touch: Step-by-Step Guide for Teasing Annuals & Delicate Perennials
When dealing with annuals or more delicate perennials – the ones that look a bit fragile, like my trailing lobelia or my gorgeous 'Bluebird' campanulas – a gentle approach is always best. The goal isn't to rip the roots apart, but to encourage them to break free from their pot-shaped memory and explore the new soil. This is a technique I use religiously for all my bedding plants and most of my smaller herbaceous perennials before planting them into my raised beds or containers.
Here's my step-by-step guide for a gentle root tease:
- Preparation is Key: First, give your plant a good watering about an hour before you plan to plant it. This helps hydrate the roots and makes them more pliable, reducing shock. I always do this, especially if the weather forecast here in the Midlands is for a dry spell after planting.
- Gently Remove from Pot: Carefully invert the pot, supporting the plant's base with your hand. Give the bottom of the pot a gentle squeeze or tap to help release the root ball. Slide the plant out slowly. Avoid pulling the stem, as this can damage the plant.
- Assess the Root Ball: Once out, examine the roots. For annuals and delicate perennials, you're usually looking for roots that are circling the outside, but not yet forming a solid, woody mass. If you see just a few roots, you might not need to do much at all!
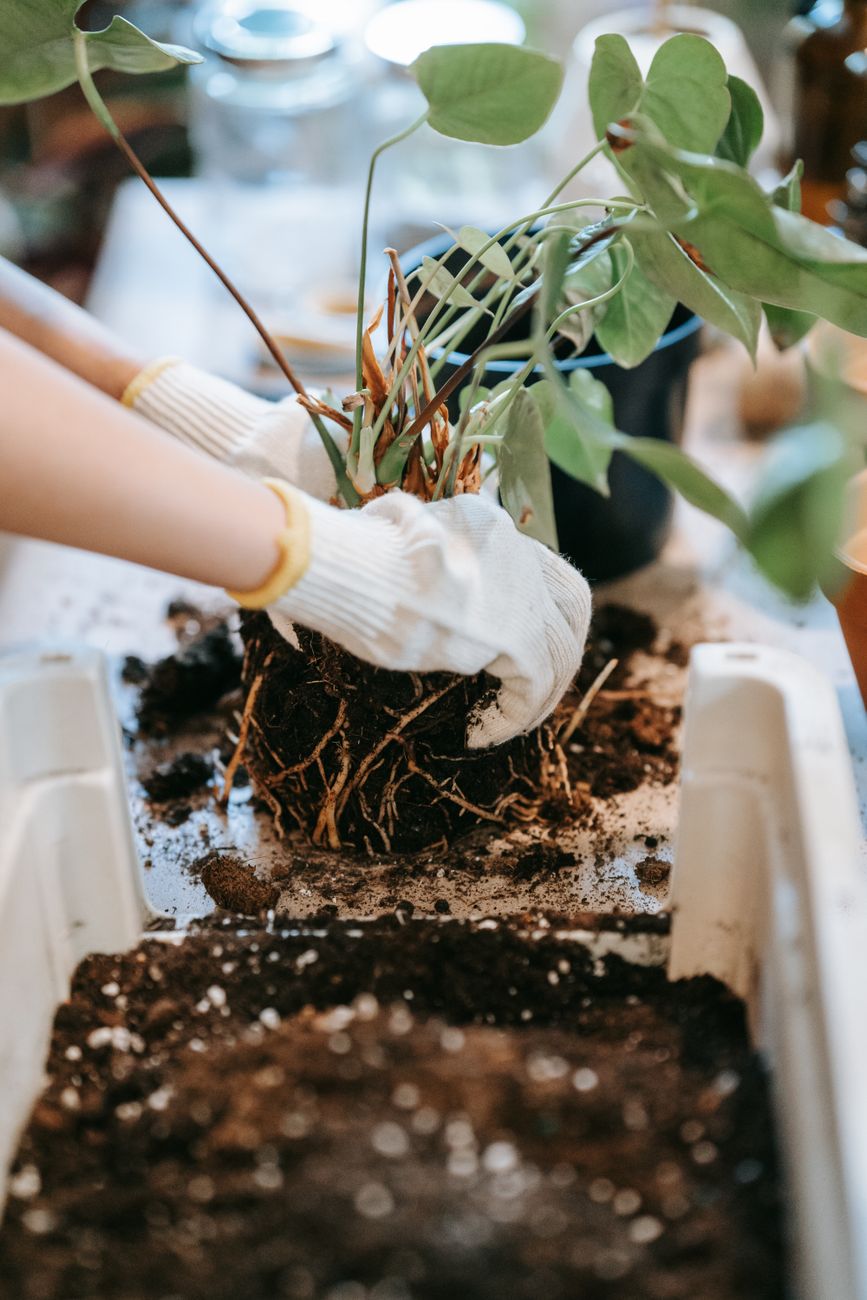
- Loosen the Base: Using your fingers, very gently tease apart the roots at the very bottom of the root ball. Think of it like gently combing tangled hair. You want to unfurl those circling roots and encourage them to point downwards and outwards. Don't be afraid to break a few tiny root tips – it stimulates new growth.
- Fan Out the Sides (If Needed): If the roots are also tightly circling the sides, gently run your fingers vertically down the sides of the root ball, just enough to loosen a few of those outer roots. The aim is to create a more open structure, not to completely dismantle the ball.
- Plant Immediately: Once teased, plant your annual or delicate perennial into its prepared hole straight away. The exposed roots are vulnerable to drying out, especially on a breezy UK day. Backfill with soil, gently firm around the base, and give it a thorough watering. This helps settle the soil and ensures good root-to-soil contact.
This gentle teasing encourages the plant to quickly send out new roots into its new home, leading to faster establishment and a much more vigorous display in your UK garden.
The Strategic Score: Techniques for Vigorously Established Perennials & Small Shrubs
Okay, so we've talked about the gentle touch for annuals and delicate perennials. But what about those tougher customers? The ones that come out of their pots looking like they've been trying to tunnel to Australia, with roots so tightly coiled they could win a prize in a spiral competition? This is where we bring out the 'strategic score' – a slightly more aggressive but incredibly effective technique for vigorously established perennials and even small shrubs.
I've learned this the hard way with plants like my hardy fuchsias and even some of the more robust lavender varieties I grow in my raised beds. When I first started, I'd just plonk these super root-bound plants straight into the ground, thinking their toughness would see them through. Big mistake! They'd often sit there, sulking for weeks, if not months. The roots, still stuck in their pot-shaped prison, just wouldn't venture out into the lovely, rich soil I'd prepared. It was like they didn't know how.
Why Scoring?
Scoring isn't about being mean to your plants; it's about tough love. For plants with thick, matted root balls, a gentle tease simply won't cut it. You need to create actual breaks in that dense root network. This encourages new root growth to 'branch out' into the surrounding soil, rather than continuing to circle around themselves. It's like giving them a stern talking-to and pointing them in the right direction!
My Step-by-Step for Strategic Scoring
This is what I do, especially when dealing with those notoriously pot-bound specimens.
Assess the Root Ball: Take the plant out of its pot. If it's a solid mass of roots, barely any soil visible, and it holds its pot shape perfectly – you're a candidate for scoring. I often see this with things like my established rosemary bushes or even some of the more mature strawberry plants I propagate.

Gather Your Tools: For scoring, I usually grab a clean, sharp knife or a small hand trowel with a sturdy edge. Hygiene is key here, folks! Give it a quick wipe with rubbing alcohol to prevent any disease transmission. I keep a bottle handy in my greenhouse for this exact purpose.
The Bottom Score: Lay the plant on its side, gently. Using your knife or trowel, make 2-4 vertical cuts about 1/2 to 1 inch deep (1-2.5 cm) into the bottom of the root ball. Think of it like slicing a cake – you're creating pathways for new roots. Don't be shy; you want to sever some of those circling roots.
The Side Scores: Now, make 2-4 vertical cuts down the sides of the root ball, again about 1/2 to 1 inch deep. I usually aim for evenly spaced cuts around the circumference. This helps break up that outer layer of matted roots.
Gently Pry & Fluff: After scoring, I'll gently try to pull apart some of the root sections, particularly at the bottom. You don't need to completely dismantle it, but encourage those scored edges to separate a little. This further stimulates new growth. You might lose a few small roots, and that's absolutely fine; we're aiming for long-term vigour.
Plant Immediately: Just like with teasing, get that scored plant into its new home as quickly as possible. Have your planting hole ready, dug generously wider than the root ball, and amended with some lovely, rich compost. In my Midlands garden, where we have a fair bit of clay, I always add a good shovel-full of homemade compost to improve drainage and provide nutrients.
My Experience with Scoring
Last year, I got a few bare-root roses that were meant to be potted up before planting out. When I finally went to plant them in their permanent spot, their roots had become incredibly dense in the pots. I gave them a good scoring, and honestly, they've established beautifully, putting on strong new growth despite our typically unpredictable British spring. I've found scoring to be a game-changer for anything from heucheras to my beloved greenhouse chili plants when they get too big for their initial pots. It really does kickstart them into vigorous growth.
Beyond the Roots: Essential Post-Planting Care for Optimal Establishment in UK Gardens
So, you've done the hard work: selected your plants, prepped the soil, and either gently teased or strategically scored those root balls. Fantastic! But the job isn't done yet. Getting a plant established, especially here in the UK with our famously changeable weather, requires a bit more TLC. Think of it as the aftercare for your new garden residents. Neglect these steps, and even the most perfectly rooted plant can struggle. I've learned this through a few heartbreaking losses early on – plants that looked great at planting time, only to wither a few weeks later because I didn't support them properly.
Watering: The Unsung Hero of Establishment
This is probably the most critical step. For the first few weeks, new plants need consistent moisture as their roots venture out into the surrounding soil.
- Deep and Infrequent: Forget little sips every day. I aim for deep, thorough watering right after planting, and then every 2-3 days, depending on the weather and soil type. My clay soil in the Midlands holds water well, so I adjust. Sandy soils might need more frequent watering. The goal is to encourage roots to grow downwards in search of water, creating a strong, stable plant.
- Check the Soil: Don't just water because the calendar says so. Stick your finger about an inch or two into the soil. If it feels dry, water. If it's still damp, hold off. Overwatering is just as bad as underwatering, leading to root rot.
- Rain isn't Always Enough: Even with a classic British drizzle, don't assume your new plants are getting enough water. Often, light rain barely penetrates the surface, especially if the plant's foliage creates a canopy. Always check the soil underneath.
Mulching: Your Garden's Blanket
Mulch is a non-negotiable in my 800 sq ft garden. It's like a magic blanket for your plants.
- Moisture Retention: This is huge for us in the UK, especially during those unpredictable dry spells we seem to get more often now. A 2-3 inch (5-7.5 cm) layer of organic mulch (like compost, well-rotted manure, or bark chippings) significantly reduces water evaporation from the soil.
- Weed Suppression: Less weeding means more time for admiring your plants (or propagating more tomatoes, in my case!). Mulch smothers weed seeds and makes any weeds that do pop through much easier to pull.
- Temperature Regulation: Mulch keeps soil cooler in summer and warmer in winter. This is particularly beneficial for new roots as they establish, protecting them from extreme temperature fluctuations.
- Nutrient Boost: As organic mulches break down, they slowly release nutrients into the soil, feeding your plants naturally.
Feeding: Hold Your Horses!
New plants don't need a heavy feed. Their primary focus is root establishment, not pushing out loads of new foliage or flowers.
- Patience is Key: I generally don't feed new plants for the first 4-6 weeks after planting. Any nutrients needed should be available from the compost you added to the planting hole.
- Gentle Start: If you feel the need to feed, opt for a very dilute, balanced liquid feed, or a slow-release granular feed at half strength. Over-fertilizing can burn delicate new roots. I usually wait until I see vigorous new growth before considering a proper feed.
Protection: Guarding Against the Elements & Pests
Our UK weather can be a real challenge, and pests are always on the prowl.
- Weather Watch: Keep an eye on the forecast. Late spring frosts can devastate new plantings. I always have some fleece or cloches ready, especially for my more tender annuals or early-planted vegetables. Strong winds can also buffet and damage young plants, so consider temporary stakes or windbreaks.
- Pest Patrol: Slugs and snails are the bane of my existence here in the Midlands! Be vigilant. I use a combination of beer traps, copper tape, and regular evening patrols to protect my young plants, especially tender seedlings. Companion planting can also help deter some pests.
Comparing Post-Planting Care Approaches: Randy's Real-World Experience
To make it a bit clearer, here's a quick comparison of common challenges and my tried-and-tested solutions here in my UK garden:
| Challenge / Aspect | Common Mistake I've Seen (or Made!) | Randy's UK-Specific Solution & Why it Works |
|---|---|---|
| Watering | Frequent, shallow watering; relying on rain | Deep, infrequent watering. Encourages deep root growth. Always finger-check soil; UK rain is unreliable for new plants. |
| Mulching | Skipping it altogether | 2-3 inches organic mulch (compost/bark). Retains moisture (crucial in UK dry spells), suppresses weeds, regulates soil temp. |
| Feeding | Immediate, strong fertilizer | No feeding for 4-6 weeks; then dilute feed. New roots are delicate; focus on establishment, not immediate growth. |
| Pest Control (Slugs/Snails) | Ignoring until damage is severe | Vigilant checks, beer traps, copper tape. UK climate is perfect for slugs; early intervention saves plants. |
| Weather Protection | Assuming it'll be fine | Fleece/cloches for late frosts; temporary windbreaks. British weather is notoriously fickle; better safe than sorry. |
| Plant Support | Not staking plants early | Stake taller perennials/veg early. Prevents wind rock, which damages developing roots, especially in exposed UK gardens. |
Conclusion: Nurturing Strong Foundations for a Thriving Garden
Phew! We've covered a fair bit, haven't we? From the silent struggle of a root-bound annual to the strategic scoring of a robust perennial, and then all the vital aftercare needed to truly see your plants thrive here in our wonderful, if sometimes challenging, UK climate.
If there's one thing I want you to take away from all my ramblings, it's this: healthy roots are the foundation of a healthy garden. It sounds simple, but it's a truth I've come to appreciate more and more in my five-plus years of intensive gardening here in the Midlands. I've seen the difference it makes in my own 800 sq ft backyard – plants that get a good start, with their roots encouraged to spread out and explore, are simply more resilient. They stand up better to our sudden downpours, shrug off those unexpected dry spells, and are generally more vigorous and productive. My 'Cherokee Purple' tomatoes in the greenhouse, for example, consistently give me bumper crops because I've made sure their roots are never constricted.
I know it can feel a bit daunting at first, wondering whether to tease, score, or just leave well enough alone. I made plenty of mistakes early on, believe me! I lost a whole bed of delphiniums one year because I didn't break up their tightly packed roots, and they just sat there, stagnating. But every failure is a lesson learned, and that's what gardening is all about: experimenting, observing, and adapting.
So, next time you're about to pop a new plant into the ground, take that extra moment. Lift it from its pot. Examine its roots. Ask yourself: does this plant need a gentle tease, or a strategic score? Then, give it the essential post-planting care it deserves – the deep watering, the protective mulch, and a watchful eye against our British weather and garden pests.
By giving your plants the best possible start, you're not just planting a seed or a seedling; you're nurturing a strong foundation for a thriving, vibrant garden that will bring you joy season after season. Happy gardening, everyone! I'd love to hear about your own root-teasing adventures in the comments below!
