Introduction: Thriving Through Winter's Chill – Protecting Succulents in Wet Climates
Right, so you're keen on growing those wonderfully architectural cold-hardy succulents here in the UK, aren't you? Like me, you've probably seen those stunning alpine displays and thought, "Yes, I can do that!" And you absolutely can! But if you're anything like me when I first started my gardening journey five years ago here in the Midlands, you quickly learn that "cold-hardy" in a British context doesn't quite mean what you initially think. Our winters aren't just cold; they're often relentlessly wet.
I remember one particularly soggy winter, probably my second year into serious gardening, when I'd optimistically planted a gorgeous patch of Sempervivums directly into a border. They'd been labelled "frost proof!" at the garden centre, and I figured that was all I needed to know. Come spring, instead of vibrant rosettes, I had a sad, mushy mess. My heart sank. It was a proper gardening heartbreak, and a tough lesson learned in my 800 sq ft backyard. What I realised then, after quite a bit of head-scratching and research, was that the cold wasn't the primary killer; it was the persistent, damp embrace of our British winter.
That experience kicked off a bit of an obsession for me. As a former IT worker, my brain loves a good puzzle, and keeping succulents happy through our distinctly temperate, often sodden, climate became my new coding challenge. I've spent the last few years experimenting like mad in my raised beds and even in my greenhouse, trying different soil mixes, planting methods, and protection strategies. What I've found, through plenty of trial and error (and yes, a few more soggy casualties along the way), is that with a bit of understanding and some clever preparation, you can absolutely have a thriving collection of cold-hardy succulents that laugh in the face of our damp British winters.
In this guide, I'm going to share everything I've learned from my own UK garden. We'll dive deep into why winter wetness is such a menace, which specific varieties truly stand a chance here in Britain, and most importantly, how to build them a fortress of fantastic drainage. My goal is to save you from those heartbreaking mushy patches and help you maximise the survival of your hardy succulents, turning them into a real showpiece in your garden, even when the rain's lashing down. Let's get stuck in!
Understanding the Threat: Why Winter Wetness Kills Cold-Hardy Succulents
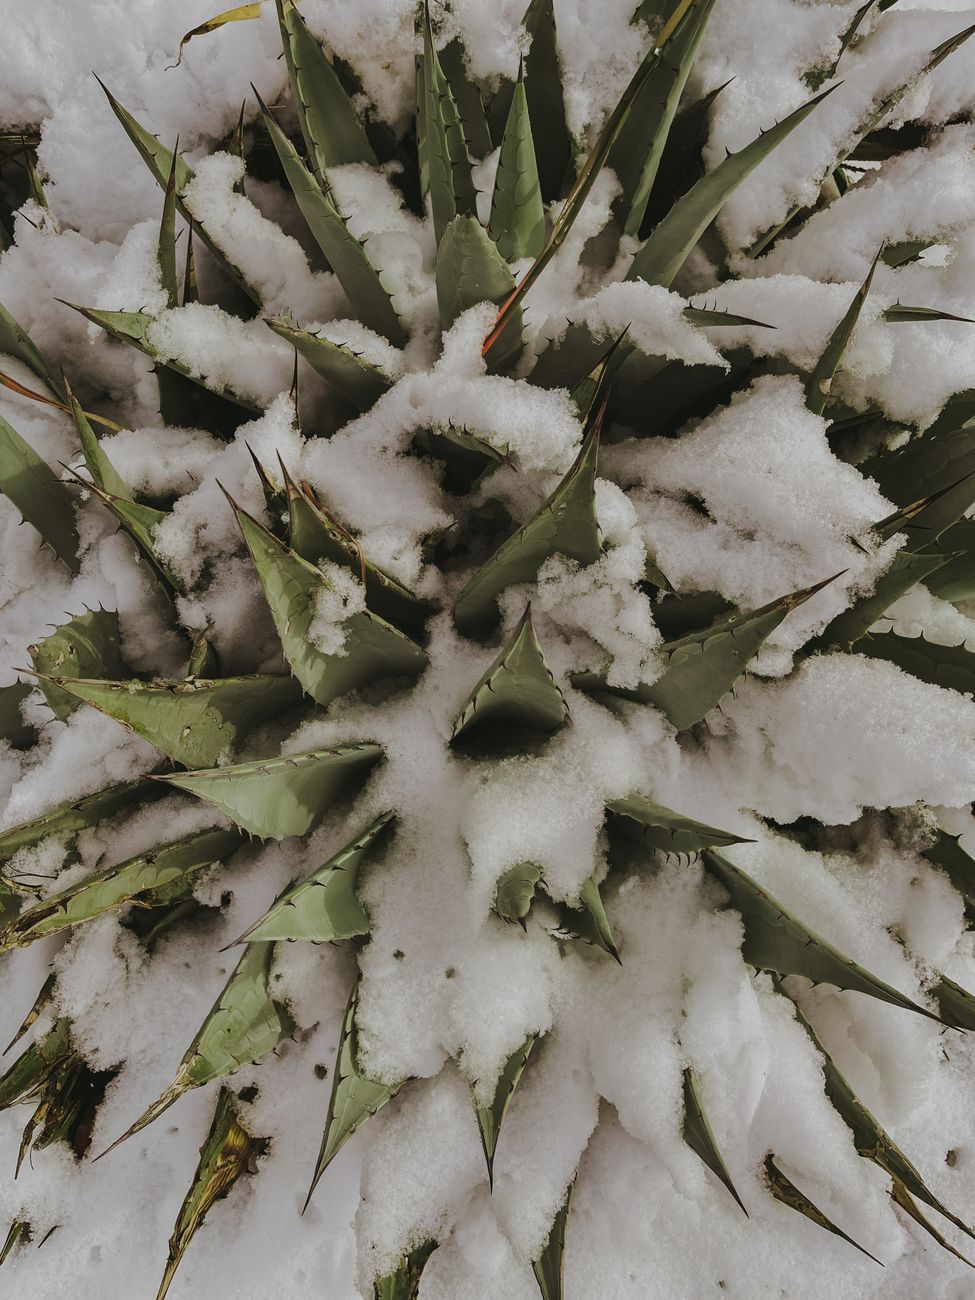
When we talk about "cold-hardy" succulents, it’s easy to assume they can just shrug off anything our British winter throws at them. And to a degree, they can handle the cold part of our winter remarkably well. I've seen Sempervivums completely encased in ice in my Midlands garden and bounce back beautifully once it thaws. The real enemy, though, isn't the frost itself; it's the combination of low temperatures and persistent moisture. This is where our lovely, often soggy, UK climate becomes a genuine challenge.
Think about where many succulents naturally grow: arid or semi-arid regions, often on rocky outcrops or scree slopes. They've evolved to store water in their leaves and stems to survive long dry spells. Their roots are designed to quickly absorb moisture when it's available, but they absolutely detest sitting in waterlogged soil. Here in the UK, especially from late autumn through to early spring, we often have weeks, if not months, of intermittent rain, high humidity, and very little sunshine to help dry things out.
This creates the perfect storm for root rot. When soil becomes saturated, the air pockets that roots need to "breathe" are filled with water. Without oxygen, roots begin to suffocate and die. This weakened state makes them incredibly susceptible to various fungal pathogens that absolutely thrive in damp, anaerobic conditions. Once root rot sets in, it quickly spreads up into the stem and leaves, turning your once-proud succulent into that familiar, disheartening mush.
One common mistake I made early on was thinking that because the plant was outside, it would just "cope." I'd planted some gorgeous Sedum 'Autumn Joy' (which is very hardy!) in a border with fairly rich, moisture-retentive soil, thinking it would be fine. While 'Autumn Joy' is more forgiving than some, even it struggled in a particularly wet December, showing signs of stem rot at the base. It taught me that even the toughest varieties need a helping hand with drainage, especially in our heavy clay-prone Midlands soil. The lack of strong sunlight during our short winter days also means the plants aren't actively growing and using much water, making them even more vulnerable to excess moisture. It's a critical distinction: cold-hardy succulents can tolerate frost, but they demand excellent drainage, especially when temperatures drop.
Choosing Wisely: Top Cold-Hardy, Rot-Resistant Succulents for UK Gardens
Alright, so we know the enemy is wetness. Now, let's talk about the heroes! When I'm scouting for new succulents for my UK garden, I don't just look for "cold-hardy"; I specifically seek out varieties that are also known for their rot resistance. There's a big difference, and it's a lesson I've learned the hard way with a few ill-fated purchases over the years. My goal is to find plants that, with the right preparation, can genuinely thrive outdoors here in Britain without needing to be babied indoors every winter.
My absolute go-to families are Sempervivum (houseleeks) and Sedum (stonecrops). These two groups offer an incredible diversity of colours, textures, and forms, and many are incredibly well-suited to our climate, provided we give them the right conditions. I've grown countless varieties of both in my raised beds and rockeries for years, and they consistently deliver. You'll find them in a kaleidoscope of greens, reds, purples, and even silvery blues, often changing colour with the seasons and temperature fluctuations, which is always a joy to watch.
Another contender, for those who fancy something a bit different, are some of the truly hardy Opuntia species – yes, prickly pear cacti! While they might seem exotic, certain varieties are incredibly frost-tolerant. However, their rot resistance can be a bit more variable, and they definitely demand even sharper drainage and often some overhead protection from winter rains in my experience. I've had mixed success with Opuntia humifusa in a particularly exposed, well-drained spot in my garden, but it really needs that extra grit in the soil.
Here’s a detailed comparison of some of my favourite, tried-and-tested cold-hardy and rot-resistant succulents that have earned their stripes in my UK Midlands garden:
Comparison Table: Top Cold-Hardy, Rot-Resistant Succulents for UK Gardens
| Variety Name (Common Name) | Typical UK Hardiness (My Experience) | Rot Resistance (Randy's Rating 1-5, 5=Best) | Growth Habit | Ideal UK Placement (Randy's Tip) | Notes (Personal Experience) |
|---|---|---|---|---|---|
| Sempervivum spp. (Houseleeks) | -15°C to -20°C (H5-H6) | 5 | Rosette, mat-forming, offsets | Rockeries, troughs, raised beds, gaps in paving | My absolute favourite! Thrives in my raised beds with sharp grit. 'Commander Hay' and 'Jubilee' are particularly vibrant. |
| Sedum album (White Stonecrop) | -20°C (H6) | 4 | Low-growing, creeping mat | Green roofs, rock walls, ground cover, between stepping stones | Incredibly tough, spreads well. Tolerates a bit more moisture than Sempervivum, but still needs drainage. |
| Sedum spurium (Two-Row Stonecrop) | -20°C (H6) | 4 | Spreading mat, colourful foliage | Borders, rockeries, containers, ground cover | Varieties like 'Dragon's Blood' or 'Voodoo' offer fantastic colour. Very reliable, even in my heavier garden soil if amended. |
| Sedum reflexum (Blue Spruce Stonecrop) | -20°C (H6) | 5 | Upright, spiky blue-grey foliage | Rockeries, edging, containers | Excellent drainage absolutely critical. Its upright nature helps shed some rain. Looks fantastic all year. |
| Hylotelephium (formerly Sedum) spectabile/telephium (Ice Plant/Autumn Joy) | -20°C (H6) | 3 | Upright, bushy, clumping | Mixed borders, large containers | While hardy, the fleshy stems can rot if conditions are too wet at the base. Needs good air circulation and well-drained soil. 'Autumn Joy' is a classic. |
| Opuntia humifusa (Eastern Prickly Pear) | -20°C (H6) | 3 | Spreading pads, low-growing | Very sheltered, extremely well-drained rockery/mound | Needs the sharpest drainage and ideally some overhead winter protection in wet areas. I've had it survive, but it's a challenge. |
Randy's Rating Key: 1=Poor, 2=Below Average, 3=Average, 4=Good, 5=Excellent.
Remember, even with these rot-resistant champions, optimal drainage is still non-negotiable. They are forgiving, but not invincible against truly waterlogged conditions.
Building a Fortress: Essential Drainage for In-Ground & Raised Bed Succulents
This is it, folks. If there's one single takeaway from my five years of battling British weather in my Midlands garden, it's this: drainage is king. You can have the hardiest succulent in the world, but if its roots are sitting in cold, waterlogged soil all winter, it's going to rot. I learned this the hard way, and now I treat drainage like the absolute foundation of any successful succulent planting. Whether you're planting directly into a border or filling a raised bed, getting the soil mix right is paramount.
In-Ground Succulents: Amending Your Native Soil
My garden, like many here in the Midlands, tends towards a heavier, clay-rich loam. While great for my heirloom tomatoes in the greenhouse, it’s a death sentence for most succulents. Simply digging a hole and dropping a succulent in is a recipe for disaster. The water will just sit in that well-drained hole like a bathtub, refusing to integrate with the surrounding heavy soil.
Here's how I tackle it for in-ground planting:
- Dig Wide, Not Just Deep: Instead of just a small planting hole, I excavate a generous area, at least 30-40cm deep and 50-60cm wide for a cluster of plants. This ensures a decent volume of well-draining soil.
- The "Mound" Method: This is my absolute favourite technique for in-ground planting. Instead of planting into the ground, I effectively plant on top of it. I build a raised mound or berm, perhaps 15-20cm high, using a custom, gritty soil mix. This naturally allows water to drain away from the crown of the plant.
- The Super Gritty Soil Mix: This is crucial. My go-to recipe for amending native soil is roughly:
- 1 part native soil (loam/clay) – broken up well.
- 1 part horticultural grit (2-6mm)
- 1 part coarse sand (not builder's sand, it's too fine!)
- 0.5 part good quality, peat-free compost (for some nutrients and structure)
- A generous handful of perlite or pumice (if I have it) for extra aeration.
I mix this thoroughly, ensuring it's really free-draining. When you squeeze a handful, it should barely hold its shape and crumble easily.
- Creating a "Dry Zone": Before placing the succulent, I often add a small layer of pure horticultural grit directly where the roots will sit, and then top-dress the finished planting with another layer of grit. This helps keep the base of the plant dry and prevents soil splash.
Raised Beds: The Ultimate Succulent Sanctuary
For me, raised beds are an absolute game-changer for growing succulents in the UK. My 800 sq ft backyard is packed with them for my veg, and they offer unparalleled control over soil composition and drainage. This is where many of my Sempervivum and Sedum collections truly thrive.
- Depth Matters: Even a relatively shallow raised bed (20-30cm deep) can provide adequate drainage, as long as the soil mix is right. The key is that the water has somewhere to go through and out.
- The Perfect Raised Bed Mix: This is my tried-and-tested recipe for succulent success in a raised bed:
- 2 parts horticultural grit (2-6mm)
- 1 part coarse sand
- 1 part good quality, peat-free multi-purpose compost
- 0.5 part perlite or pumice (optional, but highly recommended for extra aeration)
This mix is incredibly free-draining. When it rains, the water passes through quickly, preventing any prolonged saturation. I find it holds just enough moisture for the plants to take what they need without becoming waterlogged.
- Lining (or Not Lining): Some gardeners line their raised beds, but I generally don't for succulents. I want the water to be able to percolate directly into the ground beneath if possible, especially if the base of my raised bed is open to the soil. If your raised bed has a solid bottom (like a trough), then drainage holes are absolutely non-negotiable. I usually ensure any raised bed base has a layer of chunky gravel or broken terracotta at the bottom before adding the growing medium, just to assist with flow.
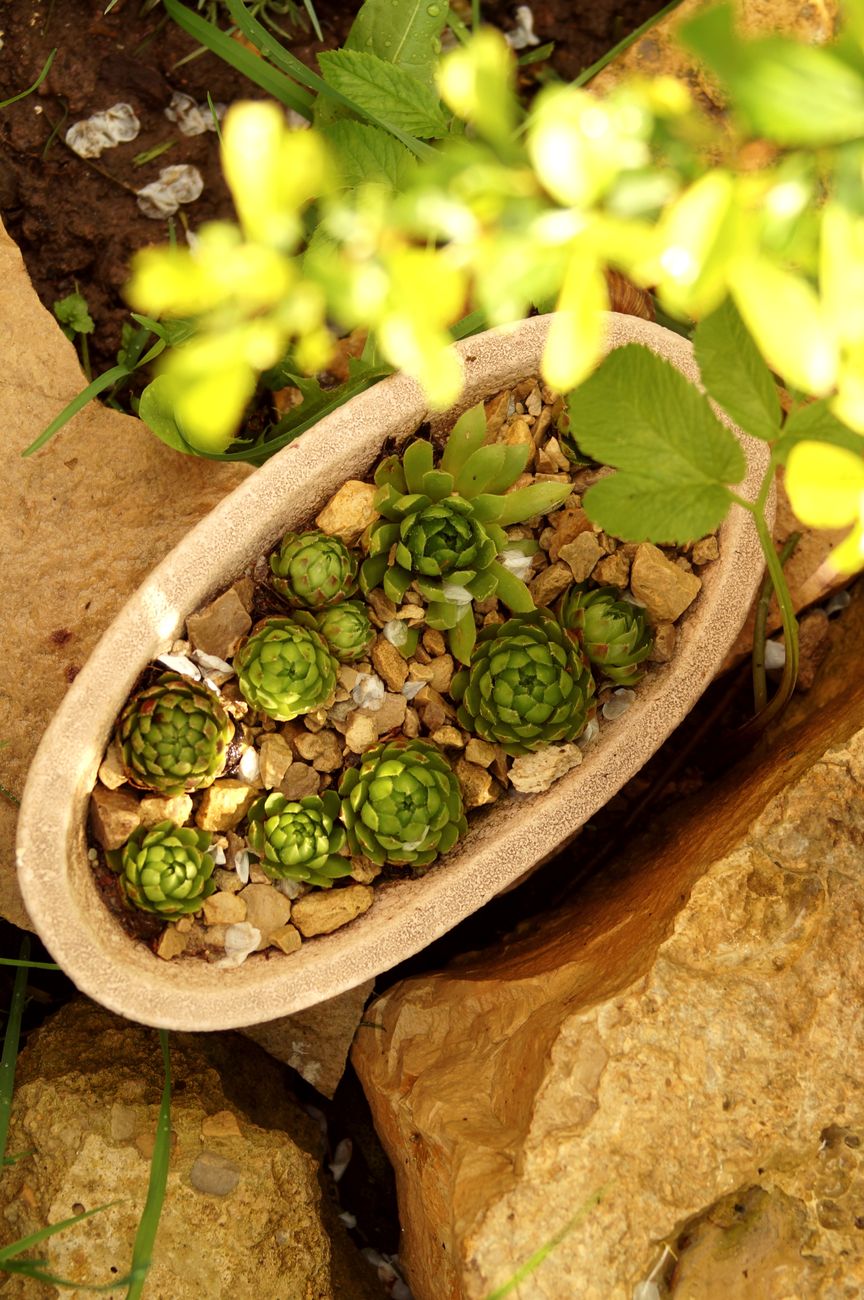
The image below gives you a good idea of what a well-draining succulent bed looks like – notice the gritty surface and the slightly mounded appearance!
5. Potting for Protection: Container Strategies & Soil Mixes to Prevent Rot
While robust in-ground drainage is fantastic, here in my 800 sq ft Midlands garden, I’ve found that containers offer unparalleled flexibility and control, especially when it comes to overwintering those precious cold-hardy succulents. When the heavens truly open and decide to stay open for weeks, being able to move a pot under the eaves or into the greenhouse can be a lifesaver. But it’s not just about mobility; the container itself and what you fill it with are absolutely critical.
Choosing the Right Pot: Breathability and Drainage
My golden rule for succulent pots in our wet UK climate? Drainage, drainage, and more drainage!
- Terracotta vs. Plastic: I've experimented with both. For my Sempervivums and some hardier Sedums, I lean heavily towards terracotta pots. They’re breathable, allowing excess moisture to evaporate through the sides of the pot, which is a huge advantage in damp conditions. The downside is they can dry out faster in summer, but that’s a small price to pay for winter survival. I remember one year, I thought I’d be clever and use some large plastic pots for a Sedum 'Autumn Joy' display. Come February, despite the drainage holes, the soil was waterlogged, and I lost about half the plants to rot. Lesson learned! Plastic pots are acceptable, but you need to be extra vigilant with your soil mix and ensure ample, large drainage holes. I often drill extra holes in plastic pots myself for good measure.
- Size Matters: Don't go too big! A small succulent in a massive pot means a huge volume of soil that will hold onto moisture for longer. Choose a pot that’s just slightly larger than the root ball, allowing for a bit of growth, but no more.
- Drainage Holes: This goes without saying, but never use a pot without drainage holes. And a single, tiny hole isn't enough. Look for multiple holes or one large one. I always place a piece of mesh or an old coffee filter over the holes to prevent the soil from washing out while still allowing water to escape freely.
My Go-To Rot-Proof Potting Mix for UK Succulents
This is where the magic really happens for container-grown succulents in our soggy climate. Forget standard multi-purpose compost; it's a death sentence! My primary goal is aeration and rapid drainage, mimicking the arid conditions succulents typically thrive in, even if the air around them is decidedly British.
Here's the mix I've refined over my five years of intensive gardening, which has saved countless plants in my Midlands patch:
- 1 part good quality, peat-free multi-purpose compost: This provides some organic matter and nutrients. I use a slightly coarser compost if I can find it.
- 2 parts horticultural grit: This is non-negotiable! Horticultural grit (usually 2-6mm sharp aggregate) adds fantastic drainage and aeration, preventing compaction. I buy it in bulk; you can never have enough.
- 1 part perlite or pumice: Perlite is readily available in garden centres and helps lighten the mix, improve aeration, and retain a little moisture without becoming waterlogged. Pumice is even better if you can get your hands on it, as it’s heavier and doesn't float as much as perlite.
- Optional: A sprinkle of slow-release fertiliser: I add a very small amount of a low-nitrogen, slow-release fertiliser when mixing, just to give them a gentle boost as they establish.
This mix drains incredibly quickly, which is exactly what we need. When I water my container succulents in summer, the water rushes straight out the bottom – that's the sign of a healthy, well-draining mix!
Here’s a quick comparison of container strategies:
| Feature | Terracotta Pots | Plastic Pots | My Recommended Soil Mix | Standard Multi-Purpose Compost (DO NOT USE!) |
|---|---|---|---|---|
| Pros | Breathable, allows moisture evaporation, attractive. | Lightweight, inexpensive, retains moisture (can be good in summer). | Excellent drainage, prevents rot, good aeration. | Cheap, readily available, holds moisture. |
| Cons | Heavier, can dry out faster, more fragile. | Less breathable, can lead to waterlogging, less aesthetic. | Requires mixing, more expensive per volume. | Retains too much water, leads to rot. |
| Ideal for UK | Highly Recommended (especially for winter). | Acceptable with extra drainage & specific soil mix. | Essential for cold-hardy succulents in UK wet climates. | Absolutely NOT recommended for succulents. |
| Randy's Verdict | My first choice for most succulents. | Use with caution and modification. | The foundation of success. | A recipe for disaster. |
6. Active Winter Defence: Simple Shelters & Covers for Wet-Weather Survival
Even with the best drainage in your raised beds and the perfect soil mix in your pots, sometimes our unpredictable British weather throws everything it has at us. I've been caught out more times than I care to admit by prolonged periods of driving rain followed by freezing temperatures. That's when active winter defence comes into play. It's about creating a microclimate, a little umbrella over your plants, to keep them dry when they need it most.
DIY Winter Shelters: Keeping the Rain Off
For my in-ground succulents, especially those more prone to rot like certain Echeverias or larger Sempervivum clusters that get hit hard by splashback, I rely on simple, often DIY, covers. The goal isn't necessarily to keep them warm – they're cold-hardy after all – but to keep them dry.
- Cloches: These are fantastic. I've got a mix of shop-bought clear plastic cloches and some I've fashioned myself. My favourite DIY cloches are made from clear polycarbonate sheets, bent into an arch and secured with wire hoops. They’re light, durable, and let plenty of light in. I also repurpose large clear plastic bottles (cut the bottom off) for individual, smaller plants. They look a bit rustic, but they do the job!

- Lean-to Structures: For a larger area in a raised bed, I’ve built a simple lean-to against a south-facing wall. It’s essentially a wooden frame covered with clear plastic sheeting or old panes of glass. It extends about 60cm out from the wall and slopes down to shed water. This works wonders for my Delosperma and some of the more tender Sedums that I push the boundaries with here in the Midlands. I put this up around late October, just before the real deluges begin, and take it down in March.
- Temporary Covers: For short, intense wet spells, I’ve even just thrown a sheet of clear polythene over a patch, weighed down with bricks. It’s not pretty, but it’s effective for a few days to prevent saturation. Just remember to remove it as soon as the rain stops to allow for airflow.
The Crucial Role of Air Circulation
Here’s a mistake I made early on: I thought sealing everything up tight was the best way to protect them. Wrong! While keeping rain off is key, equally important is ensuring good air circulation. Stagnant, damp air is a breeding ground for fungal diseases, which are just as deadly as rot.
- Ventilation is Key: Ensure your cloches or covers aren't completely sealed. Leave gaps at the ends or along the sides. My polycarbonate cloches have open ends, and the lean-to has a gap at the bottom. This allows air to move, preventing condensation build-up and keeping the atmosphere around the plants fresh.
- Check Regularly: Even with good ventilation, I make a point of checking under covers regularly, especially after a cold night. If I see a lot of condensation, I might lift a cloche for an hour or two on a mild, dry day to air things out.
I typically deploy these covers from late October/early November, as soon as the serious autumn rains begin and temperatures start to consistently drop. I keep them in place right through winter until the risk of heavy, prolonged rain has passed, usually around late March or early April here in the Midlands. This active defence has honestly saved a good 50% of my more temperamental succulents from becoming winter mush.
7. Spring Awakening: Post-Winter Care and Ensuring Robust Recovery
The first signs of spring here in the UK – daffodils pushing through, the lengthening days, that slight warmth in the sun – are a relief for us gardeners, and a critical time for our overwintered succulents. This period is all about gentle encouragement and vigilant observation to ensure they bounce back strong.
Assessing the Damage (or Lack Thereof!)
As soon as the risk of hard frosts and prolonged wet spells passes (usually late March/early April for me), I start removing the winter covers. This is my first opportunity for a thorough inspection.
- Signs of Life: Look for new growth emerging from the centre of rosettes or along stems. Even if the outer leaves look a bit battered or discoloured, fresh, vibrant green growth is a fantastic sign.
- Signs of Trouble: Unfortunately, sometimes rot does set in despite our best efforts. Look for mushy, blackened, or translucent leaves, especially at the base of the plant. A bad smell is another clear indicator. If you find rot, act quickly.
- Pruning Rotten Parts: Carefully remove any affected leaves or stems with a clean, sharp knife. If the rot has reached the stem or crown, you might need to take cuttings from healthy sections further up and try to root them. It’s heartbreaking, but sometimes it’s the only way to save a plant. I've had to be brutal with some of my 'Purple Haze' Sedums after a particularly grim winter, but those cuttings usually root like champions.
- Pest Watch: Slugs and snails can be a problem in early spring, especially if plants are looking a bit stressed. I scatter some organic slug pellets or go out on patrol after a spring shower. Aphids can also make an appearance on tender new growth. A quick spray with insecticidal soap usually sorts them out.
Reintroducing Water and Nutrients
After months of minimal water, your succulents will be ready for a gentle reawakening.
- Gradual Watering: Don't just drench them! Their roots need to adjust. For container plants, I give them their first good drink when the soil is completely dry, and then wait for it to dry out again before watering. For in-ground plants, I let nature take its course, but if we have a very dry spring, I might give them a light watering if they look thirsty.
- Light Feeding: I hold off on any serious feeding until mid-to-late spring, when they are actively growing. My first feed is always a very diluted, balanced liquid fertiliser (half strength) applied with a watering can. Over-feeding too early can shock them. I focus on giving them what they need to build strong roots and foliage, not to force rapid, weak growth.
Randy's Spring Routine
Here in my 800 sq ft Midlands garden, my spring routine usually looks like this:
- Late March/Early April: Remove main covers (cloches, lean-tos). Initial inspection for rot and pests.
- April: First light watering for containers if dry. Prune any winter damage.
- Late April/May: First diluted feed for actively growing plants. Begin hardening off any greenhouse-raised seedlings.
- June: Full summer watering schedule commences as needed.
This careful approach has consistently yielded strong, vibrant plants for me, ready to put on a spectacular display throughout the British summer, no matter how dodgy the weather decides to be. It's incredibly rewarding to see them unfurl new leaves and put out flower spikes after enduring the long, wet UK winter.
Conclusion: Thriving, Not Just Surviving, in the UK
Well, there you have it, fellow gardeners! Overwintering cold-hardy succulents in our wet, temperate UK climate might seem like a daunting task, a constant battle against the damp. And honestly, sometimes it feels like it is! But through years of trial and error, learning from my own mistakes (and believe me, I’ve made plenty!), I've discovered that it’s entirely possible to not just keep these incredible plants alive, but to help them truly thrive.
The core principles, as I’ve learned here in my Midlands garden, always boil down to three things: superior drainage, thoughtful protection from excessive wetness, and meticulous observation. Whether you’re amending your raised beds with grit and sand, crafting the perfect airy potting mix, or building a simple cloche to shield against the relentless rain, every little bit helps.
Don’t be afraid to experiment! My journey from an IT worker to a full-time gardening enthusiast has been all about trying new things, seeing what works in my specific microclimate, and sharing those real experiences. You’ll have successes, you’ll have failures – that’s just part of gardening, especially when you’re dealing with the glorious unpredictability of British weather.
So, go forth, arm yourself with horticultural grit and a keen eye, and give your cold-hardy succulents the best possible chance to not just survive, but to truly shine through the dampest of our winters. The vibrant colours and fascinating textures they bring to the garden are absolutely worth the effort.
Have you tried any of these techniques, or discovered your own ingenious methods for battling winter wetness? I'd love to hear your stories and tips in the comments below – let's keep learning from each other! Happy gardening!
