Right, fellow gardeners! Randy here, coming to you from my little patch of green in the UK Midlands. You know that feeling, don't you? You've got a gorgeous Hydrangea, a favourite hardy Geranium, or a particularly prolific Gooseberry bush, and you just wish you had more of it. Maybe to fill a gap in a border, share with a neighbour, or simply expand your own collection without breaking the bank. I certainly do!
When I first traded my IT screen for a trowel five years ago, I was obsessed with getting more plants for free. My 800 sq ft backyard, though lovingly packed, always feels like it could squeeze in one more treasured plant. I tried everything – seeds (great for tomatoes in my greenhouse, but a slow game for shrubs), and cuttings (oh, the heartbreak of so many failed attempts!). But then I stumbled upon a method that felt almost like cheating, it was so easy and so successful: ground layering.
This isn't some fancy, complicated horticultural technique only for the pros. This is pure, low-effort, high-success plant magic that any UK home gardener can master. Trust me, if I can do it with our notoriously unpredictable British weather, you can too. It’s become my absolute go-to for multiplying my favourite shrubs and hardy perennials, and I reckon it's about time I shared this secret weapon with you all.
Unlock Easy Plant Multiplication: Why Ground Layering is a Gardener's Secret Weapon
Let's be honest, we all love a bargain, and what's better than getting a brand-new, healthy plant for absolutely nothing? That's the core appeal of ground layering for me. I’ve filled entire sections of my garden, particularly the shadier spots where my Hydrangeas thrive, by simply encouraging a branch to grow roots while it's still attached to the parent plant. It's like the plant is doing all the hard work for you, which, after years of battling slugs and the occasional hailstorm here in the Midlands, is exactly what I need.
Ground layering is essentially mimicking what many plants do naturally. Think about how some ground-cover plants or even brambles send out shoots that root where they touch the soil. We're just giving nature a helping hand, nudging a branch to form its own root system before we snip it free. The beauty of this method, especially for us here in the UK, is that the 'baby' plant gets all the water and nutrients it needs from the 'mum' plant throughout the entire rooting process. This means it's incredibly resilient, shrugging off those sudden dry spells or unexpected frosts that can often spell doom for delicate cuttings.
I've used it to get more of my beloved 'Annabelle' Hydrangeas, which are fantastic for big, blousy blooms even after a harsh winter. I've also multiplied my favourite Gooseberry 'Hinnonmaki Red' bushes to expand my fruit cage, and even a few of my shrub roses. It’s a truly satisfying way to grow your garden without constantly reaching for your wallet. It's also fantastic for replacing an ageing plant – layer a new one from an established healthy branch, and you've got a perfect clone ready to take its place.

Ground Layering vs. Cuttings & Seeds: High Success with Minimal Fuss
Now, I'm not knocking other propagation methods. I'm a big fan of growing vegetables from seed, and my greenhouse is always packed with trays of heirloom tomatoes like 'Cherokee Purple' and 'Gardener's Delight' every spring. But when it comes to woody shrubs and many perennials, seeds are often a long, slow gamble, and they might not even come true to the parent plant.
Cuttings? Oh, I've had my share of heartbreaks there. When I first started gardening, I'd take dozens of rose cuttings, meticulously follow all the advice, and still end up with a tray full of limp, mouldy stems after a few weeks. Some plants, like certain Lavenders or Fuchsias, root fairly easily from cuttings. But many of the shrubs I love – Hydrangeas, Dogwoods, even some of my more robust perennials – are notoriously finicky with traditional stem cuttings, especially when you're battling our changeable British weather. A sudden cold snap or an unexpected heatwave can dry them out or rot them before they've even thought about rooting.
This is where ground layering shines like a beacon in a foggy Midlands morning! Because the layered branch remains attached to the parent plant, it's constantly supplied with water and food. It’s not under the stress of trying to survive on its own while also developing roots. This dramatically increases the success rate and reduces the amount of fussing about you need to do. I’ve found that I can just set it up, keep the soil moist, and largely forget about it until it's time to check for roots.
Here's a quick comparison based on what I've learned over the years in my UK garden:
| Feature | Ground Layering | Stem Cuttings | Seeds (for Shrubs/Perennials) |
|---|---|---|---|
| Success Rate | Very High (often 80%+) | Variable (10-70% depending on plant) | Variable (low for many species) |
| Effort Required | Low - Set it and forget it | Medium - Requires monitoring/care | Medium-High - Sowing, pricking out |
| Time to New Plant | Medium (6-18 months) | Medium (3-12 months for rooting) | Long (years for maturity) |
| Equipment Needed | Minimal (knife, peg, soil) | Moderate (propagator, hormone, etc.) | Moderate (trays, compost, light) |
| True to Parent | Yes (exact clone) | Yes (exact clone) | Often No (genetic variation) |
| UK Weather Resilience | Excellent (parent provides support) | Poor for many species (prone to drying/rot) | Good (but slow initial growth) |
| My Personal Experience | My go-to for woody plants; reliable and satisfying. | Often a gamble, especially with fickle plants; can be rewarding but frustrating. | Great for veg, but for shrubs it's a patience test and often not what I want. |
Which Shrubs & Perennials Thrive with Ground Layering? Top Picks for UK Gardeners
Now, while ground layering is fantastic, it's not a one-size-fits-all solution for every plant. You need a plant that has flexible branches that can be bent down to touch the soil. Over the years, experimenting in my Midlands plot, I've really narrowed down the stars of the show – the plants that respond beautifully to this method in our British climate.
The best candidates are usually plants with relatively flexible, lower-growing stems that are happy to send out roots along their branches. Many garden favourites fit this bill perfectly. I remember trying to layer a sturdy old Oak tree branch once – a definite failure! But that was early on, before I understood the need for flexibility. What works here in Britain are the plants that already have a bit of a sprawling habit or those whose branches you can gently persuade to meet the earth.
Here are some of my top picks that I’ve personally propagated with great success in my UK garden:
| Plant Type | Specific UK Varieties I've Layered/Recommended | Why it's a Good Candidate | My Personal Tip for UK Conditions |
|---|---|---|---|
| Hydrangeas | H. macrophylla (e.g., 'Teller Pink'), H. paniculata (e.g., 'Limelight') | Flexible stems, naturally root easily, love moist soil. | Layer in early spring as new growth emerges; ensure consistent moisture through summer. |
| Shrub Roses | 'Gertrude Jekyll', 'Munstead Wood', 'The Generous Gardener' (climbing type too) | Flexible basal shoots, good for filling gaps or replacing old plants. | Choose a healthy, non-flowering shoot. I layer mine in late spring to give roots time before winter. |
| Gooseberries/Currants | 'Hinnonmaki Red', 'Invicta', Blackcurrant 'Ben Sarek' | Naturally low-growing, very flexible branches, root readily. | Perfect for expanding your fruit patch. Layer in autumn or early spring for best results. |
| Lavender | 'Hidcote', 'Munstead' | Bushy habit, lower branches often touch the ground. | Surprisingly effective! Layer in spring. Ensure good drainage if your soil is heavy clay. |
| Rhododendrons/Azaleas | Many hardy varieties | Flexible lower branches, especially if pruned to keep bushy. | Patience is key here; they can take longer to root. Keep the spot consistently damp. |
| Viburnums | V. opulus (Guelder Rose), V. davidii | Flexible, often arching stems. | Great for hedging or adding structure. Layer in spring or early summer. |
| Climbers | Clematis (many types), Honeysuckle | Long, flexible stems easily guided to the soil. | Layer a section of stem between nodes. I've used this to get more Clematis 'Nelly Moser'. |
| Perennials | Lamium, Ajuga, ground-cover Sedums | Many naturally root where stems touch the ground. | Essentially helping nature along. Great for filling bare spots quickly. |
A word of caution: avoid anything with very stiff, woody stems that won't bend without snapping, or plants that absolutely despise having their stems in damp soil for extended periods. Ground layering works because it keeps things moist and stable, so if a plant needs dry conditions at its base, it's probably not a good candidate.
Your Ground Layering Toolkit: What You'll Need Before You Start
One of the many reasons I love ground layering is how refreshingly low-tech it is. You don't need a fancy propagator, rooting hormones, or a heated mat. Most of what you'll need is probably already lurking in your shed or garden, just like mine! It's all about making the most of what you've got.
Here's my essential toolkit for getting started with ground layering:
- A Sharp, Clean Knife or Secateurs: This is crucial. You'll need to make a small, clean wound on the stem to encourage rooting, and a blunt or dirty tool can cause more harm than good. I always make sure mine are freshly sharpened and sterilised with a bit of rubbing alcohol – I learned that the hard way with fungal issues in my early gardening days here in the Midlands.
- Sturdy Pegs or Wire Hooks: These are for holding the layered branch firmly in contact with the soil. You can buy purpose-made "layering pins" or "U-shaped garden stakes," but honestly, I just bend old metal coat hangers into a U-shape, or use a few heavy stones or bricks from around the garden. Saves a few quid, and they work just as well!
- A Small Bag of Potting Compost or Good Quality Garden Soil: While the parent plant will feed the layered branch, encouraging new roots is much easier in a light, free-draining medium. A small bag of multi-purpose compost works wonders. If your garden soil is heavy clay like mine can be in parts of my plot, mixing in some grit or compost around the layer point really helps with drainage and root development.
- A Small Pot (Optional, but Recommended): If you're layering a particularly precious plant, or if you want to make transplanting as seamless as possible, you can layer directly into a small pot sunk into the ground. It makes lifting and moving the new plant much less of a shock to its system. Just make sure the pot has drainage holes!
- A Watering Can: Keeping the layering spot consistently moist is absolutely key. Even though the parent plant is supplying water, the new roots need constant encouragement. Our British summers can be surprisingly parched, even after a wet spring, so a regular drink is vital for success.
- A Dibber or Hand Trowel: Just a small hand trowel is all you need to dig a shallow trench or loosen the soil where you plan to layer the branch. Nothing fancy, just something to get the soil ready.
- Bricks, Stones, or Heavy Objects (Optional): As mentioned with the pegs, any heavy object can help secure the branch if you don't have enough pegs or wire. My garden is full of old bricks, and they're perfect for this.
That's it! No need for an expensive shopping spree. With these simple tools and a bit of patience, you're well on your way to multiplying your favourite plants, the easy, high-success, Randy-approved way. Next up, we'll get our hands dirty and dive into the step-by-step process itself!
The Ground Layering Process: A Visual Walkthrough for New Plants
Right, you’ve got your kit ready, you know what plants are prime for the job, and you’re buzzing with the thought of free plants – excellent! Now for the hands-on part. I’m going to walk you through exactly how I do it here in my Midlands garden, step by step. I promise you, it's far easier than it sounds, and the satisfaction of seeing those roots form is just brilliant.
Step 1: Choosing Your Branch – The Parent Plant's Best Offer
First things first, pick your branch. I always look for a healthy, flexible stem that’s at least pencil-thick and still relatively young – usually one to two years old. It needs to be low enough on the parent plant to easily bend down to the ground without snapping. In my garden, for shrubs like my Forsythia or even some of the lower branches on my Ribes sanguineum, I’m looking for about 30-45cm of clear stem to work with. Make sure it's free of any pests or diseases, we want to give our new plant the best start.
Step 2: Preparing the Ground – A Cozy Bed for New Roots
Before you even touch the branch, prepare the spot on the ground where it’s going to lie. I clear away any weeds, grass, or debris, then loosen the soil with a hand trowel to a depth of about 10-15cm. This is where your rich, well-draining compost comes in. I mix in a good handful or two of my homemade garden compost – the stuff I make from all my kitchen scraps and garden waste – to give the future roots a lovely, nutrient-rich, and aerated environment. This really helps, especially if your native UK soil is a bit heavy clay like mine can be in spots.
Step 3: Wounding the Stem – The Secret to Rooting
This is the crucial bit where you encourage the plant to send out new roots. About 15-30cm from the tip of the branch, locate a leaf node – that's where a leaf or side shoot emerges from the stem. This is where the plant's natural rooting hormones are concentrated. Using your sharp, clean knife (I always wipe mine with rubbing alcohol first to prevent disease), make a small wound.
I usually opt for a "tongue" cut: a diagonal slice upwards, about 2.5-5cm long, going about one-third of the way through the stem, so it creates a little flap or tongue. Another method is to simply scrape away a 2.5cm ring of bark around the stem. This exposes the cambium layer, tricking the plant into thinking it needs to root to survive. Some gardeners will apply rooting hormone powder to this wound – I sometimes do for slower rooters like Lavender, but often, for vigorous growers, it’s not strictly necessary.
Step 4: Securing the Layer – Keeping It Grounded
Gently bend the wounded section of the branch down into the prepared trench in the soil. Make sure the wounded part is fully buried and in firm contact with the enriched soil. This is where your bent wire, U-pin, or even a heavy stone comes in handy. I use repurposed coat hangers bent into a 'U' shape to peg the branch firmly into the soil. You want it to stay put! If it springs back up, the wound won't make good contact with the soil, and rooting will be much less likely. The tip of the branch should be curving upwards out of the soil.
Step 5: Watering and Marking – The Finishing Touches
Once secured, gently backfill the trench with more of your compost-enriched soil, firming it down gently around the buried stem. Give it a good, thorough watering. You want that soil to settle in nicely around the wound. Finally, and this is a step I learned the hard way after nearly tripping over a forgotten layer once, mark the spot! A simple plant label or even a small stick will do. This reminds you where your future plant is, and helps you avoid disturbing it.
From Layer to Independent Plant: Care, Rooting Check, and Separation Day
You’ve done the hard part! Now begins the waiting game, which, for a keen gardener like me, can feel like an eternity. But trust me, patience here in our British climate is a virtue.
The Waiting Game: Ongoing Care for Your Layer
Once your ground layer is set, the main thing it needs is consistent moisture. Especially during dry spells, which we certainly get our fair share of even here in the UK, I make sure to give the layered area a regular drink. Don't let it dry out completely. I usually check the soil every few days, and if the top inch feels dry, I water it. Beyond that, it’s mostly hands-off. Keep an eye out for any weeds popping up around the layer and gently remove them, as they’ll compete for water and nutrients. Pests like slugs and snails can sometimes take a fancy to the new, tender growth that might emerge from the layered section, so a little organic slug deterrent can be helpful, especially in my damp Midlands garden.
The Rooting Check: Is It Ready?
This is the exciting part! Rooting times vary wildly depending on the plant species and our unpredictable British weather. Some fast rooters like Forsythia or Hydrangea might show roots in as little as 3-6 months, especially if layered in spring. Others, like Rosemary, Daphne, or many evergreens, can take a full year, or even two!
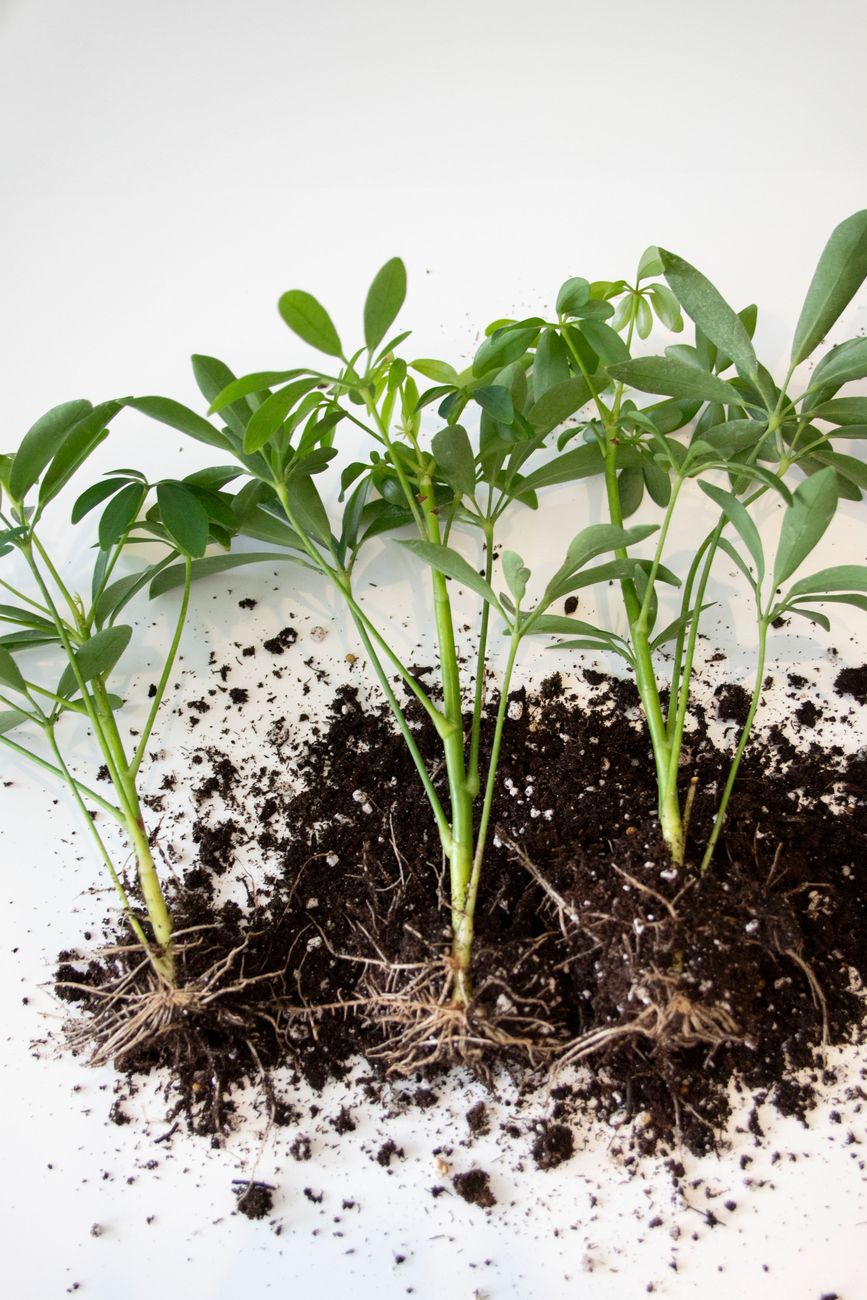
I usually start checking after about 6-8 months, typically the following spring if I layered in the previous summer. Gently, gently, unbury a small section of the layered stem near the wound. You're looking for white, fleshy roots emerging. If you see them, fantastic! If not, don't despair. Re-cover it carefully, give it another good water, and leave it for a few more months. Another good indicator is if the tip of the layered branch is showing vigorous new growth – that’s often a sign that roots are forming to support it. One mistake I made early on was checking too often and disturbing the delicate new roots. Learn from my impatience!
Separation Day: Cutting the Cord
When you're confident your layer has a healthy root ball – usually when you can see a good network of roots, not just a few stragglers – it's time for the big day! This is like sending your child off to nursery, a mix of pride and a tiny bit of worry.
- Preparation: Have your sharp, clean secateurs ready, along with a pot filled with good quality multi-purpose compost (I use a peat-free blend).
- The Cut: Using your secateurs, make a clean cut between the new, rooted plant and the parent plant. You want to sever the connection completely.
- Lifting: Carefully, and I mean carefully, dig up your newly independent plant. Try to get as much of the root ball as possible. The more soil that stays attached, the less shock the plant will experience.
- Potting Up: Immediately pot your new plant into the prepared container. Gently firm the compost around the roots, ensuring the plant is at the same level it was in the ground.
- Watering In: Give it a thorough watering. This helps settle the compost around the roots and reduces transplant shock.
Hardening Off and Beyond
Your new plant is still a baby, and it’s been living a sheltered life under its parent. It needs time to adjust to being fully independent. I generally keep newly separated layers in a sheltered spot in my garden, often in the partial shade of my greenhouse or under the eaves of the house, for a few weeks. This "hardening off" period allows it to gradually adapt to full sun, wind, and our sometimes-harsh British weather. Keep it well-watered during this time. Once it's showing signs of new growth and looks robust, it's ready for its final planting spot in your garden or to be given away to a very lucky friend!
Common Ground Layering Challenges & Pro Tips for UK Success
While ground layering is incredibly successful, it's not without its quirks, especially when you're battling the unpredictable nature of our British climate. I've certainly had my share of head-scratching moments and outright failures over the years. Here are some common challenges I've encountered and my hard-won tips for overcoming them here in the UK.
Challenge 1: Not Rooting or Taking Too Long
This is probably the most common frustration. You've followed all the steps, waited patiently, and... nothing.
- Randy's Pro Tip: Patience, my friend, is key here in the UK. Many plants, especially evergreens or those layered later in the season (late summer/autumn), simply take longer to root due to cooler soil temperatures. I've had Rosemary layers take nearly two years! Ensure your wound is deep enough to interrupt the sap flow but not so deep it kills the stem. Also, consistent moisture is vital – if the ground dries out, rooting stops. If after a year you still have no roots, try again with a fresh branch and perhaps try a deeper wound or a dash of rooting hormone. Sometimes, the parent plant wasn't vigorous enough.
Challenge 2: The Branch Snaps When Bending
Oh, I've done this more times than I care to admit! You're gently coaxing a branch down, and snap. Especially with older, woodier stems.
- Randy's Pro Tip: Always choose young, flexible stems – typically one- or two-year-old growth. Avoid anything too thick or stiff. If a stem is a bit stubborn, try to bend it a little bit each day for a few days before you plan to layer it, gradually training it downwards. You can also make a series of small, gentle relief cuts on the underside of a thicker branch to help it bend without breaking, but be careful not to cut too deep.
Challenge 3: Pests and Critters
New growth, especially tender shoots emerging from a layered section, can be a magnet for slugs, snails, and even curious mice or voles.
- Randy's Pro Tip: This is a real issue in my damp Midlands garden! I use organic slug pellets around the layered area, especially after a good rain. For mice or voles, if you suspect them, a cloche or a small cage made of chicken wire over the layered spot can offer protection. Sometimes, a ring of sharp grit or crushed eggshells can deter slugs too.
Challenge 4: The UK Weather – Too Wet, Too Dry, Too Cold!
Our famously unpredictable British weather can throw a spanner in the works. Periods of heavy rain can lead to waterlogged soil and rot, while summer droughts can dry out your layers before they have a chance to root. Early cold snaps can also halt progress.
- Randy's Pro Tip: This is where good site selection and soil preparation come into their own. If your garden is prone to waterlogging, ensure your prepared layering spot has excellent drainage by adding plenty of grit and compost. In dry spells, regular watering is non-negotiable – I often use a soaker hose near my layered plants to ensure consistent, deep moisture. If you layer later in the season, consider adding a layer of mulch (like wood chip or straw) over the layered area to insulate it from early frosts and retain moisture. I've found that layering earlier in the season (late spring/early summer) generally gives the best results here, as it allows maximum time for rooting before the colder, wetter months.
Challenge 5: Forgetting Where You Layered It!
Yes, I've done this. Buried a layer, got distracted by some rampant bindweed, and then completely lost track of it.
- Randy's Pro Tip: Always, always mark your layers immediately after you've finished. A simple plant label, a stick, or even a small, distinctive stone will do. This not only helps you remember where it is but also prevents accidental disturbance when you're weeding or digging nearby.
Ground layering is a forgiving process, and even if your first attempt isn't perfect, you'll learn something valuable. Each plant and each season in the UK brings its own unique set of conditions. So, don't be afraid to experiment!
Conclusion: Your Garden's Future, Rooted in Simplicity
So there you have it, folks – my comprehensive guide to ground layering, born from years of getting my hands dirty right here in my 800 sq ft Midlands garden. We’ve explored why this method is a true gardener's secret weapon, offering high success rates with incredibly low effort, especially when compared to the fuss of seeds or the finicky nature of cuttings. We've talked about the best shrubs and perennials for the job in our UK climate, gathered our simple toolkit, and walked through every step from choosing the perfect branch to celebrating separation day.
I've shared my own experiences, the mistakes I’ve made (and learned from!), and the specific challenges our British weather can throw at us. My biggest takeaway, and the one I hope you'll carry with you, is that gardening doesn't have to be complicated or expensive. Ground layering is a testament to the simple magic that happens when you work with your plants. It's about observing, understanding, and gently nudging nature along.
Imagine multiplying your favourite Hydrangea, adding more aromatic Lavender to your borders, or even gifting a home-grown Forsythia to a neighbour, all for the cost of a bit of compost and your time. I've done it countless times, and there's a unique satisfaction in seeing those new roots, knowing you've helped create new life from existing beauty.
Don't let any past gardening woes hold you back. This isn't about having a "green thumb" – it's about enthusiasm, a willingness to learn, and a bit of dirt under the fingernails. So, grab your trowel, pick a willing plant, and give ground layering a try. I promise you, you'll be amazed at the results, and you'll unlock a whole new level of plant propagation joy in your own UK garden. Happy layering!
