Tired of Weedy Gravel? Discover Permanent Organic Solutions for UK Gardens
Right, let's be honest with each other for a moment, fellow UK gardeners. Is there anything more soul-destroying than looking out at what was once a beautifully pristine gravel path or decorative bed, only to see it slowly but surely swallowed by a relentless tide of weeds? I've been there, more times than I care to admit! Here in my 800 sq ft Midlands garden, packed with everything from my beloved heirloom tomatoes in the greenhouse to a chaotic herb patch, I've got a fair few areas of gravel. There's the path leading up to my potting shed, a small decorative bed around a lovely Acer palmatum, and even some gravel under my raised beds to help with drainage. For years, these spots were a constant battleground.
When I first traded my IT keyboard for a trowel five years ago, I thought gravel would be low maintenance. Oh, Randy, you innocent fool! I quickly learned that British weather, with its glorious dampness and unpredictable sun, is a weed's best friend. I spent countless hours bent double, pulling out dandelions, wrestling with bindweed, and despairing at the sheer tenacity of mare's tail. I tried all sorts, from endless hand-weeding sessions that left my back screaming, to those 'natural' sprays that just seemed to annoy the weeds rather than defeat them. It felt like I was fighting a losing battle, and honestly, it took the shine off my otherwise joyful gardening experience.
But you know me, I'm obsessed with experimenting and finding what really works here in our unique UK climate. I refused to give up on my gravel areas; they have their place, offering definition and drainage, especially in a small space like mine. So, I dug in (pun intended!) and started researching, testing, and learning from my own successes and, crucially, my failures. What I've discovered are permanent, organic strategies that actually deliver pristine aesthetics without resorting to harsh chemicals. These aren't quick fixes, but sustainable solutions that have transformed my gravel beds from weed nurseries into genuinely low-maintenance features. I'm going to share all my hard-won knowledge, straight from my garden to yours, so you can reclaim your gravel and enjoy your outdoor space again, cuppa in hand!
Understanding the Enemy: Common UK Weeds Thriving in Gravel Beds
Before we can build our weed-proof fortress, we need to know exactly who we're up against. In my experience here in the Midlands, gravel beds are absolute magnets for certain types of weeds, mainly because they offer fantastic drainage (which some weeds love), a relatively undisturbed surface for seeds to land, and often a thin layer of organic matter accumulating beneath the stones.
Let me tell you, I've battled some formidable foes in my time. The most persistent culprits in my UK garden, and likely in yours too, include:
- Dandelions (Taraxacum officinale): Oh, the ubiquitous dandelion! Their taproots are legendary, plunging deep into any crevice, making them incredibly hard to remove completely once established. They love gravel because the stones don't offer much resistance to their deep roots.
- Couch Grass (Elymus repens): This one is a real nightmare. Its extensive rhizome system means it spreads horizontally underground, popping up new shoots all over the place. I once let a small patch near my greenhouse get away from me, and it took me a full season of diligent digging to get it under control. It's incredibly resilient, especially in our often-damp British soil.
- Bindweed (Convolvulus arvensis): Another deep-rooted terror. Bindweed wraps itself around anything, and its roots can go down for meters. I’ve found it particularly challenging in gravel where it can weave through the stones, making it hard to get a clean pull. Last summer, a patch near my Acer palmatum bed seemed to emerge from nowhere, strangling some of my ornamental grasses.
- Mare's Tail (Equisetum arvense): If you've got this, you have my deepest sympathies. It's an ancient plant with incredibly deep, brittle roots that break off easily, meaning each broken piece can regenerate. It thrives in damp, often poor, soil conditions, which can sometimes be the case beneath neglected gravel. I've been battling a small patch near my compost bins for years; it's a true testament to its persistence!
- Moss and Algae: While not technically "weeds" in the traditional sense, these green invaders can quickly colonise damp, shaded gravel areas, making them slippery and unsightly. Here in our often-wet UK climate, especially during autumn and winter, moss can quickly become an issue, particularly on paths with less sun.
Understanding these common invaders is the first step towards a permanent solution. For instance, knowing that dandelions have taproots tells you you need to extract the entire root. Recognizing couch grass means you need to be vigilant about digging out every piece of rhizome. It's about tailoring your attack plan to the enemy's strengths.

The Big Clean-Up: Organic Strategies for Reclaiming Overgrown Gravel Beds
Alright, so you've identified your foes. Now it's time to roll up our sleeves and get stuck into the messy, but incredibly satisfying, job of reclaiming those overgrown gravel beds. This isn't a job for the faint-hearted, especially if your beds are as neglected as some of mine have been after a particularly busy season. But trust me, a thorough clean-up now will save you countless hours down the line.
My go-to method, and frankly, the most effective for truly overgrown areas, is good old-fashioned manual weeding. Yes, I know, it sounds like a chore, but hear me out. For gravel, it's about getting down on your hands and knees and being meticulous. I use a sturdy weeding knife or a hand fork, specifically one with a bit of a curve, to tease out the weeds. The trick is to gently move the gravel aside, expose the base of the weed, and then pull, making sure you get as much of the root system as possible. For dandelions, push the weeding knife deep alongside the taproot and lever it out. For bindweed and couch grass, follow the runners and roots as far as you can. It's slow work, but it's the only way to truly eradicate those deep-rooted perennial weeds that plague us here in the UK.
One mistake I made early on was trying to do this after a long dry spell. The ground was like concrete, and roots just snapped off, leaving bits behind to regrow. I've learned that the best time for a big clean-up is after a good rain, when the soil beneath the gravel is soft and moist. The roots come out much more easily, giving you a better chance of complete removal.
For smaller, annual weeds or new seedlings, a Dutch hoe can be quite effective. I use mine on my gravel path after a light rain; the sharp blade skims just under the surface, severing the young weeds. The key here is to do it often, before the weeds have a chance to establish deep roots. It's a great preventative measure once the initial clean-up is done.
What about those "organic" weed sprays, you ask? I've experimented with vinegar-based solutions and commercial organic weed killers that use fatty acids. My honest take? They can be useful for scorching young, annual weeds on patios or paths where there are no desirable plants, but they rarely get to the root of persistent perennial weeds like couch grass or mare's tail. They're primarily contact killers, meaning they only affect the parts of the plant they touch. For a truly permanent solution, especially with the resilient weeds we face in British gardens, you need to tackle the root system. I've found them to be more of a temporary cosmetic fix than a long-term organic strategy.
For truly stubborn, isolated patches of weeds like mare's tail (which is notoriously difficult), I've sometimes resorted to carefully pouring boiling water directly onto the plant. This works by cooking the plant cells and can be quite effective for small areas, but you must be incredibly careful not to splash it on any desired plants or yourself. It's not a solution for a large bed, but for a persistent clump in a difficult spot, it can be a last resort.
The big clean-up is about patience and thoroughness. You'll likely need to make a few passes over a week or two, especially as new seedlings emerge or missed root fragments resprout. Don't get disheartened – every weed you remove completely is a victory!
Building a Fortress: Comparing Organic Weed Barrier Options for New and Existing Beds
Once you've done the hard graft of clearing those existing weeds, the last thing you want is for them to return. This is where building a "fortress" comes in – creating an effective, organic weed barrier that prevents new weed seeds from germinating and stops perennial weeds from pushing through from below. This is the permanent solution we're striving for!
I've experimented with various options in my UK garden, especially when creating new beds or rejuvenating old ones. The choice of barrier often depends on whether you're starting from scratch or working around established plants, and what level of durability you need.
Let's look at some of the best organic options I've found that actually work here in Britain:
Cardboard
A true hero in my no-dig raised beds, and surprisingly effective under gravel too! Cardboard acts as an excellent light and weed suppressor. I've used it extensively around my greenhouse where I have a gravel path, and it’s been brilliant.
Newspaper
Similar to cardboard but generally less durable. It's a good option if you have an abundance of it and are looking for a very temporary or light-duty barrier.
Natural Fibre Weed Membranes
These are fantastic. Made from jute, hemp, or other biodegradable materials, they allow water and air to pass through (crucial for soil health and nearby plants) but block weeds. I've used these around my newly planted fruit bushes that are nestled in a gravel area, and they've performed really well.
Installation Tips:
- For New Beds: If you're creating a new gravel bed, this is the easiest scenario. After clearing the area thoroughly, lay your chosen barrier material directly onto the prepared soil. Overlap the edges by at least 15-20cm (6-8 inches) to prevent weeds from sneaking through the gaps. Secure it with landscape staples or a layer of soil/gravel to prevent it from shifting, especially in windy British weather! Then, spread your gravel on top.
- For Existing Beds with Established Plants: This is trickier, and where I learned a few lessons the hard way. You can't just lay a solid sheet. Instead, you'll need to carefully cut around the base of your established plants. Make an 'X' cut or a circular cut in the barrier, just large enough to fit snugly around the stem of the plant without constricting it. The goal is to cover as much bare soil as possible. This is where natural fibre membranes are particularly good, as they are more pliable and easier to cut accurately. Cardboard can also be cut into smaller pieces and fitted like a jigsaw puzzle around plants.
Here’s a comparison of the organic weed barrier options I've personally tried and tested in my UK garden:
| Barrier Type | Pros (for UK conditions) | Cons (for UK conditions) |
|---|
Beyond Barriers: Natural Mulches and Groundcovers for Permanent Weed Suppression
So, we've talked about laying down a robust barrier, which is a fantastic start. But in my UK garden, especially with our often-damp climate and the sheer tenacity of British weeds, I've learned that you need to go "beyond the barrier" for truly permanent suppression. This is where natural mulches and even living groundcovers come into their own. They don't just block weeds; they improve your soil, regulate temperature, and add a beautiful, natural aesthetic.
I've experimented quite a bit with different organic mulches in my 800 sq ft space, trying to find that sweet spot between weed control and looking good around my established plants. The trick, I've found, is to choose something that complements your gravel and doesn't just get washed away with the first proper downpour we get here in the Midlands!
The Power of Organic Mulches
Organic mulches act as a secondary layer of defence, smothering any weed seeds that manage to land on top of your gravel and barrier. They also slowly break down, adding valuable organic matter to the soil beneath – a win-win for your established plants.
My personal favourite for decorative beds has to be a good quality woodchip or bark mulch. I've tried everything from straw (too messy, blows away easily in British winds) to grass clippings (breaks down too fast, can get slimy). For me, the coarser, chunkier mulches have proven to be the best.
When I reclaimed a particularly stubborn section of my gravel path that curves around my raised herb beds, I first laid down a weed membrane, then about 5cm of decorative gravel. But I still found stubborn weeds like bindweed pushing through the edges. So, I added a 5-7cm layer of composted woodchip around the base of my rosemary and lavender plants. What a difference! It not only suppressed the weeds but also kept the soil around the herbs cooler in summer and offered a bit of insulation in winter.
Here's a quick rundown of what I've found works here in Britain:
| Mulch Type | Pros (UK Specific) | Cons (UK Specific) | My Experience (Randy's Garden) |
|---|---|---|---|
| (to be honest, I've got a bit of a soft spot for the 'Cotswold Gold' gravel look). They tend to get lost in the overall aesthetic. |

Living Groundcovers for Permanent Weed Suppression
For areas with established plants, particularly those that like well-drained conditions, living groundcovers are an absolute dream. They knit together to form a living carpet, blocking out light and physically suppressing weeds, all while looking beautiful. They also help keep the soil cool and moist, which is a blessing in our unpredictable British summers.
I've had great success with these around the edge of my gravel beds and even between larger specimen plants within the gravel:
- Creeping Thyme (Thymus serpyllum): This is a superstar. It's tough, drought-tolerant once established, and when you brush past it, it releases a lovely scent. I've got 'Pink Chintz' in a sunny gravel patch, and it forms a dense mat that nothing gets through. Plus, the bees love its tiny flowers.
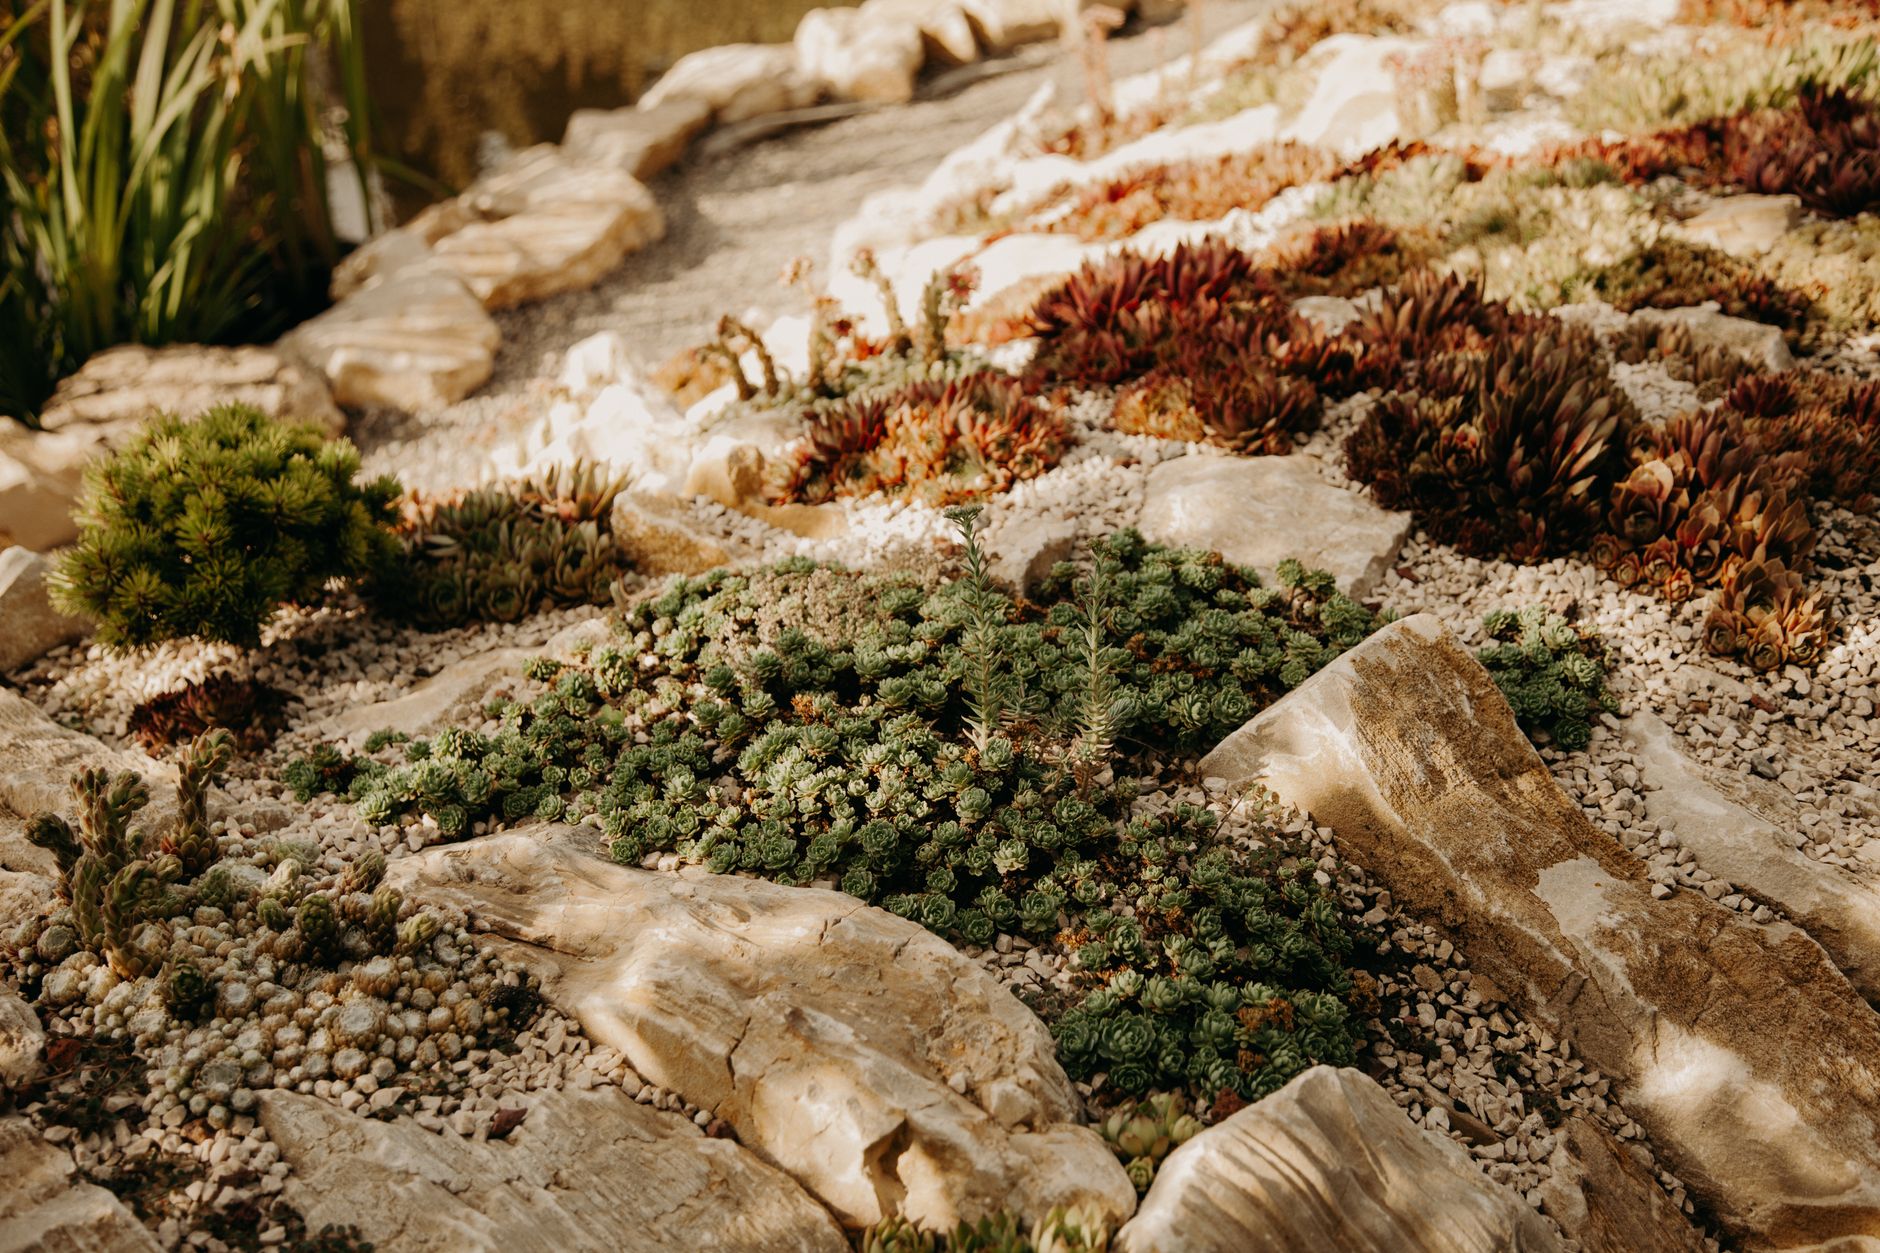
- Sedum (various low-growing varieties): Succulents are fantastic for dry, sunny gravel beds. They spread slowly but surely, forming dense mats. I particularly like Sedum album 'Coral Carpet' for its subtle colour changes and incredible resilience.
- Acaena 'Blue Haze': This is a slightly different texture, with lovely blue-green foliage. It's incredibly tough and spreads to form a fantastic weed-suppressing carpet. Just keep an eye on its vigour, especially in a rich spot.
The key with groundcovers is to plant them fairly close together initially, so they can quickly knit together before weeds have a chance to establish. Keep them well-watered until they're properly settled in, especially during any dry spells we get.
Long-Term Low Maintenance: Organic Routines for Pristine Gravel Aesthetics
Alright, so you've done the hard graft: cleared the weeds, laid the barrier, topped it with gravel, and perhaps added some organic mulch or groundcovers. Now for the satisfying part – keeping it looking pristine with minimal effort. This isn't a "set it and forget it" system, but with the right organic routines, it gets pretty close, even with our infamous British weather!
The "Little and Often" Approach
This is my mantra for all gardening, but especially for gravel beds. I used to let things get out of hand, then spend an entire weekend battling a jungle. Now, I dedicate just 15-20 minutes a week, usually on a Sunday morning with a cuppa, to my gravel areas.
- Spot Weeding: Despite all your efforts, a few brave weed seeds will inevitably find their way. Wind, birds, or even your boots can carry them. Catch them young! A small hand weeder or even just your fingers can quickly dispatch tiny seedlings. If they've germinated in the gravel layer above your barrier, they're usually very easy to pull out. I've found a good pair of gardening gloves and a kneeling mat are my best friends here.
- Edging: Grass is the sneakiest invader. It loves to creep in from lawn edges. I use a sharp half-moon edger or even a spade to maintain a crisp edge between my lawn and gravel, at least once a month during the growing season. This prevents the grass from getting established and becoming a nightmare to remove.
- Leaf and Debris Removal: Our autumns here in the UK are beautiful but messy! Decaying leaves and other organic debris can create a perfect seedbed for weeds if left on your gravel. A quick rake-over with a leaf rake (one with plastic tines works best to avoid disturbing the gravel too much) or a leaf blower can keep things tidy. I usually do this every couple of weeks in autumn.
Topping Up and Refreshing
Over time, gravel can settle, and organic mulches will decompose. This is natural and part of the cycle!
- Gravel: Depending on foot traffic and how much our lovely British rain washes it around, you might need to top up your decorative gravel every 2-3 years. A thin layer of 2-3cm is usually enough to refresh the look and maintain depth. I find a good hose down with the pressure washer every now and then also helps to get rid of any moss or grime that builds up, especially in shadier spots that stay damp.
- Organic Mulches: As mentioned, these break down. I aim to top up my woodchip or bark mulch annually, usually in late winter or early spring, before the main weed flush. A 3-5cm layer is usually sufficient to refresh the weed suppression and keep the aesthetics looking tip-top. This is also a great opportunity to check on your established plants and give them a little organic feed if needed.
Dealing with the Unpredictable UK Weather
Ah, British weather! It's a constant challenge and teacher.
- Wet Spells: Prolonged damp conditions, which we get a lot of, can encourage moss and algae growth on gravel, especially in shaded areas. My pressure washer is invaluable for this. A light spray with an organic moss killer (check it's safe for your plants!) can also help.
- Dry Spells: Yes, we do get them! If you have established plants in your gravel beds, remember they'll still need water during prolonged dry periods. The mulch and gravel will help retain moisture, but regular checking is key. I use a watering can with a rose attachment to water directly at the base of the plants, avoiding saturating the entire gravel bed and encouraging weed seeds to sprout.
Enjoy Your Weed-Free Gravel Oasis: Final Tips for Lasting Beauty
Well, we've come full circle, haven't we? From battling those relentless weeds in my own UK garden to outlining a comprehensive organic strategy for your decorative gravel beds. It's been a journey of trial and error for me, learning what truly works here in the changeable British climate, and I'm genuinely thrilled to share these insights with you.
Reclaiming and maintaining a weed-free gravel bed around your established plants is not about finding a magic bullet. It's about understanding the enemy (our stubborn UK weeds!), implementing a layered defence, and then committing to a consistent, gentle maintenance routine.
Randy's Recap for Permanent Pristine Gravel:
- The Big Clean-Up is Non-Negotiable: Get rid of every last weed and root fragment. Don't skimp on this first step. I learned this the hard way after a particularly frustrating summer battling reappearing docks in a newly laid bed.
- Barrier Up: Choose a high-quality, permeable weed barrier. I've found that woven landscape fabric works best for existing beds, giving those established plants space to breathe while blocking out the light.
- Layer with Mulch and Life: Don't just rely on gravel. A good 5-7cm layer of organic mulch like composted woodchip provides a secondary weed barrier, improves soil health, and looks fantastic. And for sunny spots, consider tough, low-growing groundcovers like creeping thyme – they're a living weed suppressor!
- Adopt "Little and Often": Consistency is your best friend. Those 15-20 minutes a week will save you hours of back-breaking work later. Catching weeds when they're tiny is infinitely easier than when they've taken root.
- Embrace the Aesthetics: This isn't just about weed control; it's about creating a beautiful, tranquil space in your garden. The contrast of pristine gravel, lush plants, and perhaps a well-placed stone or two can be incredibly rewarding.
Remember, gardening is a continuous conversation with nature. There will always be a rogue weed, a particularly wet week, or a surprise dry spell. But by following these organic strategies, you're not just fighting weeds; you're building a resilient, beautiful, and sustainable garden environment.
My own gravel paths and beds here in the Midlands are now a source of joy, not dread. They provide a clean, elegant backdrop for my herbs, a clear route to my beloved greenhouse full of heirloom tomatoes, and a low-maintenance solution that lets me focus on the plants I truly love.
So, go on, give these methods a try! Start with a small section, experiment with what works best in your specific UK garden conditions, and reclaim your gravel beds. I'd love to hear your experiences and any tips you discover along the way – drop a comment below! Happy gardening, fellow green thumbs!
