
Breathe New Life into Your Woody Herbs: Why Rejuvenation Matters
If you're anything like me, your culinary herb garden is a cornerstone of your kitchen. Here in my 800 sq ft Midlands backyard, my raised beds are bursting with everything from vibrant mint to the sturdy, aromatic mainstays: rosemary, thyme, and sage. There's nothing quite like stepping out to snip fresh herbs for dinner, is there? But let's be honest, those woody stalwarts can sometimes get a bit… unruly. They can grow leggy, sparse, and frankly, a bit sad-looking over the years.
I've been gardening intensively for over five years now, ever since I swapped my IT desk for digging forks, and I've learned a fair bit about bringing these fantastic plants back from the brink. I remember my first sage bush; it was glorious for a couple of years, then slowly transformed into a gnarled, woody mess with tiny, flavourless leaves. I nearly binned it, thinking it was past its prime. That was a mistake I learned from! What I discovered is that with a bit of timely intervention and the right techniques, we can breathe incredible new life into these often-neglected heroes of the herb garden.
Rejuvenating your woody herbs isn't just about making them look pretty again, though that's certainly a bonus. It’s fundamentally about improving their health, boosting their vigour, and most importantly, increasing their yield and flavour profile. Here in the UK, especially with our sometimes-unpredictable weather patterns, healthy, well-maintained plants are much more resilient. They’re better equipped to handle a damp summer or a sudden cold snap. By understanding how to prune and care for them, you’re essentially hitting the reset button, encouraging fresh, tender growth that’s packed with the aromatic oils we crave.
From Leggy to Lush: Understanding Woody Growth in Culinary Herbs
Have you ever looked at your rosemary bush and thought, "Where did all the leaves go?" Or your thyme patch has more bare stems than fragrant foliage? That's woody growth, and it’s a completely natural part of the lifecycle for herbs like rosemary, thyme, and sage. As these plants mature, their stems become harder, thicker, and less productive. This lignification, as the fancy botanical term goes, means fewer new shoots, smaller leaves, and a significant drop in the essential oils that give them their distinctive flavour. Essentially, the plant is pouring its energy into maintaining old, inefficient structures rather than creating fresh, delicious growth.
In my UK garden, I’ve seen this happen time and again. My first attempt at growing 'Miss Jessup's Upright' rosemary ended up looking like a miniature, sparsely-leaved tree after about three years, rather than a dense, productive shrub. The leaves it did produce were tiny and a bit bitter. The same goes for my common thyme – it spread beautifully for a while, then parts of it just gave up, leaving bald patches and stringy, woody stems. This is particularly noticeable after a harsh British winter or a prolonged dry spell, as the plant prioritises survival over lush growth.
The good news is that this woody state isn't a death sentence. It’s simply a signal that it's time for us, the gardeners, to step in and guide the plant back to its youthful, productive self. By strategically removing the older, less productive wood, we stimulate the plant to produce new, succulent growth from dormant buds lower down. This isn't just about aesthetics; it's about encouraging a continuous cycle of fresh, flavourful leaves for your culinary adventures.

Gear Up: Essential Tools for Successful Herb Pruning
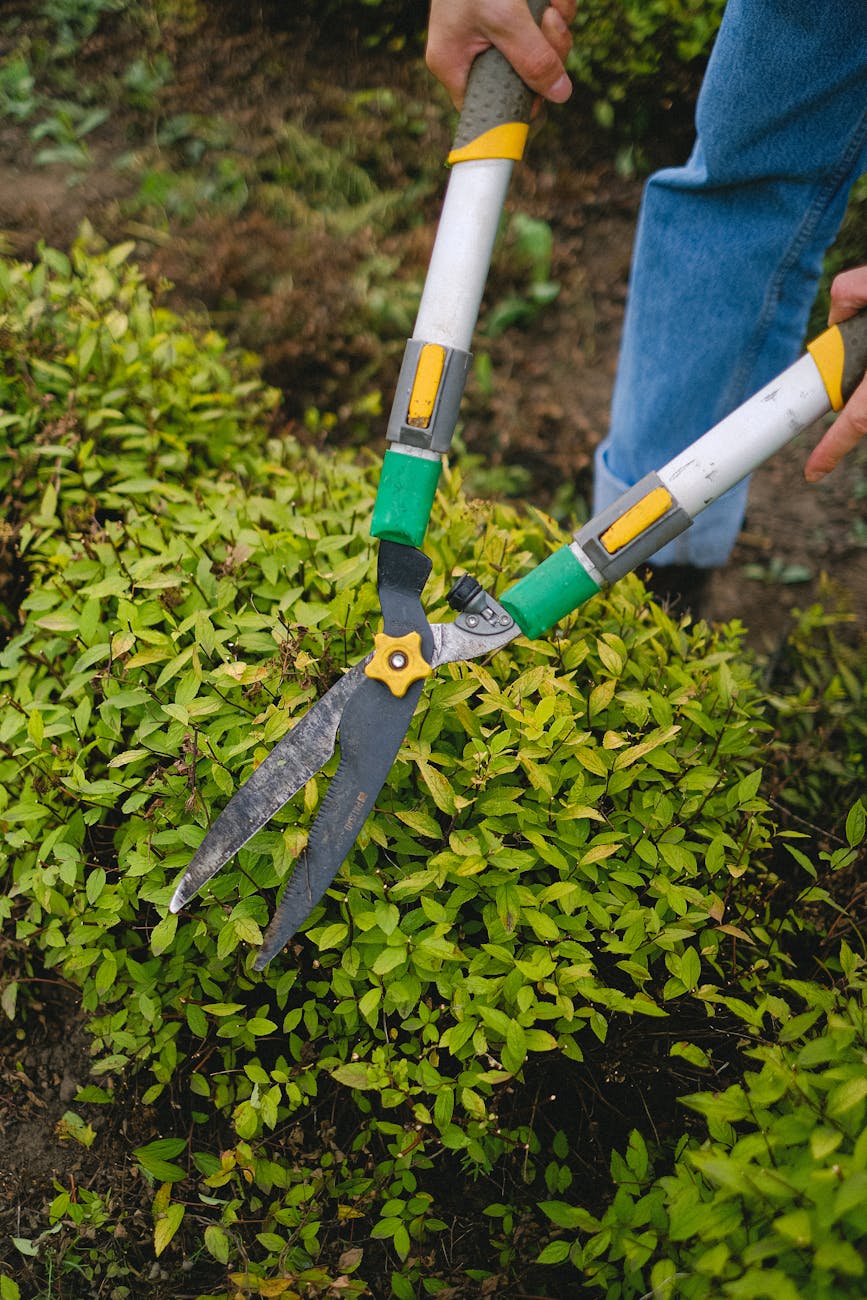
Before we dive into the nitty-gritty of specific pruning techniques, let's talk tools. Just like I wouldn't try to debug a server with a blunt screwdriver (back in my IT days, anyway!), you wouldn't want to tackle your precious herbs with dull, dirty shears. The right tools make all the difference, ensuring clean cuts that heal quickly, preventing disease, and making the job a whole lot easier for you.
Here in my Midlands garden, I rely on a few key pieces of equipment. First up are my trusty hand pruners (or secateurs). I've got a bypass style pair, which means the blades overlap like scissors, giving a clean, precise cut that's ideal for living stems. Anvil pruners, where a blade closes onto a flat surface, are better for dead wood, but for living herbs, bypass is king. I also keep a smaller, sharper pair of snips or herb scissors specifically for harvesting and lighter trimming. These are brilliant for getting into tight spots without damaging surrounding growth.
A critical, and often overlooked, step is cleaning and sharpening. I always give my tools a wipe-down with rubbing alcohol before and after use to prevent the spread of any potential diseases, especially if I'm moving between different plants. And keeping them sharp? That's non-negotiable. A sharp blade makes a clean cut, which heals faster and reduces stress on the plant. A blunt blade tears and crushes the stem, leaving an open wound susceptible to pests and diseases – something we definitely want to avoid in our often-damp British climate. Trust me, it’s worth the five minutes of maintenance!
Rosemary Revival: Specific Pruning Techniques for UK Gardens
Rosemary is one of my absolute favourites. I grow 'Tuscan Blue' in a large pot by the kitchen door, and I've got a sprawling 'Miss Jessup's Upright' in a raised bed, both thriving here in the Midlands. Its evergreen nature and incredible aroma make it indispensable. But, as I mentioned earlier, it's also one of the quickest to become woody and unproductive if left unchecked.
The key to rejuvenating rosemary in a UK garden is timing and technique. I've learned this the hard way. One year, I pruned a bit too enthusiastically in late autumn, and the subsequent harsh winter, with its unexpected frosts, damaged the new growth I'd encouraged. Now, my rule of thumb is to do the main, heavier pruning in early to mid-spring (think late March to early May, depending on your specific location and the warmth of the spring). This gives the plant plenty of time to recover and put on new growth before the next winter. You can do lighter trims for harvesting throughout the growing season, right up until late summer, but avoid heavy pruning after August here in Britain, as new growth won't have time to harden off before the cold arrives.
When pruning, the golden rule for rosemary (and many other woody herbs) is don't cut into old, completely leafless wood. Rosemary struggles to regenerate from bare, woody stems. Instead, look for points where there's still some green growth or small, dormant buds. I typically aim to cut back by about one-third to one-half of the plant's size, shaping it as I go. Remove any dead, diseased, or damaged branches first. Then, systematically work your way around, cutting just above a leaf node or a new side shoot. This encourages branching and a bushier habit.
Rosemary Pruning Strategies for UK Conditions
| Pruning Strategy | When to Do It (UK) | How to Do It | Pros for UK Gardens
Thyme Transformation: Rejuvenating Overgrown Thyme for Abundant Harvests
Ah, thyme! The backbone of so many British dishes, from roast potatoes to hearty stews. In my 800 sq ft Midlands garden, I’ve grown countless varieties – from the classic Common Thyme that scrambles over my raised bed edges to the delicate, lemon-scented types. While rosemary is all about reaching for the sky, thyme is more of a ground-hugger, and its woody tendencies manifest a bit differently. You'll often find it getting leggy, with sparse growth at the tips and a bare, woody centre that just looks… sad.
The biggest mistake I made early on was treating my thyme like a perennial flower, just letting it do its thing. After a few years, my beautiful 'Silver Queen' patch started to die back in the middle, leaving a woody void. I learned the hard way that regular, lighter pruning is key for thyme, especially here in our often damp UK climate. Unlike rosemary, which can handle a more aggressive chop into older wood, thyme prefers a gentler hand. My rule of thumb is to never cut back more than a third of the plant at any one time, and definitely avoid hacking into the truly old, grey, brittle wood.
For thyme, I aim for a rejuvenation prune twice a year, usually in late spring after the first flush of flowers has faded, and then again lightly in late summer or early autumn. This encourages a dense, bushy habit and prevents that dreaded woody collapse in the middle. I use my sharp snips to gently shear off the top few inches of growth, focusing on removing all the spent flower stalks. This not only keeps the plant tidy but also encourages new, flavourful foliage to emerge from just below the cuts. If you've got a particularly sprawling 'Creeping Thyme' that's trying to take over the world (a common sight in my garden!), a good trim back will keep it in check and looking its best.

Thyme Pruning Guide: Cultivar Comparison for UK Gardens
Here's a quick comparison of some popular thyme varieties and how I manage them in my UK garden:
| Thyme Variety | Growth Habit in UK Garden | Woody Tendency & Pruning Needs | My Personal UK Experience & Tip Sage (Salvia officinalis) | Bushy, woody base; grey-green foliage | Low to moderate. Benefits from annual shaping to prevent excessive woodiness. Can become leggy with fewer leaves if not pruned. | I find 'Purple Sage' needs a good trim in early spring to really make the colours pop and keep it from flopping. For 'Tricolor Sage', consistent harvesting helps keep it compact.
