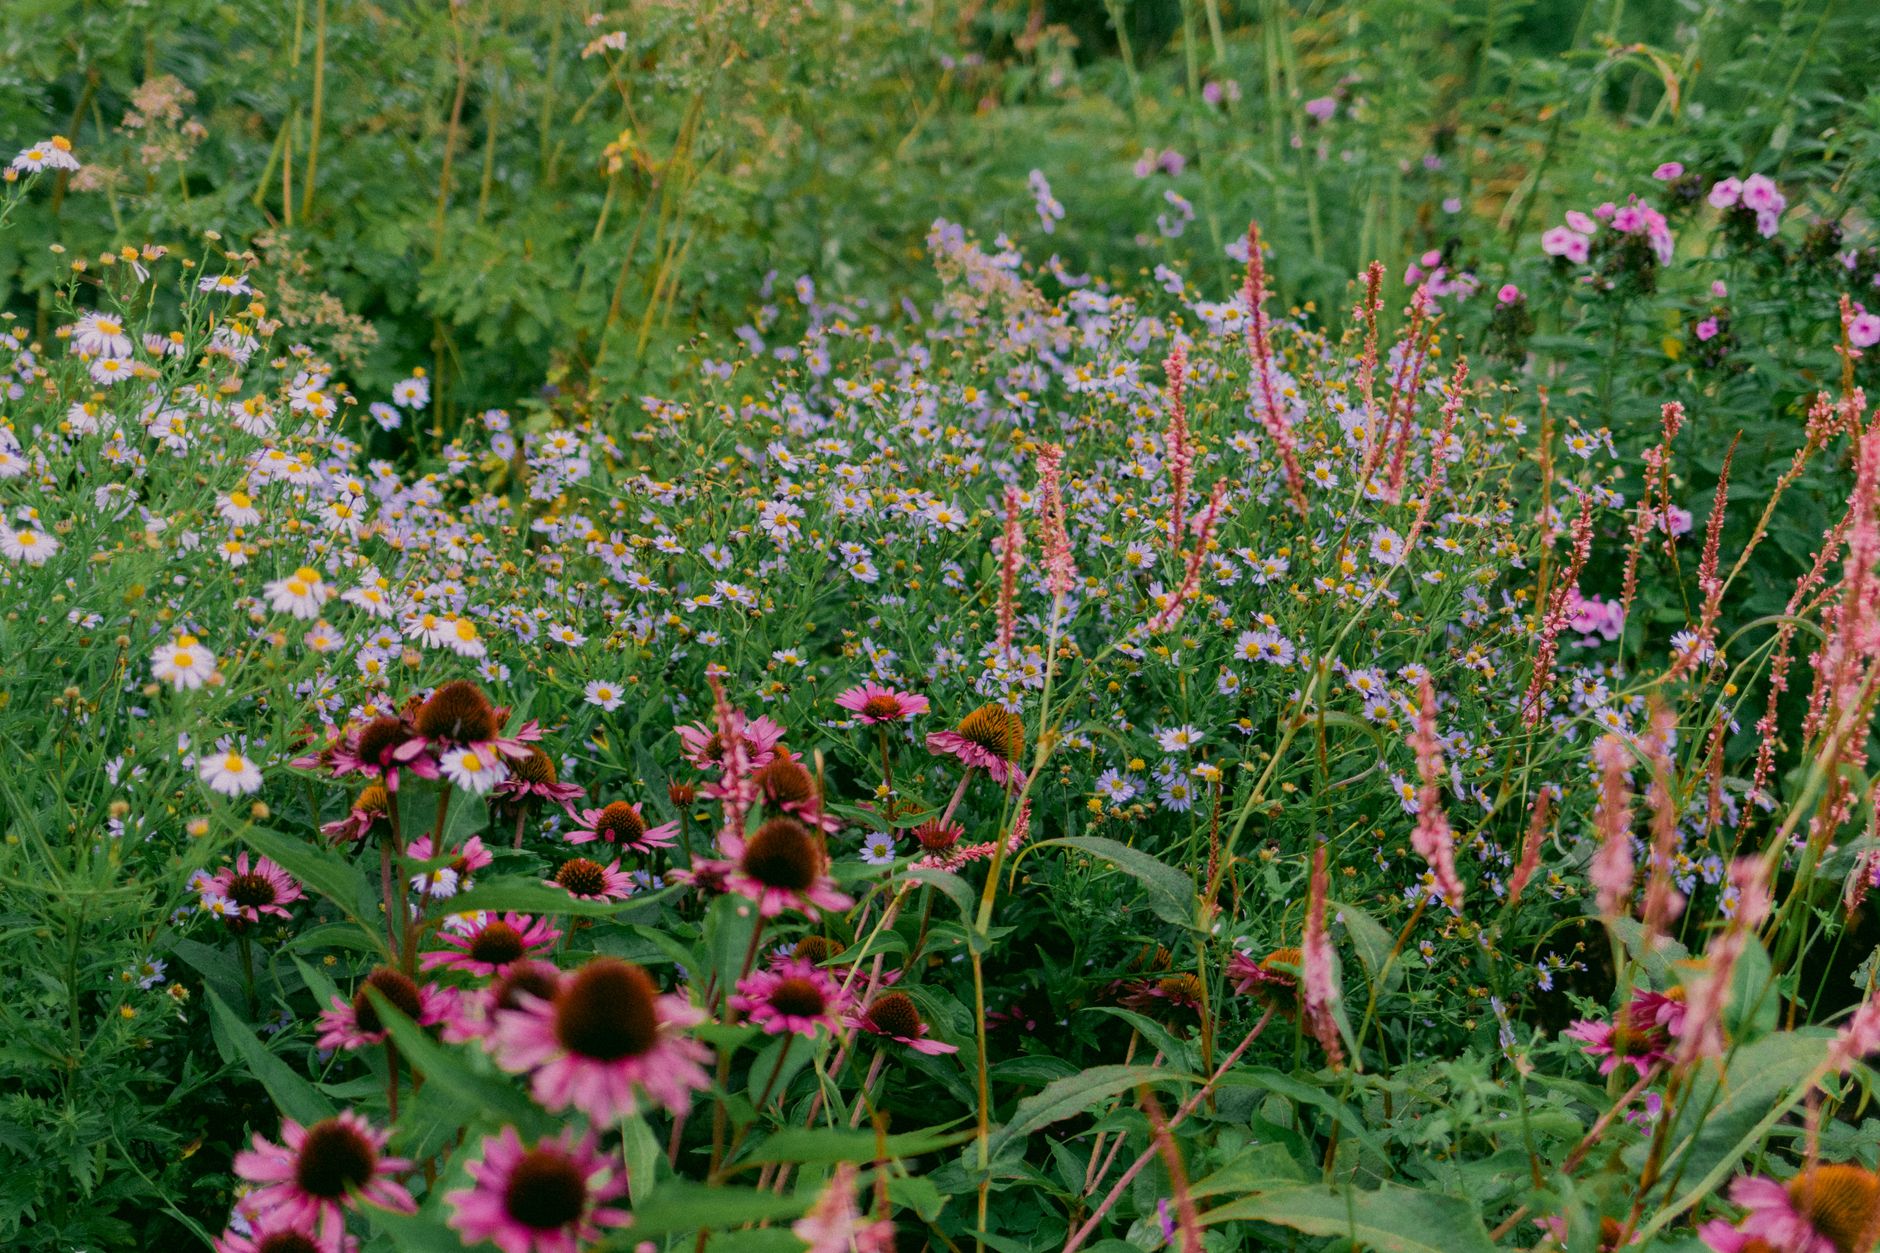
Revitalising Your Established Perennial Borders – A Gentle Approach
There’s a unique satisfaction that comes from tending a garden, isn't there? Watching something thrive, knowing you’ve played a part in its journey. But let's be honest, sometimes our beloved perennial borders can start to look a bit... tired. You know the feeling – those once-vibrant plants seem to lose their oomph, the soil feels lifeless, and the whole display just looks a bit 'run-down'. When I first started gardening five years ago here in the UK, transitioning from a career in IT to digging in the dirt, I absolutely loved the idea of established borders. It felt like a proper, mature garden. But I quickly learned that 'established' doesn't mean 'maintenance-free forever'.
In my 800 sq ft Midlands garden, packed with everything from heirloom tomatoes in the greenhouse to a riot of herbs and perennials, I've seen this decline firsthand. My initial instinct, often driven by a bit of youthful gardening enthusiasm (and perhaps a touch of impatience), was to rip everything out and start again. But after a few seasons of that exhausting cycle, and frankly, some disheartening results thanks to our often-unpredictable British weather, I realised there had to be a better way. A gentler way.
This article isn't about wholesale renovation or digging up every plant you own. We're going to talk about rejuvenating those established perennial borders using non-disruptive strategies. We'll rebuild soil structure and foster microbial health from the top down, aiming for long-term vibrancy without the back-breaking effort of a complete overhaul. My goal, and what I've found works brilliantly here in the UK, is to create a thriving ecosystem beneath the surface that supports stunning growth above. It’s all about working with nature, not against it.
Diagnosing the Decline: Spotting the Signs of a 'Run-Down' Border
Before we can fix anything, we need to understand what we're dealing with. Just like troubleshooting a computer system back in my IT days, you need to diagnose the problem first. A 'run-down' perennial border isn't usually a sudden collapse; it's a gradual decline, often over several seasons. I've definitely made the mistake of ignoring subtle signs in my own garden, only to face a much bigger issue later.
One year, my beautiful clump of Astrantia major 'Claret' – a real star in my partial shade border – started looking sparse and less floriferous. Its leaves were smaller, slightly yellowed, and it just didn't have that robust vigour I'd come to expect. My usually reliable Geranium 'Rozanne', a plant I swear by for its incredible flowering season here in the UK, also seemed to be producing fewer, less vibrant blooms. The soil around these plants felt compacted, almost lifeless when I poked at it, and rain seemed to just sit on the surface rather than soaking in. These were classic symptoms.
Here in the Midlands, with our often heavy clay soil, compaction is a constant battle. Years of foot traffic, heavy rain, and simply not adding enough organic matter can turn once-fluffy soil into a brick-like substance. When this happens, roots struggle to access oxygen and nutrients, and beneficial soil microbes can't do their vital work. Below is a little table I put together to help you quickly spot the difference between a healthy, happy border and one that's crying out for a bit of TLC. This is based on what I look for in my own UK garden.
| Feature | Healthy, Vibrant Border | Run-Down, Declining Border |
|---|---|---|
| Plant Growth | Vigorous, lush foliage; strong stems; abundant, vibrant flowers; good disease resistance. | Stunted, sparse, or leggy growth; smaller, discoloured leaves (yellowing, purpling); few or poor-quality flowers; increased susceptibility to pests/diseases. |
| Soil Appearance | Dark, crumbly, rich in organic matter; visible earthworm activity; good tilth. | Pale, compacted, crusty surface; muddy when wet, hard when dry; few or no earthworms; often weedy. |
| Drainage | Water soaks in readily after rain or watering; no standing puddles. | Water pools on the surface for extended periods; soil feels waterlogged or excessively dry and hard. |
| Root Health | Roots are well-developed, white, and fibrous; easily penetrate the soil. | Roots are sparse, discoloured, or struggle to penetrate compacted soil; can be shallow. |
| Weed Pressure | Weeds are present but easily managed; often fewer types of persistent weeds. | Increased weed growth, especially tough, deep-rooted weeds that thrive in poor soil (e.g., bindweed, mare's tail). |
| General Vibe | Buzzing with pollinators; a sense of life and abundance. | Quiet, less insect activity; plants look stressed and uninviting. |
Hands-On Soil Health Check: Simple DIY Tests for UK Gardeners
Once you’ve got a hunch that your border is feeling a bit under the weather, it's time to get your hands dirty and confirm your suspicions. You don't need fancy lab equipment; some of the best tests are simple, hands-on ones you can do in your own garden. I've been doing these for years in my Midlands plot, and they've saved me a lot of guesswork.
First up, the "squeeze test" for soil texture and structure. Grab a handful of slightly damp soil from your border, right where your plants are growing. Squeeze it firmly in your palm.
- Sandy soil will fall apart as soon as you open your hand. It feels gritty.
- Clay soil will hold its shape like a sausage, and you can often make it quite shiny if you rub it. It feels sticky and smooth.
- Loamy soil, the ideal, will form a loose ball that crumbles easily when poked. It feels rich and slightly silty.
My garden, like many in the Midlands, leans heavily towards clay. Knowing this means I always focus on adding plenty of organic matter to improve drainage and aeration, which is crucial for healthy root development in our British climate.
Next, the "percolation test" for drainage. This is super easy. Dig a small hole, about 30cm deep and 30cm wide, in the affected area of your border. Fill it with water and time how long it takes for the water to drain completely.
- If it drains in under 10 minutes, you might have sandy soil, which drains a bit too quickly.
- If it takes an hour or more, you've likely got compacted clay or a serious drainage issue.
- Somewhere in between, say 15-30 minutes, is generally a good sign.
I learned this the hard way when planting a few new shrubs. After a particularly heavy downpour, I noticed water sitting around the base of one for hours. A quick percolation test confirmed the stubborn clay was refusing to drain, so I knew that spot needed some serious attention.
Finally, a quick pH check. Soil pH affects nutrient availability, so it's a critical factor. You can buy inexpensive pH testing kits from any garden centre here in the UK. They usually involve mixing a small soil sample with water and adding a tablet or liquid that changes colour. Comparing the colour to a chart will give you your pH reading. Most perennials prefer a slightly acidic to neutral pH (6.0-7.0). If your soil is too acidic or too alkaline, certain nutrients become locked up, even if they are present in the soil.

My soil tends to be slightly alkaline (around 7.5), which is common in many parts of the UK, especially where there's underlying limestone. This means I choose plants that tolerate it well, and I regularly mulch with ericaceous compost around plants that prefer a more acidic environment, like my Hydrangeas. Don't get too bogged down in getting the perfect pH; understanding the general range is enough to guide your plant choices and amendment strategies.
Building Soil Structure from the Top Down: Non-Disruptive Mulching and Top-Dressing
Now that we know what's going on beneath the surface, it's time to get to the good stuff: fixing it! And the best way to do this, especially in an established perennial border, is by working from the top down. Forget digging and disturbing those precious root systems; we're going to feed the soil and build its structure gently through mulching and top-dressing. This is a technique I've become utterly obsessed with in my UK garden, and it's brought some of my most 'run-down' areas back to life.
I swear by a good, thick layer of organic mulch. It's a true game-changer. Mulching isn't just about suppressing weeds (though it does a brilliant job of that). It's about protecting the soil, retaining moisture (which is a godsend during our occasional British heatwaves, or those long dry spells), regulating soil temperature, and most importantly, slowly breaking down to feed the soil microbes and improve structure.
Last summer, after diagnosing a particularly sad-looking patch where my Phlox paniculata 'Blue Paradise' was struggling, I decided to go all-in with a top-dressing of homemade compost followed by a layer of leaf mould. I applied about 5-7 cm (2-3 inches) of the compost, carefully working it around the plants without disturbing their roots, and then topped that with another 5 cm of leaf mould. I did this in early spring, just as new growth was emerging. The results were fantastic. By mid-summer, the Phlox had bounced back with stronger stems and more vibrant flowers, and the soil beneath felt noticeably softer and richer.
Here's a comparison of some of my favourite non-disruptive mulches and top-dressing materials that work well here in the UK:
| Material | Pros for UK Gardens | Cons for UK Gardens | Best Use/Randy's Tip |
|---|---|---|---|
| Compost (Homemade or Peat-Free) | Nutrient-rich, excellent for soil structure, feeds microbes, retains moisture, suppresses weeds. Readily available. | Can be expensive to buy in large quantities. Quality varies. | My go-to top-dressing. Apply 5-7cm (2-3 inches) in spring around all perennials. Never bury plant crowns! |
| Leaf Mould | Fantastic for improving soil structure and water retention, provides slow-release nutrients, free if you make it yourself. | Takes 1-2 years to break down. Low in immediate nutrients compared to compost. | Great as a mulch, especially in shady borders. I make huge piles from autumn leaves every year. |
| Wood Chippings (from local arborists) | Long-lasting, excellent weed suppression, good moisture retention, good for pathways or permanent beds. | Can deplete nitrogen from soil as it breaks down initially (nitrogen draw-down), can look coarse. | Best for paths or wider, less intensely planted borders. Apply a layer of compost underneath to counteract nitrogen draw-down. |
| Well-Rotted Manure | Very rich in nutrients, excellent for heavy feeders, improves soil structure. | Can be 'hot' if not fully rotted (burns roots), smell can be an issue initially. Ensure it's from a reputable source (herbivore only!). | Use sparingly as a top-dressing in autumn/winter, especially around hungry plants like Roses or Delphiniums. |
| Strulch (Straw Mulch) | Lightweight, good weed suppression, deters slugs, breaks down slowly, improves soil. | Can blow away in windy conditions before settling. Appearance isn't for everyone. | I've used this around brassicas in my veg beds to deter slugs, but it also works well in perennial borders. |
When applying any of these, remember the golden rule: keep the mulch a few centimetres away from the base of your plants, especially woody stems and crowns. Piling it up against them can lead to rot and disease, particularly during our damp British winters. The idea is to create a living blanket over the soil, not a suffocating one. This gentle, consistent feeding and protection will transform your 'run-down' borders into vibrant, thriving displays, just as it has for me here in the heart of the UK.
Cultivating the Unseen Workforce: Boosting Microbial Life in Your Borders
Once you’ve started to physically rebuild that soil structure from the top down with mulches and top-dressing, it’s time to really think about the invisible heroes beneath our feet: the microbes. For me, coming from an IT background where everything was about visible outputs and code, it was a real shift to appreciate the utterly vital, yet unseen, work these microscopic organisms do. They’re the engine of your soil, breaking down organic matter, making nutrients available to plants, and even fighting off diseases. Here in my 800 sq ft Midlands garden, encouraging a bustling microbial community has been one of the biggest game-changers for my established borders.
The best way I’ve found to foster this unseen workforce is by consistently feeding them. Just like us, they need good food! My compost bins are constantly churning out black gold, a mix of kitchen scraps, garden waste, and even shredded cardboard from my old IT deliveries. I aim for a hot compost in summer, but even a slower, cooler process through our damp British winters produces fantastic material. I’m not just talking about adding a thick layer of compost as a top-dress, though that’s brilliant; I also love brewing a good compost tea. I fill an old pillowcase with mature compost, dunk it in a bucket of rainwater, and let it steep for a day or two, stirring occasionally. Then I dilute that earthy-smelling liquid and drench the soil around my perennials. I’ve noticed a marked difference in plant vigour after a few applications, especially on some of my more established roses that were looking a bit tired.
Beyond compost, I regularly use liquid seaweed extract, particularly in spring and early summer. It’s not just a fertiliser; it’s packed with trace elements and hormones that stimulate microbial activity. I’ve been using a brand called Maxicrop for years, following the dilution rates on the bottle, and applying it around my perennial beds every few weeks during the growing season. What works here in Britain, especially with our often unpredictable weather, is that it gives plants a gentle boost without overwhelming them. One mistake I made early on was thinking more was better, leading to some leggy growth. Now, I stick to a regular, lighter application.
Finally, and this might seem obvious, but avoid anything that harms this delicate ecosystem. That means steering clear of synthetic chemical fertilisers and pesticides. They might give a quick fix, but they’re like hitting your soil with a sledgehammer, wiping out the very life you're trying to encourage. My approach has always been about working with nature, not against it. When I first started gardening five years ago, I briefly considered a 'stronger' weedkiller for a particularly stubborn patch, but quickly realised that short-term gain would have long-term consequences for the soil I was trying to nurture. Patience and natural methods, like persistent hand-weeding and good mulching, have always won out in my UK garden.
Smart Watering and Resilient Planting: Supporting Long-Term Vibrancy
Once you've got the soil structure and microbial life humming along, the next pieces of the puzzle are smart watering practices and choosing the right plants for long-term success.
Watering Wisdom for UK Borders
Even in the UK, where rain is often a given, we can get surprisingly dry spells, especially through July and August here in the Midlands. Deep, infrequent watering is the mantra for established perennials. When I water my borders, I make sure the water penetrates deep into the soil, encouraging roots to grow downwards, seeking moisture, rather than staying near the surface. This makes plants much more resilient to dry periods. I learned this the hard way when I first started; I’d give a quick sprinkle every evening, and my plants always looked thirsty the next day. Now, I use a soaker hose for an hour or two once a week during dry periods, or I stand there with a watering wand, really soaking each plant until the water starts to pool slightly.
Rainwater harvesting is a big one for me. I’ve got several water butts connected to my greenhouse and shed gutters, collecting hundreds of litres of precious soft water. Our tap water can be quite hard here in the Midlands, and rainwater is much better for plants and the soil microbiome. It's also free, which is a bonus when you're watering an 800 sq ft garden packed to the brim! Applying a good, thick mulch (as we discussed in earlier sections) also dramatically reduces water evaporation, meaning you water less often. This really helps, especially after a classic British summer downpour is followed by a week of unexpected sunshine.
Planting for Resilience in Our British Climate
The final, crucial step for long-term vibrancy is selecting plants that are truly suited to your specific conditions and our often-unpredictable British weather. There’s no point trying to force a sun-loving Mediterranean plant into a soggy, shady corner of Gloucestershire, or expecting a bog plant to thrive in a windswept, dry border in Norfolk.
In my UK garden, I've found that choosing varieties known for their hardiness and adaptability to our temperate climate is key. I'm a big fan of native plants and reliable stalwarts like Geraniums (I love 'Rozanne' for its long flowering season), hardy salvias (like 'Caradonna'), and robust phlox varieties. When adding new plants, I always look for strong, healthy specimens with good root systems, planting them at the right time of year – typically spring or autumn here in the UK – to give them the best chance to establish before the extremes of summer heat or winter cold.
I also think about future growth. One mistake I made when I first started was planting things too close together, eager to fill every gap. Within a year or two, things were overcrowded, competing for light and nutrients, and making it harder for air to circulate, which can be an issue in our damp climate. Now, I give plants ample space to mature, understanding that patience pays off in the long run for healthier, more resilient borders. What works here in Britain is allowing plants to establish properly, without immediate competition.

Ongoing Nurturing: Maintaining a Thriving Perennial Paradise
So, we've walked through diagnosing those tired borders, hands-on soil health checks, building structure from the top down with non-disruptive mulching, supercharging your soil's unseen microbial workforce, and adopting smart watering and resilient planting choices. It might sound like a lot, but trust me, it’s a journey that’s incredibly rewarding.
The truth is, gardening, especially with established perennial borders, is never a "one and done" job. It's an ongoing conversation with your plants and your soil, a constant process of observation, learning, and gentle intervention. Here in my 800 sq ft garden, which is packed with everything from heirloom tomatoes in the greenhouse to a riot of perennial herbs and flowers, I’ve learned that patience and consistency are your greatest allies. Our British climate, with its famous unpredictability, means you always need to be ready to adapt – a sudden late frost, an unexpected heatwave, or weeks of relentless rain can all throw a spanner in the works. But by focusing on the fundamentals we’ve discussed, you build a robust, resilient system that can weather most of what Mother Nature throws at it.
My approach now, after five years of intense experimentation and a fair few failures (I still cringe thinking about the year I didn't mulch enough and my border dried out in a freak August heatwave!), is to listen to my garden. I regularly walk around, cup of tea in hand, observing what's thriving, what's struggling, and what needs a little extra love. A plant looking a bit yellow might need a dose of liquid seaweed or compost tea. A patch of soil looking compacted might need another gentle top-dress of compost. It’s all about small, consistent actions that build up over time.
Ultimately, rejuvenating your perennial borders isn't just about making them look pretty again, although that's a fantastic bonus. It’s about creating a truly healthy ecosystem, a vibrant space where plants can flourish, pollinators can thrive, and you can connect with nature right outside your back door. It’s about understanding that the beauty above ground is a direct reflection of the health below.
So, I encourage you to roll up your sleeves, grab your trowel, and start your own journey. Begin with one border, one patch, one plant. Experiment. Observe. Don't be afraid to make mistakes – I've certainly made my share! The satisfaction of seeing a 'run-down' border transform into a thriving, buzzing paradise is immense. It's a living, breathing testament to the power of gentle, consistent care. And honestly, there's nothing quite like it for a former IT worker like me to get away from the screens and just get my hands dirty. Happy gardening, fellow UK green-thumbs!
