Don't Panic! Rescuing Your Wilting Transplants
There's a moment every UK gardener knows, a gut-punch feeling that hits harder than a surprise April frost. You've nurtured those tiny seedlings indoors, babied them under grow lights, hardened them off with meticulous care, and finally, proudly, planted them out into your raised beds or greenhouse. Then, you step out the next morning, or even just a few hours later, and there it is: a sad, limp sight. Your once vibrant, perky little plant is wilting, looking utterly dejected.
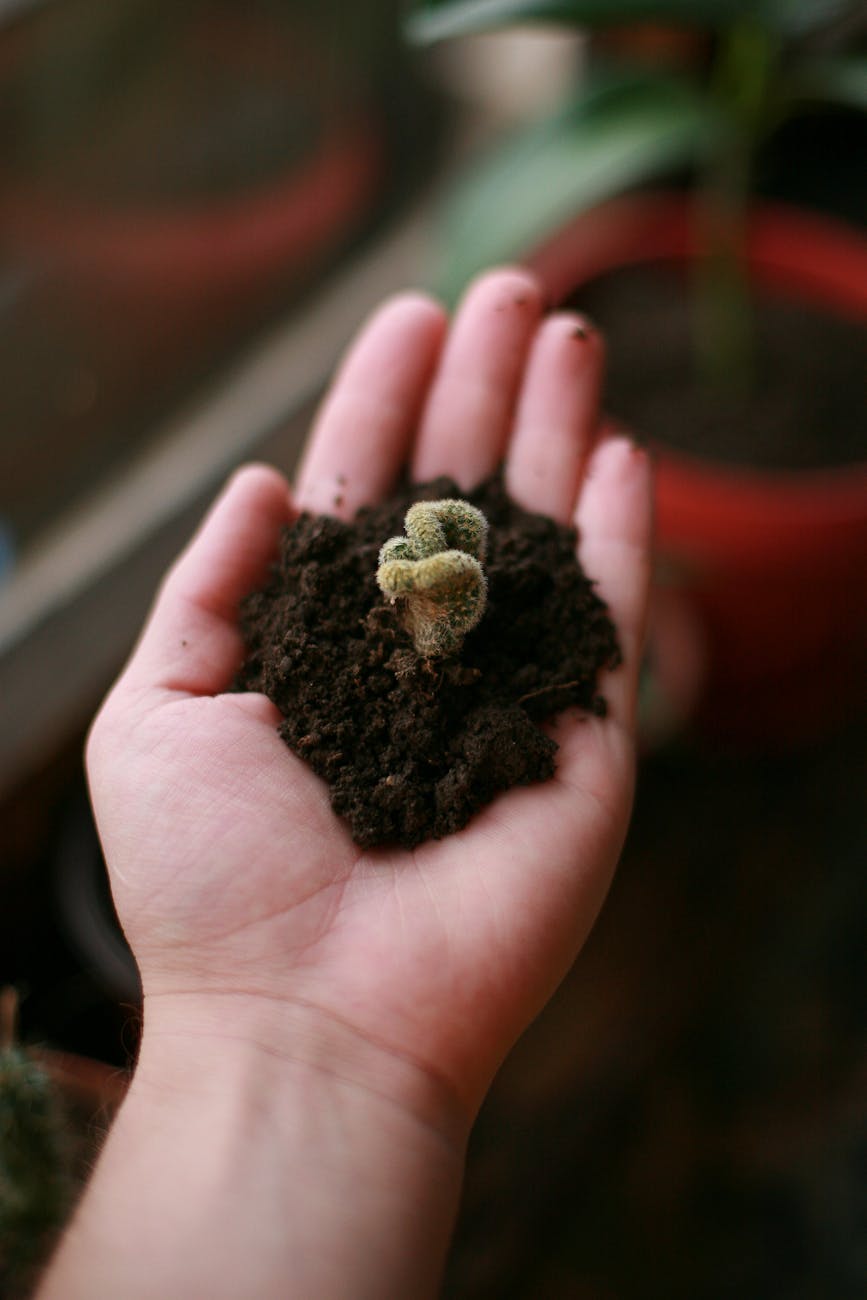
Believe me, I've been there countless times in my 800 sq ft Midlands garden. When I first started gardening five years ago, fresh out of the IT world and brimming with theoretical knowledge, the sight of a wilting 'Black Krim' tomato seedling I'd spent weeks coddling felt like a personal failure. My heart would sink, and I'd immediately jump to worst-case scenarios. But over the seasons, through a lot of trial and error (and a fair few lost plants, I'll admit), I've learned that wilting after transplanting isn't always a death sentence. In fact, it's often a completely normal, if unsettling, part of a plant's journey.
What we're talking about here is transplant shock, and it's something every single one of us, from the seasoned allotment holder to the first-time container gardener, will encounter. The good news? Most of the time, with a bit of understanding and some quick, sensible action, you can rescue those stressed plants and get them thriving again. Here in Britain, where our weather can be as unpredictable as a toddler's mood, knowing how to spot and tackle transplant shock is an invaluable skill. I'm going to share everything I've learned from my own garden – the mistakes I've made, the specific tactics that work here in the Midlands, and how you can turn those wilting worries into gardening wins.
Why Your Seedlings Are Wilting: Understanding Transplant Shock
So, why does this happen? Why do our seemingly healthy plants suddenly look like they've given up the ghost after a change of scenery? The answer, in short, is stress. Imagine being suddenly uprooted from your cosy, familiar home and plonked into a completely new environment – different temperatures, different light, different everything. That's essentially what your seedlings experience. This phenomenon is known as transplant shock, and it's primarily a physiological response to a sudden disruption of the plant's routines and systems.
The biggest culprit is almost always root disturbance. When you pull a plant out of its pot or seed tray, even if you're super careful, some of those delicate feeder roots are inevitably damaged or severed. These tiny roots are crucial for absorbing water and nutrients from the soil. With fewer working roots, the plant simply can't take up enough moisture to keep its leaves turgid and happy, leading to that tell-tale droop. Last season, I learned this the hard way with a batch of 'Patio Snacker' cucumbers. I was in a rush, a classic Randy mistake, and didn't handle them as gently as I should have. They looked utterly miserable for days, completely limp, because their roots had taken a beating.
Beyond root damage, there are several other factors that contribute to transplant shock, especially considering our British climate:
- Environmental Shift: Moving from a protected indoor environment (or even a small pot) to the outdoors, or a larger space, exposes the plant to different light intensity, wind, and temperature fluctuations. A sudden blast of strong sun after being under milder grow lights, or a chilly gust of wind, can overwhelm the plant's ability to adapt. I've found this particularly challenging with peppers and basil, which are much happier in the consistent warmth of my greenhouse than out in the exposed raised beds early in the season.
- Water Imbalance: Not enough water in the new spot means the roots struggle. Too much water, however, can drown the remaining roots, leading to rot and an inability to absorb moisture. Finding that perfect balance immediately after transplanting is key.
- Nutrient Availability: The soil in the new location might have different nutrient levels or pH compared to the potting mix the seedling was used to. While less immediate, this can add to the overall stress.
- Lack of Hardening Off: This is a big one, and a mistake I still sometimes make if I'm too eager. If you don't gradually introduce your seedlings to outdoor conditions (temperatures, wind, direct sun) over a week or two, they simply aren't ready for the shock of the real world. Think of it as sending a child straight from their cot to a marathon!
Understanding these underlying causes is the first step to preventing transplant shock, but if it's already happened, don't despair. Knowing why it's happening helps us figure out the best way to intervene.
Spotting the Signs: Early vs. Severe Transplant Shock Symptoms
Knowing what to look for, and when, is absolutely crucial for a swift recovery. I've spent countless hours observing my plants in the greenhouse and raised beds, learning to distinguish between a temporary sulk and a genuine cry for help. The earlier you catch the signs of transplant shock, the better your chances of a successful rescue.
Early Transplant Shock Symptoms
These are the subtle cues your plant gives you that it's feeling a bit sorry for itself, but isn't in critical condition yet. You might see these within a few hours to a day after transplanting:
- Slight Drooping or Limpness: The leaves might not be fully collapsed, but they'll lack their usual perky stiffness. They might look a bit 'tired'.
- Dull Leaf Colour: The vibrant green might appear slightly muted or less glossy than before.
- Stunted Growth: You might notice that the plant just isn't putting on any new growth, or existing growth seems to have paused. This is a sign the plant is diverting all its energy to root establishment.
- Slight Yellowing of Lower Leaves: Sometimes, the very lowest, oldest leaves might start to show a hint of yellow as the plant sheds non-essential parts to conserve energy.
Severe Transplant Shock Symptoms
These are the signs that your plant is really struggling and needs immediate attention. If you see these, you need to act quickly, usually within 1-3 days of transplanting:
- Severe Wilting and Collapse: The entire plant, stem and leaves, will be completely limp, almost hugging the ground. This is often accompanied by a significant loss of turgor, making the leaves feel soft and floppy.
- Extensive Yellowing and Browning: Many leaves, not just the lower ones, will turn yellow, brown, or even develop crispy edges. This indicates significant cellular damage and water loss.
- Leaf Drop: The plant might start shedding its leaves, a desperate attempt to reduce water loss through transpiration.
- Stunted or Shrivelled New Growth: Any new growth present might look shrivelled or completely stop developing, indicating the plant is too stressed to produce new tissue.
- Stems Turning Brown or Black: In very severe cases, the stem itself might start to discolour, which is a very worrying sign of advanced decline or even rot.
To make it easier to compare, I've put together a little table based on my observations here in the Midlands. I've found that for hardy plants like broad beans, the signs are often less dramatic, whereas more sensitive varieties like my greenhouse tomatoes or aubergines will put on quite the show of distress.
| Symptom | Early Transplant Shock | Severe Transplant Shock | My Observation (UK Midlands) |
|---|---|---|---|
| Leaf Appearance | Slight droop, duller green, less turgid | Limp, collapsed, extensive yellowing/browning, crispy edges | My 'Sungold' tomatoes often do a slight droop, but my 'Mohawk' aubergines go full-on floppy within hours. |
| Growth | Stunted, paused new growth | No new growth, shrivelled existing growth | Basil and peppers are notorious for just stopping growth for a week if stressed. |
| Overall Plant | Looks 'tired' or 'unhappy', but still somewhat upright | Entire plant appears collapsed, potentially losing leaves | I've seen 'Costoluto Fiorentino' tomatoes completely flatten themselves, especially if it's been a sunny day after transplant. |
| Timeframe (Post-Transplant) | Within a few hours to 1 day | 1-3 days, rapidly worsening | The speed depends heavily on the weather. A warm, sunny day here in the UK can make symptoms appear much faster. |
| Prognosis | Good chance of recovery with prompt action | Recovery possible, but may take longer and require more intervention | Early intervention is key. I've rescued many plants from early shock, but severe cases are a battle. |
Immediate Action Plan: Steps to Revive Stressed Plants
Alright, you've spotted the signs. Don't panic! This is where your quick thinking and a bit of hands-on care can make all the difference. Over the years, I've developed a go-to sequence of actions that has saved countless plants in my UK garden, from precious heirloom tomatoes in the greenhouse to hardy cabbages in the raised beds.
Here's my immediate action plan, tried and tested in various British weather conditions:
Assess Moisture Levels – The Goldilocks Zone:
- Check the Soil: This is always my first step. Gently stick your finger about an inch or two into the soil around the base of the wilting plant. Is it bone dry, or is it soggy?
- If Dry: Give it a thorough, slow watering. Don't just dump water on it; allow it to soak in slowly, ensuring the root ball gets properly moistened. I often use a watering can with a fine rose to avoid displacing the soil or roots. For my tomatoes in the greenhouse, I always make sure the grow bag or pot is thoroughly saturated after planting.
- If Soggy: This is trickier. Overwatering can be just as deadly as underwatering. If the soil is waterlogged, you might need to gently try and improve drainage, or carefully lift the plant and amend the soil around the root zone with some grit if it's really bad. More often, I just hold off on watering and let it dry out a bit.
- Randy's Tip: Here in the Midlands, our unpredictable rain can sometimes make soil too wet. If I've just transplanted and a downpour is forecast, I might even cover very delicate plants with a cloche or fleece for a day or two to prevent waterlogging.
Provide Immediate Shade or Protection:
- Shield from Sun and Wind: A wilting plant is struggling to retain moisture. Strong sunlight and drying winds will only exacerbate this. If your plant is outdoors, create some temporary shade. I've used everything from an upturned terracotta pot, a piece of cardboard stuck in the ground, to a bit of garden fleece draped over some canes. For delicate greenhouse dwellers like my 'Black Beauty' aubergines, I might even hang a shade cloth over that section for a day or two.
- Move if Possible: If the plant is in a pot or small container, and it's not too big, consider moving it to a shadier, more sheltered spot for 24-48 hours. This is particularly effective for herbs like basil or coriander that don't appreciate harsh conditions immediately after transplanting.
Reduce Stressors: Pruning (Carefully!):
- Remove Non-Essential Leaves: This might sound counterintuitive, but if a plant is severely wilting, it might be trying to support too much foliage with a compromised root system. I'll sometimes snip off the lowest couple of leaves, or any yellowing/browning ones. This reduces the surface area for transpiration (water loss) and allows the plant to focus its energy on root recovery. Don't go overboard though – a few leaves, not half the plant! I've done this successfully with peppers and courgettes that were looking particularly grim.
Consider a Gentle Boost (Optional, and with caution):
- Seaweed Extract: I'm a big believer in liquid seaweed extract. It's not a fertiliser; it's more of a tonic, packed with trace elements and hormones that can help stimulate root growth and reduce stress. I'll mix it at half the recommended strength and apply it as a drench around the base of the plant. I've seen fantastic results with this, particularly for my young 'Moneymaker' tomatoes and 'Rouge Vif d'Etampes' pumpkins when they've had a rough start.
- Avoid Strong Fertilisers: Do NOT apply strong chemical fertilisers to a stressed plant. It's like giving a sick person a huge meal they can't digest – it will only add to their stress and can burn delicate roots.
Maintain Vigilance and Patience:
- Regular Checks: Keep an eye on your wilting plants several times a day, especially during warm weather. Adjust watering and shade as needed.
- Patience is a Virtue: Sometimes, it just takes time. A plant might look miserable for 24-48 hours, or even a few days, before it starts to perk up. Don't give up on it too soon! I've had chilli plants that looked dead to the world for three days, only to bounce back stronger than ever.
By following these steps, you're giving your stressed plants the best possible chance to recover and get back on track. It's all about reducing immediate stress and giving those recovering roots a helping hand.
5. Long-Term Care for Recovery: Nurturing Your Plants Back to Health
So, you’ve done the immediate emergency rescue, and your wilting little warriors have perked up a bit. Fantastic! But the journey isn't over. Think of it like a patient discharged from A&E – they still need proper aftercare to make a full recovery. This is where patience, observation, and a gentle hand really pay off in your UK garden. I've learned this over years of nursing everything from 'Costoluto Fiorentino' tomatoes to delicate basil back from the brink, often after some particularly dodgy British weather has had its way.
My focus shifts to consistent, measured care. The plant has been through a traumatic experience, so now it needs stability. This means keeping an eagle eye on moisture levels, especially in my raised beds where things can dry out quickly. I check the soil daily by sticking my finger in about an inch deep. If it feels dry, I water; if it's still damp, I wait. Overwatering at this stage can be just as detrimental as underwatering, as the compromised root system can easily succumb to rot.
Another crucial step is gentle nourishment. Your plants don't need a huge feast right now; their systems are still recovering. I often reach for a very diluted liquid seaweed extract – something like a quarter or half strength. Seaweed is brilliant for stimulating root growth and reducing stress, and I've seen it work wonders on my brassicas and even my more delicate herbs after they’ve had a shock. I usually wait a week or two after the initial wilting has subsided before offering this, ensuring the plant has stabilised somewhat. Remember, the goal isn't rapid growth, but steady, healthy recovery.
And finally, continued protection. Even if the immediate threat (like scorching sun or strong winds) has passed, keep an eye on the forecast. Here in the Midlands, we can get sudden changes. If a cold snap is predicted, I'll cover my recovering plants with fleece, especially my greenhouse tomatoes if they’re still young. If heavy rain is on its way, I might move smaller pots under cover to prevent waterlogging. It’s all about creating the most stable, supportive environment possible for them to regain their strength.
Here's a little table I've put together based on my own trial and error in the UK climate, outlining what to do and what to avoid during this delicate recovery phase:
| Aspect of Care | What Randy Does (Do's) in his UK Garden | What Randy Avoids (Don'ts) |
|---|---|---|
| Watering | Consistent, measured moisture: Check soil daily; water when top inch is dry. Use tepid water. | Overwatering: Never let plants sit in soggy soil. Underwatering: Don't let them dry out completely. |
| Feeding | Diluted nourishment: After 1-2 weeks, use quarter-strength liquid seaweed or compost tea. | Heavy feeding: Avoid strong chemical fertilisers. Immediate feeding: Don't feed right after transplant shock. |
| Sunlight | Filtered sun: Continue to provide dappled shade for a few days if sun is intense. Gradually increase exposure. | Full, intense sun: Don't expose recovering plants to the hottest parts of the day too soon. |
| Protection | Shield from elements: Use fleece for cold snaps, cloches for heavy rain, windbreaks. | Ignoring forecasts: Don't assume the weather will be stable. Leaving exposed: Avoid exposing to harsh wind or cold. |
| Pest/Disease | Daily inspection: Check for any signs of pests or disease, as stressed plants are vulnerable. | Overlook signs: Don't assume wilting is only shock. Inspect closely for other issues. |
| Patience | Observe & wait: Allow plants time to recover. New growth is the best sign. | Expect instant results: Don't get disheartened if recovery is slow. Intervene excessively: Leave them be unless necessary. |
6. Prevention is Key: Avoiding Transplant Shock in Future Plantings
While rescuing wilting plants can feel like a heroic feat, I'd much rather avoid the drama altogether! Over my 5+ years of intensive gardening here in the Midlands, I've learned that prevention truly is the best cure when it comes to transplant shock. It boils down to a few key practices that, once you get them into your routine, make a massive difference to your success rates, especially with our notoriously fickle British weather.
The number one rule in my book, especially for anything leaving my greenhouse or windowsill for the great outdoors, is hardening off. This is non-negotiable. I've made the mistake in my early days of just chucking my beautifully pampered 'Gardener's Delight' seedlings straight into the raised beds, only for them to look utterly miserable within hours. Never again! Hardening off is the process of gradually acclimatising your young plants to outdoor conditions – the wind, the fluctuating temperatures, the direct sunlight, and even the rain.
My hardening off routine typically starts about 7-10 days before I plan to plant out. I'll take my trays of seedlings, be it tomatoes, peppers, or even my hardy kale, and place them outside in a sheltered, shady spot for an hour or two on the first day. Each day, I'll increase their exposure time and gradually move them to brighter, more exposed locations. By the end of the week, they're spending full days and even nights outdoors, as long as frost isn't a threat (which can still happen in late May here in the UK!). This slow introduction builds their resilience and toughens up their cell structure, making them far less likely to collapse when they hit their permanent home.
![IMAGE_PLACEHOLDER_N: hardening off seedlings UK]
Another huge factor is timing. Planting at the right time for our UK climate is crucial. I always wait until the soil has genuinely warmed up and the risk of late frosts has passed. For my heirloom tomatoes in the greenhouse, that's usually late April/early May, but for my outdoor veg like courgettes or French beans, I won't even think about it until late May or early June here in the Midlands. Cold, wet soil is a recipe for disaster for sensitive young roots. I use a soil thermometer to check – I'm looking for at least 10-12°C (50-54°F) for most vegetables.
Beyond that, it's about being gentle and prepared. I always water my seedlings thoroughly a few hours before transplanting. This ensures they're well-hydrated and the root ball holds together better. When planting, I try to disturb the roots as little as possible. If they're root-bound, I might gently tease them apart, but I avoid tearing or ripping. I also make sure the planting hole is well-prepared with some good quality compost, giving them a rich, hospitable start. After planting, a good drink of water helps settle the soil around the roots and eliminates air pockets. These small steps, born from experience (and a few early failures!), make all the difference in achieving strong, happy plants in my 800 sq ft backyard.
7. When to Let Go: Learning from Unsuccessful Rescues and Moving On
Alright, let's be honest. As much as we try, not every rescue mission is a success. Sometimes, despite all your best efforts – the shading, the gentle watering, the encouraging words – a plant just doesn't make it. And that's okay. It’s a tough pill to swallow, especially when you've invested time and hope into those tiny seedlings, but it's an inevitable part of gardening here in the UK, where conditions can be so unpredictable.
I've been there countless times. One year, I had a whole tray of 'Black Krim' heirloom tomato seedlings, my pride and joy, that I'd hardened off beautifully. But a freak hailstorm hit just hours after I'd planted them out in the greenhouse. Despite my immediate care, a few just couldn't recover from the physical damage and the shock. Their stems went limp and stayed that way, eventually turning brown. It was heartbreaking, but I learned a valuable lesson about keeping a closer eye on storm warnings and perhaps delaying planting out those particularly vulnerable varieties until the weather was truly settled.
The key is to recognise when it's time to admit defeat and, crucially, to learn from it. If a plant shows no signs of improvement after several days – no new growth, persistent wilting despite optimal conditions, or if the stem feels soft and mushy at the base – it's likely too far gone. Trying to revive a plant that's truly dead or dying can actually invite pests and diseases into your garden, which is the last thing you want.
When I have to let go, I don't see it as a failure, but as an opportunity. That plant, even in its demise, has taught me something valuable about timing, weather, or perhaps a flaw in my own methods. Into the compost heap it goes, becoming nourishment for future successes. It’s the circle of life in my Midlands garden! Don't dwell on it. Take a moment, reflect on what might have gone wrong, and then move on. There's always another seed to sow, another plant to nurture, and another season of learning ahead. It's all part of the glorious, messy, and utterly rewarding journey of growing.
Conclusion: Embrace the Learning Curve, Embrace the Green!
Well, there you have it, fellow UK gardeners! We've journeyed through the sometimes-stressful world of transplant shock, from understanding why our precious seedlings wilt to the immediate steps we can take to revive them, and then on to nurturing them back to full health. We've also delved into the crucial preventative measures that can save us a lot of heartache, and even discussed the tough but necessary act of letting go when a plant truly can't be saved.
My biggest takeaway from five years of intensive gardening in my 800 sq ft Midlands backyard is this: gardening is a continuous learning process. Every wilting leaf, every unexpected cold snap, every pest invasion is an opportunity to learn, adapt, and grow as a gardener. Don't be disheartened by a few sad-looking plants. Instead, arm yourself with the knowledge we've covered today, observe your plants closely, and trust your instincts.
Remember, the goal isn't perfection; it's progress. It's about providing the best possible environment for your plants to thrive, understanding our unique British climate, and responding with care and knowledge. Whether you're growing your first 'Sungold' tomatoes or experimenting with unusual heirloom varieties like I do, you're building a connection with nature that's incredibly rewarding.
So, the next time you see a sad, droopy plant, don't panic. Take a deep breath, grab your watering can, and remember the steps we've talked about. You've got this! And if you've got your own stories of transplant shock triumphs or even the ones that got away, I'd absolutely love to hear them in the comments below. We're all in this glorious, green adventure together! Happy gardening, everyone!
