
Growing glorious tomatoes here in the UK can feel like a bit of a national sport, can't it? Every summer, I see gardeners across the Midlands and beyond pouring their hearts into getting those sweet, sun-ripened beauties. When I first started out five years ago, fresh from the IT world and full of gardening dreams, I just let my tomato plants do their own thing. I thought more leaves meant more fruit, especially with our often-damp British summers. Boy, was I wrong! My first few seasons were a mixed bag – some decent harvests, but often battling blight in my raised beds and getting a lot of small, late-ripening fruit.
Over the years, experimenting in my 800 sq ft backyard packed with raised beds and a greenhouse, I've learned that one of the most impactful, yet often misunderstood, techniques for determinate tomatoes is strategic pruning. It's not about hacking away indiscriminately; it’s about understanding what your plant needs to thrive in our specific UK climate. For container-grown determinates or those nestled in small beds, good pruning is the secret sauce to maximising fruit quality, getting an earlier, more concentrated harvest, and crucially, improving airflow to keep those pesky fungal diseases like blight at bay. This isn't just theory for me; it's what I've tried, tested, and seen work wonders in my own UK garden, turning those mediocre harvests into truly abundant ones.
Unlock Better Harvests: Why Strategic Pruning Matters for Determinate Tomatoes
Let's be honest, growing tomatoes in the unpredictable British climate isn't always straightforward. We often battle cooler springs, humid summers, and the ever-present threat of blight. This is precisely why strategic pruning for determinate tomatoes isn't just a suggestion; it's a game-changer. When I first started out, I treated all my tomatoes the same, and my determinate 'Red Alert' plants in pots would become dense, leafy jungles. I ended up with lots of small fruit hidden deep within the foliage, ripening slowly, and often succumbing to botrytis because air couldn't circulate properly.
What I've learned through years of trial and error in my Midlands garden is that pruning determinates is about directing the plant's energy. Unlike their vining cousins, determinate varieties put all their effort into a concentrated burst of fruit production. By strategically removing certain parts of the plant, we're essentially telling it, "Focus your energy here, on these fruits, and let's make sure they get plenty of sun and air!" This not only leads to larger, better-quality tomatoes, but also encourages earlier ripening – a huge bonus in our often-short UK growing season. Plus, and this is a big one for us here in Britain, improved airflow drastically reduces the risk of fungal diseases. A dense, humid canopy is an open invitation for blight, but a well-pruned plant can often better resist it, even during a damp July. It’s about working with our climate, not against it.
Determinate vs. Indeterminate: Tailoring Your Pruning Strategy for UK Climates
One of the biggest 'aha!' moments I had in my early gardening days was truly grasping the difference between determinate and indeterminate tomatoes. Initially, I treated them all the same, and my determinate 'Roma' plants, crammed into pots, suffered from a lack of air circulation, especially during a particularly humid July here in the Midlands. Understanding this distinction is absolutely fundamental to successful pruning, especially when you're trying to maximise your harvest in our unique UK conditions.
Determinate tomatoes, often called "bush" varieties, are fantastic for the UK home gardener, particularly if you're working with containers, grow bags, or smaller raised beds like mine. They grow to a predetermined size, set their fruit all at once over a shorter period, and then gracefully finish their production. This makes them ideal for getting a good, concentrated crop before our autumn chill sets in. Indeterminate varieties, on the other hand, are the "vining" types that just keep growing and producing fruit until frost finally knocks them back. While I love growing heirlooms like 'Cherokee Purple' in my greenhouse, for outdoor growing here in the UK, determinates often offer a more reliable and manageable harvest.
Here's a quick rundown of the key differences and how they influence our pruning approach in the UK:
| Feature | Determinate Tomatoes (Bush) | Indeterminate Tomatoes (Vining) |
|---|---|---|
| Growth Habit | Bushy, compact, stops growing at a certain height. | Continuous, vining, grows indefinitely until frost. |
| Fruiting Pattern | Sets fruit all at once, in a concentrated burst (e.g., 2-4 weeks). | Produces fruit continuously over a long season. |
| Pruning Goal (UK) | Direct energy to primary fruit set, improve airflow, earlier concentrated harvest. | Manage growth, promote continuous fruiting, prevent overcrowding. |
| Support Needs | Often needs some staking or caging to support fruit weight, but less intensive. | Requires strong, continuous support (stakes, trellises, strings) for the entire season. |
| Ideal UK Location | Excellent for outdoor containers, raised beds, small plots; earlier harvest. | Best in greenhouses, very sheltered sunny spots; longer season, higher overall yield (given time). |
| Example UK Varieties | 'Red Alert', 'Roma VF', 'Moneymaker' (sometimes semi-determinate), 'Sub Arctic Plenty'. | 'Gardener's Delight', 'Sungold', 'Shirley', 'Ailsa Craig', most heirlooms like 'Brandywine'. |
For determinate varieties in my UK garden, especially those in my raised beds or pots, the pruning strategy is all about encouraging that initial flush of fruit and ensuring those fruits ripen well before the cold damp of late autumn. We're aiming for a strong, healthy bush with excellent air circulation, not an endless vine.
Essential Tools & Timing: When to Grab Your Snips for Determinate Varieties
Alright, let's talk practicalities. Before you even think about snipping away at your precious tomato plants, you need the right tools, and more importantly, you need to know when to use them. I learned the hard way that using grubby old secateurs is an open invitation for disease, especially with our damp UK conditions that are just begging for fungal issues.
First up, your tools:
- Sharp, Clean Pruning Shears or Snips: This is non-negotiable. A clean cut heals faster and reduces the risk of disease. I always give mine a quick wipe with rubbing alcohol or a disinfectant spray before and after each pruning session. Trust me, it’s worth the extra 30 seconds.
- Gloves (Optional, but Recommended): Tomato plants can be a bit sticky, and some people get a mild skin irritation. I usually wear a light pair to keep my hands clean and protected.

Now, for the when – and this is where UK-specific timing comes in.
- Start Early, but Not Too Early: Begin pruning once your determinate plants are well-established, typically around 12-18 inches tall and have started to put out their first flowers. For me here in the Midlands, this usually means late May or early June, depending on how kind the spring weather has been.
- Little and Often is Key: Don't wait for your plant to become an unruly monster. Regular, light pruning every week or two is far better than a drastic overhaul. This minimises stress on the plant and keeps diseases from getting a foothold.
- Choose a Dry Day: This is absolutely critical in our British climate. Pruning creates open wounds on the plant, which are vulnerable to disease spores if it's wet. Always prune on a dry, preferably sunny, day when the forecast is clear for at least 24 hours. Here in the Midlands, that can be a challenge, so I really keep an eye on the forecast!
- When to Stop: For determinate varieties, you'll want to ease off pruning once the main flush of fruit has set and started to swell, or when the first fruits begin to show colour (usually mid-July to early August for me). At this point, the plant's energy should be fully directed to ripening those fruits, and further pruning can actually stress it out or remove valuable foliage that's still photosynthesising. I remember one season, I got a bit overzealous with my pruning in late August, trying to squeeze out a few more green tomatoes. All I did was stress the plant and delay ripening on the already formed fruit. Live and learn, eh?
Core Pruning Techniques: Removing Suckers and Lower Leaves for Optimal Fruit
Right, let's get our hands (gloved, hopefully!) dirty with the actual pruning techniques for our determinate tomatoes. Remember, the goal here is to get high-quality, early fruit and to keep our plants healthy amidst the challenges of the UK growing season. There are two primary techniques I focus on for my determinate varieties: sucker removal and lower leaf removal.
Removing Suckers: Focusing Energy for Better Fruit
Suckers are those little shoots that emerge in the "V" where a leaf stem meets the main stem. On indeterminate tomatoes, you'd typically remove almost all of these to encourage a single, strong cordon. However, with determinates, it's a bit different. Determinate tomatoes are bred to be bushier, and some of these suckers will actually develop flowers and fruit!
- What to Remove (and What to Keep): My rule of thumb for determinates is to remove any suckers that appear below the first flower cluster. These lower suckers often don't have enough time or energy to produce fruit that will ripen in our UK climate and just steal energy from the main crop. I also remove any suckers that are growing inwards, creating a dense, airless centre to the plant – this is crucial for preventing disease here in the UK.
- How to Remove: When suckers are small (under 4 inches), you can simply pinch them out with your fingers. If they've grown larger, use your clean snips to make a clean cut as close to the main stem as possible without damaging it.
- Randy's Mistake & Lesson: When I first started, I treated all my tomatoes like cordon varieties, pinching out almost every sucker on my determinate 'Tumbling Tom' plants. I ended up with very sparse plants and a much smaller harvest than I should have had. I learned that determinates need a bit more foliage to support their concentrated fruit set, so don't be afraid to let a few upper suckers develop into fruiting stems, especially if they are growing outwards and contributing to a healthy, open bush shape.
Removing Lower Leaves: Boosting Airflow and Preventing Disease
This technique is absolutely vital for UK gardeners, especially if you're battling humidity and the dreaded blight. Lower leaves are often the first to get splashed with soil, which can carry disease spores, and they contribute to a dense, humid canopy right at ground level.
- Why Remove Them:
- Disease Prevention: As mentioned, soil splash is a prime vector for blight and other fungal diseases. Removing the lower leaves creates a "sterile zone" between the soil and the plant, significantly reducing the risk. This has been a game-changer in my damp Midlands garden.
- Improved Airflow: A clear base allows air to circulate freely around the plant, drying out foliage and reducing the humid conditions that fungi love.
- Energy Diversion: These older, lower leaves are often less efficient at photosynthesis and can become yellow or senescent. Removing them allows the plant to focus its energy on new growth and developing fruit.
- How to Remove: Once the plant has set its first cluster of fruit and is growing well, I start removing the bottom 6-12 inches of leaves. Use your clean snips to make a clean cut close to the main stem. I continue to remove any leaves that are yellowing, touching the soil, or showing signs of disease throughout the season.
- Timing: Start this process once the plant is established and has fruit developing. Continue weekly as the plant grows, ensuring there's always a good gap between the soil and the lowest leaves.
Through years of battling blight in my greenhouse and raised beds, I've seen firsthand the difference good airflow makes. Removing those lower leaves, especially on determinate varieties in pots, has been a game-changer for disease prevention and getting a healthier, more productive plant in our often-challenging British weather.

Maximising Airflow & Disease Resistance: A Pruning Checklist for Containers & Beds
So, we've talked about getting those pesky suckers and lower leaves off, which is brilliant for focusing the plant's energy. But there’s another huge win from strategic pruning, especially here in the often-damp UK climate: airflow and disease resistance. Trust me, I've battled my share of blight and fungal issues in my Midlands garden, and good air circulation is your best defence.
Determinate tomatoes, while bushier, can still become dense jungles if left unchecked. This is particularly true for those of us growing in containers or small raised beds, where space is at a premium and humidity can build up quickly. I've found that giving my plants a good 'haircut' not only helps the fruit ripen but also dramatically reduces the risk of disease by letting air move freely through the foliage. Less stagnant air means less opportunity for fungal spores to settle and thrive.
When I’m out in my 800 sq ft backyard, whether I’m checking on my 'Moneymaker' in a big pot or my 'Roma' plants in a raised bed, my pruning approach has a slightly different focus for each. Here's how I think about it:
| Feature/Goal | Container-Grown Determinate Tomatoes (e.g., 'Tiny Tim', 'Shirley') | Raised Bed Determinate Tomatoes (e.g., 'Roma', 'Celebrity') |
|---|---|---|
| Space | Very restricted; need to keep plant compact and upright. | More lateral growth possible, but still manage spread. |
| Primary Pruning Focus | Maintain a single strong stem (or 2-3 at most) to save space; aggressive lower leaf removal. | Clear lower leaves for soil splash; manage bushiness to prevent tangling with neighbours. |
| Airflow Strategy | Ensure air can circulate around the pot and through the plant. Remove any leaves touching the pot rim or ground. | Focus on internal plant airflow and preventing leaves from touching soil or adjacent plants. |
| Disease Prevention | Crucial for avoiding dampness around the base and root zone. Prioritise swift drying after UK rain. | Prevents soil-borne diseases splashing up onto leaves; reduces humidity within the plant canopy. |
| Support | Essential for stability in pots; often a single sturdy stake or small cage. | Stronger cages or stakes to support heavier fruit load and wider spread. |
| Watering Impact | Pruning reduces leaf area, potentially decreasing water demand slightly, but containers dry faster. | Better airflow means less chance of humidity-related issues from overhead watering (which I try to avoid anyway!). |
For my container tomatoes, like the 'Shirley' varieties I sometimes grow on my patio, I'm quite vigilant. I ensure no leaves are touching the soil in the pot, and I'll even remove some of the inner leaves if they're creating a dense cluster that looks like it's trapping moisture. In my raised beds, where I might have three or four determinate plants like 'Roma' or 'Legend' in a row, I'm constantly checking that they're not growing into each other, creating a shared, humid microclimate. That's a recipe for disaster in a British summer, believe me!
Common Pruning Mistakes: What to Avoid for a Bumper Determinate Tomato Crop
We all make mistakes, especially when we're learning something new! When I first started gardening five years ago here in the UK, I made almost every tomato pruning mistake in the book. It’s all part of the journey, but hopefully, my blunders can help you avoid some common pitfalls and secure a much better harvest.
Here are some of the missteps I’ve learned from, often the hard way, in my own UK garden:
Over-Pruning (The 'Less is More' Fallacy)
This was my biggest mistake when I started. I heard "prune for bigger fruit" and thought, "great, I'll take everything off!" For indeterminate tomatoes, a more aggressive approach can work, but for determinates, it's a huge no-no. Remember, determinate tomatoes set their fruit all at once, and they need that foliage to photosyntynthesize and protect the developing fruit from sun scald.
I once got a bit carried away with my 'Roma' plants, thinking I was doing them a favour by stripping off too many leaves. What happened? The fruit that did set was smaller, and the plants struggled to produce enough energy. Worse, during a particularly sunny week here in the Midlands, some of the exposed fruit got scorched. It was a proper wake-up call that determinate plants need a good balance of leaves.
Pruning When Wet (Inviting Disease)
Our British weather, bless its heart, can be a bit… damp. It's tempting to get out there with your snips whenever you have a moment, but never prune your tomatoes when their leaves are wet. This is incredibly important for disease prevention.
When you make a cut on a wet plant, you're essentially creating an open wound and giving any water-borne fungal or bacterial spores a direct entry point into the plant. I learned this when I ended up with a nasty blight outbreak after a morning prune following a heavy dew. Now, I always wait until the afternoon when the plants are completely dry, especially after a typical UK summer shower.
Using Dirty or Dull Tools (The Silent Killer)
This might seem obvious, but it's easy to forget in the heat of the moment. Using dirty tools can spread diseases from one plant to another, or even from one part of the plant to another. Similarly, dull snips can tear and damage the stems, creating larger, slower-healing wounds.
I’ve been guilty of just grabbing my secateurs and going at it. Now, I always give them a quick wipe with rubbing alcohol or a weak bleach solution between plants, especially if I’m moving between different varieties or if a plant looks a bit sickly. A sharp, clean cut heals much faster, reducing the risk of infection.
Not Understanding Determinate Growth (Treating Them Like Indeterminates)
This loops back to the fundamental difference between determinate and indeterminate varieties. If you prune your determinate tomatoes as aggressively as you would an indeterminate, constantly removing every sucker, you'll severely limit your harvest. Determinate plants produce fruit on the ends of their stems and branches, so indiscriminately removing suckers that might be developing into fruit-bearing stems is counterproductive.
It's about balance. I focus on the lower suckers and those that are clearly going to crowd the plant, rather than chasing every single one like I would with my greenhouse indeterminates.
Post-Pruning Care & Support: Nurturing Your Plants for a Rich Harvest
Pruning isn't just a one-off event; it's part of an ongoing relationship with your plants. Once you've made those strategic cuts, a bit of thoughtful aftercare will help your determinate tomatoes bounce back stronger and funnel all that energy into producing a fantastic crop.
Hydration and Nutrition Boost
After a pruning session, especially if you've removed a fair bit of foliage, your plants might appreciate a good drink. The slight stress from pruning, combined with a sudden shift in energy allocation, means they'll benefit from consistent moisture. I always give my plants a thorough watering at the base after I’ve finished pruning.
It’s also a great time to consider a gentle feed. Here in the Midlands, once my determinate tomatoes start setting fruit, I switch to a tomato-specific feed high in potassium (K) to encourage fruit development. After pruning, a slightly diluted dose can help them recover and push nutrients towards the developing fruits. I've found a good organic liquid feed, like comfrey tea or a specific tomato feed, works wonders.
Ongoing Support and Monitoring
Even though determinate tomatoes are often called "bush" varieties, most will still benefit from some form of support, especially once they start getting laden with fruit. Those 'Roma' plants in my raised beds, for instance, can get pretty heavy.
I typically use sturdy stakes or small tomato cages. After pruning, it’s a good idea to check that your supports are still secure and tie in any new growth that needs directing. This ensures the plant remains upright, keeping fruit off the soil (again, crucial for disease prevention in our UK climate!) and maintaining that all-important airflow.
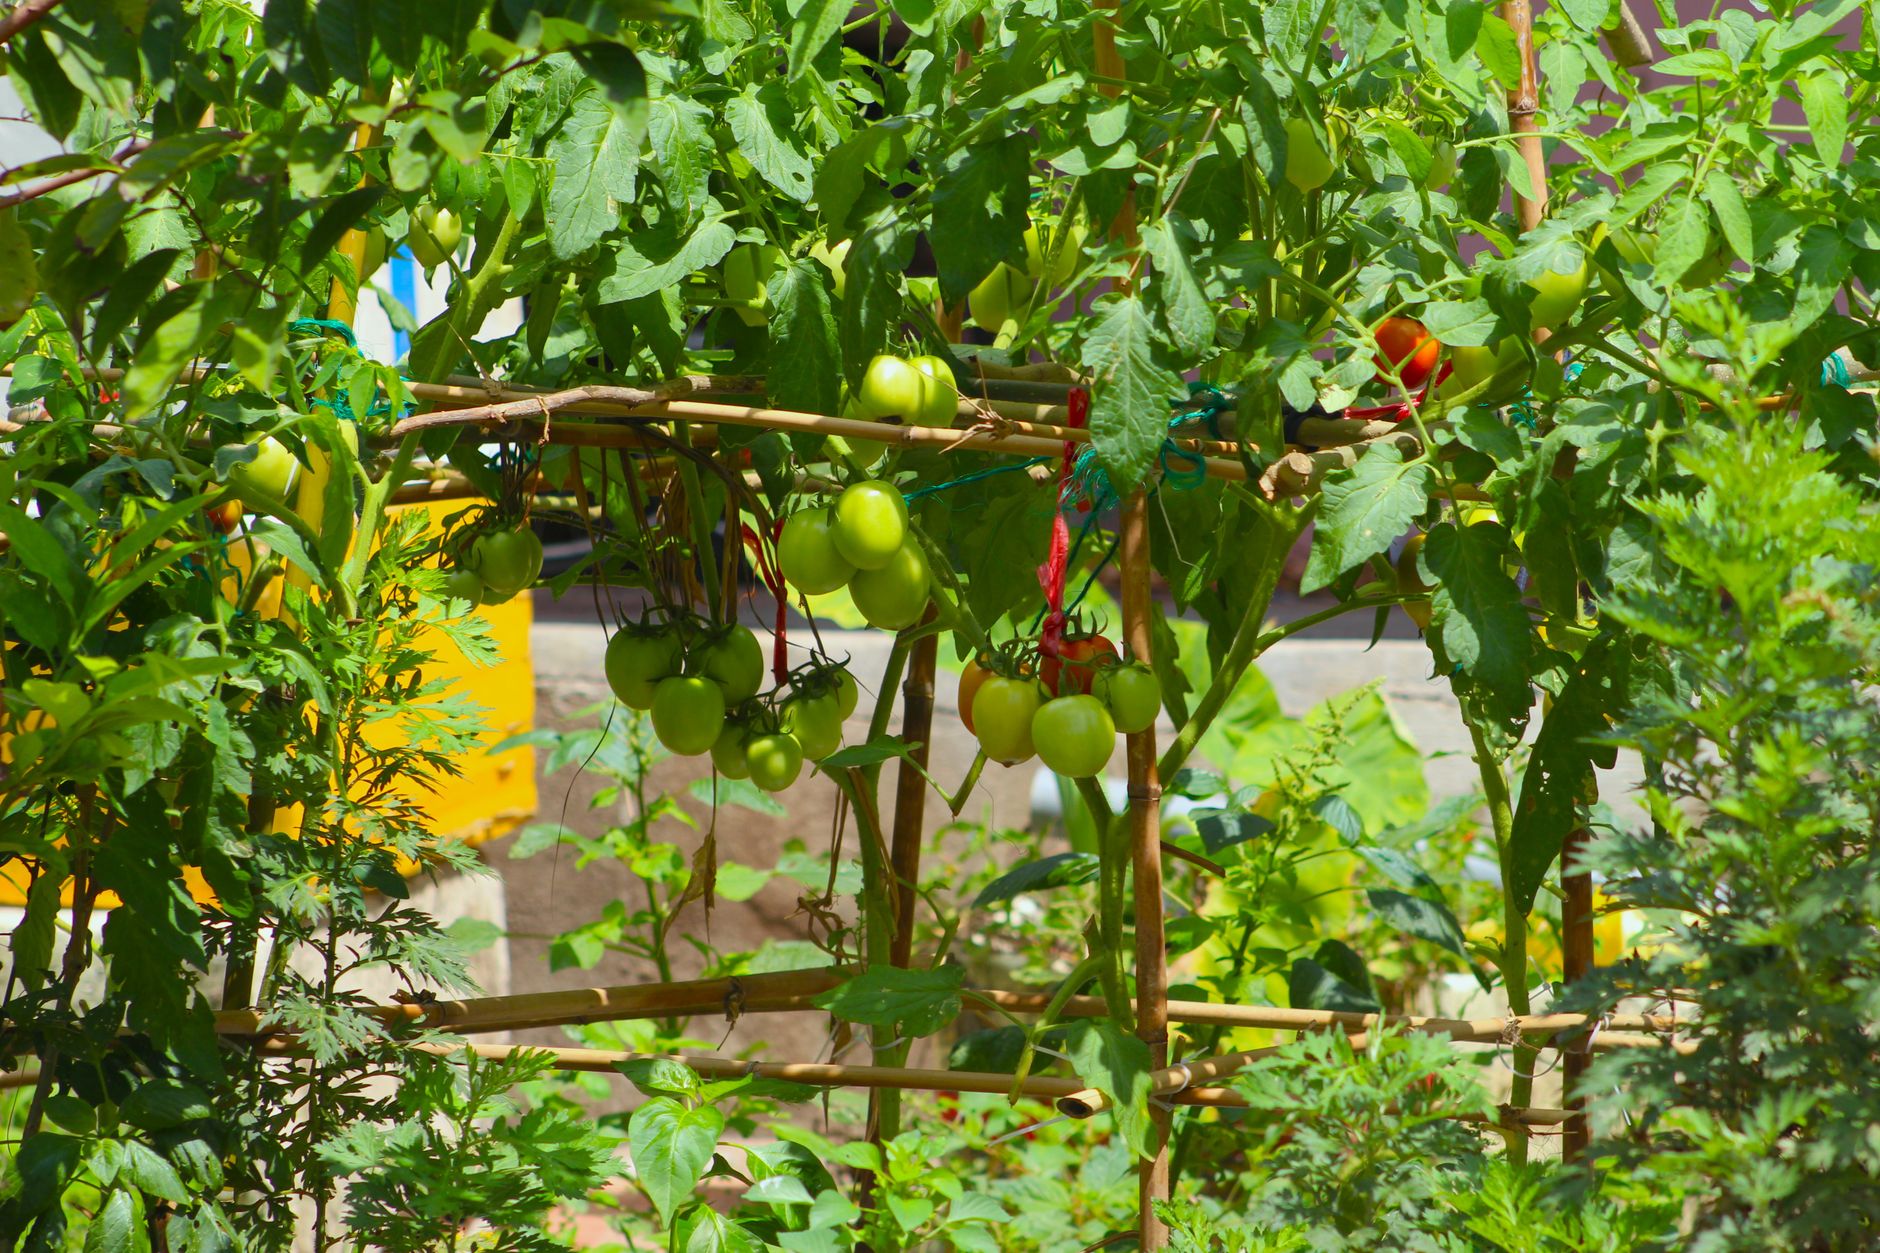
Keep a close eye on your plants in the days and weeks following pruning. Look for any signs of stress, such as wilting or discolouration. Also, inspect the pruned areas for any signs of disease. If you see anything suspicious, address it immediately. This vigilance is key, especially if our British weather turns unexpectedly wet or humid.
Conclusion: Your Path to Determinate Tomato Success in the UK!
Well, there we have it – a deep dive into the art and science of strategic pruning for determinate tomatoes! As a passionate home gardener here in the UK, I can honestly say that mastering these techniques has been one of the biggest game-changers in my own backyard. From my greenhouse heirloom tomatoes to the bush varieties thriving in my raised beds, understanding how to work with their growth habit, rather than against it, has led to significantly better harvests.
We've explored why pruning is so vital for deteriminate varieties, helping them channel their energy into fruit production rather than excessive foliage, and how it dramatically improves airflow to ward off those dreaded UK diseases. We've talked tools, timing, and specific techniques like sucker removal and clearing lower leaves. And crucially, we've covered the subtle differences in approach for container-grown plants versus those in beds, and highlighted those common mistakes I've made (so you don't have to!).
Ultimately, strategic pruning for determinate tomatoes isn't about being perfect; it's about being observant, understanding your plant, and adapting to our wonderfully unpredictable British climate. It’s about giving your plants the best possible chance to produce that delicious, sun-ripened fruit we all crave.
So, grab your clean, sharp snips, head out into your garden, and get pruning! Don't be afraid to experiment a little and see what works best for your specific varieties and microclimate. I promise you, the reward of a bumper crop of homegrown determinate tomatoes, bursting with flavour, is absolutely worth the effort. Happy gardening, fellow UK tomato enthusiasts!
