From Sieve to Sponge: Unlocking Your Sandy Soil's Potential for a Thriving UK Garden
Alright, fellow UK gardeners, let's talk soil! Specifically, that frustratingly fast-draining, nutrient-hungry stuff many of us in Britain, myself included here in the Midlands, have to contend with: sandy soil. When I first started digging into my 800 sq ft backyard plot five years ago, fresh out of an IT job and utterly green, I quickly learned that my dream of lush vegetable beds was going to need a bit more than just good intentions. My soil felt like a giant sieve, letting water vanish faster than a cuppa on a cold day, and my plants, bless their struggling hearts, often looked more parched than productive.
I'll admit, those early days were a steep learning curve. My first attempts at growing a decent crop of potatoes or even just some hardy kale were met with yellowing leaves and stunted growth, despite what I thought was diligent watering. It was disheartening, but for an ex-IT worker who loves a good problem to solve, it became an obsession. I wasn't just going to accept "bad soil." I was going to transform it. And that's exactly what I've been doing in my raised beds and greenhouse ever since, growing everything from vibrant heirloom tomatoes like 'Cherokee Purple' to robust brassicas and a whole host of herbs.
If you're looking at your garden and wondering why your plants are always thirsty, or why those expensive nutrients seem to disappear into thin air, you're in the right place. Through years of experimenting, some glorious successes, and a fair few British weather-induced failures, I've learned the practical, real-world ways to turn sandy soil from a thirsty, challenging adversary into a rich, moisture-retaining haven. It's not magic, it's just good, honest gardening, and I'm going to share everything I've learned from my own UK garden with you.
Diagnosing Your Garden's Thirst: How to Identify Sandy Soil in Your Plot
Before we get stuck into the solutions, let's make sure we're actually dealing with sandy soil. It's surprisingly common across the UK, especially in areas with certain geological histories. The easiest way to tell? Get your hands dirty!
The Simple Soil Texture Test (My Go-To Method)
This is the first thing I did when I started, and it's something I still recommend to anyone new to their plot.
- Grab a handful: After a good rain, or after you've watered a section of your garden, dig down about 4-6 inches and grab a small handful of soil.
- Feel it: Rub it between your fingers. Does it feel gritty, almost like sugar or fine sand? Can you see individual particles? If it feels like it's trying to escape your grasp, that's a strong indicator.
- Try to form a ball: Now, try to squeeze it into a ball in your palm.
- If it crumbles apart immediately or won't form a ball at all: You've almost certainly got sandy soil. It simply lacks the clay or silt particles to bind together.
- If it forms a weak ball that easily falls apart when you poke it, you're still leaning towards sandy loam.
In my own garden here in the Midlands, that initial test was a dead giveaway. My soil just refused to hold any shape; it felt like I was trying to mould beach sand.

Other Clues from Your UK Garden
Beyond the feel, there are other tell-tale signs I've observed over the years that point to sandy soil:
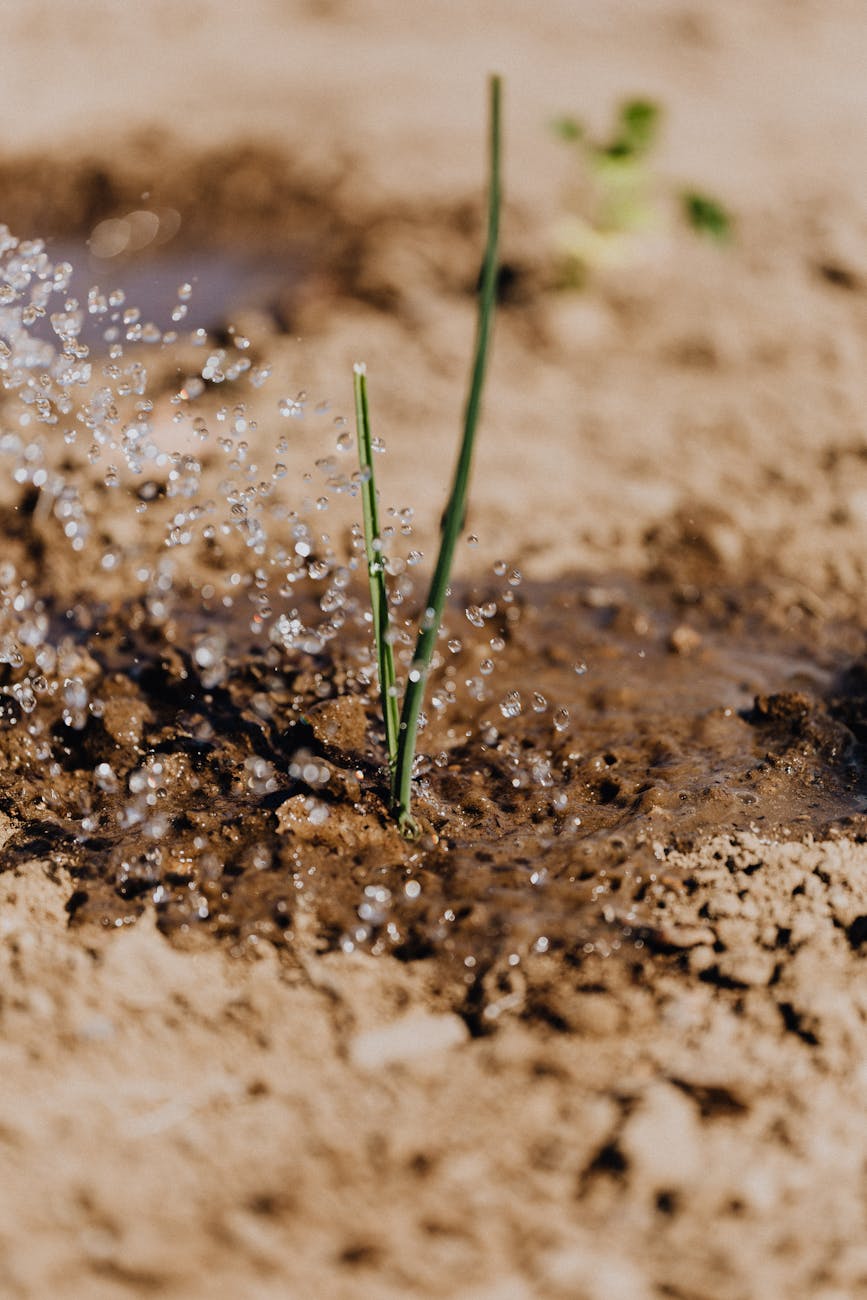
- Rapid Drainage: You water your plants, or we get a typical British downpour, and within hours, sometimes minutes, the surface looks dry again. Water doesn't puddle; it just disappears. I used to watch my newly planted lettuces wilt barely a day after a good soak, and it drove me mad!
- Quick Warming: Sandy soil tends to warm up faster in spring, which can be a blessing for early crops, but it also means it dries out faster.
- Pale or Leached Plants: Are your plants looking a bit anaemic, with yellowing leaves even when watered? This can be a sign of nutrient deficiency because the good stuff is washing away too quickly. I saw this a lot with my early attempts at growing 'Cobra' French beans – they were just never as vigorous as I expected.
- Crusty Surface (sometimes): While less common than with clay, if your sandy soil has a low organic matter content, it can sometimes form a slight crust on top after drying out, especially if it's been compacted.
If these descriptions sound familiar, welcome to the club! But don't despair; we can absolutely turn this around.
The Challenges of Sandy Soil: Why Your Plants Struggle with Water and Nutrients
So, you've diagnosed your sandy soil. Now, let's get into why it's such a challenge for our plants, particularly here in our often-unpredictable British climate. It's not just "bad luck"; there's some solid science behind it, and understanding it helps us tackle the problem effectively.
Think of sandy soil like a colander or, as I often call it, a giant sieve. The individual particles of sand are relatively large and irregular in shape. This means that when they pack together, there are big gaps, or "pore spaces," between them.
The Water Retention Headache
This is the most immediate and obvious problem. When you water your garden, or when one of our classic UK rain showers rolls through, the water simply rushes through those large pore spaces. There's very little for the water to cling to, unlike the microscopic spaces in a clay or silty soil.
- Poor Capillary Action: In finer soils, water can move upwards and sideways through tiny channels, making it available to roots over a longer period. Sandy soil lacks this; water just goes straight down, taking valuable moisture away from the root zone. I've learned this the hard way trying to grow thirsty crops like courgettes in my sandy beds – they'd wilt by midday on a sunny June day, even after a morning watering.
- Rapid Evaporation: Because the surface dries out so quickly, especially in a sunny spell we might get here in the UK, even more moisture is lost to evaporation from the top layer, leaving the shallow roots high and dry.
The Nutrient Leaching Nightmare
This is the silent killer for plants in sandy soil. Nutrients, especially important ones like nitrogen, potassium, and magnesium, are often dissolved in water. As water drains rapidly through sandy soil, it literally washes these essential nutrients away before plant roots have a chance to absorb them.
- Low Cation Exchange Capacity (CEC): This is a fancy term for a soil's ability to hold onto positively charged nutrient ions. Sandy soils have a very low CEC because sand particles themselves don't have many sites to bind these nutrients. It's like trying to stick magnets to plastic – they just don't hold.
- Constant Replenishment Needed: Because nutrients don't "stick" around, plants in sandy soil are perpetually hungry. You can add fertilisers, but unless you're adding them constantly and in small doses, a significant amount will be lost. This was a big lesson for me when I was trying to grow my 'San Marzano' tomatoes in the greenhouse; they were showing signs of nutrient deficiency despite regular feeding, simply because the sandy soil couldn't hold onto the goodness.
Essentially, sandy soil offers little in the way of a stable home for water and nutrients, which are both absolutely vital for plant growth. It makes our plants work harder, stress more, and ultimately produce less. But, and this is the exciting part, we can radically change this by introducing organic matter, turning that sieve into a sponge!
Organic Powerhouses: Boosting Water & Nutrients with Compost, Manure & Leaf Mould
This is where the magic happens, folks! My gardening journey truly took off when I grasped the fundamental principle of improving sandy soil: pile on the organic matter. It’s the single most effective way to address both water retention and nutrient levels. Organic matter acts like a super-absorbent sponge, filling those large sandy pores, holding onto moisture, and providing a slow-release larder of nutrients for our plants. It also feeds the crucial microbial life in the soil, which is essential for a healthy ecosystem.
I've experimented extensively with all sorts of organic amendments in my 800 sq ft Midlands garden, and these three are my absolute champions.
1. Home-Made or Shop-Bought Compost: The Black Gold Standard
Compost is quite simply the backbone of my garden's health. It's decomposed organic material, rich in humus, and absolutely brilliant for sandy soil.
- What it does: It improves soil structure, significantly boosts water-holding capacity, and slowly releases a broad spectrum of nutrients. It also introduces beneficial microbes that help plants access existing nutrients.
- My experience: I make as much compost as I possibly can from my kitchen scraps, garden waste, and shredded cardboard. I have three large compost bins (dalek-style ones work a treat for smaller UK gardens!) constantly on the go. Every autumn and spring, I generously fork a good 2-3 inches of well-rotted compost into all my raised beds and around the base of perennial plants. My greenhouse beds, where I grow my prized heirloom tomatoes like 'Marmande' and 'Costoluto Fiorentino', get an extra thick layer because they're so hungry. The difference in water retention and the sheer vigour of my plants after a few seasons of adding compost is astounding. My 'Red Russian' kale, which used to bolt quickly, now thrives, holding moisture much better.
2. Well-Rotted Manure: The Nutrient-Rich Workhorse
Manure, particularly from horses or cows, is another fantastic amendment, bringing a potent punch of nutrients and organic matter.
- What it does: It's particularly high in nitrogen, phosphorus, and potassium (NPK), essential for strong plant growth. Like compost, it adds organic matter to improve soil structure and water retention. It also stimulates microbial activity.
- My experience: Sourcing good quality, well-rotted manure is key. Fresh manure can burn plants due to high nitrogen and ammonia, so it needs to be aged for at least 6-12 months. I'm lucky enough to have a local stables nearby in the Midlands where I can get trailer-loads of well-rotted horse manure. I generally apply it in autumn, digging a generous 3-4 inches into my vegetable beds, especially those planned for heavy feeders like my brassicas (cabbage 'Copenhagen Market', broccoli 'Calabrese') and hungry squashes. This gives it plenty of time to fully integrate over winter. I also use it as a top dressing around my fruit bushes, like my blackcurrants, which appreciate the nutrient boost.
3. Leaf Mould: The Moisture Retention Specialist
Often overlooked, leaf mould is simply decomposed leaves, and it's an absolute gem for sandy soils, particularly for its incredible water-holding abilities.
- What it does: While lower in nutrients than compost or manure, leaf mould is a phenomenal soil conditioner. It dramatically improves soil structure, creates a vast network of tiny pores for water retention, and encourages a healthy fungal network in the soil.
- My experience: This one takes a bit of patience, but it's worth every second. Every autumn, I collect as many fallen leaves as I can from my garden and neighbourhood trees (oak and beech are particularly good). I stuff them into black bin bags, poke a few holes for aeration, and leave them in a quiet corner for 1-2 years. When it's ready, it looks like dark, crumbly, earthy material. I use leaf mould primarily as a top dressing or mixed into the top 2-3 inches of my seed-sowing beds. It's brilliant for mulching around my herb garden (thyme, rosemary, chives) to keep moisture in, and I mix it into my potting mixes for container-grown plants like my patio tomatoes and chillies, giving them that extra moisture buffer during our often-dry summers.
Comparison Table: Organic Powerhouses for Sandy Soil
| Amendment | Key Benefits for Sandy Soil | Nutrient Level (Relative) | Water Retention (Relative) | Best Use & Randy's Tip for UK Gardeners |
|---|---|---|---|---|
| Compost | All-rounder: improves structure, adds broad nutrients, boosts microbes | Medium-High | High | Dig 2-3 inches into beds annually (autumn/spring). Essential for all crops. "Make your own – it's free, sustainable, and powerful!" |
| Well-Rotted Manure | High in NPK, rapid nutrient boost, adds organic matter | High | Medium-High | Dig 3-4 inches into hungry crop beds (brassicas, squashes) in autumn. "Always ensure it's well-rotted; fresh can burn!" |
| Leaf Mould | Exceptional water retention, improves soil structure, fungal activity | Low | Very High | Top-dress around plants, mix into seed-starting mixes. "Takes time (1-2 years), but invaluable for moisture-loving plants like lettuce." |
By consistently incorporating these organic powerhouses into your sandy soil, you'll start to see a remarkable transformation. Your plants will be happier, healthier, and far more resilient, even when the British weather throws its usual curveballs. It's a long-term investment, but one that pays dividends in spades, turning that frustrating sieve into a thriving, productive sponge!
5. Beyond Organics: Enhancing Sandy Soil with Clay, Biochar & Green Manures
While compost, well-rotted manure, and leaf mould are the absolute bedrock of sandy soil improvement, sometimes you need to call in a few extra specialists to really get things humming. I've certainly found that in my 800 sq ft Midlands garden, pushing the boundaries with a few other amendments has given me even better results, especially in those really thirsty spots.
Clay: The Missing Link for Soil Structure
Think about it: sandy soil is all large particles. Clay, on the other hand, is made of incredibly fine particles that bind together, holding onto water and nutrients like nobody's business. Adding a bit of clay to sandy soil is like adding glue to a pile of pebbles – it helps them stick together, improving the soil's structure and its ability to retain moisture and nutrients.
I first experimented with bentonite clay a couple of years ago in a particularly challenging raised bed where my 'Charlotte' potatoes always seemed to struggle with dryness. I mixed about a bag (25kg) into roughly 1.5 cubic metres of soil, along with my usual compost. It felt like a bit of a gamble, but the difference was noticeable by mid-summer. The soil felt richer, and the potatoes certainly looked happier and less stressed during dry spells. You can often find bentonite clay from agricultural suppliers or some larger garden centres here in the UK. Just be sure to mix it in thoroughly – it’s not something you just sprinkle on top!
Biochar: The Long-Term Soil Booster
Biochar is a bit of a wonder product that I've been increasingly impressed with, especially for my greenhouse tomatoes like 'Sungold' and 'Black Krim'. It's essentially charcoal specifically produced for soil amendment, and its porous structure is what makes it so brilliant. It acts like a microscopic sponge, holding onto water and nutrients, and providing an incredible habitat for beneficial microbes.
I started adding biochar to my greenhouse beds about three seasons ago. I mix it in at a rate of about 5-10% by volume when I'm refreshing the beds in early spring. The great thing about biochar is its longevity – it can stay in the soil for hundreds, even thousands, of years, providing a lasting benefit. It's not a quick fix, but a long-term investment in your soil's health, particularly effective in nutrient-leaching sandy soils. Just be sure to "charge" it first by soaking it in a nutrient solution or compost tea before adding it to your soil, otherwise, it can temporarily lock up nutrients.
Green Manures: Nature's Way to Improve Soil
Green manures are another fantastic tool in the sandy soil arsenal, and they're something I incorporate into my crop rotation every year. These are cover crops – like 'Phacelia', 'Mustard', 'Vetch', or 'Clover' – that you sow, let grow for a period, and then dig back into the soil while they're still green.
They work wonders for sandy soil in several ways. Their extensive root systems delve deep, breaking up compaction and adding much-needed organic matter as they decompose. Leguminous green manures like 'Vetch' or 'Clover' even fix nitrogen from the air, making it available for your next crop. I often sow 'Phacelia' after my early potatoes or onions have finished in July, letting it grow until the first frosts, then chop and drop it or lightly dig it in. It's an incredibly effective way to naturally build soil fertility and structure without having to constantly haul in external amendments.
Comparing Your Sandy Soil Amendments
To give you a clearer picture, here's a quick comparison of the amendments we've discussed:
| Amendment | Primary Benefit for Sandy Soil | Application Note (UK) | Relative Cost (UK) | Speed of Results | Longevity in Soil |
|---|---|---|---|---|---|
| Compost | Organic matter, water retention, nutrients, microbial life | Dig in 2-4 inches annually, readily available. | Low-Medium | Immediate | Medium (annual top-up) |
| Well-rotted Manure | Organic matter, nutrients, microbial life, structure | Dig in 2-3 inches annually (autumn/winter), source locally. | Low-Medium | Immediate | Medium (annual top-up) |
| Leaf Mould | Organic matter, water retention, fungal life | Dig in or mulch, make your own from collected leaves (oak/beech best). | Very Low | Slower | Medium |
| Clay (e.g., Bentonite) | Fine particles, Cation Exchange Capacity, structure | Mix thoroughly into top 6-12 inches, one-off significant application. | Medium-High | Gradual | Very High |
| Biochar | Porosity, microbial habitat, nutrient retention, carbon sink | "Charge" then mix into top 6-12 inches, one-off application. | High | Gradual | Extremely High |
| Green Manures | Organic matter, root structure, nitrogen fixation | Sow in rotation, dig in before flowering. Specific to growing season. | Low | Gradual | Short-Medium |
6. Practical Application: Step-by-Step Guide to Incorporating Amendments for Lasting Results
So, you've got your chosen amendments, and you're ready to transform that thirsty sand into a fertile haven. This isn't just about throwing things on top; proper incorporation is key to getting those lasting results we're aiming for. I've learned this the hard way – one year I just scattered some compost and barely scratched it in, and frankly, it felt like a waste of time and effort in our British climate!
Here’s my step-by-step approach that works wonders in my UK garden:
Step 1: Prepare Your Beds (Autumn or Early Spring is Best)
I always aim to tackle this job in late autumn, after I’ve cleared out most of my summer crops, or in early spring before the planting frenzy truly begins. This gives the amendments time to settle and start working their magic. Clear any weeds, spent plants, or debris from the area you're working on. If you've got existing plants, you'll need to work around them carefully or lift and replant them after.
Step 2: Layer Your Amendments
This is where the magic really starts. I like to layer things up, especially in my raised beds. For a typical 4x8ft raised bed, I'd start by spreading a good 4-6 inch thick layer of well-rotted compost or leaf mould evenly over the surface. If I'm adding manure, that goes down next, another 2-3 inches.
If you're using biochar, now's the time to sprinkle that over the top, following the manufacturer's recommendations (usually around 5-10% of your soil volume, so a good handful per square foot). If you're incorporating clay, spread it evenly over the top layer of organic matter.
Step 3: Dig It In – Deeply and Thoroughly
This is the most crucial part. Don't be afraid to get stuck in! Using a sturdy garden fork (my favourite is my trusty stainless steel one), start digging the amendments into the top 6-12 inches of your sandy soil. The goal is to mix everything together as thoroughly as possible, creating a uniform blend.
I typically work in small sections, pushing my fork in to its full depth, lifting the soil and amendments, and turning them over. Then I push the fork in again, slightly overlapping the previous section. Imagine you're making a giant garden cake! This ensures the organic matter and other amendments are distributed throughout the rooting zone, not just sitting on the surface. For areas where I’m planting deeper root vegetables like carrots or parsnips, I might even go a bit deeper, aiming for 12-18 inches if the soil allows.

Step 4: Level and Water
Once you've thoroughly incorporated everything, rake the surface level. Then, give the area a really good, deep watering. This helps settle the soil, encourages the amendments to start integrating, and kick-starts microbial activity. I usually let it sit for a week or two before planting, if time allows, to let everything 'mellow'.
Step 5: Consider Green Manure (If Appropriate)
If you're amending a bed that won't be planted for a while (e.g., in late autumn), consider sowing a green manure after Step 4. This will further improve the soil over winter, preventing nutrient leaching and adding even more organic matter when you dig it in come spring. I often do this with winter 'Vetch' in my designated rotation beds.
7. Ongoing Care: Maintaining Your Improved Sandy Soil for Long-Term Garden Success
Improving sandy soil isn't a one-and-done job; it's an ongoing relationship with your garden. Think of it as a continuous cycle of feeding and nurturing. After all the hard work of initial amendments, you want to make sure your soil continues to thrive and support your plants year after year.
Regular Top-Dressing with Organic Matter
This is perhaps the most important ongoing task. Every autumn, after clearing my summer crops, I give all my beds a fresh blanket of homemade compost or well-rotted farmyard manure, usually about 2-3 inches thick. I let the worms and the winter weather work it into the soil. In spring, before planting, I might add another inch or two of compost as a top-up if the soil looks hungry. This constant replenishment of organic matter is vital for maintaining that improved structure and nutrient-holding capacity in your sandy soil.
Mulching is Your Best Friend
I cannot stress this enough – mulching is an absolute game-changer for sandy soil, especially with our often dry British summers. A good 2-4 inch layer of organic mulch (straw, wood chippings, leaf mould, or even grass clippings – though be careful they don't contain weed seeds!) around your plants will drastically reduce water evaporation from the soil surface.
This means less watering for you, happier plants, and as the mulch slowly breaks down, it contributes even more precious organic matter to the soil. I swear by a thick layer of straw around my 'Romanesco' cauliflower and 'Runner Beans' in the summer; it keeps the soil cool and moist, which is something sandy soil struggles with naturally.
Smart Watering Strategies
Even with improved sandy soil, you still need to be mindful of how you water. Forget those little daily sprinkles! Sandy soil still drains relatively quickly, so deep, infrequent watering is the key. This encourages your plants to send their roots down deeper, making them more resilient to dry spells.
I check the soil moisture with my finger before watering – if it feels dry a couple of inches down, it's time for a good soak. For my thirsty greenhouse tomatoes, I use an irrigation system that delivers water slowly and directly to the roots, ensuring minimal waste and maximum absorption.
Crop Rotation and Green Manures
Continuing with a good crop rotation plan helps prevent nutrient depletion and supports diverse microbial life in your soil. As mentioned earlier, incorporating green manures into your rotation, especially in beds that are resting or between main crops, is a brilliant way to continuously add organic matter and improve soil structure without much extra effort. This is particularly useful in my smaller garden where I need to maximise every inch.
Observe, Learn, Adapt
Finally, and perhaps most importantly, always observe your soil and your plants. They are the best indicators of what's working and what's not. How quickly does the soil dry out after rain? Are your plants looking vigorous or are they wilting on a warm day? The best tool you have is your own experience and intuition. Every year in my UK garden brings new challenges (and successes!), often weather-related, and constant observation helps me adapt my approach.
Conclusion: Your Journey to a Thriving Garden on Sandy Soil
So there you have it, fellow gardener! We've journeyed from diagnosing that frustratingly fast-draining sandy soil to uncovering a treasure trove of practical amendments that can transform it. From the humble powerhouses of compost, manure, and leaf mould, to the more specialized contributions of clay, biochar, and green manures, you now have a comprehensive toolkit to tackle the challenge head-on.
I know firsthand how disheartening it can be when your plants struggle, especially after all the effort you put in. I've been there, watching my prize 'Costoluto Fiorentino' tomatoes wilt in the greenhouse despite regular watering, only to realise my sandy soil just wasn't holding onto enough moisture. But what I've learned over my five-plus years of intensive gardening here in the Midlands is that sandy soil isn't a curse; it's an opportunity for incredible improvement.
The key takeaway is this: organic matter is your sandy soil's best friend. It's the magic ingredient that boosts water retention, locks in nutrients, and fosters a vibrant, healthy soil ecosystem. While the initial transformation might feel like a big job, remember that every bucket of compost, every forkful of well-rotted manure, and every carefully chosen green manure you dig in, is an investment in the long-term health and productivity of your garden.
Don't be discouraged if you don't see overnight miracles. Soil improvement is a gradual process, but the rewards are immense: more resilient plants, healthier harvests, and a garden that truly thrives, even when faced with our unpredictable British weather.
So, roll up your sleeves, grab your fork, and start building that beautiful, rich, moisture-retentive soil your plants (and you!) deserve. I'd absolutely love to hear about your own sandy soil transformation stories and what amendments have worked best for you here in the UK. Let's make those sandy patches sing!
Happy gardening!
Randy Thompson
Passionate UK Home Gardener, Midlands
