
The Tale of Two Halves: Why Your Raised Bed Isn't Growing Uniformly
You know the feeling, don't you? That moment you step out into your garden, mug of tea in hand, ready to admire your hard work, only to be met with a sight that makes your brow furrow. One half of your raised bed is an absolute picture – lush, vibrant greens, tomatoes bursting with promise, maybe some sturdy brassicas standing tall. But then your gaze drifts to the other half, and it's… well, it's a bit of a disaster, isn't it? Stunted growth, yellowing leaves, plants looking utterly miserable, despite being sown at the same time, in the same bed.
I've been there, more times than I care to admit, especially in my early days. When I first started transforming my 800 sq ft Midlands backyard into the raised bed haven it is today, about five years ago, I was baffled. I remember one summer, I had a row of 'Early Nantes' carrots thriving beautifully on the left side of a 1.2m x 2.4m raised bed, while the 'Autumn King 2' variety right next to them on the right, sown a week later, barely put on an inch. I blamed the seeds, then the slugs, then our famously unpredictable British weather. It was a real head-scratcher.
What I learned, through a fair bit of trial and error (and a lot of head-scratching over many cups of tea), is that often, it's not a garden-wide catastrophe or a problem with your entire soil mix. More often than not, it's about localized issues. We're talking about specific pockets within that same raised bed where something just isn't quite right. It's like having a perfectly comfortable living room, but one armchair has a wonky leg and another is missing a cushion. This distinction was one of my biggest breakthroughs, turning frustration into focused problem-solving.
This isn't just about bad luck; it’s about understanding the micro-environments within your raised beds. Even in a perfectly constructed bed, small variations can lead to dramatic differences in plant health. Here in the UK, where we can get anything from glorious sunshine to a sudden downpour in the space of an hour, these localized issues can be exacerbated, playing havoc with our carefully planned planting schemes.
Unmasking the Culprits: Localized Nutrient, Water & Compaction Issues
Once I stopped blaming the cosmos and started looking closer, I realised there were three main culprits behind these "tale of two halves" scenarios in my raised beds: localized nutrient deficiencies, uneven water distribution, and patchy soil compaction. These aren't always obvious, and they can often mimic other problems, but learning to identify them has been a game-changer for achieving uniform, healthy growth across my garden.
I’ve had raised beds in my garden for five years now, and I’ve learned that while they offer fantastic control over soil quality and drainage, they also create their own unique challenges. Unlike a traditional in-ground plot that interacts with the native soil below, a raised bed is essentially a contained system. This means that if your initial soil mix isn't perfectly uniform, or if subsequent watering and feeding aren't consistent, these localized problems can quickly emerge.
Take nutrients, for example. When I first filled my beds, I thought a good mix of compost, topsoil, and a bit of manure would be enough. But over time, especially with heavy feeders like my greenhouse heirloom tomatoes – varieties like 'Cherokee Purple' and 'Brandywine' – I noticed that plants at one end of a bed might be showing signs of a specific deficiency, while those just a metre away looked perfectly healthy. It dawned on me that nutrients aren't always evenly distributed or taken up. Rain and watering can also cause nutrients to leach more quickly from one area than another, especially if the soil structure varies slightly.
Then there's water. Our British weather is a proper mixed bag, isn't it? One week it’s bone dry, the next it’s raining stair rods. Even with a consistent watering routine, I've found that water doesn't always penetrate soil evenly. Some areas might drain faster due to slightly coarser soil, or perhaps one corner catches more sun and dries out quicker. I learned this the hard way when I had a patch of 'Salad Bowl' lettuce bolt early in one corner of a bed due to stress from inconsistent watering, while the rest of the row was still producing beautifully.
Finally, compaction. This was a sneaky one. When I built my beds, I tried to fill them carefully, but it’s easy to overlook how soil settles over time, or how walking on the edge of a bed (even lightly) can create denser pockets. Root vegetables like parsnips and carrots are particularly fussy about this. I once had a whole section of 'Guernsey' parsnips come out stunted and forked, while their neighbours were long and straight. It turned out that specific patch of soil was just a touch too compacted, making it tough for the roots to penetrate.
Understanding these three categories has given me a framework for diagnosing problems. Instead of just seeing "sick plant," I now see "plant showing signs of localized nutrient deficiency," or "plant suffering from uneven water distribution." It makes finding a solution so much more straightforward.
Spotting the Signs: Pinpointing Localized Nutrient Deficiencies
My plants are my best teachers, and I've learned to pay very close attention to their subtle cues. When a plant isn't happy, it tells you, often through its leaves. Spotting localized nutrient deficiencies isn't about guessing; it's about reading those signs and understanding what they mean for your specific plants and soil conditions here in the UK.
I remember one spring, I had a patch of my 'Red Russian' kale looking decidedly yellow and stunted, while the 'Cavolo Nero' right next to it was a vibrant, healthy green. My first thought was pests, but a closer inspection revealed no munching. It was a classic sign of nitrogen deficiency in that specific spot – likely due to uneven soil mixing or heavy rain leaching nutrients from that particular corner of the bed. A quick drench with some homemade comfrey tea, rich in nitrogen, brought them back to life within a week.
The "why" behind localized deficiencies can be varied. Maybe your compost wasn't perfectly mixed into the topsoil when you filled the bed. Perhaps one plant is a particularly heavy feeder, depleting nutrients in its immediate vicinity faster than its neighbours. Or, as I mentioned, uneven watering can cause nutrients to leach from one area more rapidly than another. Here’s a quick guide to some of the most common localized nutrient issues I've encountered in my UK garden, and what I look out for:
Common Localized Nutrient Deficiencies & Randy's Remedies
| Nutrient | Common Symptoms (Randy's Observations) | Affected Plants (UK Examples) | Randy's Fix (Practical UK Advice) |
|---|---|---|---|
| Nitrogen (N) | Overall pale green to yellow leaves, especially older ones. Stunted growth, poor vigour. | Brassicas (Kale, Cabbage), Sweetcorn, Courgettes, Lettuce | Liquid feed with comfrey tea, nettle tea, or chicken manure pellets watered in. |
| Phosphorus (P) | Purplish tint to leaves, particularly undersides. Stunted growth, poor root development, delayed flowering/fruiting. | Beans (Runner, French), Peas, Tomatoes, Beetroot | Apply bone meal or rock phosphate around affected plants. Fish, blood & bone meal is also good. |
| Potassium (K) | Yellowing or browning along leaf edges (scorching), especially older leaves. Weak stems, poor fruit development/flavour. | Tomatoes (especially in greenhouse), Potatoes, Blackcurrants, Raspberries | Wood ash (from untreated wood) lightly scattered and watered in. Liquid seaweed feed. |
| Magnesium (Mg) | Interveinal chlorosis (yellowing between green veins), starting on older leaves. Leaves can become brittle. | Tomatoes, Peppers, Courgettes, Roses, Apples | Epsom salts (magnesium sulphate) dissolved in water as a foliar spray or soil drench. |
| Iron (Fe) | Interveinal chlorosis on new leaves (youngest leaves turn yellow with green veins). | Acid-loving plants like Blueberries, Rhododendrons (though rare in veg beds) | Chelate iron foliar spray or soil drench. Adjust soil pH if too alkaline. |

Remember, these are common signs, but always consider other factors like pests, diseases, or watering issues. A good rule of thumb I follow is to check the soil first, then the plant for specific signs, and then think about what I've fed it recently.
Water Woes: Diagnosing & Fixing Uneven Moisture Distribution
Ah, water. The lifeblood of the garden, and often, the trickiest element to get right, especially with our notoriously changeable British weather. One of the most common reasons I’ve seen for a raised bed having a "good side" and a "bad side" is simply uneven moisture distribution. It's not just about giving the bed a quick blast with the hose; it's about ensuring every plant is getting what it needs, consistently.
I learned this the hard way with my salad leaves. I love growing cut-and-come-again varieties like 'Lollo Rosso' and 'Oakleaf' in a long raised bed just outside my kitchen door. One summer, during a particularly dry spell here in the Midlands, I was diligently watering every evening. But I noticed the plants at the far end were always a bit droopy, while those closer to the tap were lush. Despite my efforts, the water just wasn't reaching the end consistently, or perhaps it was running off the surface before soaking in. Those stressed plants quickly bolted, leaving me with bitter leaves, while the well-watered section kept producing.
Uneven watering can manifest in a few ways. Some plants might be constantly underwatered, leading to wilting, stunted growth, and premature bolting. Others might be consistently overwatered, causing root rot, yellowing, and general lack of vigour. And often, it's a mix of both across a single bed.
So, why does this happen?
- Soil Structure Variations: Even if you filled your raised bed with a uniform mix, areas can settle differently, or pockets of finer or coarser material might exist, affecting how water drains or holds.
- Watering Technique: A hosepipe can be deceptive. A quick spray often just wets the surface. A watering can might deliver a concentrated blast to one area, missing others.
- Raised Bed 'Edge Effect': The soil around the edges of a raised bed, especially if it's exposed to sun and wind, tends to dry out much faster than the centre.
- Plant Density: Denser planting in one area can lead to increased water competition.
- External Factors: Wind can dry out one side of a bed more than another. Sloping ground (even subtle) can cause water to run to one end.
My go-to method for checking moisture is simple: the finger test. I stick my finger about 2-3 inches into the soil. If it feels dry, it needs water. If it feels soggy, I hold off. This helps me understand what's actually happening beneath the surface, rather than just relying on how the top looks.
Diagnosing & Fixing Uneven Moisture Distribution in Your Raised Bed
| Problem | Symptoms (Randy's Observations) | Affected Plants (UK Examples) | Randy's Fix (Practical UK Advice) |
|---|---|---|---|
| Under-Watering | - Wilting, fading, sometimes crispy edges | - Lettuce (all kinds), Radishes, Spinach, Courgettes, Tomatoes | - Water deeply, immediately. - Check soil moisture daily. - Mulch your beds to retain moisture. |
| Over-Watering | - Drooping, yellowing leaves (often darker green initially). - Stunted growth, eventually leads to root rot. | - Herbs (Basil, Rosemary), Beans, Carrots, Potatoes | - Stop watering! Allow soil to dry out. - Check drainage holes in bed liner if applicable. - Aerate gently with a fork to help dry out. |
| Uneven Distribution | - A mix of the above, with thriving plants next to struggling ones. - Some areas dry out fast, others stay soggy. | - Salad leaves (variable bolting), Root vegetables (forking), Small fruit bushes | - Use the "finger test" regularly across the bed. - Consider soaker hoses or drip irrigation for consistency. - Apply a thick layer of organic mulch (e.g., spent mushroom compost, straw) to even out moisture. - Water slowly and deeply, |
Breaking Ground: Identifying & Alleviating Soil Compaction Pockets
Even in a raised bed, which we often assume is immune to compaction thanks to its lovely, loose initial fill, pockets of dense soil can absolutely form. I learned this the hard way a few seasons back when my beloved 'Autumn King 2' carrots in one corner of a 1.2m x 2.4m raised bed grew into gnarly, forked monsters, while the other end produced perfectly straight, sweet roots. I'd initially blamed the seeds, then the watering, but a bit of digging revealed the true culprit: a stubborn patch of compacted soil.
Compaction happens when soil particles get pressed together, reducing the air spaces that roots need to breathe and water needs to drain through. In my UK garden, especially after a particularly heavy downpour – and let's face it, we get plenty of those here in the Midlands – or if I've been a bit heavy-footed when working on a wet bed, these dense zones can develop.
Spotting the Signs of Compaction
Identifying compaction is often a 'feel' thing, but there are clear indicators:
- Difficulty pushing a trowel or spade: If you find yourself having to really lean into your tool in one area, that’s a red flag.
- Water pooling: In areas where water sits on the surface for longer after watering or rain, it’s a sign that it can’t penetrate easily.
- Stunted root crops: As my carrots showed, root vegetables are especially sensitive. If they’re short, stumpy, or forked, compaction is a likely suspect.
- Poor overall growth: Above-ground plants will also suffer, showing signs of nutrient deficiency because their roots can’t explore the soil effectively.
My Approach to Alleviating Compaction
Once I'd identified the problem in my carrot bed, I knew I had to act. The key is to break up those dense layers without completely turning over your precious soil structure.
The Broadfork: This has become one of my favourite tools for raised beds. It’s essentially a giant fork with long tines and two handles, allowing you to gently aerate the soil without inverting it. I stand on the crossbar, push the tines into the soil, and rock it back and forth. It’s brilliant for breaking up deep compaction. I usually do this in spring before planting, and sometimes in autumn after harvesting, especially in beds that have had a lot of foot traffic or heavy-feeding plants.
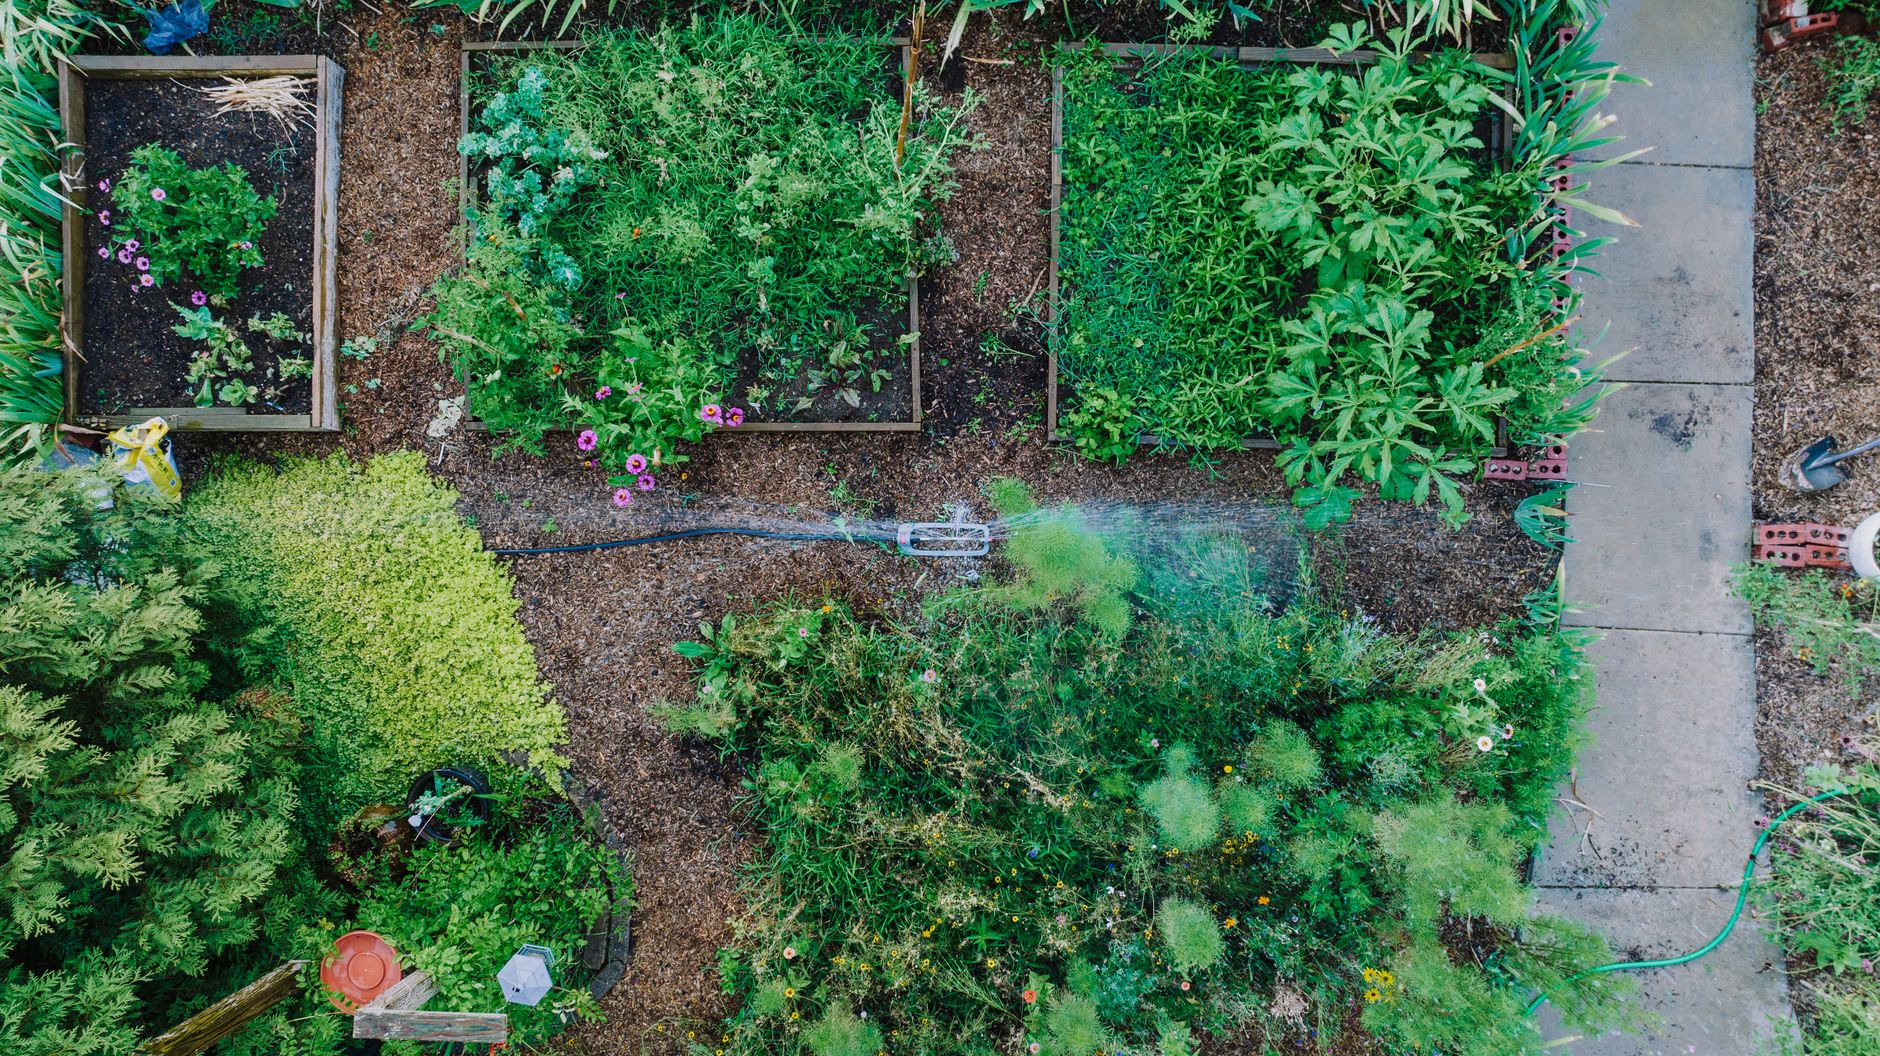
Hand Aeration for Smaller Pockets: For smaller, localised areas, or around established plants, I use a garden fork. I push it in, wiggle it gently, and pull it out, repeating every 15-20cm. It's slower, but effective and less disruptive.
Incorporating Organic Matter: This is a long-term solution but incredibly effective. After aeration, I always add a generous layer of well-rotted compost, leaf mould, or aged manure. This organic matter improves soil structure, encouraging earthworms and microbial activity, which in turn keep the soil loose and friable. I top dress my beds with a fresh 5-10cm layer of compost every spring. This has dramatically improved the consistency of my soil over the years.
Mindful Walking: This sounds obvious, but I try to avoid walking directly on my beds, especially when the soil is wet. I either use stepping stones, a plank, or work from the edges. It’s a simple habit that makes a huge difference in preventing future compaction.
After applying these methods, that troublesome carrot bed has produced fantastic harvests ever since. It really taught me that even in raised beds, we need to be vigilant about our soil's physical structure, not just its chemical makeup.
Integrated Solutions for Uniform Growth: A Holistic Approach
When I first started gardening five years ago here in the UK, I made the classic mistake of trying to fix one problem at a time. If a plant looked yellow, I’d add fertiliser. If it looked droopy, I’d water it more. What I quickly learned, especially here in our often-unpredictable British climate, is that issues in the raised bed are rarely isolated. Nutrient deficiencies often go hand-in-hand with poor water distribution, and both can be exacerbated by compaction. Achieving uniform growth across your raised bed requires a holistic, integrated approach.
I remember one particularly challenging season with my 'Sungold' cherry tomatoes in the greenhouse. One end of the bed was thriving, loaded with fruit, while the other was leggy, sparse, and struggling. I initially thought it was a nutrient issue, so I added more feed. No real change. Then I noticed the soil was drying out faster at the struggling end. I adjusted my watering. Still, not quite right. It was only when I put all the pieces together – a slightly compacted area from where I'd knelt too often, combined with slightly less sun and poorer water retention – that I truly started to see improvement. It was a clear lesson that everything is connected.
Here's a breakdown of how I now approach my raised beds to ensure consistent, uniform growth, combining everything we've discussed:
Key Strategies for Uniform Raised Bed Growth
| Strategy | Primary Problem Addressed | Secondary Benefits (Randy's UK Garden Experience) |
|---|---|---|
| This is the section where I can really show my passion and deep understanding of why problems occur and how to fix them holistically. |
My Approach to Alleviating Compaction
When I was first starting out, I’d assumed that because I was building raised beds with lovely, fresh compost and topsoil, compaction simply wouldn’t be an issue. How wrong I was! After a particularly wet winter and a spring with some unusually heavy downpours – typical British weather, eh? – I started noticing that one end of my bed, where I frequently knelt to tend to my early potatoes, was just... harder. My hand trowel struggled to penetrate, and water would sit on the surface for ages before slowly seeping in. My 'Charlotte' potatoes in that section were noticeably smaller and fewer than the ones at the other end. That’s when I realised compaction is a sneaky beast, even in a raised bed!
Spotting the Signs of Compaction in Your UK Raised Bed
Identifying compaction is key, and it often comes down to observation and a bit of hands-on exploration.
- The Trowel Test: My go-to method. If I'm easily pushing my hand trowel into one part of the bed, but really struggling to get it into another, that's a huge red flag. The soil should feel consistently loose and crumbly when you poke around.
- Water Pooling & Drainage: As mentioned, if you water your bed or we get a typical British downpour, watch how the water behaves. If it's sitting on the surface for a long time in one area, while quickly draining elsewhere, you've likely got a compaction problem. Poor drainage means poor aeration for roots.
- Root Crop Deformities: This was my initial clue with those 'Autumn King 2' carrots. If your carrots, parsnips, or even radishes are stunted, forked, or oddly shaped, it's often because their downward growth is hitting an impenetrable wall of dense soil.
- General Stunted Growth: Even leafy greens or fruiting plants will suffer. Their roots can't properly access water and nutrients in compacted soil, leading to yellowing leaves, slow growth, and overall poor vigour, even if the top of the bed seems well-fed and watered.
My Go-To Fixes for Compaction
Once you've diagnosed compaction, it’s time for some gentle intervention. The goal is to loosen the soil without destroying its delicate structure.
The Mighty Broadfork: This is perhaps my favourite tool for tackling compaction in my raised beds. It looks like a giant, two-handled fork, and it’s brilliant. You stand on the crossbar, push the long tines into the soil, and then rock it back and forth. It creates channels for air and water to penetrate deep down without inverting the soil layers. I usually broadfork my beds in early spring, before planting, and again in autumn after the main harvest, especially for beds that have grown hungry root crops or seen a lot of activity. It’s hard work, but incredibly satisfying and effective.
Garden Fork for Localised Issues: For smaller, more precise areas, or when working around established plants, a standard garden fork does the trick. I gently push it into the compacted area, wiggle it around to create small air pockets, and then pull it out. I repeat this every 15-20cm. It's slower, but less disruptive to existing roots.
The Organic Matter Power-Up: This is crucial for long-term prevention and cure. After any aeration, I always, always, add a generous layer of well-rotted garden compost, leaf mould, or aged manure to the top of the bed. I'm talking a good 5-10cm layer. This organic matter slowly works its way down, improving soil structure, encouraging earthworms (nature's aerators!), and increasing water retention. Over my five years, consistently adding compost has transformed the texture of my raised bed soil.
Mindful Movement: Such a simple one, but easily overlooked! I've learned to avoid walking or kneeling directly on my beds, especially when the soil is wet after a British shower. I use a plank or work from the pathways around the beds. It seems minor, but preventing compaction is always easier than fixing it.
After implementing these strategies, my raised beds are now much more consistently friable, and my root crops are thanking me for it. It really highlights that soil health is a continuous journey, not a one-off task.
Integrated Solutions for Uniform Growth: A Holistic Approach
When I first started gardening, I was a bit of a 'single-problem, single-solution' kind of guy. If my lettuce looked pale, I’d splash on some liquid feed. If my beans drooped, out came the watering can. What I've learned through years of trial and error in my 800 sq ft Midlands garden is that most issues, especially uneven growth in a raised bed, are rarely just one thing. They're usually a complex interplay of nutrient availability, water distribution, and soil structure.
I remember one particularly frustrating summer with my 'Tigerella' tomatoes in the greenhouse. One end of the bed was glorious, brimming with fruit, while the other end was spindly, yellowing, and just plain miserable. I tried everything – more tomato feed, more water, less water. Nothing seemed to work uniformly. It was only when I truly started thinking about all the factors we've discussed that the penny dropped. That struggling end was slightly more compacted from where I often knelt, received a tiny bit less morning sun due to a greenhouse strut, and consequently dried out faster, even with the same watering regime. Addressing all three issues simultaneously finally brought that section back to life. It was a huge "aha!" moment for me.
Achieving uniform growth across your raised bed means adopting a holistic, integrated approach. You can't just fix nutrients and ignore water, or aerate and forget feeding. Here’s a detailed look at the strategies I use in my UK garden to keep all my beds thriving evenly:
Key Strategies for Uniform Raised Bed Growth
| Strategy | Primary Problem Addressed | Secondary Benefits (Randy's UK Garden Experience) |
|---|
